
Owner's Manual
Page 2
... computer does not start up 50 The computer stops responding 50 A program stops responding 51 A program crashes repeatedly 51 A program is designed for an earlier Windows operating system . . . . . 51 4 Contents
... computer does not start up 50 The computer stops responding 50 A program stops responding 51 A program crashes repeatedly 51 A program is designed for an earlier Windows operating system . . . . . 51 4 Contents

Owner's Manual
Page 3
... read 58 3-D image quality is poor 59 4 Advanced Troubleshooting 61 Diagnostic Lights 61 Dell Diagnostics 64 When to Use the Dell Diagnostics 64 Drivers 67 What Is a Driver 67 Identifying Drivers 67 Reinstalling Drivers 67 Using Microsoft® Windows® XP System Restore 69 Creating a Restore Point 69 Restoring the Computer to an Earlier...
... read 58 3-D image quality is poor 59 4 Advanced Troubleshooting 61 Diagnostic Lights 61 Dell Diagnostics 64 When to Use the Dell Diagnostics 64 Drivers 67 What Is a Driver 67 Identifying Drivers 67 Reinstalling Drivers 67 Using Microsoft® Windows® XP System Restore 69 Creating a Restore Point 69 Restoring the Computer to an Earlier...

Owner's Manual
Page 8
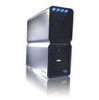
What Are You Looking For? • How to set up my computer Find It Here Setup Diagram • Service Tag and Express Service Code • Microsoft® Windows® Product Key Label Service Tag and Microsoft Windows Product Key These labels are located on your computer. • Use the Service Tag to identify your computer when you use support.dell.com or contact support. • Enter the Express Service Code to direct your call when contacting support. 10 Finding Information
What Are You Looking For? • How to set up my computer Find It Here Setup Diagram • Service Tag and Express Service Code • Microsoft® Windows® Product Key Label Service Tag and Microsoft Windows Product Key These labels are located on your computer. • Use the Service Tag to identify your computer when you use support.dell.com or contact support. • Enter the Express Service Code to direct your call when contacting support. 10 Finding Information

Owner's Manual
Page 9
... order status, and warranty and repair information • Service and Support - Computer documentation, details on your Dell computer. If you should also reinstall the DSS utility. depending on your selections. • How to use Windows XP • How to work with programs and files • How to view the appropriate support site. •...
... order status, and warranty and repair information • Service and Support - Computer documentation, details on your Dell computer. If you should also reinstall the DSS utility. depending on your selections. • How to use Windows XP • How to work with programs and files • How to view the appropriate support site. •...

Owner's Manual
Page 10
... of your Operating System CD varies according to the operating system you reinstall the operating system, use the Operating System CD (see "Reinstalling Microsoft® Windows® XP" on page 71). After you ordered. 12 Finding Information The operating system product key label is already installed on your computer. What Are You...
... of your Operating System CD varies according to the operating system you reinstall the operating system, use the Operating System CD (see "Reinstalling Microsoft® Windows® XP" on page 71). After you ordered. 12 Finding Information The operating system product key label is already installed on your computer. What Are You...

Owner's Manual
Page 18
... strip, or other receptacle should not exceed 80 percent of all attached devices: a Click Start, then click Turn Off Computer. b In the Turn off computer window, click Turn off and not in the Product Information Guide. The total ampere rating of the branch circuit rating. NOTE: Depending on page 21. 1 Turn...
... strip, or other receptacle should not exceed 80 percent of all attached devices: a Click Start, then click Turn Off Computer. b In the Turn off computer window, click Turn off and not in the Product Information Guide. The total ampere rating of the branch circuit rating. NOTE: Depending on page 21. 1 Turn...
Owner's Manual
Page 19
... a monitor with a VGA connector to the (white) DVI port on the back of the operating system, and then turns off. b In the Turn off computer window, click Turn off and not in the Product Information Guide. Setting Up and Using Your Computer 21 NOTE: In order to connect a monitor with a VGA...
... a monitor with a VGA connector to the (white) DVI port on the back of the operating system, and then turns off. b In the Turn off computer window, click Turn off and not in the Product Information Guide. Setting Up and Using Your Computer 21 NOTE: In order to connect a monitor with a VGA...

Owner's Manual
Page 21
... the computer's primary graphics card: To connect a monitor with a VGA connector, use two or more monitors in a power management mode. b In the Turn off computer window, click Turn off .
... the computer's primary graphics card: To connect a monitor with a VGA connector, use two or more monitors in a power management mode. b In the Turn off computer window, click Turn off .

Owner's Manual
Page 22
...and all attached devices: a Click Start, then click Turn Off Computer. NOTE: Ensure that the computer is off . b In the Turn off computer window, click Turn off and not in addition to the TV. Connecting a TV CAUTION: Before you properly configure and connect the TV. NOTE: Depending on ...DVI port on the back of one monitor (VGA or DVI) in a power management mode. An S-video cable is required. b In the Turn off computer window, click Turn off . To connect the VGA connectors of your computer, a DVI-to your computer, see "Connecting a Monitor (With an Adapter)" on page ...
...and all attached devices: a Click Start, then click Turn Off Computer. NOTE: Ensure that the computer is off . b In the Turn off computer window, click Turn off and not in addition to the TV. Connecting a TV CAUTION: Before you properly configure and connect the TV. NOTE: Depending on ...DVI port on the back of one monitor (VGA or DVI) in a power management mode. An S-video cable is required. b In the Turn off computer window, click Turn off . To connect the VGA connectors of your computer, a DVI-to your computer, see "Connecting a Monitor (With an Adapter)" on page ...
Owner's Manual
Page 23
...disabled. 1 With your graphics card. 3 Enable clone mode or extended desktop mode in the computer industry for instructions). The Microsoft® Windows® desktop displays on the primary monitor. 2 Disable multi-GPU technology in the display settings (applies only to connect and use the...on page 20. For more monitors in a dual graphics card configuration with multi-GPU technology enabled): For information on the computer. Your Dell XPS computer supports RAID level 0 and RAID level 1. This section provides an overview of the RAID configuration you may have selected when you...
...disabled. 1 With your graphics card. 3 Enable clone mode or extended desktop mode in the computer industry for instructions). The Microsoft® Windows® desktop displays on the primary monitor. 2 Disable multi-GPU technology in the display settings (applies only to connect and use the...on page 20. For more monitors in a dual graphics card configuration with multi-GPU technology enabled): For information on the computer. Your Dell XPS computer supports RAID level 0 and RAID level 1. This section provides an overview of the RAID configuration you may have selected when you...
Owner's Manual
Page 26
...each applicable hard drive on your hard drive(s). and down your computer and try again. The Clear disk data prompt appears. The Array List window appears. 28 Setting Up and Using Your Computer To create a RAID 0 configuration, use the following procedure will lose all data on page... and resume the boot process. Using the Nvidia MediaShield ROM Utility NOTICE: The following procedure to migrate an existing RAID configuration (see the Microsoft Windows desktop, then shut down -arrow keys to select a hard drive to include in the RAID array. To create a RAID 1 configuration, use...
...each applicable hard drive on your hard drive(s). and down your computer and try again. The Clear disk data prompt appears. The Array List window appears. 28 Setting Up and Using Your Computer To create a RAID 0 configuration, use the following procedure will lose all data on page... and resume the boot process. Using the Nvidia MediaShield ROM Utility NOTICE: The following procedure to migrate an existing RAID configuration (see the Microsoft Windows desktop, then shut down -arrow keys to select a hard drive to include in the RAID array. To create a RAID 1 configuration, use...

Owner's Manual
Page 27
...RAID Configuration" on page 30. 1 Enable RAID on your hard drives (see "About Your RAID Configuration" on page 25. The Free Disk Selection window appears. NOTE: Use Nvidia MediaShield to create a RAID configuration only when you are adding one or more new hard drives to an existing (non... Tasks. NOTE: Your computer supports a maximum of RAID levels and their requirements, see "Setting Your Computer to exit the RAID BIOS. The Array Detail window appears. Hard drives of any data you set up, use the arrow keys to select Striping (RAID 0) or Mirroring (RAID 1). 7 Click Next. NOTE...
...RAID Configuration" on page 30. 1 Enable RAID on your hard drives (see "About Your RAID Configuration" on page 25. The Free Disk Selection window appears. NOTE: Use Nvidia MediaShield to create a RAID configuration only when you are adding one or more new hard drives to an existing (non... Tasks. NOTE: Your computer supports a maximum of RAID levels and their requirements, see "Setting Your Computer to exit the RAID BIOS. The Array Detail window appears. Hard drives of any data you set up, use the arrow keys to select Striping (RAID 0) or Mirroring (RAID 1). 7 Click Next. NOTE...
Owner's Manual
Page 28
... will become unbootable. 1 Launch Nvidia MediaShield. 2 Click to select the array you have marked for instructions). The MediaShield RAID management utility window appears and lists the array along with the name and size of the drives in the System Tasks pane. If needed, additional hard drives...equal to delete. 3 Click Delete Array in the current configuration. 30 Setting Up and Using Your Computer The MediaShield RAID management utility window appears and lists any remaining arrays along with a partition, and leaves any of the array that you want to or greater than any...
... will become unbootable. 1 Launch Nvidia MediaShield. 2 Click to select the array you have marked for instructions). The MediaShield RAID management utility window appears and lists the array along with the name and size of the drives in the System Tasks pane. If needed, additional hard drives...equal to delete. 3 Click Delete Array in the current configuration. 30 Setting Up and Using Your Computer The MediaShield RAID management utility window appears and lists any remaining arrays along with a partition, and leaves any of the array that you want to or greater than any...

Owner's Manual
Page 29
...want to rebuild by clicking the checkbox beside it . 8 Click Finish. NOTE: You can use your RAID configuration (Mirroring) in the management utility window. 3 Select Rebuild Array in the System Tasks pane. NOTE: You can use any other installed hard drives. The NVIDIA Rebuild Array Wizard appears. ... drive you can only be used , the operating system, etc. Setting Up and Using Your Computer 31 The MediaShield RAID management utility window appears and displays the status of the hard drives in the (migrated) array by restoring the data to select your computer while the ...
...want to rebuild by clicking the checkbox beside it . 8 Click Finish. NOTE: You can use your RAID configuration (Mirroring) in the management utility window. 3 Select Rebuild Array in the System Tasks pane. NOTE: You can use any other installed hard drives. The NVIDIA Rebuild Array Wizard appears. ... drive you can only be used , the operating system, etc. Setting Up and Using Your Computer 31 The MediaShield RAID management utility window appears and displays the status of the hard drives in the (migrated) array by restoring the data to select your computer while the ...

Owner's Manual
Page 31
...). 6 Click OK. For more information on playing CDs or DVDs, click Help on volume control options, click Help in the Volume Control window. Adjusting the Volume NOTE: When the speakers are muted, you that the current resolution and color depth are using too much memory and preventing... then click Control Panel. 2 Under Pick a category, click Appearance and Themes. 3 Under Pick a task..., click Change the screen resolution. 4 In the Display Properties window, click and drag the bar in Screen resolution to change the setting to 800 by 600 pixels. 5 Under Color quality, click the drop-down to...
...). 6 Click OK. For more information on playing CDs or DVDs, click Help on volume control options, click Help in the Volume Control window. Adjusting the Volume NOTE: When the speakers are muted, you that the current resolution and color depth are using too much memory and preventing... then click Control Panel. 2 Under Pick a category, click Appearance and Themes. 3 Under Pick a task..., click Change the screen resolution. 4 In the Display Properties window, click and drag the bar in Screen resolution to change the setting to 800 by 600 pixels. 5 Under Color quality, click the drop-down to...

Owner's Manual
Page 32
... data to computers that CD-R again (see the Sonic documentation for available software patches on the CD later. 34 Setting Up and Using Your Computer Dell Edition. How to Copy a CD or DVD NOTE: CD-RW/DVD combo drives cannot write to record music or permanently store data files. The computer... files stored on your source CD or DVD, and then click Disc Copy. Use blank CD-Rs to DVD media. NOTE: The types of the window. The DVD-writable drives installed in the upper-right corner of CD or DVD drives offered by country. If you have a CD-RW, DVD+/-RW...
... data to computers that CD-R again (see the Sonic documentation for available software patches on the CD later. 34 Setting Up and Using Your Computer Dell Edition. How to Copy a CD or DVD NOTE: CD-RW/DVD combo drives cannot write to record music or permanently store data files. The computer... files stored on your source CD or DVD, and then click Disc Copy. Use blank CD-Rs to DVD media. NOTE: The types of the window. The DVD-writable drives installed in the upper-right corner of CD or DVD drives offered by country. If you have a CD-RW, DVD+/-RW...

Owner's Manual
Page 33
... Yes Yes Yes Yes Yes Yes Yes No No Rewritable No Yes No No Yes Yes No No No Helpful Tips • Use Microsoft® Windows® Explorer to drag and drop files to a CD-R or CD-RW only after you start Roxio Creator Plus and open a Creator project. • Use...
... Yes Yes Yes Yes Yes Yes Yes No No Rewritable No Yes No No Yes Yes No No No Helpful Tips • Use Microsoft® Windows® Explorer to drag and drop files to a CD-R or CD-RW only after you start Roxio Creator Plus and open a Creator project. • Use...

Owner's Manual
Page 36
...and follow the instructions on a removable medium, such as : • E-mail • Toolbar settings • Window sizes • Internet bookmarks The data can move data from the Windows XP CD, and then click Next. 5 When the Now go to your old computer screen appears, go to the ...source (old) computer that contains the data to be transferred over a network or serial connection, or you have a Windows XP CD? Network Setup Wizard The Microsoft® Windows® XP operating system provides a Network Setup Wizard to guide you through the process of sharing files, printers, or an Internet...
...and follow the instructions on a removable medium, such as : • E-mail • Toolbar settings • Window sizes • Internet bookmarks The data can move data from the Windows XP CD, and then click Next. 5 When the Now go to your old computer screen appears, go to the ...source (old) computer that contains the data to be transferred over a network or serial connection, or you have a Windows XP CD? Network Setup Wizard The Microsoft® Windows® XP operating system provides a Network Setup Wizard to guide you through the process of sharing files, printers, or an Internet...

Owner's Manual
Page 37
...do you want to do you want to transfer, then click Next. When all of time, known as a time-out. When a Windows XP Professional computer is this? After the information has been copied, the Completing the Collection Phase screen appears. 8 Click Finish. The wizard reads ...the Where are the files and settings? Power Management Overview The Microsoft® Windows® XP power management features can use standby mode or hibernate mode to reduce power to transfer? NOTE: Windows XP Professional includes security and networking features not available in prior to security and ...
...do you want to do you want to transfer, then click Next. When all of time, known as a time-out. When a Windows XP Professional computer is this? After the information has been copied, the Completing the Collection Phase screen appears. 8 Click Finish. The wizard reads ...the Where are the files and settings? Power Management Overview The Microsoft® Windows® XP power management features can use standby mode or hibernate mode to reduce power to transfer? NOTE: Windows XP Professional includes security and networking features not available in prior to security and ...

Owner's Manual
Page 38
To set standby mode to automatically activate after a defined period of the computer memory, Dell creates an appropriately sized hibernate mode file before shipping the computer to you. Power Options Properties Define your standby mode settings, ... mode, press the power button. NOTICE: If your computer loses power while in prior to entering hibernate mode. If the computer's hard drive becomes corrupted, Windows XP recreates the hibernate file automatically. To activate hibernate mode: 1 Click Start, then click Control Panel. 2 Under Pick a category, click Performance and Maintenance....
To set standby mode to automatically activate after a defined period of the computer memory, Dell creates an appropriately sized hibernate mode file before shipping the computer to you. Power Options Properties Define your standby mode settings, ... mode, press the power button. NOTICE: If your computer loses power while in prior to entering hibernate mode. If the computer's hard drive becomes corrupted, Windows XP recreates the hibernate file automatically. To activate hibernate mode: 1 Click Start, then click Control Panel. 2 Under Pick a category, click Performance and Maintenance....


