Owner's Manual
Page 72
...the computer and any installed PCI cards (four slots) and PCI Express cards (one x16 slot and one x1 slot). 19 power supply fans For optimal cooling, two power supply fans are provided. Use the blue line-in connector to attach a record/playback device such as a printer, to the ... connector on the computer. 6 VGA video connector If your computer. 8 sound card connectors • Line-in PCI slot 2, 3, or 4. www.dell.com | support.dell.com 5 DVI video connector If your subwoofer. 9 padlock ring Insert a padlock to lock the computer cover. 10 optional modem connector If you have...
...the computer and any installed PCI cards (four slots) and PCI Express cards (one x16 slot and one x1 slot). 19 power supply fans For optimal cooling, two power supply fans are provided. Use the blue line-in connector to attach a record/playback device such as a printer, to the ... connector on the computer. 6 VGA video connector If your computer. 8 sound card connectors • Line-in PCI slot 2, 3, or 4. www.dell.com | support.dell.com 5 DVI video connector If your subwoofer. 9 padlock ring Insert a padlock to lock the computer cover. 10 optional modem connector If you have...

Owner's Manual
Page 74
www.dell.com | support.dell.com Inside View of Your Computer floppy drive CD/DVD drive processor airflow shroud hard drive shroud PCI card shroud and fan processor fan power supply fans (2) system board power supply 74 Removing and Installing Parts
www.dell.com | support.dell.com Inside View of Your Computer floppy drive CD/DVD drive processor airflow shroud hard drive shroud PCI card shroud and fan processor fan power supply fans (2) system board power supply 74 Removing and Installing Parts

Owner's Manual
Page 105
...and out of the retention base. If you are installing a processor upgrade kit from Dell, reuse the original heat sink and blower when you are not installing a processor upgrade kit from Dell, discard the original heat sink. Press on the second retention tab while lifting the... heat sink up slightly. NOTICE: Lay the heat sink down and out on its side. heat sink retention tab retention base Removing and Installing Parts 105 b On the retention base locate the tab opposite the power supply...
...and out of the retention base. If you are installing a processor upgrade kit from Dell, reuse the original heat sink and blower when you are not installing a processor upgrade kit from Dell, discard the original heat sink. Press on the second retention tab while lifting the... heat sink up slightly. NOTICE: Lay the heat sink down and out on its side. heat sink retention tab retention base Removing and Installing Parts 105 b On the retention base locate the tab opposite the power supply...

Owner's Manual
Page 118
... and the computer. A good connection exists between a 1 GB (or 1000-Mbps) connection. off (no light) - www.dell.com | support.dell.com Controls and Lights (continued) Link integrity light (on integrated network adapter) Activity light (on page 14.) Power DC power supply: Wattage 460 W Heat dissipation 931.2 BTU/hr Voltage (see the safety instructions fixed-voltage...
... and the computer. A good connection exists between a 1 GB (or 1000-Mbps) connection. off (no light) - www.dell.com | support.dell.com Controls and Lights (continued) Link integrity light (on integrated network adapter) Activity light (on page 14.) Power DC power supply: Wattage 460 W Heat dissipation 931.2 BTU/hr Voltage (see the safety instructions fixed-voltage...

Owner's Manual
Page 150
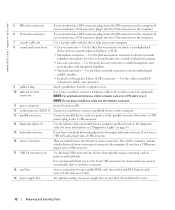
... connector, 72 E e-mail problems, 39 End User License Agreement, 10 ergonomics information, 10 error messages, 40 diagnostic lights, 53 F fans power supply, 72 processor, 71 Files and Settings Transfer Wizard, 26 Finding Information, 9 floppy drive installing, 96 removing, 95 H hard drive activity light..., 69 installing, 91 installing second, 94 problems, 39 removing, 90 hardware Dell Diagnostics, 56 drives, RAID configuration, 17 Hardware Troubleshooter, 64 headphone connector, 70 Help and Support Center, 11 help file Windows Help ...
... connector, 72 E e-mail problems, 39 End User License Agreement, 10 ergonomics information, 10 error messages, 40 diagnostic lights, 53 F fans power supply, 72 processor, 71 Files and Settings Transfer Wizard, 26 Finding Information, 9 floppy drive installing, 96 removing, 95 H hard drive activity light..., 69 installing, 91 installing second, 94 problems, 39 removing, 90 hardware Dell Diagnostics, 56 drives, RAID configuration, 17 Hardware Troubleshooter, 64 headphone connector, 70 Help and Support Center, 11 help file Windows Help ...
Owner's Manual
Page 151
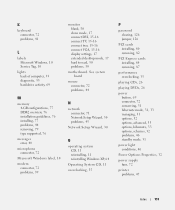
... network connector, 71 Network Setup Wizard, 30 problems, 45 Network Setup Wizard, 30 O operating system CD, 11 reinstalling, 11 reinstalling Windows XP, 64 Operating System CD, 11 overclocking, 35 P password clearing, 126 jumper, 126 PCI cards installing, 80 removing, 82 PCI Express cards ..., 31 options, 32 options, advanced, 33 options, hibernate, 33 options, schemes, 32 problems, 46 standby mode, 31 power light conditions, 46 Power Options Properties, 32 power supply fans, 72 printer problems, 47 Index 151 K keyboard connector, 72 problems, 41 L labels Microsoft Windows, 10 Service Tag...
... network connector, 71 Network Setup Wizard, 30 problems, 45 Network Setup Wizard, 30 O operating system CD, 11 reinstalling, 11 reinstalling Windows XP, 64 Operating System CD, 11 overclocking, 35 P password clearing, 126 jumper, 126 PCI cards installing, 80 removing, 82 PCI Express cards ..., 31 options, 32 options, advanced, 33 options, hibernate, 33 options, schemes, 32 problems, 46 standby mode, 31 power light conditions, 46 Power Options Properties, 32 power supply fans, 72 printer problems, 47 Index 151 K keyboard connector, 72 problems, 41 L labels Microsoft Windows, 10 Service Tag...

Service Manual
Page 7
...USB connectors for voice or musical input into a sound or telephony program. If your computer is running the Microsoft® Windows® 2000 or Windows XP operating system, the necessary mouse drivers have been installed on the computer. 7 security cable slot Use a security cable with integrated amplifiers. The integrated ... card containing a parallel connector configured to a TV. 5 DVI video connector If your monitor has a DVI connector, plug it into the network connector. 11 power connector Insert the power cable. 12 power supply fans 13 card slots For optimal cooling, two...
...USB connectors for voice or musical input into a sound or telephony program. If your computer is running the Microsoft® Windows® 2000 or Windows XP operating system, the necessary mouse drivers have been installed on the computer. 7 security cable slot Use a security cable with integrated amplifiers. The integrated ... card containing a parallel connector configured to a TV. 5 DVI video connector If your monitor has a DVI connector, plug it into the network connector. 11 power connector Insert the power cable. 12 power supply fans 13 card slots For optimal cooling, two...

Service Manual
Page 10
... instructions located in the Product Information Guide for important voltage setting information.) Backup battery 460 W 931.2 BTU/hr fixed-voltage power supply - 110 V at 50/60 Hz manual selection and auto-sensing power supplies - 90 to 135 V at 50/60 Hz; 180 to 265 V at 50/60 Hz; 100 V at 50/60...
... instructions located in the Product Information Guide for important voltage setting information.) Backup battery 460 W 931.2 BTU/hr fixed-voltage power supply - 110 V at 50/60 Hz manual selection and auto-sensing power supplies - 90 to 135 V at 50/60 Hz; 180 to 265 V at 50/60 Hz; 100 V at 50/60...

Service Manual
Page 21
... of matched memory size, speed, and technology. Back to Contents Page Removing and Installing Parts Dell™ Dimension™ XPS Service Manual Memory Cards Drives Hard Drive Floppy Drive CD/DVD Drive Processor Airflow Shroud Processor System Board Power Supply Front Panel Front LED Board Drive Door Battery Memory You can increase your computer memory...
... of matched memory size, speed, and technology. Back to Contents Page Removing and Installing Parts Dell™ Dimension™ XPS Service Manual Memory Cards Drives Hard Drive Floppy Drive CD/DVD Drive Processor Airflow Shroud Processor System Board Power Supply Front Panel Front LED Board Drive Door Battery Memory You can increase your computer memory...

Service Manual
Page 39
... retention tab while lifting the heat sink up slightly. Press on its side. NOTICE: If you are not installing a processor upgrade kit from Dell, discard the original heat sink. Open the processor cover. Press out on the socket release lever. 7. Push down on the retention base tab...operation. If you are installing a processor upgrade kit from Dell, reuse the original heat sink and blower when you touch it. 5. Be sure that the heat sink has had sufficient time to cool before you install your new processor. 6. On the retention base, locate the tab opposite the power supply.
... retention tab while lifting the heat sink up slightly. Press on its side. NOTICE: If you are not installing a processor upgrade kit from Dell, discard the original heat sink. Open the processor cover. Press out on the socket release lever. 7. Push down on the retention base tab...operation. If you are installing a processor upgrade kit from Dell, reuse the original heat sink and blower when you touch it. 5. Be sure that the heat sink has had sufficient time to cool before you install your new processor. 6. On the retention base, locate the tab opposite the power supply.

Service Manual
Page 43
... You Begin." 2. CAUTION: To prevent static damage to components inside your computer, discharge static electricity from your body before you reinstall the power supply, replace the cables as shown below. NOTICE: To avoid damaging the cables when you touch any of your computer and devices to 20 ...computer, wait 10 to electrical outlets, and turn them on the system board has turned off. Before removing a component from its electrical outlet. Power Supply CAUTION: Before you begin any of the procedures in this light, see "System Board Components." 1. You can do so by touching an ...
... You Begin." 2. CAUTION: To prevent static damage to components inside your computer, discharge static electricity from your body before you reinstall the power supply, replace the cables as shown below. NOTICE: To avoid damaging the cables when you touch any of your computer and devices to 20 ...computer, wait 10 to electrical outlets, and turn them on the system board has turned off. Before removing a component from its electrical outlet. Power Supply CAUTION: Before you begin any of the procedures in this light, see "System Board Components." 1. You can do so by touching an ...

Service Manual
Page 50
Technical Overview Dell™ Dimension™ XPS Service Manual Inside View of Your Computer System Board Components Power Supply DC Connector Pin Assignments Inside View of Your Computer System Board Components
Technical Overview Dell™ Dimension™ XPS Service Manual Inside View of Your Computer System Board Components Power Supply DC Connector Pin Assignments Inside View of Your Computer System Board Components

Service Manual
Page 51
Power Supply DC Connector Pin Assignments DC Power Connector P1 Pin Number Signal name Color Wire Gauge 1 +3.3 VDC Orange 16-AWG 2 +3.3 VDC Orange 16-AWG 3 COM Black 18-AWG 4 +5 VDC Red 18-AWG 5 ...
Power Supply DC Connector Pin Assignments DC Power Connector P1 Pin Number Signal name Color Wire Gauge 1 +3.3 VDC Orange 16-AWG 2 +3.3 VDC Orange 16-AWG 3 COM Black 18-AWG 4 +5 VDC Red 18-AWG 5 ...


