
Setup and Quick Reference Guide
Page 39
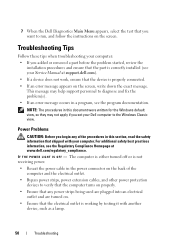
...display errors or problems. This series of repetitive three short beeps. For additional safety best practices information, see the Regulatory Compliance Homepage at www.dell.com/regulatory_compliance. If the power light is blinking amber, the computer is connected and powered on the keyboard, move the mouse, or press the... power button to indicate different states: • If the power light is off, the computer is either turned off or is not receiving power. • If the power light is steady blue and the computer is steady amber, there may be a ...
...display errors or problems. This series of repetitive three short beeps. For additional safety best practices information, see the Regulatory Compliance Homepage at www.dell.com/regulatory_compliance. If the power light is blinking amber, the computer is connected and powered on the keyboard, move the mouse, or press the... power button to indicate different states: • If the power light is off, the computer is either turned off or is not receiving power. • If the power light is steady blue and the computer is steady amber, there may be a ...
Setup and Quick Reference Guide
Page 49
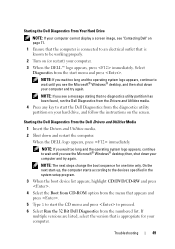
...on (or restart) your computer. 3 When the DELL™ logo appears, press immediately. When the DELL logo appears, press immediately. Troubleshooting 49 If multiple versions are listed, select the version that is known to be working properly. 2 Turn on the screen. NOTE: If you wait too ...long and the operating system logo appears, continue to wait until you see a message stating that no diagnostics utility partition has been found, run the Dell Diagnostics from the Drivers and Utilities ...
...on (or restart) your computer. 3 When the DELL™ logo appears, press immediately. When the DELL logo appears, press immediately. Troubleshooting 49 If multiple versions are listed, select the version that is known to be working properly. 2 Turn on the screen. NOTE: If you wait too ...long and the operating system logo appears, continue to wait until you see a message stating that no diagnostics utility partition has been found, run the Dell Diagnostics from the Drivers and Utilities ...
Setup and Quick Reference Guide
Page 50
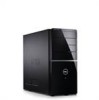
...installation procedures and ensure that the part is working by testing it with your Dell computer to run, and follow the instructions on the screen, write down the exact message. The computer is either turned off or is properly connected. • If an error message appears on ...the screen. 7 When the Dell Diagnostics Main Menu appears, select the test that you set your computer. IF T H E POWER ...
...installation procedures and ensure that the part is working by testing it with your Dell computer to run, and follow the instructions on the screen, write down the exact message. The computer is either turned off or is properly connected. • If an error message appears on ...the screen. 7 When the Dell Diagnostics Main Menu appears, select the test that you set your computer. IF T H E POWER ...
Setup and Quick Reference Guide
Page 53
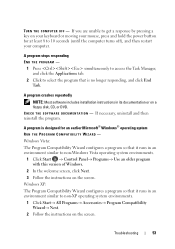
..., CD, or DVD. C H E C K T H E S O F T W A R E D O C U M E N T A T I O N - Windows XP: The Program Compatibility Wizard configures a program so that it runs in an environment similar to 10 seconds (until the computer turns off), and then restart your mouse, press and hold the power button for an earlier Microsoft® Windows® operating system RUN THE PROGRAM COMPATIBILITY...; Use an older program with this version of Windows. 2 In the welcome screen, click Next. 3 Follow the instructions on your keyboard or moving your computer. TURN THE COMPUTER OFF -
..., CD, or DVD. C H E C K T H E S O F T W A R E D O C U M E N T A T I O N - Windows XP: The Program Compatibility Wizard configures a program so that it runs in an environment similar to 10 seconds (until the computer turns off), and then restart your mouse, press and hold the power button for an earlier Microsoft® Windows® operating system RUN THE PROGRAM COMPATIBILITY...; Use an older program with this version of Windows. 2 In the welcome screen, click Next. 3 Follow the instructions on your keyboard or moving your computer. TURN THE COMPUTER OFF -

Setup and Quick Reference Guide
Page 54
... Update service provides proactive e-mail notification of software and hardware updates for the Dell Technical Update service, go to support.dell.com/technicalupdate. 54 Troubleshooting BACK UP YOUR FILES IMMEDIATELY • Use a virus-scanning program to run the software. See the software ... at least 8 to get a response by pressing a key on your computer. A solid blue screen appears TURN THE COMPUTER OFF - If you are unable to 10 seconds (until the computer turns off), and then restart your computer. • Ensure that the device drivers do not conflict with the program...
... Update service provides proactive e-mail notification of software and hardware updates for the Dell Technical Update service, go to support.dell.com/technicalupdate. 54 Troubleshooting BACK UP YOUR FILES IMMEDIATELY • Use a virus-scanning program to run the software. See the software ... at least 8 to get a response by pressing a key on your computer. A solid blue screen appears TURN THE COMPUTER OFF - If you are unable to 10 seconds (until the computer turns off), and then restart your computer. • Ensure that the device drivers do not conflict with the program...
Setup and Quick Reference Guide
Page 55
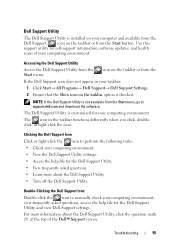
... or right-click the icon. NOTE: If the Dell Support Utility is customized for the Dell Support Utility. • View frequently asked questions. • Learn more information about the Dell Support Utility. • Turn off the Dell Support Utility. The icon in your taskbar: 1 ...Click Start→ All Programs→ Dell Support→ Dell Support Settings. 2 Ensure that the Show icon on the taskbar...
... or right-click the icon. NOTE: If the Dell Support Utility is customized for the Dell Support Utility. • View frequently asked questions. • Learn more information about the Dell Support Utility. • Turn off the Dell Support Utility. The icon in your taskbar: 1 ...Click Start→ All Programs→ Dell Support→ Dell Support Settings. 2 Ensure that the Show icon on the taskbar...
Setup and Quick Reference Guide
Page 62
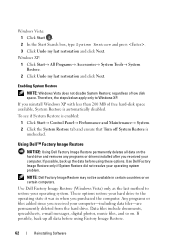
... options. Therefore, the steps below apply only to restore your computer-including data files-are permanently deleted from the hard drive. NOTE: Dell Factory Image Restore may not be available in when you purchased the computer. If possible, back up all data on the hard drive...and Maintenance→ System. 2 Click the System Restore tab and ensure that Turn off System Restore is automatically disabled. Use Dell Factory Image Restore (Windows Vista) only as the last method to Windows XP. Use Dell Factory Image Restore only if System Restore did not resolve your operating system ...
... options. Therefore, the steps below apply only to restore your computer-including data files-are permanently deleted from the hard drive. NOTE: Dell Factory Image Restore may not be available in when you purchased the computer. If possible, back up all data on the hard drive...and Maintenance→ System. 2 Click the System Restore tab and ensure that Turn off System Restore is automatically disabled. Use Dell Factory Image Restore (Windows Vista) only as the last method to Windows XP. Use Dell Factory Image Restore only if System Restore did not resolve your operating system ...
Setup and Quick Reference Guide
Page 63
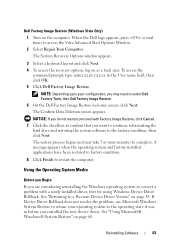
...new device driver. Using the Operating System Media Before you Begin If you may take 5 or more minutes to select Dell Factory Tools, then Dell Factory Image Restore. 6 On the Dell Factory Image Restore welcome screen, click Next. Reinstalling Software 63 A message appears when the operating system and factory-installed ...The System Recovery Options window appears. 3 Select a keyboard layout and click Next. 4 To access the recovery options, log on page 60. When the Dell logo appears, press several times to the operating state it was in the User name field, then click OK. 5 Click...
...new device driver. Using the Operating System Media Before you Begin If you may take 5 or more minutes to select Dell Factory Tools, then Dell Factory Image Restore. 6 On the Dell Factory Image Restore welcome screen, click Next. Reinstalling Software 63 A message appears when the operating system and factory-installed ...The System Recovery Options window appears. 3 Select a keyboard layout and click Next. 4 To access the recovery options, log on page 60. When the Dell logo appears, press several times to the operating state it was in the User name field, then click OK. 5 Click...
Setup and Quick Reference Guide
Page 69
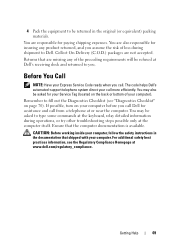
...working inside your computer, follow the safety instructions in the original (or equivalent) packing materials. If possible, turn on your computer before you call Dell for insuring any of loss during operations, or try other troubleshooting steps possible only at the computer itself.... Delivery (C.O.D.) packages are also responsible for assistance and call more efficiently. The code helps Dell's automated-support telephone system direct your call from a telephone at www.dell.com/regulatory_compliance. You are not accepted. Before You Call NOTE: Have your Express Service ...
...working inside your computer, follow the safety instructions in the original (or equivalent) packing materials. If possible, turn on your computer before you call Dell for insuring any of loss during operations, or try other troubleshooting steps possible only at the computer itself.... Delivery (C.O.D.) packages are also responsible for assistance and call more efficiently. The code helps Dell's automated-support telephone system direct your call from a telephone at www.dell.com/regulatory_compliance. You are not accepted. Before You Call NOTE: Have your Express Service ...
Service Manual
Page 13
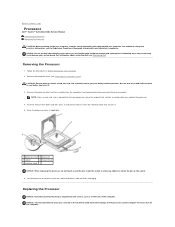
... Homepage at www.dell.com/regulatory_compliance. Follow the procedures in Before Working on the back of the pins inside your system board. NOTE: Unless a new heat sink is required for the new processor, reuse the original heat sink/fan assembly when you turn on the computer....socket to avoid permanent damage to the processor and the computer when you replace the processor. 4. Back to Contents Page Processor Dell™ Vostro™ 420/220/220s Service Manual Removing the Processor Replacing the Processor CAUTION: Before working inside the socket or allow any objects to fall...
... Homepage at www.dell.com/regulatory_compliance. Follow the procedures in Before Working on the back of the pins inside your system board. NOTE: Unless a new heat sink is required for the new processor, reuse the original heat sink/fan assembly when you turn on the computer....socket to avoid permanent damage to the processor and the computer when you replace the processor. 4. Back to Contents Page Processor Dell™ Vostro™ 420/220/220s Service Manual Removing the Processor Replacing the Processor CAUTION: Before working inside the socket or allow any objects to fall...
Service Manual
Page 45
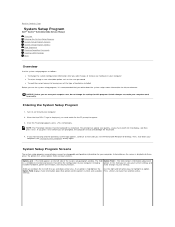
... it to display, and then press . This field appears on the left arrow keys to highlight an option. Scroll up - settings. Turn on the screen is divided into three areas: the options list, active options field, and key functions. If you press before you are...can make changes to your computer. 2. In this F2 prompt appears, press immediately. Back to Contents Page System Setup Program Dell™ Vostro™ 420/220/220s Service Manual Overview Entering the System Setup Program System Setup Program Screens System Setup Program Options Boot Sequence Clearing Forgotten ...
... it to display, and then press . This field appears on the left arrow keys to highlight an option. Scroll up - settings. Turn on the screen is divided into three areas: the options list, active options field, and key functions. If you press before you are...can make changes to your computer. 2. In this F2 prompt appears, press immediately. Back to Contents Page System Setup Program Dell™ Vostro™ 420/220/220s Service Manual Overview Entering the System Setup Program System Setup Program Screens System Setup Program Options Boot Sequence Clearing Forgotten ...
Service Manual
Page 47
...the USB flash option to change the boot sequence for the current boot only. You can also use this feature to restart your computer. 3. Turn on the drive, the computer generates an error message. Then shut down your computer and try again. For example, if you wait too ...safety best practices information, see Removing the Computer Cover). Option Settings l Diskette Drive - Changing Boot Sequence for the Current Boot You can run the Dell Diagnostics on Your Computer. 2. Use the arrow keys to highlight the Boot Sequence menu option and press to a USB memory key, highlight USB ...
...the USB flash option to change the boot sequence for the current boot only. You can also use this feature to restart your computer. 3. Turn on the drive, the computer generates an error message. Then shut down your computer and try again. For example, if you wait too ...safety best practices information, see Removing the Computer Cover). Option Settings l Diskette Drive - Changing Boot Sequence for the Current Boot You can run the Dell Diagnostics on Your Computer. 2. Use the arrow keys to highlight the Boot Sequence menu option and press to a USB memory key, highlight USB ...

Service Manual
Page 48
... 7. Remove the 2-pin jumper plug from pins 2 and 3 and fix it on pins 2 and 3 to clear the CMOS setting. 2. Turn on Your Computer. 5. The file downloads to clear the password. 6. Remove the computer cover (see the Regulatory Compliance Homepage at support....dell.com. 3. Locate the latest BIOS update file for approximately five seconds to your computer at www.dell.com/regulatory_compliance 1. Follow the procedure in After Working on Your Computer. If you install a...
... 7. Remove the 2-pin jumper plug from pins 2 and 3 and fix it on pins 2 and 3 to clear the CMOS setting. 2. Turn on Your Computer. 5. The file downloads to clear the password. 6. Remove the computer cover (see the Regulatory Compliance Homepage at support....dell.com. 3. Locate the latest BIOS update file for approximately five seconds to your computer at www.dell.com/regulatory_compliance 1. Follow the procedure in After Working on Your Computer. If you install a...
Service Manual
Page 51
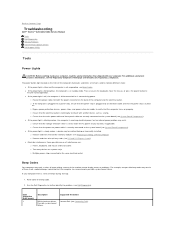
...is plugged into an electrical outlet and that the power strip is turned on. ¡ Bypass power protection devices, power strips, and power extension cables to verify that the computer turns on properly. ¡ Ensure that the electrical outlet is working ... Dell (see Dell Diagnostics). Run the Dell Diagnostics to further identify the problem. (see Contacting Dell). l If the power light is in standby mode. Back to Contents Page Troubleshooting Dell™ Vostro™ 420/220/220s Service Manual Tools Dell Diagnostics Solving Problems Dell Technical Update Service Dell Support...
...is plugged into an electrical outlet and that the power strip is turned on. ¡ Bypass power protection devices, power strips, and power extension cables to verify that the computer turns on properly. ¡ Ensure that the electrical outlet is working ... Dell (see Dell Diagnostics). Run the Dell Diagnostics to further identify the problem. (see Contacting Dell). l If the power light is in standby mode. Back to Contents Page Troubleshooting Dell™ Vostro™ 420/220/220s Service Manual Tools Dell Diagnostics Solving Problems Dell Technical Update Service Dell Support...
Service Manual
Page 53
...screen. 8. Ensure that the computer is connected to an electrical outlet that is displayed in the search field and press to run the Dell Diagnostics from the diagnostics utility partition on (or restart) your computer. When the test completes, record the test results and then press... menu and then press . Selecting Test Memory initiates the extended memory test, which can take up - Turn on your Drivers and Utilities disc (see the Regulatory Compliance Homepage at www.dell.com/regulatory_compliance. NOTE: Keyboard failure may not ship with the mouse, or press and then , to...
...screen. 8. Ensure that the computer is connected to an electrical outlet that is displayed in the search field and press to run the Dell Diagnostics from the diagnostics utility partition on (or restart) your computer. When the test completes, record the test results and then press... menu and then press . Selecting Test Memory initiates the extended memory test, which can take up - Turn on your Drivers and Utilities disc (see the Regulatory Compliance Homepage at www.dell.com/regulatory_compliance. NOTE: Keyboard failure may not ship with the mouse, or press and then , to...
Service Manual
Page 55
... select Extended Test to customize the test, if applicable, by the manufacturer. If you to perform a more . NOTE: When contacting Dell support, have to repeatedly reset time and date information after turning on your Dell™ computer to increase the possibility of devices in the system. Allows you cannot resolve the problem, contact...
... select Extended Test to customize the test, if applicable, by the manufacturer. If you to perform a more . NOTE: When contacting Dell support, have to repeatedly reset time and date information after turning on your Dell™ computer to increase the possibility of devices in the system. Allows you cannot resolve the problem, contact...

Service Manual
Page 56
... drive is turned up by clicking any of different regions worldwide and different disc formats, not all DVD titles work in all programs before writing to a disc - If the drive is not muted by clicking the slidebar and dragging it up. See Dell Diagnostics. Adjust... indicate a defect in the lower-right corner of data during the writing process. Run the Dell Diagnostics - For additional safety best practices information, see the Regulatory Compliance Homepage at www.dell.com/regulatory_compliance. l Click the speaker icon in the drive or the media. See Sound and...
... drive is turned up by clicking any of different regions worldwide and different disc formats, not all DVD titles work in all programs before writing to a disc - If the drive is not muted by clicking the slidebar and dragging it up. See Dell Diagnostics. Adjust... indicate a defect in the lower-right corner of data during the writing process. Run the Dell Diagnostics - For additional safety best practices information, see the Regulatory Compliance Homepage at www.dell.com/regulatory_compliance. l Click the speaker icon in the drive or the media. See Sound and...

Service Manual
Page 58
... The computer stops responding NOTICE: You may lose data if you are unable to the computer. l Ensure that shipped with a Dell IEEE 1394 device - Test the keyboard - Lockups and Software Problems CAUTION: Before you have problems with your computer, and then restart... program stops responding End the program - 1. Click End Task. Click Start and click Control Panel. 2. Contact the IEEE 1394 device manufacturer. Turn the computer off ), and then restart your computer. Click the Applications tab. 3. Check the keyboard cable - See Hardware Troubleshooter. For additional safety...
... The computer stops responding NOTICE: You may lose data if you are unable to the computer. l Ensure that shipped with a Dell IEEE 1394 device - Test the keyboard - Lockups and Software Problems CAUTION: Before you have problems with your computer, and then restart... program stops responding End the program - 1. Click End Task. Click Start and click Control Panel. 2. Contact the IEEE 1394 device manufacturer. Turn the computer off ), and then restart your computer. Click the Applications tab. 3. Check the keyboard cable - See Hardware Troubleshooter. For additional safety...
Service Manual
Page 59
...® Accessories® Program Compatibility Wizard® Next. 2. In the welcome screen, click Next. 3. A solid blue screen appears Turn the computer off ), and then restart your computer. l See the software documentation for troubleshooting information - If necessary, uninstall and then ...information. l Verify that your computer meets the minimum hardware requirements needed to non-XP operating system environments. 1. l Run the Dell Diagnostics (see Replacing or Adding a Memory Module). If you receive an insufficient memory message - A program crashes repeatedly NOTE: ...
...® Accessories® Program Compatibility Wizard® Next. 2. In the welcome screen, click Next. 3. A solid blue screen appears Turn the computer off ), and then restart your computer. l See the software documentation for troubleshooting information - If necessary, uninstall and then ...information. l Verify that your computer meets the minimum hardware requirements needed to non-XP operating system environments. 1. l Run the Dell Diagnostics (see Replacing or Adding a Memory Module). If you receive an insufficient memory message - A program crashes repeatedly NOTE: ...
Service Manual
Page 60
... cable. For additional safety best practices information, see the Regulatory Compliance Homepage at www.dell.com/regulatory_compliance. Simultaneously press to highlight Shut down or Turn Off, and then press . 3. Turn on to verify that your computer. Click Start® Control Panel® Mouse. ... information, see "About Your Computer" in the Setup and Quick Reference Guide. After the computer turns off (see the Regulatory Compliance Homepage at www.dell.com/regulatory_compliance. l Ensure that the cable is not damaged or frayed and check cable connectors for...
... cable. For additional safety best practices information, see the Regulatory Compliance Homepage at www.dell.com/regulatory_compliance. Simultaneously press to highlight Shut down or Turn Off, and then press . 3. Turn on to verify that your computer. Click Start® Control Panel® Mouse. ... information, see "About Your Computer" in the Setup and Quick Reference Guide. After the computer turns off (see the Regulatory Compliance Homepage at www.dell.com/regulatory_compliance. l Ensure that the cable is not damaged or frayed and check cable connectors for...

