Setup and Quick Reference Guide
Page 11
Restricting the airflow can damage the computer or cause a fire.The computer turns on the fan when the computer gets hot. Fan noise is running. Do not store your Dell™ computer in the air vents. Vostro 1510 1 2 8 3 7 6 1 wireless switch 3 USB connectors (2) 5 AC Adapter connector 7 video connector 4 5 2 ExpressCard/54 slot 4 air vents 6 network connector...
Restricting the airflow can damage the computer or cause a fire.The computer turns on the fan when the computer gets hot. Fan noise is running. Do not store your Dell™ computer in the air vents. Vostro 1510 1 2 8 3 7 6 1 wireless switch 3 USB connectors (2) 5 AC Adapter connector 7 video connector 4 5 2 ExpressCard/54 slot 4 air vents 6 network connector...
Setup and Quick Reference Guide
Page 12
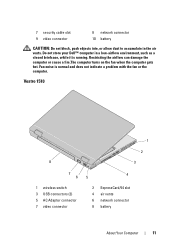
... normal and does not indicate a problem with the fan or the computer. The computer turns on the fan when the computer gets hot. Do not store your Dell™ computer in the air vents. Fan noise is running. Vostro 1710 9 87 1 USB connector 3 USB connectors (2) 5 USB connector 7 network connector 9 battery 1 2 3 65 4 2 ExpressCard/54...
... normal and does not indicate a problem with the fan or the computer. The computer turns on the fan when the computer gets hot. Do not store your Dell™ computer in the air vents. Fan noise is running. Vostro 1710 9 87 1 USB connector 3 USB connectors (2) 5 USB connector 7 network connector 9 battery 1 2 3 65 4 2 ExpressCard/54...

Setup and Quick Reference Guide
Page 13
...you begin any other computers with your computer. Do not use a battery from other external cables from the computer. The computer turns on your Dell™ computer in this section, follow the safety instructions that shipped with your computer. The battery is designed to accumulate in the... the computer. CAUTION: Do not block, push objects into, or allow dust to work with your Dell™ computer. CAUTION: Before removing or replacing the battery, turn off the computer, disconnect the AC adapter from the electrical outlet and the computer, disconnect the modem ...
...you begin any other computers with your computer. Do not use a battery from other external cables from the computer. The computer turns on your Dell™ computer in this section, follow the safety instructions that shipped with your computer. The battery is designed to accumulate in the... the computer. CAUTION: Do not block, push objects into, or allow dust to work with your Dell™ computer. CAUTION: Before removing or replacing the battery, turn off the computer, disconnect the AC adapter from the electrical outlet and the computer, disconnect the modem ...
Setup and Quick Reference Guide
Page 16
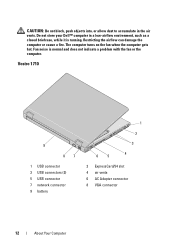
NOTE: It is recommended that you turn on and shut down your computer at least once before you install any cards or connect the computer to a docking device or other external device, such as a DVD player, if applicable. 5 Open the computer display and press the power button to turn on the computer. 3 Connect USB devices, such as a mouse or keyboard, if applicable. 4 Connect IEEE 1394 devices, such as a printer. 16 Setting Up Your Computer
NOTE: It is recommended that you turn on and shut down your computer at least once before you install any cards or connect the computer to a docking device or other external device, such as a DVD player, if applicable. 5 Open the computer display and press the power button to turn on the computer. 3 Connect USB devices, such as a mouse or keyboard, if applicable. 4 Connect IEEE 1394 devices, such as a printer. 16 Setting Up Your Computer
Setup and Quick Reference Guide
Page 35
... the keyboard, move the mouse, or press the power button to indicate different states: • If the power light is off, the computer is either turned off or is not receiving power. • If the power light is steady blue and the computer is not responding, ensure that shipped with your...
... the keyboard, move the mouse, or press the power button to indicate different states: • If the power light is off, the computer is either turned off or is not receiving power. • If the power light is steady blue and the computer is not responding, ensure that shipped with your...
Setup and Quick Reference Guide
Page 43
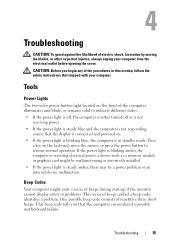
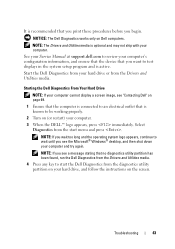
...that you print these procedures before you want to test displays in the system setup program and is known to be working properly. 2 Turn on Dell computers. NOTE: If you wait too long and the operating system logo appears, continue to start menu and press . Troubleshooting 43 NOTICE: ...The Dell Diagnostics works only on (or restart) your hard drive, and follow the instructions on the screen. Select Diagnostics from the Drivers and Utilities ...
...that you print these procedures before you want to test displays in the system setup program and is known to be working properly. 2 Turn on Dell computers. NOTE: If you wait too long and the operating system logo appears, continue to start menu and press . Troubleshooting 43 NOTICE: ...The Dell Diagnostics works only on (or restart) your hard drive, and follow the instructions on the screen. Select Diagnostics from the Drivers and Utilities ...
Setup and Quick Reference Guide
Page 45
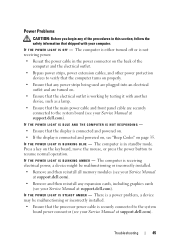
...S B L I N K I N G B L U E - There is a power problem, a device may be malfunctioning or incorrectly installed. • Remove and then reinstall all memory modules (see your Service Manual at support.dell.com). • Remove and then reinstall any of the computer and the electrical outlet. • Bypass power strips, power extension cables, and other power protection... devices to verify that the computer turns on properly. • Ensure that any power strips being used are plugged into an electrical outlet and ...
...S B L I N K I N G B L U E - There is a power problem, a device may be malfunctioning or incorrectly installed. • Remove and then reinstall all memory modules (see your Service Manual at support.dell.com). • Remove and then reinstall any of the computer and the electrical outlet. • Bypass power strips, power extension cables, and other power protection... devices to verify that the computer turns on properly. • Ensure that any power strips being used are plugged into an electrical outlet and ...
Setup and Quick Reference Guide
Page 47
... COMPUTER AND TO THE ELECTRICAL OUTLET The computer stops responding NOTICE: You may lose data if you are unable to 10 seconds (until the computer turns off), and then restart your computer. A program crashes repeatedly NOTE: Most software includes installation instructions in this section, follow the safety information that is no...
... COMPUTER AND TO THE ELECTRICAL OUTLET The computer stops responding NOTICE: You may lose data if you are unable to 10 seconds (until the computer turns off), and then restart your computer. A program crashes repeatedly NOTE: Most software includes installation instructions in this section, follow the safety information that is no...
Setup and Quick Reference Guide
Page 48
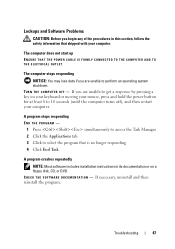
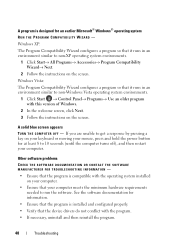
... by pressing a key on your keyboard or moving your mouse, press and hold the power button for at least 8 to 10 seconds (until the computer turns off), and then restart your computer. • Ensure that it runs in an environment similar to non-XP operating system environments. 1 Click Start→ All...
... by pressing a key on your keyboard or moving your mouse, press and hold the power button for at least 8 to 10 seconds (until the computer turns off), and then restart your computer. • Ensure that it runs in an environment similar to non-XP operating system environments. 1 Click Start→ All...
Setup and Quick Reference Guide
Page 50
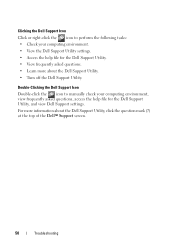
... the help file for the Dell Support Utility, and view Dell Support settings. Double-Clicking the Dell Support Icon Double-click the icon to perform the following tasks: • Check your computing environment, view frequently asked questions. • Learn more information about the Dell Support Utility. • Turn off the Dell Support Utility. For more about...
... the help file for the Dell Support Utility, and view Dell Support settings. Double-Clicking the Dell Support Icon Double-click the icon to perform the following tasks: • Check your computing environment, view frequently asked questions. • Learn more information about the Dell Support Utility. • Turn off the Dell Support Utility. For more about...
Setup and Quick Reference Guide
Page 56
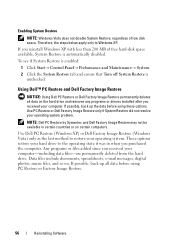
...→ System. 2 Click the System Restore tab and ensure that Turn off System Restore is automatically disabled. Using Dell™ PC Restore and Dell Factory Image Restore NOTICE: Using Dell PC Restore or Dell Factory Image Restore permanently deletes all data before using PC Restore or ...up the data before using these options. regardless of free hard-disk space available, System Restore is unchecked. NOTE: Dell PC Restore by Symantec and Dell Factory Image Restore may not be available in when you received your computer. Data files include documents, spreadsheets, e-mail...
...→ System. 2 Click the System Restore tab and ensure that Turn off System Restore is automatically disabled. Using Dell™ PC Restore and Dell Factory Image Restore NOTICE: Using Dell PC Restore or Dell Factory Image Restore permanently deletes all data before using PC Restore or ...up the data before using these options. regardless of free hard-disk space available, System Restore is unchecked. NOTE: Dell PC Restore by Symantec and Dell Factory Image Restore may not be available in when you received your computer. Data files include documents, spreadsheets, e-mail...
Setup and Quick Reference Guide
Page 57
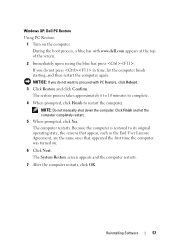
..., the screens that appear, such as the End User License Agreement, are the same ones that appeared the first time the computer was turned on the computer. The restore process takes approximately 6 to 10 minutes to complete. 4 When prompted, click Finish to proceed with www...bar with PC Restore, click Reboot. 3 Click Restore and click Confirm. NOTICE: If you do not want to restart the computer. Windows XP: Dell PC Restore Using PC Restore: 1 Turn on . 6 Click Next. The computer restarts. Click Finish and let the computer completely restart. 5 When prompted, click Yes. If you do...
..., the screens that appear, such as the End User License Agreement, are the same ones that appeared the first time the computer was turned on the computer. The restore process takes approximately 6 to 10 minutes to complete. 4 When prompted, click Finish to proceed with www...bar with PC Restore, click Reboot. 3 Click Restore and click Confirm. NOTICE: If you do not want to restart the computer. Windows XP: Dell PC Restore Using PC Restore: 1 Turn on . 6 Click Next. The computer restarts. Click Finish and let the computer completely restart. 5 When prompted, click Yes. If you do...
Setup and Quick Reference Guide
Page 58
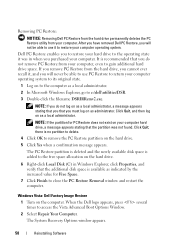
...not exist on your computer operating system to its original state. 1 Log on as a local administrator. 2 In Microsoft Windows Explorer, go to c:\dell\utilities\DSR. 3 Double-click the filename DSRIRRemv2.exe. If you remove PC Restore from the hard drive, you cannot ever recall it, and ...drive space. NOTE: If you do not remove PC Restore from your computer. Windows Vista: Dell Factory Image Restore 1 Turn on the hard drive. 5 Click Yes when a confirmation message appears. When the Dell logo appears, press several times to close the PC Restore Removal window and restart the computer....
...not exist on your computer operating system to its original state. 1 Log on as a local administrator. 2 In Microsoft Windows Explorer, go to c:\dell\utilities\DSR. 3 Double-click the filename DSRIRRemv2.exe. If you remove PC Restore from the hard drive, you cannot ever recall it, and ...drive space. NOTE: If you do not remove PC Restore from your computer. Windows Vista: Dell Factory Image Restore 1 Turn on the hard drive. 5 Click Yes when a confirmation message appears. When the Dell logo appears, press several times to close the PC Restore Removal window and restart the computer....
Setup and Quick Reference Guide
Page 67
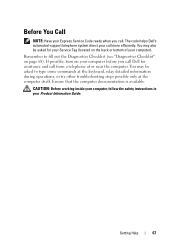
...your call more efficiently. Ensure that the computer documentation is available. Before You Call NOTE: Have your Express Service Code ready when you call Dell for your Service Tag (located on page 68). Remember to type some commands at the keyboard, relay detailed information during operations, or try ...other troubleshooting steps possible only at or near the computer. Getting Help 67 If possible, turn on your computer). You may also be asked for assistance and call from a telephone at the computer itself. The code helps...
...your call more efficiently. Ensure that the computer documentation is available. Before You Call NOTE: Have your Express Service Code ready when you call Dell for your Service Tag (located on page 68). Remember to type some commands at the keyboard, relay detailed information during operations, or try ...other troubleshooting steps possible only at or near the computer. Getting Help 67 If possible, turn on your computer). You may also be asked for assistance and call from a telephone at the computer itself. The code helps...

Setup and Features Information Tech Sheet
Page 6
The computer turns on the fan when the computer gets hot. However, power connectors and power strips vary among countries. Quick Setup WARNING: Before you begin any of ... outlets worldwide. Restricting the airflow can damage the computer or cause a fire. For additional best practices information see www.dell.com/regulatory_compliance. Fan noise is running. WARNING: The AC adapter works with your Dell™ computer in the air vents. 9 8 7 4 5 6 1 2 3 1 USB connector 3 USB connectors (2) 5 USB connector 7 network connector 9 battery 2 ExpressCard/54 slot...
The computer turns on the fan when the computer gets hot. However, power connectors and power strips vary among countries. Quick Setup WARNING: Before you begin any of ... outlets worldwide. Restricting the airflow can damage the computer or cause a fire. For additional best practices information see www.dell.com/regulatory_compliance. Fan noise is running. WARNING: The AC adapter works with your Dell™ computer in the air vents. 9 8 7 4 5 6 1 2 3 1 USB connector 3 USB connectors (2) 5 USB connector 7 network connector 9 battery 2 ExpressCard/54 slot...

Setup and Features Information Tech Sheet
Page 7
... USB devices, such as a mouse or keyboard. 4 Connect IEEE 1394 devices, such as a DVD player. 5 Open the computer display and press the power button to turn on the AC adapter to avoid damaging the cable. When you wrap the AC adapter cable, ensure that you follow the angle of the connector...
... USB devices, such as a mouse or keyboard. 4 Connect IEEE 1394 devices, such as a DVD player. 5 Open the computer display and press the power button to turn on the AC adapter to avoid damaging the cable. When you wrap the AC adapter cable, ensure that you follow the angle of the connector...
Setup and Features Information Tech Sheet
Page 8
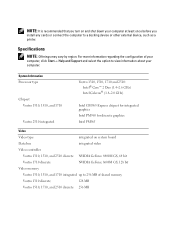
... and shut down your computer. NOTE: It is recommended that you turn on system board Data bus integrated video Video controller Vostro 1310, 1510, and 2510 discrete NVIDIA GeForce 8400M GS, 64 bit Vostro 1710 discrete NVIDIA GeForce 8600M GS, 128 bit Video memory Vostro 1310, 1510, and 1710 integrated up to a docking device or other...
... and shut down your computer. NOTE: It is recommended that you turn on system board Data bus integrated video Video controller Vostro 1310, 1510, and 2510 discrete NVIDIA GeForce 8400M GS, 64 bit Vostro 1710 discrete NVIDIA GeForce 8600M GS, 128 bit Video memory Vostro 1310, 1510, and 1710 integrated up to a docking device or other...

Service Manual
Page 2
... Your Safety Use the following tools: l Small flat-blade screwdriver l Phillips screwdriver l Small plastic scribe l Flash BIOS update (see the Dell Support website at support.dell.com) What You Need to Know for 4 seconds. 3. l In ® Microsoft ® Windows XP, click Start® Shutdown&#...and/or the connector's pins. 1. Back to Contents Page Before Working on Your Computer Service Manual Recommended Tools What You Need to turn off and not in a power management mode. l When replacing a component, you cannot shut down your computer. When connecting a cable,...
... Your Safety Use the following tools: l Small flat-blade screwdriver l Phillips screwdriver l Small plastic scribe l Flash BIOS update (see the Dell Support website at support.dell.com) What You Need to Know for 4 seconds. 3. l In ® Microsoft ® Windows XP, click Start® Shutdown&#...and/or the connector's pins. 1. Back to Contents Page Before Working on Your Computer Service Manual Recommended Tools What You Need to turn off and not in a power management mode. l When replacing a component, you cannot shut down your computer. When connecting a cable,...
Service Manual
Page 3
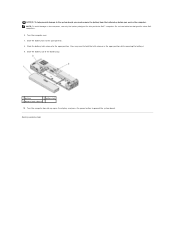
NOTICE: To help prevent damage to the open position. 8. Turn the computer over. 7. Slide the battery lock to the system board, you must... battery lock 3 battery latch release 10. Slide the battery latch release to the open position while removing the battery.) 9. Turn the computer top-side up, open the display, and press the power button to hold the latch release in the open position... the system board. Back to the computer, use batteries designed for this particular Dell™ computer. NOTE: To avoid damage to Contents Page Do not use only the battery designed for other...
NOTICE: To help prevent damage to the open position. 8. Turn the computer over. 7. Slide the battery lock to the system board, you must... battery lock 3 battery latch release 10. Slide the battery latch release to the open position while removing the battery.) 9. Turn the computer top-side up, open the display, and press the power button to hold the latch release in the open position... the system board. Back to the computer, use batteries designed for this particular Dell™ computer. NOTE: To avoid damage to Contents Page Do not use only the battery designed for other...
Service Manual
Page 10
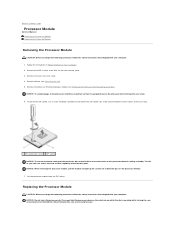
... do not touch the heat transfer areas on the processor thermal-cooling assembly. Remove the cover and set it comes to the processor when turning the cam screw. 6. To loosen the ZIF socket, use a small, flat-blade screwdriver and rotate the ZIF-socket cam screw counterclockwise until... following procedure, follow the safety instructions that shipped with your computer. 1. Remove the M2.5 x 5-mm screw that it is mounted while turning the cam screw to prevent intermittent contact between the cam screw and processor. Back to bend the pins on the processor module. 7. Press ...
... do not touch the heat transfer areas on the processor thermal-cooling assembly. Remove the cover and set it comes to the processor when turning the cam screw. 6. To loosen the ZIF socket, use a small, flat-blade screwdriver and rotate the ZIF-socket cam screw counterclockwise until... following procedure, follow the safety instructions that shipped with your computer. 1. Remove the M2.5 x 5-mm screw that it is mounted while turning the cam screw to prevent intermittent contact between the cam screw and processor. Back to bend the pins on the processor module. 7. Press ...


