
User's Guide
Page 3
... information 7 About your printer 8 Thank you for choosing this printer!...8 Minimizing your printer's environmental impact...8 Finding information about the printer...9 Understanding the parts of the printer...11 Ordering and replacing supplies 13 Ordering ink cartridges...13 Replacing ink cartridges...13 Recycling Dell products...15 Using the printer control panel buttons and menus 16 Using the printer control panel...16 Changing...
... information 7 About your printer 8 Thank you for choosing this printer!...8 Minimizing your printer's environmental impact...8 Finding information about the printer...9 Understanding the parts of the printer...11 Ordering and replacing supplies 13 Ordering ink cartridges...13 Replacing ink cartridges...13 Recycling Dell products...15 Using the printer control panel buttons and menus 16 Using the printer control panel...16 Changing...
User's Guide
Page 5
...faxes...81 Faxing FAQ...82 Networking 90 Installing the printer on a wireless network...90 Advanced wireless setup...95 Networking FAQ...101 Maintaining the printer 113 Maintaining ink cartridges...113 Cleaning the exterior of the printer...115 Cleaning the scanner glass...115 Troubleshooting 116 ...Before you troubleshoot...116 Using the Service Center to solve printer problems 116 If Troubleshooting does not...
...faxes...81 Faxing FAQ...82 Networking 90 Installing the printer on a wireless network...90 Advanced wireless setup...95 Networking FAQ...101 Maintaining the printer 113 Maintaining ink cartridges...113 Cleaning the exterior of the printer...115 Cleaning the scanner glass...115 Troubleshooting 116 ...Before you troubleshoot...116 Using the Service Center to solve printer problems 116 If Troubleshooting does not...
User's Guide
Page 9
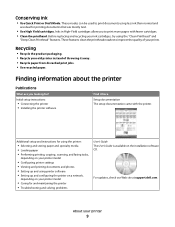
... on the installation software CD. For updates, check our Web site at support.dell.com. Recycling • Recycle the product packaging. • Recycle your old printer instead of your printer 9 Additional setup and instructions for using the printer: • Selecting and storing paper and specialty media • Loading paper &#...; Use Quick Print or Draft Mode. These features clean the printhead nozzles to print more pages with the printer. Inks in High-Yield cartridges allow you looking for printing documents that are you to improve the quality of throwing it ...
... on the installation software CD. For updates, check our Web site at support.dell.com. Recycling • Recycle the product packaging. • Recycle your old printer instead of your printer 9 Additional setup and instructions for using the printer: • Selecting and storing paper and specialty media • Loading paper &#...; Use Quick Print or Draft Mode. These features clean the printhead nozzles to print more pages with the printer. Inks in High-Yield cartridges allow you looking for printing documents that are you to improve the quality of throwing it ...
User's Guide
Page 12
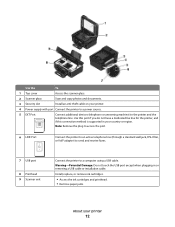
Install, replace, or remove ink cartridges. • Access the ink cartridges and printhead. • Remove paper jams. About your printer. 4 Power supply with port Connect the printer to a power source. 5 EXT Port Connect additional devices (telephone or answering machine) to a computer using a USB cable. Note: Remove the plug to access the port. 6 ...
Install, replace, or remove ink cartridges. • Access the ink cartridges and printhead. • Remove paper jams. About your printer. 4 Power supply with port Connect the printer to a power source. 5 EXT Port Connect additional devices (telephone or answering machine) to a computer using a USB cable. Note: Remove the plug to access the port. 6 ...

User's Guide
Page 13
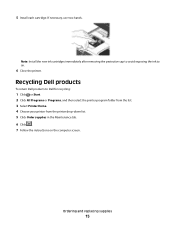
... only Dell ink cartridges. Note: The printhead moves to Dell for a single use only. Replacing ink cartridges Make sure you have a new ink cartridge or cartridges before you begin. 1 Turn on the Dell Web site at www.dell.com/supplies. To know more about recycling Dell products, visit www.dell.com/recycling. 2 Available only on your printer. 2 Open the printer. Ordering...
... only Dell ink cartridges. Note: The printhead moves to Dell for a single use only. Replacing ink cartridges Make sure you have a new ink cartridge or cartridges before you begin. 1 Turn on the Dell Web site at www.dell.com/supplies. To know more about recycling Dell products, visit www.dell.com/recycling. 2 Available only on your printer. 2 Open the printer. Ordering...
User's Guide
Page 15
... immediately after removing the protective cap to avoid exposing the ink to Dell for recycling: 1 Click or Start. 2 Click All Programs or Programs, and then select the printer program folder from the list. 3 Select Printer Home. 4 Choose your printer from the printer drop-down list. 5 Click Order supplies in the Maintenance tab. 6 Click . 7 Follow the instructions...
... immediately after removing the protective cap to avoid exposing the ink to Dell for recycling: 1 Click or Start. 2 Click All Programs or Programs, and then select the printer program folder from the list. 3 Select Printer Home. 4 Choose your printer from the printer drop-down list. 5 Click Order supplies in the Maintenance tab. 6 Click . 7 Follow the instructions...
User's Guide
Page 23
... from the Web, depending on a wireless network. • Change the wireless settings of the printer. Dell Wireless Setup Utility (referred to as Service Center) • Troubleshoot the printer. • Access the printer maintenance functions. • Contact technical support. Dell Ink Management System Order ink. Dell Service Center (referred to as Wireless Setup Utility) • Set up the wireless...
... from the Web, depending on a wireless network. • Change the wireless settings of the printer. Dell Wireless Setup Utility (referred to as Service Center) • Troubleshoot the printer. • Access the printer maintenance functions. • Contact technical support. Dell Ink Management System Order ink. Dell Service Center (referred to as Wireless Setup Utility) • Set up the wireless...
User's Guide
Page 24
.... Note: Printing Preferences is installed automatically with the printer software during printer installation Software resident in Mac OS X version 10.5 or later) • Access the printer utility. • Troubleshoot. • Order ink or supplies. • Contact Dell. • Check the printer software version installed on thecomputer. Note: Your printer may not come with a document open and then...
.... Note: Printing Preferences is installed automatically with the printer software during printer installation Software resident in Mac OS X version 10.5 or later) • Access the printer utility. • Troubleshoot. • Order ink or supplies. • Contact Dell. • Check the printer software version installed on thecomputer. Note: Your printer may not come with a document open and then...
User's Guide
Page 25
... with cartridge installation. • Print a test page. • Print an alignment page. • Clean the printhead nozzles. • Order ink or supplies. • Register the printer. • Contact technical support. Using the printer software 25 Use the To Dell Network Card Reader (referred to as Network Card Reader) • View the contents of the...
... with cartridge installation. • Print a test page. • Print an alignment page. • Clean the printhead nozzles. • Order ink or supplies. • Register the printer. • Contact technical support. Using the printer software 25 Use the To Dell Network Card Reader (referred to as Network Card Reader) • View the contents of the...
User's Guide
Page 33
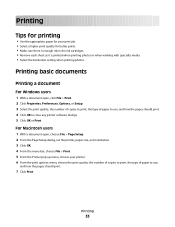
...Click OK. 4 From the menu bar, choose File > Print. 5 From the Printer pop-up menu, choose your print job. • Select a higher print quality for better prints. • Make sure there is enough ink in the ink cartridges. • Remove each sheet as it is printed when printing photos or ...when working with specialty media. • Select the borderless setting when printing photos. Printing 33 Printing Tips for printing • Use the appropriate paper for your printer. 6 From ...
...Click OK. 4 From the menu bar, choose File > Print. 5 From the Printer pop-up menu, choose your print job. • Select a higher print quality for better prints. • Make sure there is enough ink in the ink cartridges. • Remove each sheet as it is printed when printing photos or ...when working with specialty media. • Select the borderless setting when printing photos. Printing 33 Printing Tips for printing • Use the appropriate paper for your printer. 6 From ...

User's Guide
Page 50
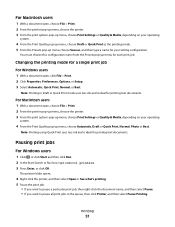
...mode: For Windows users 1 Click , or click Start and then click Run. 2 In the Start Search or Run box, type control printers. 3 Press Enter, or click OK. Changing the printing mode To conserve ink, you can select a different mode from the Print dialog when you have to manually select your... printer, then it is ideal for all print jobs to print the even-numbered pages. 12 Click Print. The printer folder opens. 4 Right-click the printer, and then select Printing ...
...mode: For Windows users 1 Click , or click Start and then click Run. 2 In the Start Search or Run box, type control printers. 3 Press Enter, or click OK. Changing the printing mode To conserve ink, you can select a different mode from the Print dialog when you have to manually select your... printer, then it is ideal for all print jobs to print the even-numbered pages. 12 Click Print. The printer folder opens. 4 Right-click the printer, and then select Printing ...
User's Guide
Page 51
... Windows users 1 With a document open , choose File > Print. 2 From the printer pop-up menu, choose the printer. 3 From the print options pop-up menu, choose Print Settings or Quality & Media, depending on your setting configuration. Note: Printing using Quick Print uses less ink and is ideal for your operating system. 4 From the Print...
... Windows users 1 With a document open , choose File > Print. 2 From the printer pop-up menu, choose the printer. 3 From the print options pop-up menu, choose Print Settings or Quality & Media, depending on your setting configuration. Note: Printing using Quick Print uses less ink and is ideal for your operating system. 4 From the Print...
User's Guide
Page 87
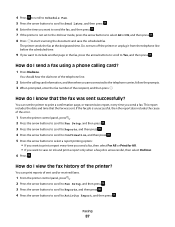
... AM or PM, and then press . 8 Press to start scanning the document and save on ink and print a report only when a fax job is unsuccessful, then the report also includes the cause of the error. 1 From the printer control panel, press . 2 Press the arrow buttons to scroll to Fax Setup, and then... when you are connected to the telephone carrier, follow the prompts. 3 When prompted, enter the fax number of sent and/or received faxes. 1 From the printer control panel, press . 2 Press the arrow buttons to scroll to Fax Setup, and then press . 3 Press the arrow buttons to scroll to Reports, and then...
... AM or PM, and then press . 8 Press to start scanning the document and save on ink and print a report only when a fax job is unsuccessful, then the report also includes the cause of the error. 1 From the printer control panel, press . 2 Press the arrow buttons to scroll to Fax Setup, and then... when you are connected to the telephone carrier, follow the prompts. 3 When prompted, enter the fax number of sent and/or received faxes. 1 From the printer control panel, press . 2 Press the arrow buttons to scroll to Fax Setup, and then press . 3 Press the arrow buttons to scroll to Reports, and then...
User's Guide
Page 89
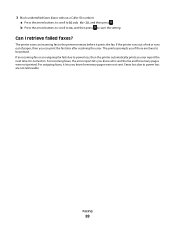
..., it lets you can print the fax later after resolving the error. If the printer runs out of ink or runs out of paper, then you know who sent the fax and how many pages were... not sent. The printer prompts you know how many pages were not printed. 3 Block unidentified faxes (.... Can I retrieve failed faxes? Faxes lost due to power loss are faxes to power loss, then the printer automatically prints an error report the next time it prints the fax. Faxing 89 b Press the arrow buttons ...
..., it lets you can print the fax later after resolving the error. If the printer runs out of ink or runs out of paper, then you know who sent the fax and how many pages were... not sent. The printer prompts you know how many pages were not printed. 3 Block unidentified faxes (.... Can I retrieve failed faxes? Faxes lost due to power loss are faxes to power loss, then the printer automatically prints an error report the next time it prints the fax. Faxing 89 b Press the arrow buttons ...
User's Guide
Page 113
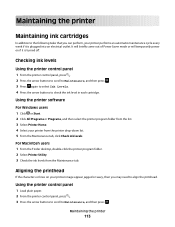
... the printhead. For Macintosh users 1 From the Finder desktop, double-click the printer program folder. 2 Select Printer Utility. 3 Check the ink levels from the printer drop-down list. 5 From the Maintenance tab, click Check ink levels. Checking ink levels Using the printer control panel 1 From the printer control panel, press . 2 Press the arrow buttons to scroll to Maintenance...
... the printhead. For Macintosh users 1 From the Finder desktop, double-click the printer program folder. 2 Select Printer Utility. 3 Check the ink levels from the printer drop-down list. 5 From the Maintenance tab, click Check ink levels. Checking ink levels Using the printer control panel 1 From the printer control panel, press . 2 Press the arrow buttons to scroll to Maintenance...
User's Guide
Page 114
... try the Clean Printhead option first to save ink. • If the ink levels are too low, then you must replace the ink cartridges before you aligned the cartridges to Maintenance, and then press . Maintaining the printer 114 Using the printer control panel 1 From the printer control panel, press . 2 Press the arrow buttons to scroll to...
... try the Clean Printhead option first to save ink. • If the ink levels are too low, then you must replace the ink cartridges before you aligned the cartridges to Maintenance, and then press . Maintaining the printer 114 Using the printer control panel 1 From the printer control panel, press . 2 Press the arrow buttons to scroll to...
User's Guide
Page 115
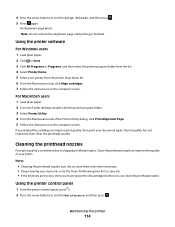
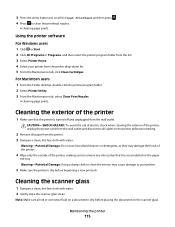
...paper exit tray. For Macintosh users 1 From the Finder desktop, double-click the printer program folder. 2 Select Printer Utility. 3 From the Maintenance tab, select Clean Print Nozzles. Note: Make sure all ink or corrective fluid on a document is dry before proceeding. 2 Remove all cables ... Clean Printhead, and then press . 4 Press to the printer before placing the document on the scanner glass. Maintaining the printer 115 Warning-Potential Damage: Using a damp cloth to remove any ink residue that the printer is dry before beginning a new print job. CAUTION-SHOCK HAZARD...
...paper exit tray. For Macintosh users 1 From the Finder desktop, double-click the printer program folder. 2 Select Printer Utility. 3 From the Maintenance tab, select Clean Print Nozzles. Note: Make sure all ink or corrective fluid on a document is dry before proceeding. 2 Remove all cables ... Clean Printhead, and then press . 4 Press to the printer before placing the document on the scanner glass. Maintaining the printer 115 Warning-Potential Damage: Using a damp cloth to remove any ink residue that the printer is dry before beginning a new print job. CAUTION-SHOCK HAZARD...
User's Guide
Page 116
...open the Service Center, use the Service Center link. If Troubleshooting does not solve your problem Visit our Web site at support.dell.com to find the following: • Live online technical support • Contact numbers for telephone technical support Setup troubleshooting &#... troubleshoot Use this checklist to solve most printer problems: • Make sure the power cord is plugged into the printer and into a properly grounded electrical outlet. • Make sure the printer is not plugged into any jams. • Check the ink cartridges, and install new cartridges if necessary...
...open the Service Center, use the Service Center link. If Troubleshooting does not solve your problem Visit our Web site at support.dell.com to find the following: • Live online technical support • Contact numbers for telephone technical support Setup troubleshooting &#... troubleshoot Use this checklist to solve most printer problems: • Make sure the power cord is plugged into the printer and into a properly grounded electrical outlet. • Make sure the printer is not plugged into any jams. • Check the ink cartridges, and install new cartridges if necessary...
User's Guide
Page 118
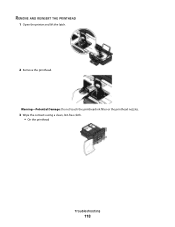
REMOVE AND REINSERT THE PRINTHEAD 1 Open the printer and lift the latch. 2 Remove the printhead. Warning-Potential Damage: Do not touch the printhead ink filter or the printhead nozzles. 3 Wipe the contacts using a clean, lint-free cloth. • On the printhead Troubleshooting 118
REMOVE AND REINSERT THE PRINTHEAD 1 Open the printer and lift the latch. 2 Remove the printhead. Warning-Potential Damage: Do not touch the printhead ink filter or the printhead nozzles. 3 Wipe the contacts using a clean, lint-free cloth. • On the printhead Troubleshooting 118
User's Guide
Page 119
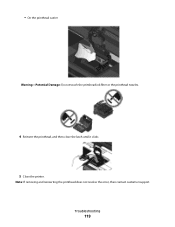
Note: If removing and reinserting the printhead does not resolve the error, then contact customer support. Troubleshooting 119 • On the printhead carrier Warning-Potential Damage: Do not touch the printhead ink filter or the printhead nozzles. 4 Reinsert the printhead, and then close the latch until it clicks. 5 Close the printer.
Note: If removing and reinserting the printhead does not resolve the error, then contact customer support. Troubleshooting 119 • On the printhead carrier Warning-Potential Damage: Do not touch the printhead ink filter or the printhead nozzles. 4 Reinsert the printhead, and then close the latch until it clicks. 5 Close the printer.


