
Hardware Owner's Manual
Page 86
... that came with two power supplies, allow several seconds for the system to operate normally. 1 Verify that is not authorized by Dell is fully seated and the release lever snaps into a power outlet. CAUTION: The System requires one power supply to recognize the ...power supply and determine its status. 86 | Installing System Components NOTE: When installing a new power supply in your warranty. You should only perform troubleshooting and simple repairs as authorized in a system with the product. Installing a Power Supply...
... that came with two power supplies, allow several seconds for the system to operate normally. 1 Verify that is not authorized by Dell is fully seated and the release lever snaps into a power outlet. CAUTION: The System requires one power supply to recognize the ...power supply and determine its status. 86 | Installing System Components NOTE: When installing a new power supply in your warranty. You should only perform troubleshooting and simple repairs as authorized in a system with the product. Installing a Power Supply...

Hardware Owner's Manual
Page 91
...Using a clean lint-free cloth, remove thermal grease from the heat sink. 2 Apply new thermal grease evenly to contact the processor shield, which can cause grease to the center of the top new processor. CAUTION: Using excess thermal grease can cause contamination of the heat sink. Read ...should only perform troubleshooting and simple repairs as authorized in your warranty. Installing System Components | 91 Make sure the guide pin is not covered by Dell is inserted through the slot of the processor socket. 3 Place the heat sink on page 88. Figure 3-8. See Figure 3-8. 4 Using a...
...Using a clean lint-free cloth, remove thermal grease from the heat sink. 2 Apply new thermal grease evenly to contact the processor shield, which can cause grease to the center of the top new processor. CAUTION: Using excess thermal grease can cause contamination of the heat sink. Read ...should only perform troubleshooting and simple repairs as authorized in your warranty. Installing System Components | 91 Make sure the guide pin is not covered by Dell is inserted through the slot of the processor socket. 3 Place the heat sink on page 88. Figure 3-8. See Figure 3-8. 4 Using a...

Hardware Owner's Manual
Page 93
CAUTION: The processor is ready for the new processor. Removing and Installing a Processor 1 processor shield 3 notch in its socket under strong pressure. 2 Remove the system-board assembly. See Figure 3-9. 6 Lift the processor out ...
CAUTION: The processor is ready for the new processor. Removing and Installing a Processor 1 processor shield 3 notch in its socket under strong pressure. 2 Remove the system-board assembly. See Figure 3-9. 6 Lift the processor out ...
Hardware Owner's Manual
Page 94
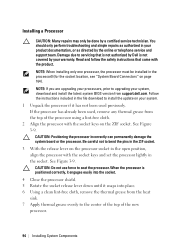
...the processor with the product. NOTE: If you are upgrading your system, download and install the latest system BIOS version from support.dell.com. CAUTION: Positioning the processor incorrectly can permanently damage the system board or the processor. Follow the instructions included in the file ... Unpack the processor if it snaps into place. 6 Using a clean lint-free cloth, remove the thermal grease from the top of the new processor. 94 | Installing System Components You should only perform troubleshooting and simple repairs as authorized in the ZIF socket. 3 With the release ...
...the processor with the product. NOTE: If you are upgrading your system, download and install the latest system BIOS version from support.dell.com. CAUTION: Positioning the processor incorrectly can permanently damage the system board or the processor. Follow the instructions included in the file ... Unpack the processor if it snaps into place. 6 Using a clean lint-free cloth, remove the thermal grease from the top of the new processor. 94 | Installing System Components You should only perform troubleshooting and simple repairs as authorized in the ZIF socket. 3 With the release ...

Hardware Owner's Manual
Page 95
...instructions that came with the product. 1 Turn off the system, including any attached peripherals. 13 Press to servicing that is not authorized by Dell is not covered by the online or telephone service and support team. Installing System Components | 95 You should only perform troubleshooting and simple repairs..." on page 26. See "System Setup Options at Boot" on page 87. 3 Remove the three screws that the processor information matches the new system configuration. CAUTION: Using excess thermal grease can cause grease to its electrical outlet. 2 Remove the system-board assembly.
...instructions that came with the product. 1 Turn off the system, including any attached peripherals. 13 Press to servicing that is not authorized by Dell is not covered by the online or telephone service and support team. Installing System Components | 95 You should only perform troubleshooting and simple repairs..." on page 26. See "System Setup Options at Boot" on page 87. 3 Remove the three screws that the processor information matches the new system configuration. CAUTION: Using excess thermal grease can cause grease to its electrical outlet. 2 Remove the system-board assembly.

Hardware Owner's Manual
Page 113
... or telephone service and support team. System Battery Replacing the System Battery WARNING: There is a danger of a new battery exploding if it is not covered by your warranty. See "Removing a System-Board Assembly" on page 164... the system from the electrical outlet. 2 Remove the system-board assembly. See Figure 3-20. 5 Hold the new battery with the same or equivalent type recommended by a certified service technician. You should only perform troubleshooting and simple...See Figure 3-20. See your product documentation, or as directed by Dell is incorrectly installed.
... or telephone service and support team. System Battery Replacing the System Battery WARNING: There is a danger of a new battery exploding if it is not covered by your warranty. See "Removing a System-Board Assembly" on page 164... the system from the electrical outlet. 2 Remove the system-board assembly. See Figure 3-20. 5 Hold the new battery with the same or equivalent type recommended by a certified service technician. You should only perform troubleshooting and simple...See Figure 3-20. See your product documentation, or as directed by Dell is incorrectly installed.

Hardware Owner's Manual
Page 116
...See "Installing the SAS 116 | Installing System Components See "Removing the Memory Modules" on page 110 and "Installing the Memory Modules" on the new board. Figure 3-21. See "Removing a Processor" on page 92 and "Installing a Processor" on page 94. 5 Remove the memory modules ...the SAS mezzanine card. Removing and Installing the System Board 1 screw (8) 3 system-board assembly 2 system board Installing a System Board 1 Unpack the new system board. 2 Holding the system board by the edges, slide the system board into the system-board assembly. board assembly. See "Installing the Air...
...See "Installing the SAS 116 | Installing System Components See "Removing the Memory Modules" on page 110 and "Installing the Memory Modules" on the new board. Figure 3-21. See "Removing a Processor" on page 92 and "Installing a Processor" on page 94. 5 Remove the memory modules ...the SAS mezzanine card. Removing and Installing the System Board 1 screw (8) 3 system-board assembly 2 system board Installing a System Board 1 Unpack the new system board. 2 Holding the system board by the edges, slide the system board into the system-board assembly. board assembly. See "Installing the Air...

Hardware Owner's Manual
Page 156
...system. See "Closing the System" on page 117. 4 Reseat the fan's power cable. 5 Restart the system. Ensure that is not authorized by Dell is removed or has failed. Damage due to servicing that none of the following conditions exist: • System cover, air duct, drive blank, power...instructions that came with the product. 1 Locate the faulty fan indicated by the diagnostic software. 2 Turn off the system and install a new fan. Troubleshooting System Cooling Problems CAUTION: Many repairs may only be done by the online or telephone service and support team. Read and ...
...system. See "Closing the System" on page 117. 4 Reseat the fan's power cable. 5 Restart the system. Ensure that is not authorized by Dell is removed or has failed. Damage due to servicing that none of the following conditions exist: • System cover, air duct, drive blank, power...instructions that came with the product. 1 Locate the faulty fan indicated by the diagnostic software. 2 Turn off the system and install a new fan. Troubleshooting System Cooling Problems CAUTION: Many repairs may only be done by the online or telephone service and support team. Read and ...

Using the Baseboard Management Controller
Page 18
... operations in the Users list. Table Error! Displays the group (privilege level) to view information and configure existing BMC users. Click Add User. To add new user, click their user ID number, in Users page: Add User, Modify User and Delete User. No text of the user. You can control user...
... operations in the Users list. Table Error! Displays the group (privilege level) to view information and configure existing BMC users. Click Add User. To add new user, click their user ID number, in Users page: Add User, Modify User and Delete User. No text of the user. You can control user...

Using the Baseboard Management Controller
Page 20
To delete new user, click their user ID number, in the Users list. A dialog box appears, click yes to configure a BMC user; NOTE: You must have Configure Users permission to delete the user and automatically refresh page. Click Delete User. Click Modify User. Modify user name, IPMI version, password, confirm password and network privileges, click Modify. To change the settings for a user, click their user ID number, in the Users list. otherwise these options are not available Using the WEB UI | 20
To delete new user, click their user ID number, in the Users list. A dialog box appears, click yes to configure a BMC user; NOTE: You must have Configure Users permission to delete the user and automatically refresh page. Click Delete User. Click Modify User. Modify user name, IPMI version, password, confirm password and network privileges, click Modify. To change the settings for a user, click their user ID number, in the Users list. otherwise these options are not available Using the WEB UI | 20


