
Glossary
Page 1
... interchange of CIM data with controllers for developing technology standards in the U.S. Ampere(s). ambient temperature - asset tag - A module that includes power supplies and fans. bus - Centimeter(s). 1 blade - bootable media - A fast storage area that keeps a copy of a system. Certificate ... system contains an expansion bus that is located. ACPI - cache - CA - The temperature of a program or data file. Dell™ Glossary NOTE: For additional information on storage terminology, visit the Storage Networking Industry Association's website at www.snia.org and ...
... interchange of CIM data with controllers for developing technology standards in the U.S. Ampere(s). ambient temperature - asset tag - A module that includes power supplies and fans. bus - Centimeter(s). 1 blade - bootable media - A fast storage area that keeps a copy of a system. Certificate ... system contains an expansion bus that is located. ACPI - cache - CA - The temperature of a program or data file. Dell™ Glossary NOTE: For additional information on storage terminology, visit the Storage Networking Industry Association's website at www.snia.org and ...

Glossary
Page 8
...be configured for peripherals, and various ROM chips. Super video graphics array. system memory - termination - Uninterruptible power supply. USB - USB devices can be terminated to remotely monitor and manage workstations. Because the System Setup program is running. ...uplink port - A battery-powered unit that automatically supplies power to configure your system's integral components, such as mice and keyboards. See memory key. 8 Symmetric multiprocessing. ...
...be configured for peripherals, and various ROM chips. Super video graphics array. system memory - termination - Uninterruptible power supply. USB - USB devices can be terminated to remotely monitor and manage workstations. Because the System Setup program is running. ...uplink port - A battery-powered unit that automatically supplies power to configure your system's integral components, such as mice and keyboards. See memory key. 8 Symmetric multiprocessing. ...
Glossary
Page 48
... array VGA と SVGA W - Unregistered DDR3 UPS - Symmetric multiprocessing I/O OS SNMP - Volt VAC - Watt WH - Simple Network Management Protocol SVGA - Zero insertion force 48 Uninterruptible power supply USB - Volts alternating current VDC - Self-Monitoring Analysis and Reporting Technology BIOS SMP - TCP/IP U-DIMM - SMART -
... array VGA と SVGA W - Unregistered DDR3 UPS - Symmetric multiprocessing I/O OS SNMP - Volt VAC - Watt WH - Simple Network Management Protocol SVGA - Zero insertion force 48 Uninterruptible power supply USB - Volts alternating current VDC - Self-Monitoring Analysis and Reporting Technology BIOS SMP - TCP/IP U-DIMM - SMART -
Glossary
Page 58
Windows Management Instrumentation 은 CIM ZIF Zero Insertion Force provider CIM management station managed system) 은 Dell OpenManage™ Server Administrator x x y x z 58 TCP/IP TCP/IP Offload Engine U-DIMM DDR3 Unregistered(Unbuffered) DDR3 Memory Module UPS Uninterruptible Power Supply USB Universal Serial Bus USB USB USB USB V - 볼트 (Volt VAC Volt Alternating Current...
Windows Management Instrumentation 은 CIM ZIF Zero Insertion Force provider CIM management station managed system) 은 Dell OpenManage™ Server Administrator x x y x z 58 TCP/IP TCP/IP Offload Engine U-DIMM DDR3 Unregistered(Unbuffered) DDR3 Memory Module UPS Uninterruptible Power Supply USB Universal Serial Bus USB USB USB USB V - 볼트 (Volt VAC Volt Alternating Current...

User Manual
Page 9
Plug the other end of the power cables into a grounded electrical outlet or a separate power source such as an uninterrupted power supply or a power distribution unit. Connecting the Power Cable(s) Connect the system's power cable(s) to the system and, if a monitor is used, connect the monitor's power cable to the monitor. Getting Started With Your System | 9
Plug the other end of the power cables into a grounded electrical outlet or a separate power source such as an uninterrupted power supply or a power distribution unit. Connecting the Power Cable(s) Connect the system's power cable(s) to the system and, if a monitor is used, connect the monitor's power cable to the monitor. Getting Started With Your System | 9

User Manual
Page 14
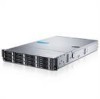
... port Video (Per System Board) 15-pin D-Sub VGA Dedicated Ethernet port for remote management access Video type Video memory Power On-board AST2050 video controller 8 MB AC power supply (per system board) System battery CR 2032 3.0-V lithium ion coin cell RAID battery (optional) Physical 3.7-V lithium ion battery...in) 79.0 cm (31.1 in) 42 kg (92.61 lb) 16.5 kg (36.38 lb) Getting Started With Your System | 14 Battery (per power supply) Wattage 1023 W low line/1100 W high line Voltage 100-240 V CA, 50-60 Hz, maximum input current: 12.0 Amps Heat dissipation 4217.063 BTU...
... port Video (Per System Board) 15-pin D-Sub VGA Dedicated Ethernet port for remote management access Video type Video memory Power On-board AST2050 video controller 8 MB AC power supply (per system board) System battery CR 2032 3.0-V lithium ion coin cell RAID battery (optional) Physical 3.7-V lithium ion battery...in) 79.0 cm (31.1 in) 42 kg (92.61 lb) 16.5 kg (36.38 lb) Getting Started With Your System | 14 Battery (per power supply) Wattage 1023 W low line/1100 W high line Voltage 100-240 V CA, 50-60 Hz, maximum input current: 12.0 Amps Heat dissipation 4217.063 BTU...

Hardware Owner's Manual
Page 3
... 10 Front-Panel Features and Indicators 11 Hard-Drive Indicator Patterns 14 Back Panel Features and Indicators 15 NIC Indicator Codes 18 Power and System Board Indicator Codes 20 Power Supply Indicator Codes 21 BMC Heart Beat LED 22 Post Error Code...23 Collecting System Event Log (SEL) for Investigation 23 Post Error...
... 10 Front-Panel Features and Indicators 11 Hard-Drive Indicator Patterns 14 Back Panel Features and Indicators 15 NIC Indicator Codes 18 Power and System Board Indicator Codes 20 Power Supply Indicator Codes 21 BMC Heart Beat LED 22 Post Error Code...23 Collecting System Event Log (SEL) for Investigation 23 Post Error...

Hardware Owner's Manual
Page 5
... a Hard-Drive Carrier 82 Removing a Hard Drive From a Hard-Drive Carrier 82 Installing a Hard Drive into a Hard-Drive Carrier 83 Power Supplies ...84 Recommended Configuration 84 Full Configuration 84 Removing a Power Supply 85 Installing a Power Supply 86 System-Board Assembly 87 Removing a System-Board Assembly 87 Installing a System-Board Assembly 88 Air Ducts ...88 Removing the...
... a Hard-Drive Carrier 82 Removing a Hard Drive From a Hard-Drive Carrier 82 Installing a Hard Drive into a Hard-Drive Carrier 83 Power Supplies ...84 Recommended Configuration 84 Full Configuration 84 Removing a Power Supply 85 Installing a Power Supply 86 System-Board Assembly 87 Removing a System-Board Assembly 87 Installing a System-Board Assembly 88 Air Ducts ...88 Removing the...

Hardware Owner's Manual
Page 8
... Troubleshooting a USB Device 150 Troubleshooting a Serial I/O Device 151 Troubleshooting a NIC 152 Troubleshooting a Wet System 153 Troubleshooting a Damaged System 154 Troubleshooting the System Battery 154 Troubleshooting Power Supplies 155 Troubleshooting System Cooling Problems 156 Troubleshooting a Fan 156 Troubleshooting System Memory 157 Troubleshooting a Hard Drive 159 Troubleshooting a Storage Controller 160 Troubleshooting Expansion Cards 161...
... Troubleshooting a USB Device 150 Troubleshooting a Serial I/O Device 151 Troubleshooting a NIC 152 Troubleshooting a Wet System 153 Troubleshooting a Damaged System 154 Troubleshooting the System Battery 154 Troubleshooting Power Supplies 155 Troubleshooting System Cooling Problems 156 Troubleshooting a Fan 156 Troubleshooting System Memory 157 Troubleshooting a Hard Drive 159 Troubleshooting a Storage Controller 160 Troubleshooting Expansion Cards 161...

Hardware Owner's Manual
Page 13
...the system. Item Indicator, Button Or Connector 1,3 Power-on indicator/ power button (motherboards 1,2) 2,4 System identification indicator/button (motherboards 1,2) 5 Hard Drives * Drive Cover Icon Description The power-on indicator lights when the system power is on the amount of memory installed in the... hard drives. NOTE: To force an ungraceful shutdown, press and hold the power button for 2.5" hard drive system and 3.5" hard drive system. The power button controls the DC power supply output to twelve hot-swappable 3.5" hard drives. About Your System | 13 ...
...the system. Item Indicator, Button Or Connector 1,3 Power-on indicator/ power button (motherboards 1,2) 2,4 System identification indicator/button (motherboards 1,2) 5 Hard Drives * Drive Cover Icon Description The power-on indicator lights when the system power is on the amount of memory installed in the... hard drives. NOTE: To force an ungraceful shutdown, press and hold the power button for 2.5" hard drive system and 3.5" hard drive system. The power button controls the DC power supply output to twelve hot-swappable 3.5" hard drives. About Your System | 13 ...

Hardware Owner's Manual
Page 16
... to a problem. Lights amber when the system needs attention due to the system. Figure 1-8. Back Panel−One Motherboard Item Indicator, Button Icon Or Connector 1 Power supply 2 2 Power supply 1 3 NIC connector 1 4 NIC connector 2 5 Serial port 6 VGA port 7 System identification indicator 8 BMC management port Description 1100 W/1400 W 1100 W/1400 W Embedded 10/100/1000 NIC connectors...
... to a problem. Lights amber when the system needs attention due to the system. Figure 1-8. Back Panel−One Motherboard Item Indicator, Button Icon Or Connector 1 Power supply 2 2 Power supply 1 3 NIC connector 1 4 NIC connector 2 5 Serial port 6 VGA port 7 System identification indicator 8 BMC management port Description 1100 W/1400 W 1100 W/1400 W Embedded 10/100/1000 NIC connectors...

Hardware Owner's Manual
Page 17
.... Item Indicator, Button Icon Or Connector 9 USB port 0 10 USB port 1 11 Power On/Off button 12 IPASS connector Description Connects USB devices to the system. The power button controls the DC power supply output to the system. NOTE: To force an ungraceful shutdown, press and hold the... power button for five seconds. About Your System | 17 NOTE: When powering on the amount of memory installed in the...
.... Item Indicator, Button Icon Or Connector 9 USB port 0 10 USB port 1 11 Power On/Off button 12 IPASS connector Description Connects USB devices to the system. The power button controls the DC power supply output to the system. NOTE: To force an ungraceful shutdown, press and hold the... power button for five seconds. About Your System | 17 NOTE: When powering on the amount of memory installed in the...

Hardware Owner's Manual
Page 21
Power Supply Status Indicator 1 power supply 2 AC power LED AC Power LED Solid green Solid yellow Off Condition Power supply is on (AC OK/DC OK) or in standby mode (100 VAC-240 VAC for 1100 W, 200 VAC-240 VAC for 1400 W) Power supply is at fault condition (UVP/OVP/OCP/SCP/OTP/Fan Fault) Power supply is off or AC input voltage is out of normal operating range (100 VAC-240 VAC for 1100 W, 200 VAC-240 VAC for 1400 W) About Your System | 21 Power Supply Indicator Codes Figure 1-11.
Power Supply Status Indicator 1 power supply 2 AC power LED AC Power LED Solid green Solid yellow Off Condition Power supply is on (AC OK/DC OK) or in standby mode (100 VAC-240 VAC for 1100 W, 200 VAC-240 VAC for 1400 W) Power supply is at fault condition (UVP/OVP/OCP/SCP/OTP/Fan Fault) Power supply is off or AC input voltage is out of normal operating range (100 VAC-240 VAC for 1100 W, 200 VAC-240 VAC for 1400 W) About Your System | 21 Power Supply Indicator Codes Figure 1-11.

Hardware Owner's Manual
Page 78
... the safety instructions that came with the product. Damage due to servicing that are still connected to a power supply can be extremely dangerous. Do not touch the components on systems that is not authorized by Dell is necessary to do so. 3 Installing System Components Safety Instructions WARNING: Working on the board unless it...
... the safety instructions that came with the product. Damage due to servicing that are still connected to a power supply can be extremely dangerous. Do not touch the components on systems that is not authorized by Dell is necessary to do so. 3 Installing System Components Safety Instructions WARNING: Working on the board unless it...

Hardware Owner's Manual
Page 79
... as directed by a certified service technician. Inside the System 1 system-board assembly (2) 3 power distribution board (2) 5 hard-drive bay 2 power supply (2) 4 cooling fan (4) 6 hard drive (12) Installing System Components | 79 Read and follow the safety instructions that is not authorized by Dell is not covered by your product documentation, or as authorized in this section...
... as directed by a certified service technician. Inside the System 1 system-board assembly (2) 3 power distribution board (2) 5 hard-drive bay 2 power supply (2) 4 cooling fan (4) 6 hard drive (12) Installing System Components | 79 Read and follow the safety instructions that is not authorized by Dell is not covered by your product documentation, or as authorized in this section...

Hardware Owner's Manual
Page 84
NOTE: Configurations higher than indicated in the table may change the power supply mode to four 115 W processors/MLB, seven memory modules/MLB, and eight 3.5" SAS hard drives/MLB Recommended Configuration Memory - 4G, 1333, 2Rx4X72 ... hard drives/MLB Up to non-redundant. In non-redundant mode if the power requirement exceeds the installed system power capacity, the BIOS will throttle the CPUs. Power Supplies NOTE: The following table lists the maximum supported configuration where power supply redundancy is enabled, then CPU throttling occurs on configurations that exceed the cap...
NOTE: Configurations higher than indicated in the table may change the power supply mode to four 115 W processors/MLB, seven memory modules/MLB, and eight 3.5" SAS hard drives/MLB Recommended Configuration Memory - 4G, 1333, 2Rx4X72 ... hard drives/MLB Up to non-redundant. In non-redundant mode if the power requirement exceeds the installed system power capacity, the BIOS will throttle the CPUs. Power Supplies NOTE: The following table lists the maximum supported configuration where power supply redundancy is enabled, then CPU throttling occurs on configurations that exceed the cap...

Hardware Owner's Manual
Page 85
...your warranty. CAUTION: The System requires one power supply to servicing that came with the product. Figure 3-5. NOTE: Removing the power supply may only be done by a certified service technician. Removing and Installing a Power Supply 1 handle 3 release lever 2 power supply Installing System Components | 85 See Figure 3-5..... 2 Disconnect the power cable from power source and the power supply. 3 Press the release lever and using the handle, slide the power supply out of the system. Read and follow the safety instructions that is not authorized by Dell is not covered by...
...your warranty. CAUTION: The System requires one power supply to servicing that came with the product. Figure 3-5. NOTE: Removing the power supply may only be done by a certified service technician. Removing and Installing a Power Supply 1 handle 3 release lever 2 power supply Installing System Components | 85 See Figure 3-5..... 2 Disconnect the power cable from power source and the power supply. 3 Press the release lever and using the handle, slide the power supply out of the system. Read and follow the safety instructions that is not authorized by Dell is not covered by...

Hardware Owner's Manual
Page 86
... seconds for the system to operate normally. 1 Verify that is not authorized by Dell is fully seated and the release lever snaps into a power outlet. NOTE: When installing a new power supply in your warranty. CAUTION: The System requires one power supply to recognize the power supply and determine its status. 86 | Installing System Components You should only perform...
... seconds for the system to operate normally. 1 Verify that is not authorized by Dell is fully seated and the release lever snaps into a power outlet. NOTE: When installing a new power supply in your warranty. CAUTION: The System requires one power supply to recognize the power supply and determine its status. 86 | Installing System Components You should only perform...

Hardware Owner's Manual
Page 121
... you remove them to the system. Installing System Components | 121 The procedure to servicing that is not authorized by Dell is similar. See "Removing and Installing a Power Supply" on page 85. 4 Disconnect all the cables from its electrical outlet. 2 Open the system. NOTE: To ...out of the cable underneath the tabs on page 117. 3 Remove the power supply. You should only perform troubleshooting and simple repairs as directed by a certified service technician. Power Distribution Boards Removing a Power Distribution Board CAUTION: Many repairs may only be done by the online or ...
... you remove them to the system. Installing System Components | 121 The procedure to servicing that is not authorized by Dell is similar. See "Removing and Installing a Power Supply" on page 85. 4 Disconnect all the cables from its electrical outlet. 2 Open the system. NOTE: To ...out of the cable underneath the tabs on page 117. 3 Remove the power supply. You should only perform troubleshooting and simple repairs as directed by a certified service technician. Power Distribution Boards Removing a Power Distribution Board CAUTION: Many repairs may only be done by the online or ...

Hardware Owner's Manual
Page 123
...Dell is not covered by your product documentation, or as directed by a certified service technician. You must route these cables properly through the tabs on the chassis to prevent them from being pinched or crimped. 5 Replace the screws securing the first power distribution board to the second power distribution board. See "Installing a Power Supply..." on the chassis to prevent them from being pinched or crimped. 7 Replace the power supply. Installing System ...
...Dell is not covered by your product documentation, or as directed by a certified service technician. You must route these cables properly through the tabs on the chassis to prevent them from being pinched or crimped. 5 Replace the screws securing the first power distribution board to the second power distribution board. See "Installing a Power Supply..." on the chassis to prevent them from being pinched or crimped. 7 Replace the power supply. Installing System ...


