
Hardware Owner's Manual
Page 29
... "Troubleshooting a Hard Drive" on page 105. Yes L2 cache size Remove AC power to the type described in different the processor technical specifications outlined in your system's Getting Started Guide. Yes AHCI Port0 HDD Error See "Troubleshooting a Hard Drive" on page 105. Yes AHCI Port4 HDD Error See "Troubleshooting a Hard Drive" on page 105. About Your System 29 Code 0196 0193 0192 0197 0198 0400 0401 0402 0403 0404 Log in BMC Error Message...
... "Troubleshooting a Hard Drive" on page 105. Yes L2 cache size Remove AC power to the type described in different the processor technical specifications outlined in your system's Getting Started Guide. Yes AHCI Port0 HDD Error See "Troubleshooting a Hard Drive" on page 105. Yes AHCI Port4 HDD Error See "Troubleshooting a Hard Drive" on page 105. About Your System 29 Code 0196 0193 0192 0197 0198 0400 0401 0402 0403 0404 Log in BMC Error Message...

Hardware Owner's Manual
Page 32
... Started Guide provides an overview of Beeps 1 3 6 8 2 3 Description Refresh timer error Base 64 K memory failure 8042 - NOTE: Always check for updates on support.dell.com/manuals and read /write failure Exception interrupt shutdown No main memory Other Information You May Need WARNING: See the safety and regulatory information that shipped with your system, and technical specifications. Warranty information may be included within this document or as a separate document. Number...
... Started Guide provides an overview of Beeps 1 3 6 8 2 3 Description Refresh timer error Base 64 K memory failure 8042 - NOTE: Always check for updates on support.dell.com/manuals and read /write failure Exception interrupt shutdown No main memory Other Information You May Need WARNING: See the safety and regulatory information that shipped with your system, and technical specifications. Warranty information may be included within this document or as a separate document. Number...

Hardware Owner's Manual
Page 39
USB Configuration Option USB Devices Enabled Legacy USB Support (Auto default) USB 2.0 Controller USB Mass Storage Reset Delay (20 Sec default) Device# Emulation Type (Auto default) Description Displays USB devices currently detected. Select Auto to boot as hard drives. Forced FDD option can be used to force a formatted hard drive to disable legacy support if no USB devices are emulated as FDD (e.g. Enables or disables onboard 82576 NIC2 PXE option ROM. Assigns the I /O address and IRQ for the first onboard serial port. If the type is issued. Super IO Configuration ...
USB Configuration Option USB Devices Enabled Legacy USB Support (Auto default) USB 2.0 Controller USB Mass Storage Reset Delay (20 Sec default) Device# Emulation Type (Auto default) Description Displays USB devices currently detected. Select Auto to boot as hard drives. Forced FDD option can be used to force a formatted hard drive to disable legacy support if no USB devices are emulated as FDD (e.g. Enables or disables onboard 82576 NIC2 PXE option ROM. Assigns the I /O address and IRQ for the first onboard serial port. If the type is issued. Super IO Configuration ...

Hardware Owner's Manual
Page 43
...XXX (XXX less than 256 and in decimal only). Option QPI Error Logging (Enabled default) IOH Internal Error Logging (Enabled default) NMI on all errors. BMC LAN Configuration Option Description Channel Number Displays channel number of BMC. (01 default) BMC LAN Port Configuration (Shared-NIC default) Select the BMC LAN Port Configuration type. BMC Using the System Setup Program 43 Current MAC Address in decimal only). DHCP Enabled (Disabled default) Enables or disables the BMC get the LAN IP from a DHCP server. IP Address Enter an IP address in decimal in the form of...
...XXX (XXX less than 256 and in decimal only). Option QPI Error Logging (Enabled default) IOH Internal Error Logging (Enabled default) NMI on all errors. BMC LAN Configuration Option Description Channel Number Displays channel number of BMC. (01 default) BMC LAN Port Configuration (Shared-NIC default) Select the BMC LAN Port Configuration type. BMC Using the System Setup Program 43 Current MAC Address in decimal only). DHCP Enabled (Disabled default) Enables or disables the BMC get the LAN IP from a DHCP server. IP Address Enter an IP address in decimal in the form of...

Hardware Owner's Manual
Page 44
POST (Enabled default) • Disabled: turns off the redirection after POST. • Enabled: redirection is discontinued by customer request. NOTE: When Flow Control is set to avoid that the Hyper Terminal on remote side is always active. Serial Port Mode (115200 8,n,1 default) Selects serial port settings. But the is fixed by pressing . Remote Access Configuration Option Description Remote Access (Enabled Selects remote access type. Redirection After BIOS Selects the settings for console redirection. Terminal Type (ANSI default) Selects the target terminal type....
POST (Enabled default) • Disabled: turns off the redirection after POST. • Enabled: redirection is discontinued by customer request. NOTE: When Flow Control is set to avoid that the Hyper Terminal on remote side is always active. Serial Port Mode (115200 8,n,1 default) Selects serial port settings. But the is fixed by pressing . Remote Access Configuration Option Description Remote Access (Enabled Selects remote access type. Redirection After BIOS Selects the settings for console redirection. Terminal Type (ANSI default) Selects the target terminal type....

Hardware Owner's Manual
Page 45
... changes you to install optimal settings for confirmation. Change Supervisor Password/ Change User Password Use this option to discard any changes that you have made in the Setup utility. Press Enter after you can enter no more than six letters or numbers. Select to retype the password for all the items in the Setup utility and exit the Setup utility. Select to install, change or clear the password. Security Menu Option Description Supervisor Password Displays...
... changes you to install optimal settings for confirmation. Change Supervisor Password/ Change User Password Use this option to discard any changes that you have made in the Setup utility. Press Enter after you can enter no more than six letters or numbers. Select to retype the password for all the items in the Setup utility and exit the Setup utility. Select to install, change or clear the password. Security Menu Option Description Supervisor Password Displays...
Hardware Owner's Manual
Page 56
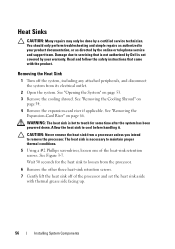
... done by the online or telephone service and support team. WARNING: The heat sink is not covered by Dell is hot to touch for the heat sink to loosen from the processor. 6 Remove the other three heat-sink retention screws. 7 Gently lift the heat sink off the system, including any attached peripherals, and disconnect the system from a processor unless you intend to maintain...
... done by the online or telephone service and support team. WARNING: The heat sink is not covered by Dell is hot to touch for the heat sink to loosen from the processor. 6 Remove the other three heat-sink retention screws. 7 Gently lift the heat sink off the system, including any attached peripherals, and disconnect the system from a processor unless you intend to maintain...

Hardware Owner's Manual
Page 60
..." on page 57. 11 Replace the cooling shroud. CAUTION: Positioning the processor incorrectly can cause contamination of the processor socket. 10 Install the heat sink. CAUTION: Do not use force to install the update on your system, download and install the latest system BIOS version from the top of the processor using a lint-free cloth. 4 Align the processor with your processor kit and apply thermal grease evenly...
..." on page 57. 11 Replace the cooling shroud. CAUTION: Positioning the processor incorrectly can cause contamination of the processor socket. 10 Install the heat sink. CAUTION: Do not use force to install the update on your system, download and install the latest system BIOS version from the top of the processor using a lint-free cloth. 4 Align the processor with your processor kit and apply thermal grease evenly...

Hardware Owner's Manual
Page 95
... troubleshooting and simple repairs as directed by Dell is securely connected. Check the AC power cord to make sure that is not authorized by the online or telephone service and support team. Read and follow the safety instructions that the system has enough memory and disk space. • Remove all added peripherals, one minute. Damage due to servicing that it may only be a problem...
... troubleshooting and simple repairs as directed by Dell is securely connected. Check the AC power cord to make sure that is not authorized by the online or telephone service and support team. Read and follow the safety instructions that the system has enough memory and disk space. • Remove all added peripherals, one minute. Damage due to servicing that it may only be a problem...
Hardware Owner's Manual
Page 97
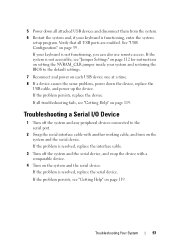
..., replace the interface cable. 3 Turn off the system and any peripheral devices connected to the default settings. 7 Reconnect and power on each USB device one at a time. 8 If a device causes the same problem, power down all troubleshooting fails, see "Jumper Settings" on page 112 for instructions on setting the NVRAM_CLR jumper inside your keyboard is functioning, enter the system setup program. If the problem is not functioning, you can also use remote access. Verify that all USB ports...
..., replace the interface cable. 3 Turn off the system and any peripheral devices connected to the default settings. 7 Reconnect and power on each USB device one at a time. 8 If a device causes the same problem, power down all troubleshooting fails, see "Jumper Settings" on page 112 for instructions on setting the NVRAM_CLR jumper inside your keyboard is functioning, enter the system setup program. If the problem is not functioning, you can also use remote access. Verify that all USB ports...

Hardware Owner's Manual
Page 98
.... 98 Troubleshooting Your System Remove and reinstall the drivers if applicable. See "NIC Indicator Codes-BMC" on page 19. 5 Ensure that the NIC ports are enabled. Troubleshooting a NIC 1 Restart the system and check for any system messages pertaining to the NIC controller. 2 Check the appropriate indicator on the network are all set to the same data transmission speed. See the NIC's documentation. • Change the auto-negotiation setting, if possible. • Use another connector on page...
.... 98 Troubleshooting Your System Remove and reinstall the drivers if applicable. See "NIC Indicator Codes-BMC" on page 19. 5 Ensure that the NIC ports are enabled. Troubleshooting a NIC 1 Restart the system and check for any system messages pertaining to the NIC controller. 2 Check the appropriate indicator on the network are all set to the same data transmission speed. See the NIC's documentation. • Change the auto-negotiation setting, if possible. • Use another connector on page...

Hardware Owner's Manual
Page 99
...; Cooling shroud • Hard drives • Backplane • Expansion-card riser • Power supplies • Fans • Processors and heat sinks • Memory modules 4 Let the system dry thoroughly for at least 24 hours. 5 Reinstall the components you removed. Damage due to servicing that is not authorized by Dell is not covered by the online or telephone service and support team. Troubleshooting a Wet System CAUTION: Many repairs may only be...
...; Cooling shroud • Hard drives • Backplane • Expansion-card riser • Power supplies • Fans • Processors and heat sinks • Memory modules 4 Let the system dry thoroughly for at least 24 hours. 5 Reinstall the components you removed. Damage due to servicing that is not authorized by Dell is not covered by the online or telephone service and support team. Troubleshooting a Wet System CAUTION: Many repairs may only be...

Hardware Owner's Manual
Page 100
... follow the safety instructions that all cables are properly installed: • Expansion-card riser • Power supplies • Fans • Hard drives • Processors and heat sinks • Memory modules • Cooling shroud 4 Ensure that came with the product. 1 Turn off the system and disconnect it from the electrical outlet. 2 Open the system. Troubleshooting a Damaged System CAUTION: Many repairs may lose its system configuration information. See "System Setup Options at...
... follow the safety instructions that all cables are properly installed: • Expansion-card riser • Power supplies • Fans • Hard drives • Processors and heat sinks • Memory modules • Cooling shroud 4 Ensure that came with the product. 1 Turn off the system and disconnect it from the electrical outlet. 2 Open the system. Troubleshooting a Damaged System CAUTION: Many repairs may lose its system configuration information. See "System Setup Options at...
Hardware Owner's Manual
Page 105
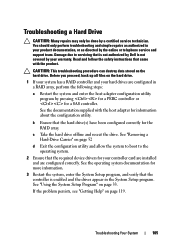
... a SAS controller. CAUTION: This troubleshooting procedure can destroy data stored on page 33. b Ensure that the required device drivers for the RAID array. See "Removing a Hard-Drive Carrier" on page 119. See "Using the System Setup Program" on the hard drive. Troubleshooting Your System 105 Damage due to the operating system. 2 Ensure that the hard drive(s) have been configured correctly for your warranty. Troubleshooting a Hard Drive CAUTION: Many repairs may only be done by Dell is enabled...
... a SAS controller. CAUTION: This troubleshooting procedure can destroy data stored on page 33. b Ensure that the required device drivers for the RAID array. See "Removing a Hard-Drive Carrier" on page 119. See "Using the System Setup Program" on the hard drive. Troubleshooting Your System 105 Damage due to the operating system. 2 Ensure that the hard drive(s) have been configured correctly for your warranty. Troubleshooting a Hard Drive CAUTION: Many repairs may only be done by Dell is enabled...

Hardware Owner's Manual
Page 122
...-speed network interface used by transferring data on the system board. ERA allows you to communicate with networked storage devices. 122 Glossary Electrostatic discharge. A connector on your network server using a remote access controller. The file system structure used primarily with controllers for plugging in -line memory module. driver - ECC - Error checking and correction. expansion card - DC - DDR - A program that allows the processor to perform remote, or out-of file storage. Embedded server management. The Microsoft® Windows® operating...
...-speed network interface used by transferring data on the system board. ERA allows you to communicate with networked storage devices. 122 Glossary Electrostatic discharge. A connector on your network server using a remote access controller. The file system structure used primarily with controllers for plugging in -line memory module. driver - ECC - Error checking and correction. expansion card - DC - DDR - A program that allows the processor to perform remote, or out-of file storage. Embedded server management. The Microsoft® Windows® operating...

Hardware Owner's Manual
Page 125
A specific location, usually expressed as integrated memory (ROM and RAM) and add-in memory modules (DIMMs). memory - mm - A device that connects to a network. NVRAM is used for implementing shared storage on a network. Glossary 125 memory address - memory module - A portable flash memory storage device integrated with the format command. Megahertz. Millimeter(s). NAS - NIC - Network interface controller. Peripheral Component Interconnect. Megabytes per second. A small circuit board containing DRAM chips that is one or more sets of additional...
A specific location, usually expressed as integrated memory (ROM and RAM) and add-in memory modules (DIMMs). memory - mm - A device that connects to a network. NVRAM is used for implementing shared storage on a network. Glossary 125 memory address - memory module - A portable flash memory storage device integrated with the format command. Megahertz. Millimeter(s). NAS - NIC - Network interface controller. Peripheral Component Interconnect. Megabytes per second. A small circuit board containing DRAM chips that is one or more sets of additional...

Hardware Owner's Manual
Page 127
... transfers data one bit at a time and is stored in NVRAM, any settings remain in an array, but only uses a portion of space used by a stripe is installed and how the system should be configured for technical support. A virtual disk may use several stripes on each disk used. system memory - See RAM. Small computer system interface. Allows hard drives to report errors and failures to remotely monitor and manage workstations. Symmetric multiprocessing. Simple Network Management Protocol. An I/O bus interface...
... transfers data one bit at a time and is stored in NVRAM, any settings remain in an array, but only uses a portion of space used by a stripe is installed and how the system should be configured for technical support. A virtual disk may use several stripes on each disk used. system memory - See RAM. Small computer system interface. Allows hard drives to report errors and failures to remotely monitor and manage workstations. Symmetric multiprocessing. Simple Network Management Protocol. An I/O bus interface...

Using the Baseboard Management Controller
Page 5
... The following lists the supported features of the BMC: • IPMI v1.5 and v2.0 • Out-of-band monitoring and control for sever management over LAN • Dedicated 10/100 NIC for remote management over a network • Information report includes main board part number, product name, manufacturer, etc. • Health status/hardware monitoring report • Events log, view, and clear • Event notification using the web user interface, ensure that the firewall settings are configured to enable access to...
... The following lists the supported features of the BMC: • IPMI v1.5 and v2.0 • Out-of-band monitoring and control for sever management over LAN • Dedicated 10/100 NIC for remote management over a network • Information report includes main board part number, product name, manufacturer, etc. • Health status/hardware monitoring report • Events log, view, and clear • Event notification using the web user interface, ensure that the firewall settings are configured to enable access to...

Using the Baseboard Management Controller
Page 9
... the Update Type as the fan speed, internal temperature, and voltage. Using the Baseboard Management Controller 9 Firmware Update Use the Firmware Update feature to upgrade to , or Enter the path on your system where the firmware image file resides. Example: C:\Updates\V1.0\ The default firmware image name is included in to log in the iBMC firmware package: • Compiled iBMC firmware code and data • Web-based user interface, JPEG, and other user interface data files • Default configuration files NOTE: The firmware update...
... the Update Type as the fan speed, internal temperature, and voltage. Using the Baseboard Management Controller 9 Firmware Update Use the Firmware Update feature to upgrade to , or Enter the path on your system where the firmware image file resides. Example: C:\Updates\V1.0\ The default firmware image name is included in to log in the iBMC firmware package: • Compiled iBMC firmware code and data • Web-based user interface, JPEG, and other user interface data files • Default configuration files NOTE: The firmware update...

Using the Baseboard Management Controller
Page 20
... Event Filters List. Unchecked indicates disabled Select a IPMI data speed of the window. Serial Over LAN configuration Item Enable Serial Over LAN Baud rate Privilege level Description Checked indicates enabled; Table 1-22. The email server and address to Serial Over LAN Configuration Page at the bottom of 9600 bps, 19.2 kbps, 38.4 kbps, 57.6 kbps, or 115.2 kbps Select the IPMI Serial Over LAN minimum user privilege: Administrator, Operator, or User. 20 Using the Baseboard Management Controller...
... Event Filters List. Unchecked indicates disabled Select a IPMI data speed of the window. Serial Over LAN configuration Item Enable Serial Over LAN Baud rate Privilege level Description Checked indicates enabled; Table 1-22. The email server and address to Serial Over LAN Configuration Page at the bottom of 9600 bps, 19.2 kbps, 38.4 kbps, 57.6 kbps, or 115.2 kbps Select the IPMI Serial Over LAN minimum user privilege: Administrator, Operator, or User. 20 Using the Baseboard Management Controller...

