
SCSI Backplane Option
Page 5
... system produce high voltages and energy hazards, which can use 1.6-inch hard-disk drives with the 1 x 8 backplane, you may not be able to use the 1 x 8 backplane in the system's internal drive compartment. support.dell.com Dell PowerEdge 6300 and 4x00 Systems SCSI Backplane Option 1-1 If you do not find...the optional small computer system interface (SCSI) backplane for the Dell PowerEdge 6300 and 4x00 systems. The 1 x 8 SCSI backplane provides hot-pluggable Ultra2/LVD SCSI connections for up to eight 1-inch hard-disk drives in your system chassis. For a description of the SCSI ...
... system produce high voltages and energy hazards, which can use 1.6-inch hard-disk drives with the 1 x 8 backplane, you may not be able to use the 1 x 8 backplane in the system's internal drive compartment. support.dell.com Dell PowerEdge 6300 and 4x00 Systems SCSI Backplane Option 1-1 If you do not find...the optional small computer system interface (SCSI) backplane for the Dell PowerEdge 6300 and 4x00 systems. The 1 x 8 SCSI backplane provides hot-pluggable Ultra2/LVD SCSI connections for up to eight 1-inch hard-disk drives in your system chassis. For a description of the SCSI ...

SCSI Backplane Option
Page 6
Unpack the SCSI backplane board. Refer to its service position (see Figure 1-1). 6. For more information, see Figure 1-1). 1-2 Dell PowerEdge 6300 and 4x00 Systems SCSI Backplane Option Disconnect the Ultra160/m SCSI cable from the system. 5. Turn off of the L-shaped mounting..., press the latch on the backplane board. 8. Remove the computer cover. Loosen the captive thumbscrew on the backplane board. Remove the hard-disk drives from the SCSI backplane board. Disconnect the fan power cable from the locking connector on the side of the connector. 10. Slide the...
Unpack the SCSI backplane board. Refer to its service position (see Figure 1-1). 6. For more information, see Figure 1-1). 1-2 Dell PowerEdge 6300 and 4x00 Systems SCSI Backplane Option Disconnect the Ultra160/m SCSI cable from the system. 5. Turn off of the L-shaped mounting..., press the latch on the backplane board. 8. Remove the computer cover. Loosen the captive thumbscrew on the backplane board. Remove the hard-disk drives from the SCSI backplane board. Disconnect the fan power cable from the locking connector on the side of the connector. 10. Slide the...

SCSI Backplane Option
Page 10
...29. Reinstall the lower drive bay key using the three screws. 25. Reinstall the hard-disk drives in the computer. Reinstalling the Drive Bay Keys 1 Key stamp 2 Lower drive bay key 3 Upper drive bay key 24. To reinstall the upper drive bay key, lock the drive locking flange and reinstall ... 1.6-inch hard-disk drives. (A six-bay backplane can accommodate 1.6-inch or 1-inch drives.) If you install a 1 x 8 backplane, you need to convert the drive carriers to the 1-inch width by removing the spacer insert that fastens to each carrier adjacent to its AC power source. 1-6 Dell PowerEdge 6300 and...
...29. Reinstall the lower drive bay key using the three screws. 25. Reinstall the hard-disk drives in the computer. Reinstalling the Drive Bay Keys 1 Key stamp 2 Lower drive bay key 3 Upper drive bay key 24. To reinstall the upper drive bay key, lock the drive locking flange and reinstall ... 1.6-inch hard-disk drives. (A six-bay backplane can accommodate 1.6-inch or 1-inch drives.) If you install a 1 x 8 backplane, you need to convert the drive carriers to the 1-inch width by removing the spacer insert that fastens to each carrier adjacent to its AC power source. 1-6 Dell PowerEdge 6300 and...

Activating the PERC 3/Di
Page 5
... the integrated PERC 3/Di and configure the hard-disk drives as RAID. DELL CONFIDENTIAL - See "Checking Inside the Computer" in your system Installation and Troubleshooting Guide for more information. 4. Press the ejectors on hard-disk drives attached to be inserted into the socket (... perform the following steps. Preliminary 1/14/00 Dell PowerEdge 4400 Systems-Activating the PERC 3/Di 1-1 (Rev. 11/3/98) FILE LOCATION: S:\SYSTEMS\opal\ts\Romb\8648Reb0.fm Dell™ PowerEdge™ 4400 Systems-Activating the PERC 3/Di support.dell.com This document explains how to your computer...
... the integrated PERC 3/Di and configure the hard-disk drives as RAID. DELL CONFIDENTIAL - See "Checking Inside the Computer" in your system Installation and Troubleshooting Guide for more information. 4. Press the ejectors on hard-disk drives attached to be inserted into the socket (... perform the following steps. Preliminary 1/14/00 Dell PowerEdge 4400 Systems-Activating the PERC 3/Di 1-1 (Rev. 11/3/98) FILE LOCATION: S:\SYSTEMS\opal\ts\Romb\8648Reb0.fm Dell™ PowerEdge™ 4400 Systems-Activating the PERC 3/Di support.dell.com This document explains how to your computer...

Activating the PERC 3/Di
Page 10
... section explains in devices, you wait too long and your system User's Guide for built-in detail the integrated RAID options on hard-disk drives attached to Page 2 of the integrated SCSI controller. 5. If the Onboard RAID option is displayed, the integrated RAID controller was not... existing data on the System Setup screens. Preliminary 1/14/00 1-6 Dell PowerEdge 4400 Systems-Activating the PERC 3/Di When Onboard RAID is detected, the selections are the correct type and repeat all data on the hard-disk drives before changing the mode of operation of the System Setup screen.
... section explains in devices, you wait too long and your system User's Guide for built-in detail the integrated RAID options on hard-disk drives attached to Page 2 of the integrated SCSI controller. 5. If the Onboard RAID option is displayed, the integrated RAID controller was not... existing data on the System Setup screens. Preliminary 1/14/00 1-6 Dell PowerEdge 4400 Systems-Activating the PERC 3/Di When Onboard RAID is detected, the selections are the correct type and repeat all data on the hard-disk drives before changing the mode of operation of the System Setup screen.

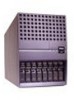
Installing the External Drive Bay
Page 5
... computer system produce high voltages and energy hazards, which can cause bodily harm. Dell™ PowerEdge™ Systems - Removing a drive while the system is not supported for hard-disk drives installed in a loss of your Installation and Troubleshooting Guide. This document applies to... Only trained service technicians are built into the drive bay assembly to two 1-inch harddisk drives in the system's external drive bay. WARNING: The power supplies in your Dell PowerEdge system. Installing the External Drive Bay This document describes how to remove the ...
... computer system produce high voltages and energy hazards, which can cause bodily harm. Dell™ PowerEdge™ Systems - Removing a drive while the system is not supported for hard-disk drives installed in a loss of your Installation and Troubleshooting Guide. This document applies to... Only trained service technicians are built into the drive bay assembly to two 1-inch harddisk drives in the system's external drive bay. WARNING: The power supplies in your Dell PowerEdge system. Installing the External Drive Bay This document describes how to remove the ...

Installing the External Drive Bay
Page 6
... with rail brackets attached SCSI hard-disk drive in Figure 1-1. Secure the hard-disk drive to install a second drive in the assembly. 1-2 Dell PowerEdge Systems - Installing the External Drive-Bay and Hard-Disk Drive Carrier 5. Repeat steps 3 through the sides of the carrier. 4. Installing a SCSI Hard-Disk Drive in the External Drive Bay To install a SCSI hard-disk drive in place. 6. Align a rail bracket with...
... with rail brackets attached SCSI hard-disk drive in Figure 1-1. Secure the hard-disk drive to install a second drive in the assembly. 1-2 Dell PowerEdge Systems - Installing the External Drive-Bay and Hard-Disk Drive Carrier 5. Repeat steps 3 through the sides of the carrier. 4. Installing a SCSI Hard-Disk Drive in the External Drive Bay To install a SCSI hard-disk drive in place. 6. Align a rail bracket with...

Installing the External Drive Bay
Page 8
...end of the cable you just installed in step b. Attach the power cable(s) to the BACKPLANE connector on the back of the drive bay assembly. 6. c. d. Remove the ribbon cable from its connector on the system board. b. Locate the system management ribbon ... the External Drive Bay Secure the connectors with terminator terminator SCSI connector (PRIMARY SCSI-A) SCSI connector (PRIMARY SCSI-B) SCSI backplane cable connector Figure 1-2. SCSI hard-disk drives in external drive-bay assembly SCSI cable with latches on the back of the drive bay assembly. 1-4 Dell PowerEdge Systems - ...
...end of the cable you just installed in step b. Attach the power cable(s) to the BACKPLANE connector on the back of the drive bay assembly. 6. c. d. Remove the ribbon cable from its connector on the system board. b. Locate the system management ribbon ... the External Drive Bay Secure the connectors with terminator terminator SCSI connector (PRIMARY SCSI-A) SCSI connector (PRIMARY SCSI-B) SCSI backplane cable connector Figure 1-2. SCSI hard-disk drives in external drive-bay assembly SCSI cable with latches on the back of the drive bay assembly. 1-4 Dell PowerEdge Systems - ...

Installing the External Drive Bay
Page 9
... computer and any attached peripherals, and disconnect the computer and peripherals from the back of the external drive bay. 5. Insert the drive-bay filler panel or a replacement hard-disk drive and its carrier in step 5. 9. support.dell.com Dell PowerEdge Systems - Press inward on the two release tabs on removing the front-panel inserts. 8. Replace the front...
... computer and any attached peripherals, and disconnect the computer and peripherals from the back of the external drive bay. 5. Insert the drive-bay filler panel or a replacement hard-disk drive and its carrier in step 5. 9. support.dell.com Dell PowerEdge Systems - Press inward on the two release tabs on removing the front-panel inserts. 8. Replace the front...

Installing the External Drive Bay
Page 10
Replace the front bezel and computer cover. 12. 10. If you installed a hard-disk drive and its carrier, connect the SCSI cable and the power cable to their electrical outlets, and turn them on. 1-6 Dell PowerEdge Systems - Installing the External Drive Bay Reconnect the computer and peripherals to the back of the hard-disk drive. 11.
Replace the front bezel and computer cover. 12. 10. If you installed a hard-disk drive and its carrier, connect the SCSI cable and the power cable to their electrical outlets, and turn them on. 1-6 Dell PowerEdge Systems - Installing the External Drive Bay Reconnect the computer and peripherals to the back of the hard-disk drive. 11.


