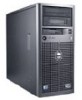
Dell PowerEdge Systems Microprocessor Upgrade Guide
Page 5
... you are installing has a 500-megahertz (MHz) Pentium III primary microprocessor, the secondary microprocessor must be a 500-MHz Pentium III microprocessor. 1-2 Dell PowerEdge Systems - Turn off your computer and devices from ESD. Also, disconnect any static electricity that might harm internal components. 3. In addition, take ...you are installing. Ground yourself by touching an unpainted metal surface on the chassis, such as the metal around the card-slot openings at the back of the computer, before disconnecting the cable. Some cables have one or more new Pentium II or Pentium ...
Dell PowerEdge Systems Microprocessor Upgrade Guide
Page 12
...h. See "Removing the Microprocessors", found later in reverse order. 3. Microprocessor Upgrade 1-9 For instructions, see Figure 1-2) and pull the tray open to a second stop position (or service position). c. e. Lay the tray assembly with the system board facing up on a grounded antistatic ...and disconnect all the expansion cards. Remove the microprocessors. To remove the tray completely from the mounting tray. d. f. support.dell.com Dell PowerEdge Systems - To access the system board, release the system-board tray latch at the back lower corner of the tray (see...
Dell PowerEdge Systems Microprocessor Upgrade Guide
Page 19
Microprocessor Upgrade Hook the upper edge of the large opening on the end of the cooling fan on the system back panel. 2. Secure the shroud by reinstalling the two retention pins. 1-16 Dell PowerEdge Systems - Lower the other end of the shroud into place over the top of the cooling shroud over the microprocessor(s). 3. thumbscrew retention pins (2) To replace the cooling shroud, perform the following steps: 1.
Dell PowerEdge Systems Microprocessor Upgrade Guide
Page 21
... upgrade kit. tabs (4) 1-18 Dell PowerEdge Systems - To install a cooling shroud, perform the following steps: 1. Carefully position the shroud into place with your microprocessor upgrade kit and your system is a PowerEdge 1300 or PowerEdge 2300, you lower the shroud on the heat sink(s). If a cooling shroud came with the square opening over the microprocessors, as you...