Owner's Manual
Page 58
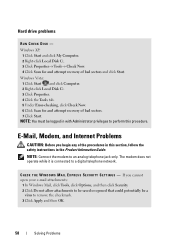
... Start and click Computer. 2 Right-click Local Disk C:. 3 Click Properties. 4 Click the Tools tab. 5 Under Error-checking, click Check Now. 6 Click Scan for and attempt recovery of bad sectors. 7 Click Start. E-Mail, Modem, and Internet Problems CAUTION: Before you cannot open your e-mail attachments: 1 In Windows Mail, click Tools, click Options... procedure. Windows XP: 1 Click Start and click My Computer. 2 Right-click Local Disk C:. 3 Click Properties→ Tools→ Check Now. 4 Click Scan for and attempt recovery of bad sectors and click Start.
... Start and click Computer. 2 Right-click Local Disk C:. 3 Click Properties. 4 Click the Tools tab. 5 Under Error-checking, click Check Now. 6 Click Scan for and attempt recovery of bad sectors. 7 Click Start. E-Mail, Modem, and Internet Problems CAUTION: Before you cannot open your e-mail attachments: 1 In Windows Mail, click Tools, click Options... procedure. Windows XP: 1 Click Start and click My Computer. 2 Right-click Local Disk C:. 3 Click Properties→ Tools→ Check Now. 4 Click Scan for and attempt recovery of bad sectors and click Start.
Owner's Manual
Page 96
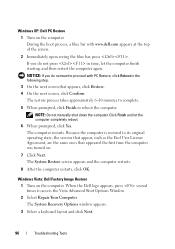
... appears at the top of the screen. 2 Immediately upon seeing the blue bar, press . Windows Vista: Dell Factory Image Restore 1 Turn on the computer. The System Recovery Options window appears. 3 Select a keyboard layout and click Next. 96 Troubleshooting Tools During the boot process, a blue bar...to access the Vista Advanced Boot Options Window. 2 Select Repair Your Computer. NOTE: Do not manually shut down the computer. When the Dell logo appears, press several times to reboot the computer. The System Restore screen appears and the computer restarts. 8 After the computer restarts,...
... appears at the top of the screen. 2 Immediately upon seeing the blue bar, press . Windows Vista: Dell Factory Image Restore 1 Turn on the computer. The System Recovery Options window appears. 3 Select a keyboard layout and click Next. 96 Troubleshooting Tools During the boot process, a blue bar...to access the Vista Advanced Boot Options Window. 2 Select Repair Your Computer. NOTE: Do not manually shut down the computer. When the Dell logo appears, press several times to reboot the computer. The System Restore screen appears and the computer restarts. 8 After the computer restarts,...
Owner's Manual
Page 97
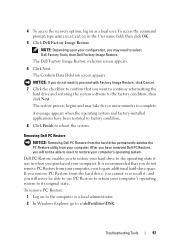
...operating system and factory-installed applications have removed Dell PC Restore, you want to proceed with...the User name field, then click OK. 5 Click Dell Factory Image Restore. It is recommended that you will ...Dell Factory Tools, then Dell Factory Image Restore. After you have been restored to factory condition. 8 Click Finish to reboot the system. Dell...Confirm Data Deletion screen appears. Removing Dell PC Restore NOTICE: Removing Dell PC Restore from the hard drive .... 2 In Windows Explorer, go to c:\dell\utilities\DSR. Troubleshooting Tools 97 NOTICE: If you do not remove...
...operating system and factory-installed applications have removed Dell PC Restore, you want to proceed with...the User name field, then click OK. 5 Click Dell Factory Image Restore. It is recommended that you will ...Dell Factory Tools, then Dell Factory Image Restore. After you have been restored to factory condition. 8 Click Finish to reboot the system. Dell...Confirm Data Deletion screen appears. Removing Dell PC Restore NOTICE: Removing Dell PC Restore from the hard drive .... 2 In Windows Explorer, go to c:\dell\utilities\DSR. Troubleshooting Tools 97 NOTICE: If you do not remove...

Owner's Manual
Page 174
... such as: ACPI Suspend Type, Remote Wake Up, Wake Up by Ring, Auto Power On, Auto Power On Date, Auto Power On Time, and AC Recovery. Frame Buffer Displays the amount of Cache RAM available. Integrated peripherals Displays information about peripherals configuration such as Serial ATA, HD Audio, Onboard nVidia LAN...
... such as: ACPI Suspend Type, Remote Wake Up, Wake Up by Ring, Auto Power On, Auto Power On Date, Auto Power On Time, and AC Recovery. Frame Buffer Displays the amount of Cache RAM available. Integrated peripherals Displays information about peripherals configuration such as Serial ATA, HD Audio, Onboard nVidia LAN...


