
Owner's Manual
Page 1
Dell™ XPS™ 410 Owner's Manual Service Tag CD or DVD eject button CD or DVD activity light FlexBays (2) for optional floppy drive or optional Media Card Reader microphone connector headphone connector diagnostic lights hard drive activity light power button USB 2.0 connectors (2) cover release latch power connector audio connectors USB 2.0 connectors (4) (rear quad) USB 2.0 connectors (2) (rear dual) network adapter card slots for PCI Express x1 (1), PCI Express x16 (1), PCI Express x4 (1), PCI (3) Model DCTA www.dell.com | support.dell.com
Dell™ XPS™ 410 Owner's Manual Service Tag CD or DVD eject button CD or DVD activity light FlexBays (2) for optional floppy drive or optional Media Card Reader microphone connector headphone connector diagnostic lights hard drive activity light power button USB 2.0 connectors (2) cover release latch power connector audio connectors USB 2.0 connectors (4) (rear quad) USB 2.0 connectors (2) (rear dual) network adapter card slots for PCI Express x1 (1), PCI Express x16 (1), PCI Express x4 (1), PCI (3) Model DCTA www.dell.com | support.dell.com

Owner's Manual
Page 4
...CDs and DVDs 29 Helpful Tips 30 Using a Media Card Reader (Optional 31 IEEE 1394 (Optional 32 Power Management 32 Overview 32 Standby Mode 32 Hibernate Mode 33 Power Options Properties 33 Cleaning Your Computer 34 Cleaning the Computer, Keyboard, and Monitor 34 Cleaning the Mouse ...Configuration 38 Configuring Your Computer for RAID 39 Using the Intel® RAID Option ROM Utility 40 Using the Intel® Application Accelerator 42 Dell DataSafe (Optional 46 Intel® Viiv™ Technology (Optional 46 Using Intel® Viiv™ Quick Resume Technology (QRT 46 Enabling ...
...CDs and DVDs 29 Helpful Tips 30 Using a Media Card Reader (Optional 31 IEEE 1394 (Optional 32 Power Management 32 Overview 32 Standby Mode 32 Hibernate Mode 33 Power Options Properties 33 Cleaning Your Computer 34 Cleaning the Computer, Keyboard, and Monitor 34 Cleaning the Mouse ...Configuration 38 Configuring Your Computer for RAID 39 Using the Intel® RAID Option ROM Utility 40 Using the Intel® Application Accelerator 42 Dell DataSafe (Optional 46 Intel® Viiv™ Technology (Optional 46 Using Intel® Viiv™ Quick Resume Technology (QRT 46 Enabling ...
Owner's Manual
Page 6
Mouse Problems 69 Network Problems 70 Power Problems 71 Printer Problems 72 Scanner Problems 72 Sound and Speaker Problems 73 No sound from speakers 73 No sound from headphones 74 Video and ...
Mouse Problems 69 Network Problems 70 Power Problems 71 Printer Problems 72 Scanner Problems 72 Sound and Speaker Problems 73 No sound from speakers 73 No sound from headphones 74 Video and ...

Owner's Manual
Page 14
...5 vents For adequate cooling, do not use the back USB connectors for devices that you troubleshoot a problem with your computer when you use the power button to ensure that typically remain connected, such as flash memory keys, cameras, or bootable USB devices. For more information on booting to attach...12 Service Tag Use the microphone connector to a USB device, see "System Setup Options" on page 129. NOTICE: Ensure that you access the Dell Support website or contact support. 14 Setting Up and Using Your Computer 1 cover release latch Use this latch to remove the cover (see "...
...5 vents For adequate cooling, do not use the back USB connectors for devices that you troubleshoot a problem with your computer when you use the power button to ensure that typically remain connected, such as flash memory keys, cameras, or bootable USB devices. For more information on booting to attach...12 Service Tag Use the microphone connector to a USB device, see "System Setup Options" on page 129. NOTICE: Ensure that you access the Dell Support website or contact support. 14 Setting Up and Using Your Computer 1 cover release latch Use this latch to remove the cover (see "...

Owner's Manual
Page 15
Back View of the Computer 1 4 2 3 1 power connector Insert the power cable. 2 back I/O connectors Plug USB, network, S/PDIF, and audio devices into the appropriate connectors (see "Back Panel Connectors" on page 16). 3 card slots (6) Access connectors for any installed PCI or PCI Express cards. 4 power selection switch Manually select AC input power: 115 volts or 230 volts Setting Up and Using Your Computer 15
Back View of the Computer 1 4 2 3 1 power connector Insert the power cable. 2 back I/O connectors Plug USB, network, S/PDIF, and audio devices into the appropriate connectors (see "Back Panel Connectors" on page 16). 3 card slots (6) Access connectors for any installed PCI or PCI Express cards. 4 power selection switch Manually select AC input power: 115 volts or 230 volts Setting Up and Using Your Computer 15

Owner's Manual
Page 32
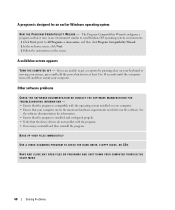
To purchase a card, contact Dell. You can reduce power to just the monitor or the hard drive, or you can ...Professional computer is completely seated in prior to devices such as a time-out. NOTICE: If your computer loses power while in this slot and you purchased an add-in Windows XP Home Edition. Your computer may vary according to... the card orientation and try again. NOTE: The connector can use standby mode or hibernate mode to reduce power to security and networking appear in certain windows. NOTE: Windows XP Professional includes security and networking features not ...
To purchase a card, contact Dell. You can reduce power to just the monitor or the hard drive, or you can ...Professional computer is completely seated in prior to devices such as a time-out. NOTICE: If your computer loses power while in this slot and you purchased an add-in Windows XP Home Edition. Your computer may vary according to... the card orientation and try again. NOTE: The connector can use standby mode or hibernate mode to reduce power to security and networking appear in certain windows. NOTE: Windows XP Professional includes security and networking features not ...

Owner's Manual
Page 33
...to select one of the standard Windows schemes installed on your computer with enough disk space to store the contents of the computer memory, Dell creates an appropriately sized hibernate mode file before shipping the computer to you. To immediately activate standby mode without a period of inactivity, ...Stand by copying system data to a reserved area on the hard drive, and then completely turning off the hard drive. If you require minimal power conservation. To exit from hibernate mode. To recover, press any key on the keyboard or move the mouse. If you use your computer, ...
...to select one of the standard Windows schemes installed on your computer with enough disk space to store the contents of the computer memory, Dell creates an appropriately sized hibernate mode file before shipping the computer to you. To immediately activate standby mode without a period of inactivity, ...Stand by copying system data to a reserved area on the hard drive, and then completely turning off the hard drive. If you require minimal power conservation. To exit from hibernate mode. To recover, press any key on the keyboard or move the mouse. If you use your computer, ...

Owner's Manual
Page 34
...and Support. 2 In the Help and Support window, click Performance and maintenance. 3 In the Performance and maintenance window, click Conserving power on the keyboard. 34 Setting Up and Using Your Computer Cleaning the Computer, Keyboard, and Monitor CAUTION: Before you to run your...or System hibernates field, and then select a time-out from the electrical outlet. Cleaning Your Computer CAUTION: Before you run with minimal power conservation. • Max Battery - If you for the changed scheme. If your Windows password before the computer exits from the corresponding...
...and Support. 2 In the Help and Support window, click Performance and maintenance. 3 In the Performance and maintenance window, click Conserving power on the keyboard. 34 Setting Up and Using Your Computer Cleaning the Computer, Keyboard, and Monitor CAUTION: Before you to run your...or System hibernates field, and then select a time-out from the electrical outlet. Cleaning Your Computer CAUTION: Before you run with minimal power conservation. • Max Battery - If you for the changed scheme. If your Windows password before the computer exits from the corresponding...

Owner's Manual
Page 46
...the user's system to quickly return to roll back your computer's hard drive data. Intel Viiv technology is a solution to help you the power to an active state after a system problem, easily retrieve deleted files, and recover individual files or an entire hard drive, and the ...Intel Matrix Storage Console (RAID) allows for systems that automatically stores periodic copies of a failure. Dell DataSafe (Optional) Dell DataSafe is an option for continued functionality in the case of the factory. Using Intel technology, your system that are ordered with ...
...the user's system to quickly return to roll back your computer's hard drive data. Intel Viiv technology is a solution to help you the power to an active state after a system problem, easily retrieve deleted files, and recover individual files or an entire hard drive, and the ...Intel Matrix Storage Console (RAID) allows for systems that automatically stores periodic copies of a failure. Dell DataSafe (Optional) Dell DataSafe is an option for continued functionality in the case of the factory. Using Intel technology, your system that are ordered with ...

Owner's Manual
Page 47
... Quick Resume option, then press to enable the Quick Resume feature. The QRT drivers are checked. 4 Click the Advanced tab. 5 From the When I press the power button on my computer drop-down menu, select Do Nothing. 6 From the When I press the sleep button on page 127). 2 Press the arrow keys to... highlight the Power Management menu option, then press to access the menu. 3 Press the up- and right-arrow keys to highlight the On option, and then press to...
... Quick Resume option, then press to enable the Quick Resume feature. The QRT drivers are checked. 4 Click the Advanced tab. 5 From the When I press the power button on my computer drop-down menu, select Do Nothing. 6 From the When I press the sleep button on page 127). 2 Press the arrow keys to... highlight the Power Management menu option, then press to access the menu. 3 Press the up- and right-arrow keys to highlight the On option, and then press to...

Owner's Manual
Page 49
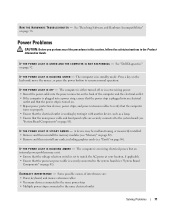
To help to the operating system. • Plug the computer into a working electrical outlet (see "Power Problems" on page 71). • If the problem persists, contact Dell (see "Contacting Dell" on page 137). Troubleshooting Tools 49 When the computer starts normally, the lights flash before turning off ... identify the problem. If the computer malfunctions, the sequence of the lights help you perform any of the Computer" on page 13). Contact Dell (see "Front View of the procedures in this section, follow the safety instructions in a normal "off" condition or a possible pre-BIOS...
To help to the operating system. • Plug the computer into a working electrical outlet (see "Power Problems" on page 71). • If the problem persists, contact Dell (see "Contacting Dell" on page 137). Troubleshooting Tools 49 When the computer starts normally, the lights flash before turning off ... identify the problem. If the computer malfunctions, the sequence of the lights help you perform any of the Computer" on page 13). Contact Dell (see "Front View of the procedures in this section, follow the safety instructions in a normal "off" condition or a possible pre-BIOS...

Owner's Manual
Page 50
... computer starts normally, continue to install additional modules (one module (see "Contacting Dell" on page 83) and restart the computer. A possible USB failure has occurred...your computer (see "Installing Memory" on page 83). • If the problem persists, contact Dell (see "Contacting Dell" on page 137). • Reseat any installed graphics card (see "Cards" on page 86... If available, install a working graphics card into your computer. • If the problem persists, contact Dell (see "Installing Memory" on page 137). Suggested Resolution • If two or more memory modules are...
... computer starts normally, continue to install additional modules (one module (see "Contacting Dell" on page 83) and restart the computer. A possible USB failure has occurred...your computer (see "Installing Memory" on page 83). • If the problem persists, contact Dell (see "Contacting Dell" on page 137). • Reseat any installed graphics card (see "Cards" on page 86... If available, install a working graphics card into your computer. • If the problem persists, contact Dell (see "Installing Memory" on page 137). Suggested Resolution • If two or more memory modules are...

Owner's Manual
Page 52
...boot from a device (such as the floppy drive or hard drive), check system setup (see "System Setup" on page 127) to run the Dell Diagnostics before you want to ensure the boot sequence is operating in quick resume mode. See "Using Intel® Viiv™ Quick Resume Technology (QRT...)" on page 46 for additional information. • Press the power button • Move the mouse • Press any key on the keyboard • Press any of the procedures in this section, follow the safety ...
...boot from a device (such as the floppy drive or hard drive), check system setup (see "System Setup" on page 127) to run the Dell Diagnostics before you want to ensure the boot sequence is operating in quick resume mode. See "Using Intel® Viiv™ Quick Resume Technology (QRT...)" on page 46 for additional information. • Press the power button • Move the mouse • Press any key on the keyboard • Press any of the procedures in this section, follow the safety ...

Owner's Manual
Page 67
...: You may lose data if you are unable to get a response by pressing a key on your keyboard or moving your mouse, press and hold the power button for at least 8 to perform an operating system shutdown. TU R N T H E C O M P U T E R O F F - Lockups and Software Problems CAUTION: Before you are unable to 10 seconds until the...
...: You may lose data if you are unable to get a response by pressing a key on your keyboard or moving your mouse, press and hold the power button for at least 8 to perform an operating system shutdown. TU R N T H E C O M P U T E R O F F - Lockups and Software Problems CAUTION: Before you are unable to 10 seconds until the...
Owner's Manual
Page 68
...-Windows XP operating system environments. 1 Click Start, point to 10 seconds until the computer turns off, and then restart your mouse, press and hold the power button for an earlier Windows operating system R U N T H E P R O G R A M C O M P A T I B I L I T Y W I Z A R D - A program is installed and configured properly. • Verify that the device drivers do not conflict with the operating...
...-Windows XP operating system environments. 1 Click Start, point to 10 seconds until the computer turns off, and then restart your mouse, press and hold the power button for an earlier Windows operating system R U N T H E P R O G R A M C O M P A T I B I L I T Y W I Z A R D - A program is installed and configured properly. • Verify that the device drivers do not conflict with the operating...
Owner's Manual
Page 71
... any of the computer and the electrical outlet. • If the computer is plugged into a power strip, ensure that the power strip is plugged into the power connector on page 86). Press a key on page 56. I F T H E P O W E R L I G H T I N G - See "Dell Diagnostics" on properly. • Ensure that the electrical outlet is working by testing it with another...
... any of the computer and the electrical outlet. • If the computer is plugged into a power strip, ensure that the power strip is plugged into the power connector on page 86). Press a key on page 56. I F T H E P O W E R L I G H T I N G - See "Dell Diagnostics" on properly. • Ensure that the electrical outlet is working by testing it with another...

Owner's Manual
Page 74
... Problems CAUTION: Before you perform any video extension cables and connect the monitor directly to the computer. • Swap the computer and monitor power cables to determine if the power cable is connected as a lamp. R E I N S T A L L T H E S O U N D D R I N T E R F E R E N C E - A D J U S T T H E W I S C O N N E C T H E A D P H O N E S F R O M T H E H E A D P H O N E C O N N E C T O R - Click or double-click the speaker icon in the Product Information Guide. NOTE: See the monitor documentation...
... Problems CAUTION: Before you perform any video extension cables and connect the monitor directly to the computer. • Swap the computer and monitor power cables to determine if the power cable is connected as a lamp. R E I N S T A L L T H E S O U N D D R I N T E R F E R E N C E - A D J U S T T H E W I S C O N N E C T H E A D P H O N E S F R O M T H E H E A D P H O N E C O N N E C T O R - Click or double-click the speaker icon in the Product Information Guide. NOTE: See the monitor documentation...

Owner's Manual
Page 75
... "shaky." Solving Problems 75 If your speaker system includes a subwoofer, ensure that the monitor is turned on. • If the power light is lit or blinking, the monitor has power. • If the power light is at least 60 cm (2 ft) away from the monitor. M O V E T H E S U B W O O F E R A W A Y F R O M T H E M O N I G H T S - See the monitor documentation for interference. CHECK THE...
... "shaky." Solving Problems 75 If your speaker system includes a subwoofer, ensure that the monitor is turned on. • If the power light is lit or blinking, the monitor has power. • If the power light is at least 60 cm (2 ft) away from the monitor. M O V E T H E S U B W O O F E R A W A Y F R O M T H E M O N I G H T S - See the monitor documentation for interference. CHECK THE...

Owner's Manual
Page 77
... the following tools: • Small flat-blade screwdriver • Phillips screwdriver • Flash BIOS update program (download from support.dell.com) Turning Off Your Computer NOTICE: To avoid losing data, save and close any open files and exit any open programs before... safety information in reverse order. Removing and Installing Parts 77 If your operating system, press and hold the power button for removing and installing the components in your Dell™ Product Information Guide. • A component can be replaced by performing the removal procedure in your computer...
... the following tools: • Small flat-blade screwdriver • Phillips screwdriver • Flash BIOS update program (download from support.dell.com) Turning Off Your Computer NOTICE: To avoid losing data, save and close any open files and exit any open programs before... safety information in reverse order. Removing and Installing Parts 77 If your operating system, press and hold the power button for removing and installing the components in your Dell™ Product Information Guide. • A component can be replaced by performing the removal procedure in your computer...
Owner's Manual
Page 78
...that could harm internal components. Removing the Computer Cover CAUTION: Before you connect a cable, ensure that the processor heat-sink assembly, power supply, graphics card, and other components may be aware that both connectors are disconnecting this section, follow the safety instructions in the Product... on the cable itself. Damage due to help protect your computer from potential damage and to servicing that is not authorized by Dell is not covered by your warranty. Also, before you perform any connector pins. Before Working Inside Your Computer Use the following ...
...that could harm internal components. Removing the Computer Cover CAUTION: Before you connect a cable, ensure that the processor heat-sink assembly, power supply, graphics card, and other components may be aware that both connectors are disconnecting this section, follow the safety instructions in the Product... on the cable itself. Damage due to help protect your computer from potential damage and to servicing that is not authorized by Dell is not covered by your warranty. Also, before you perform any connector pins. Before Working Inside Your Computer Use the following ...


