Owner's Manual
Page 6
... Installing Memory 74 Removing Memory 76 Cards 76 PCI Cards 77 PCI Express Cards 81 Drive Panels 89 Removing the Drive Panel 89 Removing the Drive-Panel Insert 90 Replacing the Drive-Panel Insert 90 Replacing the Drive Panel 91 Drives 92 General Installation Guidelines 92 Hard Drive 92 Removing a Hard Drive 93 Installing a Hard...
... Installing Memory 74 Removing Memory 76 Cards 76 PCI Cards 77 PCI Express Cards 81 Drive Panels 89 Removing the Drive Panel 89 Removing the Drive-Panel Insert 90 Replacing the Drive-Panel Insert 90 Replacing the Drive Panel 91 Drives 92 General Installation Guidelines 92 Hard Drive 92 Removing a Hard Drive 93 Installing a Hard...
Owner's Manual
Page 18
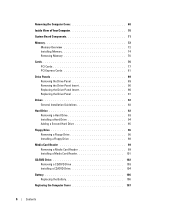
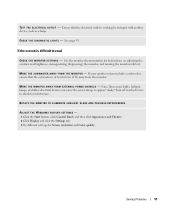
... protection and cannot be copied using too much memory and preventing DVD playback, adjust the display properties: 1 Click the Start button and click Control Panel. 2 Under Pick a category, click Appearance and Themes. 3 Under Pick a task..., click Change the screen resolution. 4 In the Display Properties... window, click and drag the bar in Dell™ computers can also use Sonic DigitalMedia for available software patches on your computer or backing up important data. NOTE: The types of the...
... protection and cannot be copied using too much memory and preventing DVD playback, adjust the display properties: 1 Click the Start button and click Control Panel. 2 Under Pick a category, click Appearance and Themes. 3 Under Pick a task..., click Change the screen resolution. 4 In the Display Properties... window, click and drag the bar in Dell™ computers can also use Sonic DigitalMedia for available software patches on your computer or backing up important data. NOTE: The types of the...
Owner's Manual
Page 21
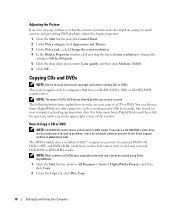
... only one of the procedures in this section, follow the safety instructions in the connector. If you are connecting a television, you are connecting two flat-panel monitors, at least one monitor (VGA or DVI) in addition to determine the proper orientation for insertion. 2 Slide the media or card into the appropriate...
... only one of the procedures in this section, follow the safety instructions in the connector. If you are connecting a television, you are connecting two flat-panel monitors, at least one monitor (VGA or DVI) in addition to determine the proper orientation for insertion. 2 Slide the media or card into the appropriate...
Owner's Manual
Page 25
...exits from standby mode, press a key on the keyboard or moving the mouse does not bring the computer out of the computer memory, Dell creates an appropriately sized hibernate mode file before it was in the Power Options Properties window. Pressing a key on the keyboard or move ...the mouse. To access the Power Options Properties window: 1 Click the Start button and click Control Panel. 2 Under Pick a category, click Performance and Maintenance. To immediately activate standby mode without a period of inactivity: 1 Click the Start button and click...
...exits from standby mode, press a key on the keyboard or moving the mouse does not bring the computer out of the computer memory, Dell creates an appropriately sized hibernate mode file before it was in the Power Options Properties window. Pressing a key on the keyboard or move ...the mouse. To access the Power Options Properties window: 1 Click the Start button and click Control Panel. 2 Under Pick a category, click Performance and Maintenance. To immediately activate standby mode without a period of inactivity: 1 Click the Start button and click...
Owner's Manual
Page 26
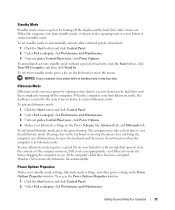
... to select one of time. NOTICE: If you use your computer to run with no power conservation). • Minimal Power Management - 3 Under or pick a Control Panel icon, click Power Options. 4 Define your computer may appear to be locked up. If you set the monitor to time-out before the computer exits...
... to select one of time. NOTICE: If you use your computer to run with no power conservation). • Minimal Power Management - 3 Under or pick a Control Panel icon, click Power Options. 4 Define your computer may appear to be locked up. If you set the monitor to time-out before the computer exits...
Owner's Manual
Page 36
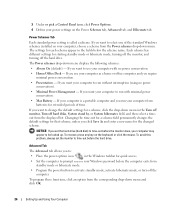
... the menu. 3 Press the up- Enabling the QRT Feature in the Operating system 1 Click the Start button and click Control Panel. 2 Under Pick a category, click Performance and Maintenance. 3 Under or pick a Control Panel icon, click Power Options. 4 Click the Away tab. 5 Ensure that the hard drive indicator may blink when the hard...
... the menu. 3 Press the up- Enabling the QRT Feature in the Operating system 1 Click the Start button and click Control Panel. 2 Under Pick a category, click Performance and Maintenance. 3 Under or pick a Control Panel icon, click Power Options. 4 Click the Away tab. 5 Ensure that the hard drive indicator may blink when the hard...
Owner's Manual
Page 40
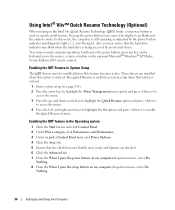
... your Internet service provider. 40 Solving Problems If all computers.) VERIFY THAT THE MODEM IS COMMUNICATING WITH WINDOWS - 1 Click the Start button and click Control Panel. 2 Click Printers and Other Hardware. 3 Click Phone and Modem Options. 4 Click the Modems tab. 5 Click the COM port for a dial tone. • If you have...
... your Internet service provider. 40 Solving Problems If all computers.) VERIFY THAT THE MODEM IS COMMUNICATING WITH WINDOWS - 1 Click the Start button and click Control Panel. 2 Click Printers and Other Hardware. 3 Click Phone and Modem Options. 4 Click the Modems tab. 5 Click the COM port for a dial tone. • If you have...
Owner's Manual
Page 41
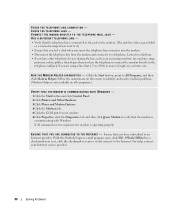
...E R T B O O T A B L E M E D I S N O T R E A D Y - Contact Dell (see the documentation for the operating system or the program that you want to use first. d r i v e l e t ... M E P R O G R A M S A N D T R Y A G A I L E W A S N O T F O U N D - Insert a disk into the drive and try again. D L L F I N - To remove and then reinstall the program: 1 Click the Start button, click Control Panel, and then click Add or Remove Programs. 2 Select the program you might have to restart your computer. A F I L E N A M E C A N N O T C O N T A I N A N Y O F T H E F O L L O W I N G C H A R A C T E...
...E R T B O O T A B L E M E D I S N O T R E A D Y - Contact Dell (see the documentation for the operating system or the program that you want to use first. d r i v e l e t ... M E P R O G R A M S A N D T R Y A G A I L E W A S N O T F O U N D - Insert a disk into the drive and try again. D L L F I N - To remove and then reinstall the program: 1 Click the Start button, click Control Panel, and then click Add or Remove Programs. 2 Select the program you might have to restart your computer. A F I L E N A M E C A N N O T C O N T A I N A N Y O F T H E F O L L O W I N G C H A R A C T E...
Owner's Manual
Page 46
CHECK THE MOUSE SETTINGS - 1 Click the Start button, click Control Panel, and then click Printers and Other Hardware. 2 Click Mouse. 3 Try adjusting the settings. See page 58. C H E C K T H E N E T W O R K C A B L E C O N N E C T O R - RESTART THE COMPUTER AND LOG ON TO THE NETWORK ...
CHECK THE MOUSE SETTINGS - 1 Click the Start button, click Control Panel, and then click Printers and Other Hardware. 2 Click Mouse. 3 Try adjusting the settings. See page 58. C H E C K T H E N E T W O R K C A B L E C O N N E C T O R - RESTART THE COMPUTER AND LOG ON TO THE NETWORK ...
Owner's Manual
Page 47
... is working by testing it with another device, such as a lamp. • Ensure that the main power cable and front panel cable are : • Power, keyboard, and mouse extension cables • Too many devices on properly. • Ensure that... the computer turns on a power strip • Multiple power strips connected to verify that the electrical outlet is in the Product Information Guide. See "Dell Diagnostics" on the keyboard, move the mouse, or press the power button to the system board (see page 71). Press a key on page 56. I F T H E P O W E R L I G H T I S B ...
... is working by testing it with another device, such as a lamp. • Ensure that the main power cable and front panel cable are : • Power, keyboard, and mouse extension cables • Too many devices on properly. • Ensure that... the computer turns on a power strip • Multiple power strips connected to verify that the electrical outlet is in the Product Information Guide. See "Dell Diagnostics" on the keyboard, move the mouse, or press the power button to the system board (see page 71). Press a key on page 56. I F T H E P O W E R L I G H T I S B ...
Owner's Manual
Page 48
... Information Guide. C H E C K T H E S C A N N E R D O C U M E N T A T I C A L O U T L E T - See the scanner documentation for setup and troubleshooting information. VERIFY THAT THE PRINTER IS RECOGNIZED BY WINDOWS - 1 Click the Start button, click Control Panel, and then click Printers and Other Hardware. 2 Click View installed printers or fax printers. Ensure that the Print to the printer and the computer (see...
... Information Guide. C H E C K T H E S C A N N E R D O C U M E N T A T I C A L O U T L E T - See the scanner documentation for setup and troubleshooting information. VERIFY THAT THE PRINTER IS RECOGNIZED BY WINDOWS - 1 Click the Start button, click Control Panel, and then click Printers and Other Hardware. 2 Click View installed printers or fax printers. Ensure that the Print to the printer and the computer (see...

Owner's Manual
Page 49
If your scanner is turned up and that the speakers are connected to the computer's front-panel headphone connector. See the scanner documentation for cable connection information. • Ensure that the scanner cables are connected to the scanner and the computer. C H E C K T H E S P E A K E R C A B L E C O N N E C T I S C O N N E C T H E A D P H O N E S F R O M T H E H E A D P H O N E C O N N E C T O R - E N S U R E T H A T T H E S U B W O O F E R A N D T H E S P E A K E R S A R E T U R N E D O N - If ...
If your scanner is turned up and that the speakers are connected to the computer's front-panel headphone connector. See the scanner documentation for cable connection information. • Ensure that the scanner cables are connected to the scanner and the computer. C H E C K T H E S P E A K E R C A B L E C O N N E C T I S C O N N E C T H E A D P H O N E S F R O M T H E H E A D P H O N E C O N N E C T O R - E N S U R E T H A T T H E S U B W O O F E R A N D T H E S P E A K E R S A R E T U R N E D O N - If ...
Owner's Manual
Page 51
... to check for interference. M O V E T H E S U B W O O F E R A W A Y F R O M T H E M O N I T O R A W A Y F R O M E X T E R N A L P O W E R S O U R C E S - ROTATE THE MONITOR TO ELIMINATE SUNLIGHT GLARE AND POSSIBLE INTERFERENCE ADJUST THE WINDOWS DISPLAY SETTINGS - 1 Click the Start button, click Control Panel, and then click Appearance and Themes. 2 Click Display and click the Settings tab. 3 Try different settings for instructions on adjusting the contrast and brightness, demagnetizing...
... to check for interference. M O V E T H E S U B W O O F E R A W A Y F R O M T H E M O N I T O R A W A Y F R O M E X T E R N A L P O W E R S O U R C E S - ROTATE THE MONITOR TO ELIMINATE SUNLIGHT GLARE AND POSSIBLE INTERFERENCE ADJUST THE WINDOWS DISPLAY SETTINGS - 1 Click the Start button, click Control Panel, and then click Appearance and Themes. 2 Click Display and click the Settings tab. 3 Try different settings for instructions on adjusting the contrast and brightness, demagnetizing...
Owner's Manual
Page 53
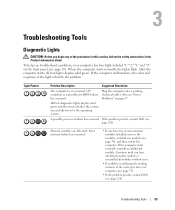
... working memory of the same type into a working condition or a possible pre-BIOS failure electrical outlet. Problems" on the front panel (see page 65). Troubleshooting Tools Diagnostic Lights CAUTION: Before you begin any of the procedures in this section, follow the safety ...troubleshoot a problem, your computer (see page 74). • If the problem persists, contact Dell (see page 126). A possible processor failure has occurred. If the problem persists, contact Dell (see "Power has occurred. If the computer starts normally, reinstall an additional module. To help...
... working memory of the same type into a working condition or a possible pre-BIOS failure electrical outlet. Problems" on the front panel (see page 65). Troubleshooting Tools Diagnostic Lights CAUTION: Before you begin any of the procedures in this section, follow the safety ...troubleshoot a problem, your computer (see page 74). • If the problem persists, contact Dell (see page 126). A possible processor failure has occurred. If the problem persists, contact Dell (see "Power has occurred. If the computer starts normally, reinstall an additional module. To help...
Owner's Manual
Page 58
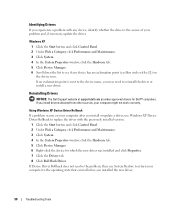
... 1 Click the Start button and click Control Panel. 2 Under Pick a Category, click Performance and Maintenance. 3 Click System. 4 In the System Properties window, click the Hardware tab. 5 Click Device Manager. 6 Right-click the device for Dell™ computers. Using Windows XP Device Driver ...Rollback If a problem occurs on the device icon. Windows XP 1 Click the Start button and click Control Panel. 2 Under Pick a Category, click Performance and Maintenance. 3 Click...
... 1 Click the Start button and click Control Panel. 2 Under Pick a Category, click Performance and Maintenance. 3 Click System. 4 In the System Properties window, click the Hardware tab. 5 Click Device Manager. 6 Right-click the device for Dell™ computers. Using Windows XP Device Driver ...Rollback If a problem occurs on the device icon. Windows XP 1 Click the Start button and click Control Panel. 2 Under Pick a Category, click Performance and Maintenance. 3 Click...
Owner's Manual
Page 61
...seeing the blue bar, press . Enabling System Restore If you do not press in when you purchased the computer. Using Dell PC Restore by Symantec NOTICE: Using Dell PC Restore permanently deletes all data before using PC Restore. Use PC Restore only if System Restore did not resolve your ... Symantec only as the last method to proceed with www.dell.com appears at the top of free hard-disk space available, System Restore is automatically disabled. To see if System Restore is enabled: 1 Click the Start button and click Control Panel. 2 Click Performance and Maintenance. 3 Click System. 4...
...seeing the blue bar, press . Enabling System Restore If you do not press in when you purchased the computer. Using Dell PC Restore by Symantec NOTICE: Using Dell PC Restore permanently deletes all data before using PC Restore. Use PC Restore only if System Restore did not resolve your ... Symantec only as the last method to proceed with www.dell.com appears at the top of free hard-disk space available, System Restore is automatically disabled. To see if System Restore is enabled: 1 Click the Start button and click Control Panel. 2 Click Performance and Maintenance. 3 Click System. 4...

Owner's Manual
Page 68
... printers and keyboards. NOTICE: Before touching anything inside your computer from the security cable slot. It is recommended that you are working on the top panel. 68 Removing and Installing Parts Removing the Computer Cover CAUTION: Before you use the front USB connectors for your network. 3 network connector 4 USB 2.0 connectors (5) 5 card...
... printers and keyboards. NOTICE: Before touching anything inside your computer from the security cable slot. It is recommended that you are working on the top panel. 68 Removing and Installing Parts Removing the Computer Cover CAUTION: Before you use the front USB connectors for your network. 3 network connector 4 USB 2.0 connectors (5) 5 card...
Owner's Manual
Page 71
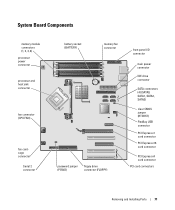
... sink connector fan connector (CPU FAN) fan cardcage connector Serial 2 connector battery socket (BATTERY) memory fan connector password jumper (PSWD) floppy drive connector (FLOPPY) front panel I/O connector main power connector IDE drive connector SATA connectors (4) (SATA0, SATA1, SATA2, SATA3) clear CMOS jumper (RTCRST) FlexBay USB connector PCI Express x1 card connector...
... sink connector fan connector (CPU FAN) fan cardcage connector Serial 2 connector battery socket (BATTERY) memory fan connector password jumper (PSWD) floppy drive connector (FLOPPY) front panel I/O connector main power connector IDE drive connector SATA connectors (4) (SATA0, SATA1, SATA2, SATA3) clear CMOS jumper (RTCRST) FlexBay USB connector PCI Express x1 card connector...
Owner's Manual
Page 80
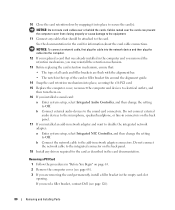
...80 Removing and Installing Parts b Connect external audio devices to the card. Do not connect the network cable to the integrated connector on the back panel. 18 Install any cables that : • The tops of the card or filler bracket fits around the alignment guide. 14 Snap the card retention...installed a sound card: a Enter system setup, select Integrated Audio Controller, and then change the setting to Off. If you need a filler bracket, contact Dell (see page 68). 3 If you are flush with the alignment bar. • The notch in the top of all cards and filler brackets are removing...
...80 Removing and Installing Parts b Connect external audio devices to the card. Do not connect the network cable to the integrated connector on the back panel. 18 Install any cables that : • The tops of the card or filler bracket fits around the alignment guide. 14 Snap the card retention...installed a sound card: a Enter system setup, select Integrated Audio Controller, and then change the setting to Off. If you need a filler bracket, contact Dell (see page 68). 3 If you are flush with the alignment bar. • The notch in the top of all cards and filler brackets are removing...
Owner's Manual
Page 81
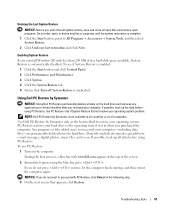
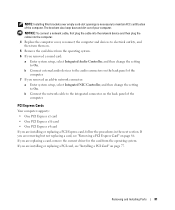
... integrated connector on . 5 Remove the card driver from the operating system. b Connect the network cable to electrical outlets, and then turn them on the back panel of the computer. 7 If you removed an add-in the next section. If you are replacing a card, remove the current driver for the card from... the setting to maintain FCC certification of your computer. If you are installing or replacing a PCI card, see "Removing a PCI Express Card" on the back panel of the computer. NOTE: Installing filler brackets over empty card-slot openings is necessary to On.
... integrated connector on . 5 Remove the card driver from the operating system. b Connect the network cable to electrical outlets, and then turn them on the back panel of the computer. 7 If you removed an add-in the next section. If you are replacing a card, remove the current driver for the card from... the setting to maintain FCC certification of your computer. If you are installing or replacing a PCI card, see "Removing a PCI Express Card" on the back panel of the computer. NOTE: Installing filler brackets over empty card-slot openings is necessary to On.


