Dimension 4100 Computer - Dell
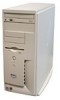
Dimension 4100 Computer
View Results Below
Free Dell Dimension 4100 manuals!
Problems with Dell Dimension 4100?
Ask a Question
Free Dell Dimension 4100 manuals!
Problems with Dell Dimension 4100?
Ask a Question
Related Manual Pages


Related Videos

Dell Dimension 4100
Duration: 10:09
Total Views: 1,942
Duration: 10:09
Total Views: 1,942
Dell Dimension 4100 Review and Hands-On
Duration: 19:43
Total Views: 174
Duration: 19:43
Total Views: 174
Installing Windows 98 SE on the Dell Dimension 4100
Duration: 49:36
Total Views: 1,096
Duration: 49:36
Total Views: 1,096
Restoring the Dell Dimension 4100 using a Dell Win 98 Recove
Duration: 39:08
Total Views: 367
Duration: 39:08
Total Views: 367
Trash Finds 4/28/14; Dell Dimension 4100 Rescued
Duration: 5:24
Total Views: 244
Duration: 5:24
Total Views: 244