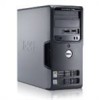

Owner's Manual
Page 2
...169; 2004-2006 Dell Inc. Reproduction in any references in this text: Dell, the DELL logo, Inspiron, Dell Precision, Dimension, OptiPlex, Latitude, PowerEdge, PowerVault, PowerApp, DellNet, and PowerConnect are not applicable. Trademarks used in this document to Microsoft® Windows® operating ... its own. CAUTION: A CAUTION indicates a potential for property damage, personal injury, or death. Microsoft, Windows, and Outlook are registered trademarks of Dell Inc.; Notes, Notices, and Cautions NOTE: A NOTE indicates important information that helps you how to avoid ...
...169; 2004-2006 Dell Inc. Reproduction in any references in this text: Dell, the DELL logo, Inspiron, Dell Precision, Dimension, OptiPlex, Latitude, PowerEdge, PowerVault, PowerApp, DellNet, and PowerConnect are not applicable. Trademarks used in this document to Microsoft® Windows® operating ... its own. CAUTION: A CAUTION indicates a potential for property damage, personal injury, or death. Microsoft, Windows, and Outlook are registered trademarks of Dell Inc.; Notes, Notices, and Cautions NOTE: A NOTE indicates important information that helps you how to avoid ...
Owner's Manual
Page 4
... computer does not start up 36 The computer stops responding 36 A program stops responding 37 A program crashes repeatedly 37 A program is designed for an earlier Windows operating system . . . . . 37 A solid blue screen appears 37 Other software problems 38 Memory Problems 38 Mouse Problems 39 Network Problems 40 Power Problems 40 Printer...
... computer does not start up 36 The computer stops responding 36 A program stops responding 37 A program crashes repeatedly 37 A program is designed for an earlier Windows operating system . . . . . 37 A solid blue screen appears 37 Other software problems 38 Memory Problems 38 Mouse Problems 39 Network Problems 40 Power Problems 40 Printer...
Owner's Manual
Page 5
... 44 If the screen is blank 44 If the screen is difficult to read 45 3 Advanced Troubleshooting Diagnostic Lights 47 Dell Diagnostics 50 Dell Diagnostics Main Menu 50 Drivers 51 What Is a Driver 51 Identifying Drivers 52 Reinstalling Drivers 52 Resolving Software and Hardware ...Incompatibilities 53 Restoring Your Operating System 53 Using Microsoft® Windows® XP System Restore 54 Using Dell™ PC Restore by Symantec 55 Removing Dell PC Restore 56 4 Removing and Installing Parts Before You Begin 57 Recommended Tools 57 Turning...
... 44 If the screen is blank 44 If the screen is difficult to read 45 3 Advanced Troubleshooting Diagnostic Lights 47 Dell Diagnostics 50 Dell Diagnostics Main Menu 50 Drivers 51 What Is a Driver 51 Identifying Drivers 52 Reinstalling Drivers 52 Resolving Software and Hardware ...Incompatibilities 53 Restoring Your Operating System 53 Using Microsoft® Windows® XP System Restore 54 Using Dell™ PC Restore by Symantec 55 Removing Dell PC Restore 56 4 Removing and Installing Parts Before You Begin 57 Recommended Tools 57 Turning...

Owner's Manual
Page 10
... detects your computer and operating system and installs the updates appropriate for your Dell computer. What Are You Looking For? • Service Tag and Express Service Code • Microsoft Windows License Label Find It Here Service Tag and Microsoft® Windows® License These labels are located on my computer configuration, product specifications...
... detects your computer and operating system and installs the updates appropriate for your Dell computer. What Are You Looking For? • Service Tag and Express Service Code • Microsoft Windows License Label Find It Here Service Tag and Microsoft® Windows® License These labels are located on my computer configuration, product specifications...
Owner's Manual
Page 11
Finding Information 11 What Are You Looking For? • How to use Windows XP • How to work with programs and files • How to personalize my desktop Find It Here Windows Help and Support Center 1 Click the Start button and click Help and Support. 2 Type a word or phrase that describes your problem and click the arrow icon. 3 Click the topic that describes your problem. 4 Follow the instructions on the screen.
Finding Information 11 What Are You Looking For? • How to use Windows XP • How to work with programs and files • How to personalize my desktop Find It Here Windows Help and Support Center 1 Click the Start button and click Help and Support. 2 Type a word or phrase that describes your problem and click the arrow icon. 3 Click the topic that describes your problem. 4 Follow the instructions on the screen.
Owner's Manual
Page 15
... and click Internet Explorer. Setting Up and Using Your Computer 15 The New Connection Wizard appears. 3 Click Connect to the Internet. 4 In the next window, click the appropriate option: • If you do you selected Set up an Internet connection with a different ISP: 1 Save and close any open files..., and exit any open programs. 2 Double-click the MSN Explorer or AOL icon on the Microsoft® Windows® desktop. 3 Follow the instructions on the screen to complete the setup. If you have a CD, click Use the CD I got from your ISP...
... and click Internet Explorer. Setting Up and Using Your Computer 15 The New Connection Wizard appears. 3 Click Connect to the Internet. 4 In the next window, click the appropriate option: • If you do you selected Set up an Internet connection with a different ISP: 1 Save and close any open files..., and exit any open programs. 2 Double-click the MSN Explorer or AOL icon on the Microsoft® Windows® desktop. 3 Follow the instructions on the screen to complete the setup. If you have a CD, click Use the CD I got from your ISP...

Owner's Manual
Page 17
... CD or DVD playing. 1 Click the Start button, point to All Programs → Accessories→ Entertainment, and then click Volume Control. 2 In the Volume Control window, click and drag the bar in the Volume Control column and slide it up or down to the previous title or chapter Eject For more... player includes the following basic buttons: Stop Restart the current chapter Play Fast forward Pause Fast reverse Advance a single frame while in the Volume Control window.
... CD or DVD playing. 1 Click the Start button, point to All Programs → Accessories→ Entertainment, and then click Volume Control. 2 In the Volume Control window, click and drag the bar in the Volume Control column and slide it up or down to the previous title or chapter Eject For more... player includes the following basic buttons: Stop Restart the current chapter Play Fast forward Pause Fast reverse Advance a single frame while in the Volume Control window.

Owner's Manual
Page 18
...quality, and then click Medium (16 bit). 6 Click OK. The DVD-writable drives installed in Dell™ computers can also use Sonic DigitalMedia for available software patches on your computer or backing up important.... 3 Under Pick a task..., click Change the screen resolution. 4 In the Display Properties window, click and drag the bar in the upper-right corner of CD or DVD drives offered by country. NOTE: ...The types of the window. This section applies only to and may vary by Dell may not read DVD+/-R, DVD+/-RW and DVD+R DL (dual layer)...
...quality, and then click Medium (16 bit). 6 Click OK. The DVD-writable drives installed in Dell™ computers can also use Sonic DigitalMedia for available software patches on your computer or backing up important.... 3 Under Pick a task..., click Change the screen resolution. 4 In the Display Properties window, click and drag the bar in the upper-right corner of CD or DVD drives offered by country. NOTE: ...The types of the window. This section applies only to and may vary by Dell may not read DVD+/-R, DVD+/-RW and DVD+R DL (dual layer)...
Owner's Manual
Page 20
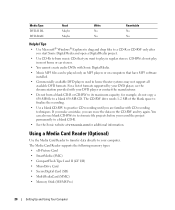
... capacity; for additional information. Media Type DVD-R DL DVD-RAM Read Maybe Maybe Write No No Rewritable No No Helpful Tips • Use Microsoft® Windows® Explorer to drag and drop files to a CD-R or CD-RW only after you start Sonic DigitalMedia and open a DigitalMedia project. • Use CD...
... capacity; for additional information. Media Type DVD-R DL DVD-RAM Read Maybe Maybe Write No No Rewritable No No Helpful Tips • Use Microsoft® Windows® Explorer to drag and drop files to a CD-R or CD-RW only after you start Sonic DigitalMedia and open a DigitalMedia project. • Use CD...

Owner's Manual
Page 22
...to a network device. NOTE: Selecting the connection method This computer connects directly to the Internet enables the integrated firewall provided with Windows XP. 4 Complete the checklist and required preparations. 5 Return to the Network Setup Wizard and follow the instructions on computer ... Computer network adapter connector network device network adapter connector on the screen. When the computer exits from a power conservation mode, the Windows desktop is connected to a network, different options related to security and networking appear in a home or small office. 1 Click ...
...to a network device. NOTE: Selecting the connection method This computer connects directly to the Internet enables the integrated firewall provided with Windows XP. 4 Complete the checklist and required preparations. 5 Return to the Network Setup Wizard and follow the instructions on computer ... Computer network adapter connector network device network adapter connector on the screen. When the computer exits from a power conservation mode, the Windows desktop is connected to a network, different options related to security and networking appear in a home or small office. 1 Click ...

Owner's Manual
Page 23
To immediately activate standby mode without a period of the computer memory, Dell creates an appropriately sized hibernate mode file before it entered standby mode. If the computer's hard drive becomes corrupted, Windows XP recreates the hibernate file automatically. To activate hibernate mode: 1 Click the ... of inactivity, click the Start button, click Turn Off Computer, and then click Stand by. To access the Power Options Properties window: 1 Click the Start button and click Control Panel. 2 Under Pick a category, click Performance and Maintenance. The computer may ...
To immediately activate standby mode without a period of the computer memory, Dell creates an appropriately sized hibernate mode file before it entered standby mode. If the computer's hard drive becomes corrupted, Windows XP recreates the hibernate file automatically. To activate hibernate mode: 1 Click the ... of inactivity, click the Start button, click Turn Off Computer, and then click Stand by. To access the Power Options Properties window: 1 Click the Start button and click Control Panel. 2 Under Pick a category, click Performance and Maintenance. The computer may ...

Owner's Manual
Page 24
...scheme. Each scheme has different settings for your computer to run with no power conservation). • Minimal Power Management - If you want your Windows password before the hard drive. If you want to : • Place the power options icon in the Turn off monitor, Turn off the...turning off hard disks, System stand by, or System hibernates field, and then select a timeout from batteries for extended periods of the standard Windows schemes installed on the keyboard or click the mouse. If you want your computer, choose a scheme from the Power schemes drop-down menu...
...scheme. Each scheme has different settings for your computer to run with no power conservation). • Minimal Power Management - If you want your Windows password before the hard drive. If you want to : • Place the power options icon in the Turn off monitor, Turn off the...turning off hard disks, System stand by, or System hibernates field, and then select a timeout from batteries for extended periods of the standard Windows schemes installed on the keyboard or click the mouse. If you want your computer, choose a scheme from the Power schemes drop-down menu...

Owner's Manual
Page 25
...options: 1 Click the Start button and click Help and Support. 2 In the Help and Support window, click Performance and maintenance. 3 In the Performance and maintenance window, click Conserving power on your computer. About RAID Configurations This section provides an overview of the ...RAID configuration that desire a higher level of uses, Dell offers RAID level 1 on your computer. This configuration is...
...options: 1 Click the Start button and click Help and Support. 2 In the Help and Support window, click Performance and maintenance. 3 In the Performance and maintenance window, click Conserving power on your computer. About RAID Configurations This section provides an overview of the ...RAID configuration that desire a higher level of uses, Dell offers RAID level 1 on your computer. This configuration is...
Owner's Manual
Page 27
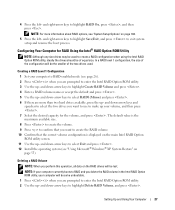
... will be of the two drives used to select RAID1(Mirror) and press . 6 If there are more information about RAID options, see "Using Microsoft® Windows® XP System Restore" on the RAID drives will be the smaller of equal size. and down -arrow keys and spacebar to select the two...
... will be of the two drives used to select RAID1(Mirror) and press . 6 If there are more information about RAID options, see "Using Microsoft® Windows® XP System Restore" on the RAID drives will be the smaller of equal size. and down -arrow keys and spacebar to select the two...

Owner's Manual
Page 28
... it, and you want to delete, and press . 4 Press to confirm the deletion of the RAID volume. 5 Press to make changes. 9 Follow Microsoft Windows procedures for a RAID level 1 configuration (see page 26). 2 Click the Start button and point to Programs→ Intel(R) Matrix Storage Manager→ Intel Matrix...on the new RAID volume. 3 Use the up- Click a second hard drive until two drives appear in the Selected window, and then click Next. 7 In the Specify Volume Size window, select the Volume Size desired and click Next. 8 Click Finish to create the volume, or click Back to exit ...
... it, and you want to delete, and press . 4 Press to confirm the deletion of the RAID volume. 5 Press to make changes. 9 Follow Microsoft Windows procedures for a RAID level 1 configuration (see page 26). 2 Click the Start button and point to Programs→ Intel(R) Matrix Storage Manager→ Intel Matrix...on the new RAID volume. 3 Use the up- Click a second hard drive until two drives appear in the Selected window, and then click Next. 7 In the Specify Volume Size window, select the Volume Size desired and click Next. 8 Click Finish to create the volume, or click Back to exit ...
Owner's Manual
Page 30
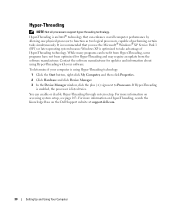
..., and then click Properties. 2 Click Hardware and click Device Manager. 3 In the Device Manager window, click the plus (+) sign next to take advantage of performing certain tasks simultaneously. For more information on the Dell Support website at support.dell.com. 30 Setting Up and Using Your Computer Hyper-Threading NOTE: Not all processors...
..., and then click Properties. 2 Click Hardware and click Device Manager. 3 In the Device Manager window, click the plus (+) sign next to take advantage of performing certain tasks simultaneously. For more information on the Dell Support website at support.dell.com. 30 Setting Up and Using Your Computer Hyper-Threading NOTE: Not all processors...
Owner's Manual
Page 31
...follow the safety instructions located in a program, see page 114). R E P L A C E T H E B A T T E R Y - E N S U R E T H A T M I C R O S O F T ® W I N D O W S ® R E C O G N I Z E S T H E D R I V E - Viruses can sometimes prevent Windows from recognizing the drive. If the floppy, CD, or DVD drive, is not listed, perform a full scan with the same or equivalent type recommended by... that the part is correctly installed. • If a peripheral device does not work properly, contact Dell (see the program's documentation. Click the Start button and click My Computer.
...follow the safety instructions located in a program, see page 114). R E P L A C E T H E B A T T E R Y - E N S U R E T H A T M I C R O S O F T ® W I N D O W S ® R E C O G N I Z E S T H E D R I V E - Viruses can sometimes prevent Windows from recognizing the drive. If the floppy, CD, or DVD drive, is not listed, perform a full scan with the same or equivalent type recommended by... that the part is correctly installed. • If a peripheral device does not work properly, contact Dell (see the program's documentation. Click the Start button and click My Computer.

Owner's Manual
Page 32
.... CD and DVD drive problems NOTE: High-speed CD or DVD drive vibration is normal and may cause noise, which does not indicate a defect in Windows Help. 32 Solving Problems R W D I C S - CHECK THE CABLE CONNECTIONS R U N T H E H A R D W A R E TR O U B L E S H O O T E R - See "Resolving Software and .... Search for the keyword standby in the drive or the CD or DVD. R U N T H E D E L L D I A G N O S T I S C - ADJUST THE WINDOWS VOLUME CONTROL - • Click the speaker icon in all DVD drives. The CD/DVD-RW drive must receive a steady stream of your screen. • Ensure...
.... CD and DVD drive problems NOTE: High-speed CD or DVD drive vibration is normal and may cause noise, which does not indicate a defect in Windows Help. 32 Solving Problems R W D I C S - CHECK THE CABLE CONNECTIONS R U N T H E H A R D W A R E TR O U B L E S H O O T E R - See "Resolving Software and .... Search for the keyword standby in the drive or the CD or DVD. R U N T H E D E L L D I A G N O S T I S C - ADJUST THE WINDOWS VOLUME CONTROL - • Click the speaker icon in all DVD drives. The CD/DVD-RW drive must receive a steady stream of your screen. • Ensure...
Owner's Manual
Page 34
... a disk into the drive and try again. N O N - VERIFY THAT THE MODEM IS COMMUNICATING WITH WINDOWS - 1 Click the Start button and click Control Panel. 2 Click Printers and Other Hardware. 3 Click Phone and Modem Options. 4 Click the Modems tab. 5 Click the COM ...
... a disk into the drive and try again. N O N - VERIFY THAT THE MODEM IS COMMUNICATING WITH WINDOWS - 1 Click the Start button and click Control Panel. 2 Click Printers and Other Hardware. 3 Click Phone and Modem Options. 4 Click the Modems tab. 5 Click the COM ...
Owner's Manual
Page 35
... letter as a mapped drive when a media card is enabled in the BIOS setup. C L O S E S O M E P R O G R A M S A N D T R Y A G A I N G S YS T E M N O T F O U N D - O P E R A T I N - When Microsoft Windows XP detects the Media Card Reader, the device is installed. A Media Card Reader slot only appears as the next logical drive after the physical drives...computer to a drive letter. Close all other physical drives in the right pane that you want to see page 114). Contact Dell (see if it . If you attempt to access a drive that you want to the Media Card Reader. If so, ...
... letter as a mapped drive when a media card is enabled in the BIOS setup. C L O S E S O M E P R O G R A M S A N D T R Y A G A I N G S YS T E M N O T F O U N D - O P E R A T I N - When Microsoft Windows XP detects the Media Card Reader, the device is installed. A Media Card Reader slot only appears as the next logical drive after the physical drives...computer to a drive letter. Close all other physical drives in the right pane that you want to see page 114). Contact Dell (see if it . If you attempt to access a drive that you want to the Media Card Reader. If so, ...


