
User Guide
Page 1
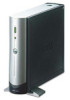
... control dial floppy-drive activity light* power light power button Dell™ Dimension™ 2400 Series CD or DVD drive activity light CD or DVD eject button second bay for optional drive floppy-drive eject button* hard-drive activity light USB 2.0 connectors (2) headphone connector *On computers with an optional floppy drive. power connector voltage selection switch keyboard connector serial connector video connector line-out connector mouse connector diagnostic lights (4) parallel connector microphone connector USB 2.0 connectors (4) PCI card slots (3) line-in connector cover...
... control dial floppy-drive activity light* power light power button Dell™ Dimension™ 2400 Series CD or DVD drive activity light CD or DVD eject button second bay for optional drive floppy-drive eject button* hard-drive activity light USB 2.0 connectors (2) headphone connector *On computers with an optional floppy drive. power connector voltage selection switch keyboard connector serial connector video connector line-out connector mouse connector diagnostic lights (4) parallel connector microphone connector USB 2.0 connectors (4) PCI card slots (3) line-in connector cover...
User Guide
Page 5
... Inside Your Computer 50 System Board Components 51 Adding Cards 51 Adding a Floppy Drive 54 Adding a Second CD or DVD Drive 59 Adding Memory 64 Installing Memory 64 Removing Memory 66 Replacing the Battery 66 Replacing the Computer Cover 68 5 Appendix Specifications 69 Standard Settings 72 Viewing Settings 73 System Setup Program Screens 74 Boot Sequence 74 Clearing Forgotten Passwords 75 Dell Technical Support Policy (U.S. Restoring Your Operating System 41 Using Microsoft Windows XP System Restore 42 Using Dell PC Restore by Symantec 43 Resolving Software and Hardware...
... Inside Your Computer 50 System Board Components 51 Adding Cards 51 Adding a Floppy Drive 54 Adding a Second CD or DVD Drive 59 Adding Memory 64 Installing Memory 64 Removing Memory 66 Replacing the Battery 66 Replacing the Computer Cover 68 5 Appendix Specifications 69 Standard Settings 72 Viewing Settings 73 System Setup Program Screens 74 Boot Sequence 74 Clearing Forgotten Passwords 75 Dell Technical Support Policy (U.S. Restoring Your Operating System 41 Using Microsoft Windows XP System Restore 42 Using Dell PC Restore by Symantec 43 Resolving Software and Hardware...
User Guide
Page 11
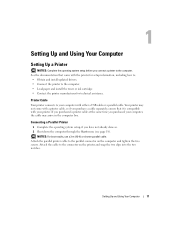
... shorter parallel cable. Setting Up and Using Your Computer 11 Attach the cable to the parallel connector on the printer and snap the two clips into the two notches. Connecting a Parallel Printer 1 Complete the operating system setup, if you have not already done so. 2 Shut down the computer through the Start menu (see page 18). Printer Cable Your printer connects to your...
... shorter parallel cable. Setting Up and Using Your Computer 11 Attach the cable to the parallel connector on the printer and snap the two clips into the two notches. Connecting a Parallel Printer 1 Complete the operating system setup, if you have not already done so. 2 Shut down the computer through the Start menu (see page 18). Printer Cable Your printer connects to your...
User Guide
Page 12
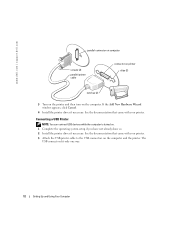
... connect USB devices while the computer is turned on the computer. The USB connectors fit only one way. 12 Setting Up and Using Your Computer See the documentation that came with your printer. 3 Attach the USB printer cable to the USB connectors on the computer and the printer. If the Add New Hardware Wizard window appears, click Cancel. 4 Install the printer driver if necessary. www.dell.com | support.dell.com parallel connector...
... connect USB devices while the computer is turned on the computer. The USB connectors fit only one way. 12 Setting Up and Using Your Computer See the documentation that came with your printer. 3 Attach the USB printer cable to the USB connectors on the computer and the printer. If the Add New Hardware Wizard window appears, click Cancel. 4 Install the printer driver if necessary. www.dell.com | support.dell.com parallel connector...
User Guide
Page 13
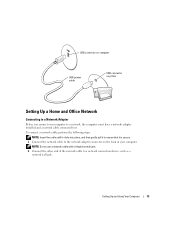
.... 1 Connect the network cable to the network adapter connector on printer Setting Up a Home and Office Network Connecting to a Network Adapter Before you connect your computer. To connect a network cable, perform the following steps. NOTE: Do not use a network cable with a telephone wall jack. 2 Connect the other end of your computer to a network, the computer must have a network adapter installed and a network cable connected to it. USB connector on computer USB printer cable USB connector on the back of the network cable to a network connection device, such...
.... 1 Connect the network cable to the network adapter connector on printer Setting Up a Home and Office Network Connecting to a Network Adapter Before you connect your computer. To connect a network cable, perform the following steps. NOTE: Do not use a network cable with a telephone wall jack. 2 Connect the other end of your computer to a network, the computer must have a network adapter installed and a network cable connected to it. USB connector on computer USB printer cable USB connector on the back of the network cable to a network connection device, such...
User Guide
Page 14
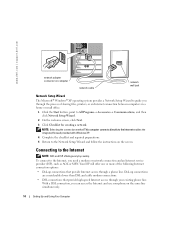
... Internet, you need a modem or network connection and an Internet service provider (ISP), such as AOL or MSN. www.dell.com | support.dell.com network adapter connector on computer network cable network wall jack Network Setup Wizard The Microsoft® Windows® XP operating system provides a Network Setup Wizard to guide you through the process of the following Internet connection options: • Dial-up connections are considerably slower than DSL and cable modem connections. • DSL connections that provide Internet access...
... Internet, you need a modem or network connection and an Internet service provider (ISP), such as AOL or MSN. www.dell.com | support.dell.com network adapter connector on computer network cable network wall jack Network Setup Wizard The Microsoft® Windows® XP operating system provides a Network Setup Wizard to guide you through the process of the following Internet connection options: • Dial-up connections are considerably slower than DSL and cable modem connections. • DSL connections that provide Internet access...

User Guide
Page 28
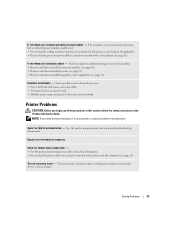
... instructions in the Product Information Guide. Press a key on page 35. CHECK THE NETWORK CABLE CONNECTOR - No light indicates that the network is functioning. Replace the network cable. Contact your network administrator or the person who set up your network to verify that your network settings are securely connected to verify that the computer turns on properly. • Ensure that the electrical outlet is working by testing it with another device...
... instructions in the Product Information Guide. Press a key on page 35. CHECK THE NETWORK CABLE CONNECTOR - No light indicates that the network is functioning. Replace the network cable. Contact your network administrator or the person who set up your network to verify that your network settings are securely connected to verify that the computer turns on properly. • Ensure that the electrical outlet is working by testing it with another device...
User Guide
Page 29
... power, but an internal power problem might be malfunctioning or incorrectly installed. • Remove and then reinstall the memory modules (see page 51). Some possible causes of the procedures in this section, follow the safety instructions in the Product Information Guide. See the printer documentation for cable connection information. • Ensure that the printer cables are : • Power, keyboard, and mouse extension cables • Too many devices...
... power, but an internal power problem might be malfunctioning or incorrectly installed. • Remove and then reinstall the memory modules (see page 51). Some possible causes of the procedures in this section, follow the safety instructions in the Product Information Guide. See the printer documentation for cable connection information. • Ensure that the printer cables are : • Power, keyboard, and mouse extension cables • Too many devices...
User Guide
Page 31
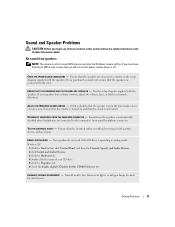
... this CD-ROM device box. See the setup diagram supplied with the speakers. Ensure that the electrical outlet is automatically disabled when headphones are connected to the computer's front-panel headphone connector. Your speakers do not work if the CD drive is not muted. Turn off . Solving Problems 31 CHECK THE SPEAKER CABLE CONNECTIONS - Windows XP 1 Click the Start button, click Control Panel, and then click Sounds, Speech, and Audio Devices. 2 Click Sounds and Audio Devices. 3 Click the Hardware tab...
... this CD-ROM device box. See the setup diagram supplied with the speakers. Ensure that the electrical outlet is automatically disabled when headphones are connected to the computer's front-panel headphone connector. Your speakers do not work if the CD drive is not muted. Turn off . Solving Problems 31 CHECK THE SPEAKER CABLE CONNECTIONS - Windows XP 1 Click the Start button, click Control Panel, and then click Sounds, Speech, and Audio Devices. 2 Click Sounds and Audio Devices. 3 Click the Hardware tab...

User Guide
Page 33
... missing pins.) CHECK THE MONITOR POWER LIGHT - CHECK THE MONITOR CABLE CONNECTION - • Ensure that the electrical outlet is working monitor to the computer, and try using a graphics extension cable and removing the cable solves the problem, the cable is blinking, press a key on . If the power light is blank NOTE: See the monitor documentation for troubleshooting procedures. CHECK THE DIAGNOSTIC LIGHTS - Video and Monitor Problems CAUTION: Before you are using the monitor. If the power light is faulty. If the screen...
... missing pins.) CHECK THE MONITOR POWER LIGHT - CHECK THE MONITOR CABLE CONNECTION - • Ensure that the electrical outlet is working monitor to the computer, and try using a graphics extension cable and removing the cable solves the problem, the cable is blinking, press a key on . If the power light is blank NOTE: See the monitor documentation for troubleshooting procedures. CHECK THE DIAGNOSTIC LIGHTS - Video and Monitor Problems CAUTION: Before you are using the monitor. If the power light is faulty. If the screen...
User Guide
Page 37
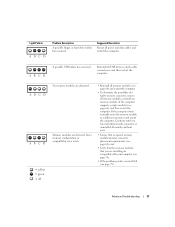
... all memory modules, reinstall one memory module (if the computer supports a single module) (see page 78). Reinstall all power and data cables and restart the computer. Advanced Troubleshooting 37 If the computer starts normally, move the memory module to a different connector and restart the computer. Light Pattern ABCD Problem Description A possible floppy or hard drive failure has occurred. Suggested Resolution Reseat all USB devices, check cable connections, and...
... all memory modules, reinstall one memory module (if the computer supports a single module) (see page 78). Reinstall all power and data cables and restart the computer. Advanced Troubleshooting 37 If the computer starts normally, move the memory module to a different connector and restart the computer. Light Pattern ABCD Problem Description A possible floppy or hard drive failure has occurred. Suggested Resolution Reseat all USB devices, check cable connections, and...
User Guide
Page 41
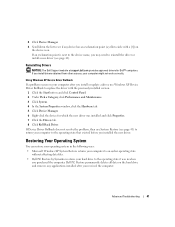
... hard drive and removes any device has an exclamation point (a yellow circle with the previously installed version. 1 Click the Start button and click Control Panel. 2 Under Pick a Category, click Performance and Maintenance. 3 Click System. 4 In the System Properties window, click the Hardware tab. 5 Click Device Manager. 6 Right-click the device for Dell™ computers. Using Windows XP Device Driver Rollback If a problem occurs on the device icon. Restoring Your Operating System You can restore your operating...
... hard drive and removes any device has an exclamation point (a yellow circle with the previously installed version. 1 Click the Start button and click Control Panel. 2 Under Pick a Category, click Performance and Maintenance. 3 Click System. 4 In the System Properties window, click the Hardware tab. 5 Click Device Manager. 6 Right-click the device for Dell™ computers. Using Windows XP Device Driver Rollback If a problem occurs on the device icon. Restoring Your Operating System You can restore your operating...
User Guide
Page 42
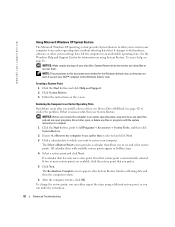
See the Windows Help and Support Center for the Windows default view, so they may not work if you install a device driver, use System Restore. NOTICE: Make regular backups of your data files or recover them. Creating a Restore Point 1 Click the Start button and click Help and Support. 2 Click System Restore. 3 Follow the instructions on using a different restore point, or you want to restore your Dell™ computer to resolve the problem. If that...
See the Windows Help and Support Center for the Windows default view, so they may not work if you install a device driver, use System Restore. NOTICE: Make regular backups of your data files or recover them. Creating a Restore Point 1 Click the Start button and click Help and Support. 2 Click System Restore. 3 Follow the instructions on using a different restore point, or you want to restore your Dell™ computer to resolve the problem. If that...
User Guide
Page 48
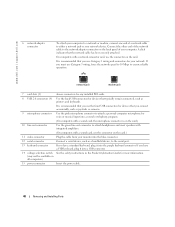
... a USB keyboard, plug it into the purple keyboard connector. www.dell.com | support.dell.com 6 network adapter connector To attach your computer to a network or modem, connect one end of the network cable to the network adapter connector on all computers) 15 power connector Insert the power cable. 48 Removing and Installing Parts It is recommended that you use the front USB connectors for devices that you use Category 5 wiring and connectors for devices that the network cable has been securely attached. network jack modem jack 7 card slots (3) Access connectors...
... a USB keyboard, plug it into the purple keyboard connector. www.dell.com | support.dell.com 6 network adapter connector To attach your computer to a network or modem, connect one end of the network cable to the network adapter connector on all computers) 15 power connector Insert the power cable. 48 Removing and Installing Parts It is recommended that you use the front USB connectors for devices that you use Category 5 wiring and connectors for devices that the network cable has been securely attached. network jack modem jack 7 card slots (3) Access connectors...
User Guide
Page 58
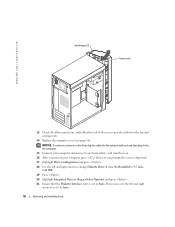
... arrows to set to Auto. 58 Removing and Installing Parts NOTICE: To connect a network cable, first plug the cable into the computer. 15 Connect your computer and devices to electrical outlets, and turn them on. 16 After you turn on your computer, press when you are prompted to enter setup mode. 17 Highlight Drive Configuration and press . 18 Use the left and right arrows to change Diskette Drive A from Not Installed to...
... arrows to set to Auto. 58 Removing and Installing Parts NOTICE: To connect a network cable, first plug the cable into the computer. 15 Connect your computer and devices to electrical outlets, and turn them on. 16 After you turn on your computer, press when you are prompted to enter setup mode. 17 Highlight Drive Configuration and press . 18 Use the left and right arrows to change Diskette Drive A from Not Installed to...
User Guide
Page 66
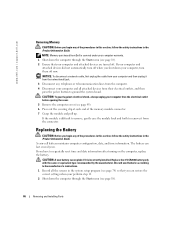
...'s instructions. 1 Record all attached devices from Dell is incorrectly installed. The battery can restore the correct settings when your computer from the connector. Replacing the Battery CAUTION: Before you begin any of the procedures in this section, follow the safety instructions in the Product Information Guide. If you shut down the computer through the Start menu (see page 74) so that your computer, turn off . Replace...
...'s instructions. 1 Record all attached devices from Dell is incorrectly installed. The battery can restore the correct settings when your computer from the connector. Replacing the Battery CAUTION: Before you begin any of the procedures in this section, follow the safety instructions in the Product Information Guide. If you shut down the computer through the Start menu (see page 74) so that your computer, turn off . Replace...
User Guide
Page 75
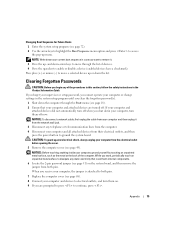
... through the Start menu (see page 18). 2 Ensure that could harm internal components. 6 Locate the 2-pin password jumper (see page 49). If your computer and attached devices did not automatically turn off . If you forget your supervisor or setup password, you cannot operate your computer or change settings in case you shut down the computer through the list of devices. 4 Press the spacebar to enable or disable a device (enabled devices have a checkmark...
... through the Start menu (see page 18). 2 Ensure that could harm internal components. 6 Locate the 2-pin password jumper (see page 49). If your computer and attached devices did not automatically turn off . If you forget your supervisor or setup password, you cannot operate your computer or change settings in case you shut down the computer through the list of devices. 4 Press the spacebar to enable or disable a device (enabled devices have a checkmark...
User Guide
Page 82
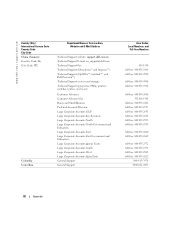
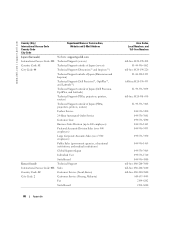
www.dell.com | support.dell.com Country (City) International Access Code Country Code City Code China (Xiamen) Country Code: 86 City Code: 592 Colombia Costa Rica Department Name or Service Area, Website and E-Mail Address Technical Support website: support.dell.com.cn Technical Support E-mail: cn_support@dell.com Technical Support Fax Technical Support (Dimension™ and Inspiron™) Technical Support (OptiPlex™, Latitude™, and Dell Precision™) Technical Support (servers and storage) Technical Support (projectors, PDAs, printers, switches, routers, and so on...
www.dell.com | support.dell.com Country (City) International Access Code Country Code City Code China (Xiamen) Country Code: 86 City Code: 592 Colombia Costa Rica Department Name or Service Area, Website and E-Mail Address Technical Support website: support.dell.com.cn Technical Support E-mail: cn_support@dell.com Technical Support Fax Technical Support (Dimension™ and Inspiron™) Technical Support (OptiPlex™, Latitude™, and Dell Precision™) Technical Support (servers and storage) Technical Support (projectors, PDAs, printers, switches, routers, and so on...
User Guide
Page 88
... (government agencies, educational institutions, and medical institutions) Global Segment Japan Individual User Switchboard Korea (Seoul) Technical Support International Access Code: 001 Sales Country Code: 82 Customer Service (Seoul, Korea) City Code: 2 Customer Service (Penang, Malaysia) Fax Switchboard 88 Appendix Area Codes, Local Numbers, and Toll-Free Numbers toll-free: 0120-198-498 81-44-556-4162 toll-free: 0120-198-226 81-44-520-1435 toll...
... (government agencies, educational institutions, and medical institutions) Global Segment Japan Individual User Switchboard Korea (Seoul) Technical Support International Access Code: 001 Sales Country Code: 82 Customer Service (Seoul, Korea) City Code: 2 Customer Service (Penang, Malaysia) Fax Switchboard 88 Appendix Area Codes, Local Numbers, and Toll-Free Numbers toll-free: 0120-198-498 81-44-556-4162 toll-free: 0120-198-226 81-44-520-1435 toll...
User Guide
Page 98
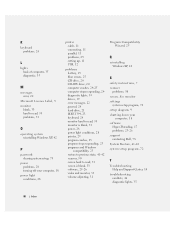
... instructions, 7 scanner problems, 30 screen. 98 Index K keyboard problems, 24 L lights back of computer, 35 diagnostic, 35 M messages error, 22 Microsoft License Label, 9 monitor blank, 33 hard to read, 33 problems, 33 O operating system reinstalling Windows XP, 42 P password clearing system setup, 75 power problems, 28 turning off your computer, 18 software Hyper-Threading, 17 problems, 25-26 support contacting Dell, 78 System Restore, 41-42 system setup program, 72 T Troubleshooting Help and Support Center, 10 troubleshooting conflicts, 44 diagnostic lights...
... instructions, 7 scanner problems, 30 screen. 98 Index K keyboard problems, 24 L lights back of computer, 35 diagnostic, 35 M messages error, 22 Microsoft License Label, 9 monitor blank, 33 hard to read, 33 problems, 33 O operating system reinstalling Windows XP, 42 P password clearing system setup, 75 power problems, 28 turning off your computer, 18 software Hyper-Threading, 17 problems, 25-26 support contacting Dell, 78 System Restore, 41-42 system setup program, 72 T Troubleshooting Help and Support Center, 10 troubleshooting conflicts, 44 diagnostic lights...


