
Service Manual
Page 6
......52 37 Removing the touchpad...53 Prerequisites...53 Procedure...53 38 Replacing the touchpad...54 Procedure...54 Post-requisites...55 39 Removing the keyboard...56 Prerequisites...56 Procedure...56 40 Replacing the keyboard...58 Procedure...58 Post-requisites...59 41 Removing the palm rest......60 Prerequisites...60 Procedure...60 42 Replacing the palm rest...61 Procedure...61 Post-requisites......
......52 37 Removing the touchpad...53 Prerequisites...53 Procedure...53 38 Replacing the touchpad...54 Procedure...54 Post-requisites...55 39 Removing the keyboard...56 Prerequisites...56 Procedure...56 40 Replacing the keyboard...58 Procedure...58 Post-requisites...59 41 Removing the palm rest......60 Prerequisites...60 Procedure...60 42 Replacing the palm rest...61 Procedure...61 Post-requisites......
Service Manual
Page 9
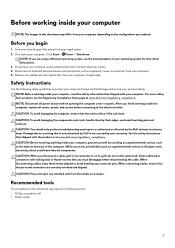
... Shut down . While you are correctly oriented and aligned. Disconnect your computer and all attached network devices and peripherals, such as keyboard, mouse, and monitor from their edges, and avoid touching pins and contacts. For more safety best practices, see the documentation of ...unpainted metal surface, such as authorized or directed by your warranty. When disconnecting cables, keep them by Dell is flat and clean. Before working inside the computer, replace all covers, panels, and screws before connecting to the electrical outlet. Before you begin 1. Disconnect all...
... Shut down . While you are correctly oriented and aligned. Disconnect your computer and all attached network devices and peripherals, such as keyboard, mouse, and monitor from their edges, and avoid touching pins and contacts. For more safety best practices, see the documentation of ...unpainted metal surface, such as authorized or directed by your warranty. When disconnecting cables, keep them by Dell is flat and clean. Before working inside the computer, replace all covers, panels, and screws before connecting to the electrical outlet. Before you begin 1. Disconnect all...
Service Manual
Page 41
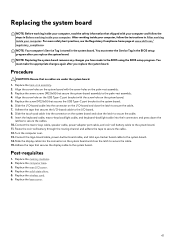
For more safety best practices, see the Regulatory Compliance home page at www.dell.com/ regulatory_compliance. Align the screw hole on the USB Type-C port bracket with the screw hole on the system board and close the latch to ... under the system board. 1. Adhere the tape that secures the display cable to secure the cable. 7. Insert the keyboard cable, macro-keys backlight cable, and keyboard-backlight cable into the connector on the I /O cover. 4. Replace the base cover. 41 NOTE: Your computer's Service Tag is stored in Before working inside your computer. Connect...
For more safety best practices, see the Regulatory Compliance home page at www.dell.com/ regulatory_compliance. Align the screw hole on the USB Type-C port bracket with the screw hole on the system board and close the latch to ... under the system board. 1. Adhere the tape that secures the display cable to secure the cable. 7. Insert the keyboard cable, macro-keys backlight cable, and keyboard-backlight cable into the connector on the I /O cover. 4. Replace the base cover. 41 NOTE: Your computer's Service Tag is stored in Before working inside your computer. Connect...
Service Manual
Page 58
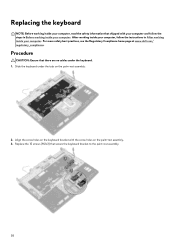
...shipped with the screw holes on the palm-rest assembly. 2. Procedure CAUTION: Ensure that secure the keyboard bracket to the palm-rest assembly. 58 Replace the 15 screws (M2x3) that there are no cables under the tabs on the palm-rest ...assembly. 3. After working inside your computer, follow the steps in After working inside your computer. For more safety best practices, see the Regulatory Compliance home page at www.dell.com/ regulatory_compliance. Slide the keyboard under the keyboard...
...shipped with the screw holes on the palm-rest assembly. 2. Procedure CAUTION: Ensure that secure the keyboard bracket to the palm-rest assembly. 58 Replace the 15 screws (M2x3) that there are no cables under the tabs on the palm-rest ...assembly. 3. After working inside your computer, follow the steps in After working inside your computer. For more safety best practices, see the Regulatory Compliance home page at www.dell.com/ regulatory_compliance. Slide the keyboard under the keyboard...
Service Manual
Page 61
.... Replace the keyboard. 3. Replace the battery. 5. Replace the memory modules. 8. Replace the coin-cell battery. 12. Replace the solid-state drive. 15. Replace the wireless card. 16. For more safety best practices, see the Regulatory Compliance home page at www.dell.com/ regulatory_compliance. Replace the computer base. 13. Post-requisites 1. Replace the base cover. 61 Replace the subwoofer. 9. Replace the display assembly. 2. Replace...
.... Replace the keyboard. 3. Replace the battery. 5. Replace the memory modules. 8. Replace the coin-cell battery. 12. Replace the solid-state drive. 15. Replace the wireless card. 16. For more safety best practices, see the Regulatory Compliance home page at www.dell.com/ regulatory_compliance. Replace the computer base. 13. Post-requisites 1. Replace the base cover. 61 Replace the subwoofer. 9. Replace the display assembly. 2. Replace...


