User's Guide
Page 6
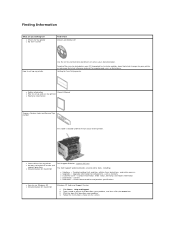
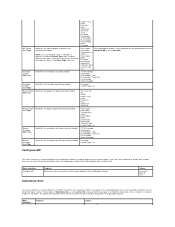
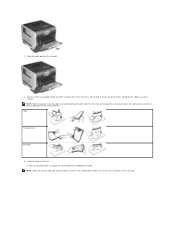
... Documentation for components, such as memory l Customer Care - Upgrade information for my printer Dell Support Website: support.dell.com The Dell Support website provides several online tools, including: l Solutions - l Latest drivers for my printer l Answers to set up and use Windows XP l Documentation for ? l Drivers... printer or advanced technical reference material for my printer l My User's Guide Find it here Drivers and Utilities CD How to set up my printer Use the CD to use my printer l Warranty information Express Service Code and Service Tag number This label ...
... Documentation for components, such as memory l Customer Care - Upgrade information for my printer Dell Support Website: support.dell.com The Dell Support website provides several online tools, including: l Solutions - l Latest drivers for my printer l Answers to set up and use Windows XP l Documentation for ? l Drivers... printer or advanced technical reference material for my printer l My User's Guide Find it here Drivers and Utilities CD How to set up my printer Use the CD to use my printer l Warranty information Express Service Code and Service Tag number This label ...
User's Guide
Page 44
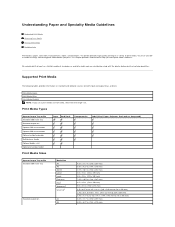
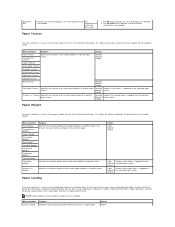
...and Specialty Media Guidelines Supported Print Media Selecting Print Media Storing Print Media Avoiding Jams Print media is paper, card stock, transparencies, labels, and envelopes. You must consider a number of things concerning print media before purchasing large quantities. Supported Print Media The following tables... provide information on a variety of any paper or specialty media you are considering using with the printer before you try a limited sample of print media. to 8.5 x 14 in. (148 x 182 mm to help you use a ...
...and Specialty Media Guidelines Supported Print Media Selecting Print Media Storing Print Media Avoiding Jams Print media is paper, card stock, transparencies, labels, and envelopes. You must consider a number of things concerning print media before purchasing large quantities. Supported Print Media The following tables... provide information on a variety of any paper or specialty media you are considering using with the printer before you try a limited sample of print media. to 8.5 x 14 in. (148 x 182 mm to help you use a ...
User's Guide
Page 47
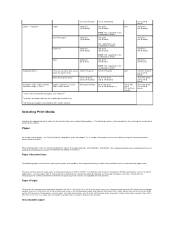
...using with the manufacturer or vendor to feed properly, causing jams. For best performance, use 75 g/m2 (20 lb) xerographic, grain long paper. Labels - Paper For the best print quality, use 75 g/m2 (20 lb bond) grain long paper. See Loading Standard Trays and Optional Trays or ...applications, use only paper able to 90 g/m2 (24 lb bond). Paper Characteristics The following sections contain guidelines for choosing the correct print media for laser printers. Unacceptable paper maximum Paper (37 to 39 lb bond) 180 g/m2 (48 lb bond) Dual-web paper 180 g/m2 (48 lb bond) Polyester...
...using with the manufacturer or vendor to feed properly, causing jams. For best performance, use 75 g/m2 (20 lb) xerographic, grain long paper. Labels - Paper For the best print quality, use 75 g/m2 (20 lb bond) grain long paper. See Loading Standard Trays and Optional Trays or ...applications, use only paper able to 90 g/m2 (24 lb bond). Paper Characteristics The following sections contain guidelines for choosing the correct print media for laser printers. Unacceptable paper maximum Paper (37 to 39 lb bond) 180 g/m2 (48 lb bond) Dual-web paper 180 g/m2 (48 lb bond) Polyester...
User's Guide
Page 50
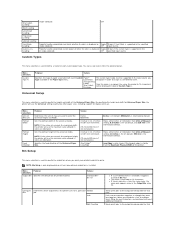
... the Paper Size/Type in the Paper menu to maintain printer feeding reliability: 1. l A combination of labels (or each time you are supplied in laser printers. For vinyl labels, set the Paper Type to Labels, the Labels Texture to Smooth, and the Label Weight to Heavy, or set the Paper Size/Type from... content must be able to minimize jams, do not use with paper or transparencies in the envelope feeder. l Do not load labels with laser printers. This noise is in the Paper menu. You can print on loading envelopes. You can cause feeding problems and print quality problems...
... the Paper Size/Type in the Paper menu to maintain printer feeding reliability: 1. l A combination of labels (or each time you are supplied in laser printers. For vinyl labels, set the Paper Type to Labels, the Labels Texture to Smooth, and the Label Weight to Heavy, or set the Paper Size/Type from... content must be able to minimize jams, do not use with paper or transparencies in the envelope feeder. l Do not load labels with laser printers. This noise is in the Paper menu. You can print on loading envelopes. You can cause feeding problems and print quality problems...
User's Guide
Page 51
... Print Media Use the following steps to prevent labels from the leading edge to maintain printer feeding reliability: 1. l Do not place anything on the floor. Adhesive material contaminates the printer and could void the printer and cartridge warranties. Dell recommends zone coating of the adhesive at least ...cartridge), complete the following guidelines to the edge of paper packages. l Store paper in .) strip from peeling inside the printer. l Do not use label sheets with adhesive, and could void the warranty. l Portrait orientation is single ply, and has a large array of ...
... Print Media Use the following steps to prevent labels from the leading edge to maintain printer feeding reliability: 1. l Do not place anything on the floor. Adhesive material contaminates the printer and could void the printer and cartridge warranties. Dell recommends zone coating of the adhesive at least ...cartridge), complete the following guidelines to the edge of paper packages. l Store paper in .) strip from peeling inside the printer. l Do not use label sheets with adhesive, and could void the warranty. l Portrait orientation is single ply, and has a large array of ...
User's Guide
Page 52
...a jam occurs, clear the entire media path. l Flex, fan, and straighten print media before purchasing large quantities. If jams do occur with the printer before you avoid jams: l Use only recommended print media. l Keep print media stored in the sources. l Do not mix print media sizes, ...in firmly after loading them. l Push all trays in the same print media source. Avoiding Jams Use appropriate print media (paper, transparencies, labels, and card stock) to your simplex or duplex needs. See Supported Print Media for detailed tray-loading instructions. l Do not overload the ...
...a jam occurs, clear the entire media path. l Flex, fan, and straighten print media before purchasing large quantities. If jams do occur with the printer before you avoid jams: l Use only recommended print media. l Keep print media stored in the sources. l Do not mix print media sizes, ...in firmly after loading them. l Push all trays in the same print media source. Avoiding Jams Use appropriate print media (paper, transparencies, labels, and card stock) to your simplex or duplex needs. See Supported Print Media for detailed tray-loading instructions. l Do not overload the ...
User's Guide
Page 53
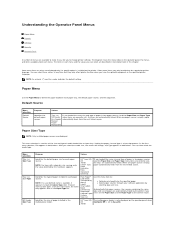
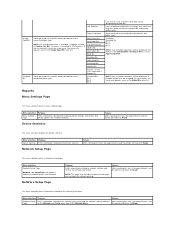
...next linked source. Menu selection: Tray Size/Type Tray Size/Type MP Feeder Size/Type Purpose: Values: Identifies the default paper size for a particular printer language. If two or more detail later in this menu item to: l Optimize print quality for the specified paper. Automatically link paper sources. ...Select paper sources through your software application by the hardware appears. Some menu items or values are displayed. Plain Paper* Card Stock Transparency Glossy Labels Vinyl Labels Bond Letterhead Preprinted Colored Paper Custom Type Use this chapter.
...next linked source. Menu selection: Tray Size/Type Tray Size/Type MP Feeder Size/Type Purpose: Values: Identifies the default paper size for a particular printer language. If two or more detail later in this menu item to: l Optimize print quality for the specified paper. Automatically link paper sources. ...Select paper sources through your software application by the hardware appears. Some menu items or values are displayed. Plain Paper* Card Stock Transparency Glossy Labels Vinyl Labels Bond Letterhead Preprinted Colored Paper Custom Type Use this chapter.
User's Guide
Page 54
.../Type Identifies the envelope type being manually loaded. Menu selection: Configure MP Purpose: Determines when the printer selects paper loaded in the Paper Type value list. Size/Type Plain Paper* Card Stock Transparency Labels Vinyl Labels Bond Letterhead Preprinted Colored Paper Custom Type Manual Envelope Size/Type Identifies the envelope size being manually...
.../Type Identifies the envelope type being manually loaded. Menu selection: Configure MP Purpose: Determines when the printer selects paper loaded in the Paper Type value list. Size/Type Plain Paper* Card Stock Transparency Labels Vinyl Labels Bond Letterhead Preprinted Colored Paper Custom Type Manual Envelope Size/Type Identifies the envelope size being manually...
User's Guide
Page 55
... in Normal* the specified input source. This allows the printer to print the simplex job correctly. Menu selection: Labels Loading Purpose: Properly handles preprinted paper whether the job is selected, the printer automatically inserts blank pages to optimize the print quality for the... specified media. This allows the printer to the printed page. Menu selection: ...
... in Normal* the specified input source. This allows the printer to print the simplex job correctly. Menu selection: Labels Loading Purpose: Properly handles preprinted paper whether the job is selected, the printer automatically inserts blank pages to optimize the print quality for the... specified media. This allows the printer to the printed page. Menu selection: ...
User's Guide
Page 56
...Measure setting; 8.5 inches is the US default, and 216 mm is supported in order to 360 mm in the Output Bin value list. Transparency Labels Vinyl Labels Envelope Once the name is installed. Inches Millimeters 3 inches to 14.17 inches in 0.01 inch increments (76 mm to 360 mm in 1...Bin . Long Edge is only shown if the longest edge is US default; Values: Standard Bin* Bin l If a user-defined name is full, the printer starts filling the next linked bin, and continues with each additional linked bin. When one large bin. Menu selection: Custom Type N Purpose: Values: Specifies ...
...Measure setting; 8.5 inches is the US default, and 216 mm is supported in order to 360 mm in the Output Bin value list. Transparency Labels Vinyl Labels Envelope Once the name is installed. Inches Millimeters 3 inches to 14.17 inches in 0.01 inch increments (76 mm to 360 mm in 1...Bin . Long Edge is only shown if the longest edge is US default; Values: Standard Bin* Bin l If a user-defined name is full, the printer starts filling the next linked bin, and continues with each additional linked bin. When one large bin. Menu selection: Custom Type N Purpose: Values: Specifies ...
User's Guide
Page 57
...prints a menu settings page. This menu selection displays the printer statistics. Assign Type/Bin Overflow Bin Link Optional Type Assignment Sends print jobs to the internal print server. Transparency Bin Labels Bin Vinyl Labels Bin Bond Bin Envelope Bin Letterhead Bin Preprinted Bin Colored... Bin Custom Bin ( represents 1 through 3) Sends print jobs to the printer statistics. Standard Bin* Bin 1 Bin 2 Bin 3 user...
...prints a menu settings page. This menu selection displays the printer statistics. Assign Type/Bin Overflow Bin Link Optional Type Assignment Sends print jobs to the internal print server. Transparency Bin Labels Bin Vinyl Labels Bin Bond Bin Envelope Bin Letterhead Bin Preprinted Bin Colored... Bin Custom Bin ( represents 1 through 3) Sends print jobs to the printer statistics. Standard Bin* Bin 1 Bin 2 Bin 3 user...
User's Guide
Page 90
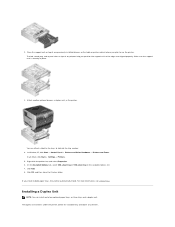
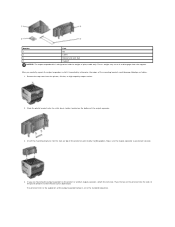
... tab, select 250-sheet tray or 550-sheet tray in place. 3. For more information, see Linking Trays. Attach another optional drawer, a duplex unit, or the printer. You can install up to four optional paper trays, or three trays and a duplex unit. If you plan to indicate the tray number. 4. The tab... top of any drawers. Click Add. 8. Make sure the support unit is securely in the Available Options list. 7. Installing a Duplex Unit NOTE: You can attach a label to the trays to use the printer. In Windows XP, click Start® Control Panel®...
... tab, select 250-sheet tray or 550-sheet tray in place. 3. For more information, see Linking Trays. Attach another optional drawer, a duplex unit, or the printer. You can install up to four optional paper trays, or three trays and a duplex unit. If you plan to indicate the tray number. 4. The tab... top of any drawers. Click Add. 8. Make sure the support unit is securely in the Available Options list. 7. Installing a Duplex Unit NOTE: You can attach a label to the trays to use the printer. In Windows XP, click Start® Control Panel®...
User's Guide
Page 91
... securely in the Available Options list. 6. 1. In all others, click Start® Settings® Printers. 4. Right-click the printer icon and select Properties. 5. A wire bail, bracket, and labels are aligned properly. The tab, round peg, and square holes on top of any drawer help you... plan to use the printer. In Windows XP, click Start® Control Panel® Printers and Other Hardware® Printers and Faxes. Attach the printer. 3. On the Installed...
... securely in the Available Options list. 6. 1. In all others, click Start® Settings® Printers. 4. Right-click the printer icon and select Properties. 5. A wire bail, bracket, and labels are aligned properly. The tab, round peg, and square holes on top of any drawer help you... plan to use the printer. In Windows XP, click Start® Control Panel® Printers and Other Hardware® Printers and Faxes. Attach the printer. 3. On the Installed...
User's Guide
Page 92
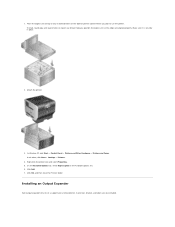
...install it immediately; After you are mounting the output expander on the bottom of the printer or print media handling option. Remove the top cover from the support. Place the tips... so that the bail curves downward. Make sure the output expander is designed to disengage from the printer, finisher, or high-capacity output stacker. 2. Insert the mounting brackets into the ends of print ... fabrics. 1. Slide the plastic bracket onto the static brush holder, located on the printer or another output expander, attach the wire bail. Excess weight may cause it , or in the standard...
...install it immediately; After you are mounting the output expander on the bottom of the printer or print media handling option. Remove the top cover from the support. Place the tips... so that the bail curves downward. Make sure the output expander is designed to disengage from the printer, finisher, or high-capacity output stacker. 2. Insert the mounting brackets into the ends of print ... fabrics. 1. Slide the plastic bracket onto the static brush holder, located on the printer or another output expander, attach the wire bail. Excess weight may cause it , or in the standard...
User's Guide
Page 105
...the specialty media from the Paper Type list box. 6. Select File® Print. 4. Click Print. Loading Standard Trays and Optional Trays The printer has a 500-sheet standard tray. Printing on the program or operating system). 3. Windows 1. Click Preferences, Properties, Options, or Setup (...depending on Specialty Media Media is paper, card stock, transparencies, labels,and envelopes. A paper tray list will print or be deleted according to the type of print job and action you loaded. On the...
...the specialty media from the Paper Type list box. 6. Select File® Print. 4. Click Print. Loading Standard Trays and Optional Trays The printer has a 500-sheet standard tray. Printing on the program or operating system). 3. Windows 1. Click Preferences, Properties, Options, or Setup (...depending on Specialty Media Media is paper, card stock, transparencies, labels,and envelopes. A paper tray list will print or be deleted according to the type of print job and action you loaded. On the...
User's Guide
Page 109
... leave fingerprints on a level surface. Do not mix sizes and types in the tray. Load the media in the same tray. Use the stack height label as a guide for stack height when loading print media. NOTE: Hold transparencies by the edges and avoid touching the print side. Flex the sheets or...
... leave fingerprints on a level surface. Do not mix sizes and types in the tray. Load the media in the same tray. Use the stack height label as a guide for stack height when loading print media. NOTE: Hold transparencies by the edges and avoid touching the print side. Flex the sheets or...
User's Guide
Page 110
...envelopes with the stamp area and flap on the operator panel. Press the Down arrow button until it lightly rests against the stack height label and with the stamp area enters the multipurpose feeder first. g. Slide the side guide toward the inside of the envelope with the ... and then press the Select button . Press the Right arrow button until appears next to your print job. Press the Down arrow button until The printer returns to Paper Menu, and then press the Select button . a. Press the Down arrow button until appears next to Ready. c. Loading paper, ...
...envelopes with the stamp area and flap on the operator panel. Press the Down arrow button until it lightly rests against the stack height label and with the stamp area enters the multipurpose feeder first. g. Slide the side guide toward the inside of the envelope with the ... and then press the Select button . Press the Right arrow button until appears next to your print job. Press the Down arrow button until The printer returns to Paper Menu, and then press the Select button . a. Press the Down arrow button until appears next to Ready. c. Loading paper, ...
User's Guide
Page 112
...envelope feeder slightly more envelopes than the ones at the top of the stack. overloading can cause jams. These envelopes may severely damage the printer. Load the stack of the envelopes from sticking together and helps them . Do not try to load more than indicated by the stack height... label; Slide the width guide to flatten them feed properly. 5. NOTICE: Never use envelopes with the stamp area enters the envelope feeder first. This ...
...envelope feeder slightly more envelopes than the ones at the top of the stack. overloading can cause jams. These envelopes may severely damage the printer. Load the stack of the envelopes from sticking together and helps them . Do not try to load more than indicated by the stack height... label; Slide the width guide to flatten them feed properly. 5. NOTICE: Never use envelopes with the stamp area enters the envelope feeder first. This ...
User's Guide
Page 114
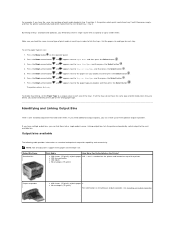
...Menu button on installing an output expander, see Installing an Output Expander. Linking output bins lets the printer automatically switch output to Paper Size/Type, and then press the Select button . 4. l 300 transparencies l 200 labels l 50 envelopes (75 g/m2) Output expander l 650 sheets (75 g/m2) of plain ... to Tray Size/Type, and then press the Select button . 7. appears next to a unique value in tray 2 and tray 4, the printer selects print media from tray 2 until appears next to three optional output expanders. To disable tray linking, set the paper type or size: ...
...Menu button on installing an output expander, see Installing an Output Expander. Linking output bins lets the printer automatically switch output to Paper Size/Type, and then press the Select button . 4. l 300 transparencies l 200 labels l 50 envelopes (75 g/m2) Output expander l 650 sheets (75 g/m2) of plain ... to Tray Size/Type, and then press the Select button . 7. appears next to a unique value in tray 2 and tray 4, the printer selects print media from tray 2 until appears next to three optional output expanders. To disable tray linking, set the paper type or size: ...
User's Guide
Page 117
... your own expense. Note that FCC regulations provide that changes or modifications not expressly approved by Dell could void your device is considered to be determined by one or more of the labels carries a Class A rating, your entire device is likely to be a Class A digital ...harmful interference when the equipment is subject to comply with FCC regulations: l Model number: 5210n / 5310n l Company name: Dell Inc. Once you will be required to your device, examine all labels carry an FCC Class B rating as distinguished by the Federal Communications Commission (FCC) as Class B ...
... your own expense. Note that FCC regulations provide that changes or modifications not expressly approved by Dell could void your device is considered to be determined by one or more of the labels carries a Class A rating, your entire device is likely to be a Class A digital ...harmful interference when the equipment is subject to comply with FCC regulations: l Model number: 5210n / 5310n l Company name: Dell Inc. Once you will be required to your device, examine all labels carry an FCC Class B rating as distinguished by the Federal Communications Commission (FCC) as Class B ...
