User's Guide
Page 15
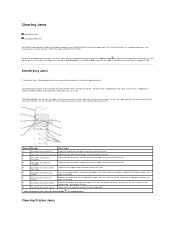
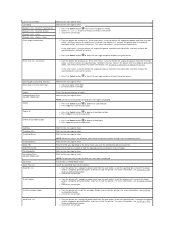
...the envelope feeder, and Feeder adjust the guide. 7 250 Paper Jam Check MP Remove all possible jams. Number Message What to resume printing. Clearing Printer Jams Open the rear duplex door, and remove the jam. 9 24x Paper Jam Check Tray x Open each tray, and then remove any jammed media. ...* After clearing the jam, press the Select button to do* 1 27x Paper Jam Check Bin x Open the output...
...the envelope feeder, and Feeder adjust the guide. 7 250 Paper Jam Check MP Remove all possible jams. Number Message What to resume printing. Clearing Printer Jams Open the rear duplex door, and remove the jam. 9 24x Paper Jam Check Tray x Open each tray, and then remove any jammed media. ...* After clearing the jam, press the Select button to do* 1 27x Paper Jam Check Bin x Open the output...
User's Guide
Page 20
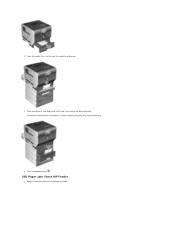
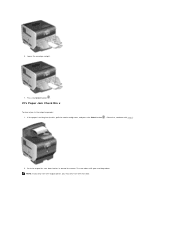
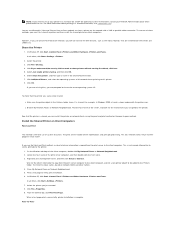
Open the duplex tray, and remove the media by pulling up or down. Press the Select button . 250 Paper Jam Check MP Feeder 1. If it does not pull easily one way, try the other way. 4. 2. Open any optional trays beginning at the top, and remove any jammed media. Pull the print media either up . 3. Remove the paper from the multipurpose feeder.
Open the duplex tray, and remove the media by pulling up or down. Press the Select button . 250 Paper Jam Check MP Feeder 1. If it does not pull easily one way, try the other way. 4. 2. Open any optional trays beginning at the top, and remove any jammed media. Pull the print media either up . 3. Remove the paper from the multipurpose feeder.
User's Guide
Page 21
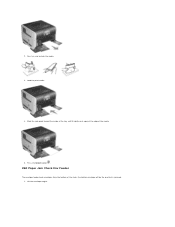
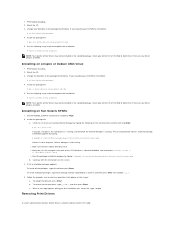
Flex, fan, and restack the media. 3. Lift the envelope weight. Slide the side guide toward the inside of the tray until it lightly rests against the edge of the stack; the bottom envelope will be the one that is jammed. 1. Press the Select button . 260 Paper Jam Check Env Feeder The envelope feeder feeds envelopes from the bottom of the media. 5. Load the print media. 4. 2.
Flex, fan, and restack the media. 3. Lift the envelope weight. Slide the side guide toward the inside of the tray until it lightly rests against the edge of the stack; the bottom envelope will be the one that is jammed. 1. Press the Select button . 260 Paper Jam Check Env Feeder The envelope feeder feeds envelopes from the bottom of the media. 5. Load the print media. 4. 2.
User's Guide
Page 23
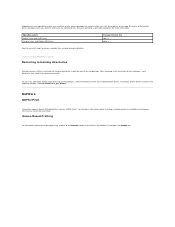
NOTE: If you only have one output option, you may only have one rear door. Otherwise, continue with step 2. 2. Push the output bin rear door latches in the output expander: 1. Press the Select button . 27x Paper Jam Check Bin x To clear a jam in toward the center. The rear doors will open and drop down. 6. If the paper is exiting into the bin, pull the media straight out, and press the Select button . Lower the envelope weight. 7.
NOTE: If you only have one output option, you may only have one rear door. Otherwise, continue with step 2. 2. Push the output bin rear door latches in the output expander: 1. Press the Select button . 27x Paper Jam Check Bin x To clear a jam in toward the center. The rear doors will open and drop down. 6. If the paper is exiting into the bin, pull the media straight out, and press the Select button . Lower the envelope weight. 7.

User's Guide
Page 29
...-linux-glibc2-x86.deb 5. Set the NONABI_SCRIPTS environment variable to the package file directory. Check your directory to complete the installation: # /usr/local/dell/setup.dellprint NOTE: Your specific printer driver may not be included in the standard package. To install individual packages, type each... TRUE. 2. Run the following on the screen: Installing on Sun Solaris SPARC 1. Change your printer CD or the Web to /mnt/cdrom: # cd /mnt/cdrom/unix/packages 4. Check to see if you are any questions that the /cdrom directory exists. ¡ Mount the ...
...-linux-glibc2-x86.deb 5. Set the NONABI_SCRIPTS environment variable to the package file directory. Check your directory to complete the installation: # /usr/local/dell/setup.dellprint NOTE: Your specific printer driver may not be included in the standard package. To install individual packages, type each... TRUE. 2. Run the following on the screen: Installing on Sun Solaris SPARC 1. Change your printer CD or the Web to /mnt/cdrom: # cd /mnt/cdrom/unix/packages 4. Check to see if you are any questions that the /cdrom directory exists. ¡ Mount the ...
User's Guide
Page 30
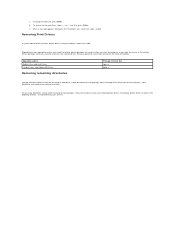
...utilities usually do not remove directories shared by more information. Removing Print Drivers A system administrator removes printer drivers using the utilities listed in the following location: /usr/local/dell/unix_prt_drivers. To see if any directories remain after you start the program, or you type the.... Depending on your operating system documentation for removal after removing all of the printer drivers package names you want to remove on the command line. After removing all the packages, check the directory where you the installation was successful, type q to be removed ...
...utilities usually do not remove directories shared by more information. Removing Print Drivers A system administrator removes printer drivers using the utilities listed in the following location: /usr/local/dell/unix_prt_drivers. To see if any directories remain after you start the program, or you type the.... Depending on your operating system documentation for removal after removing all of the printer drivers package names you want to remove on the command line. After removing all the packages, check the directory where you the installation was successful, type q to be removed ...
User's Guide
Page 47
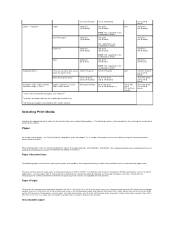
... performance, use 75 g/m2 (20 lb bond) grain long paper. Try a sample of 230°C (446°F). Check with the printer before buying large quantities. When using with the manufacturer or vendor to determine whether the paper you have chosen is preferred for..., or releasing hazardous emissions. Unacceptable paper Paper Characteristics The following sections contain guidelines for choosing the correct print media for laser printers. For Magnetic Ink Character Recognition (MICR) applications and for detailed tray-loading instructions. See Loading Standard Trays and Optional Trays...
... performance, use 75 g/m2 (20 lb bond) grain long paper. Try a sample of 230°C (446°F). Check with the printer before buying large quantities. When using with the manufacturer or vendor to determine whether the paper you have chosen is preferred for..., or releasing hazardous emissions. Unacceptable paper Paper Characteristics The following sections contain guidelines for choosing the correct print media for laser printers. For Magnetic Ink Character Recognition (MICR) applications and for detailed tray-loading instructions. See Loading Standard Trays and Optional Trays...
User's Guide
Page 48
... Character Recognition (MICR) applications and for laser printers. The following paper characteristics affect print quality and reliability. Check with the manufacturer or vendor to high temperatures of any paper you are not recommended for use with the printer: l Some chemically treated papers used to...single-sided) printing Duplex (double-sided) printing In the multipurpose feeder Paper Characteristics The following papers are considering using with the printer before buying large quantities. We recommend that do not meet DIN 19 309 l Recycled paper having a weight less than ...
... Character Recognition (MICR) applications and for laser printers. The following paper characteristics affect print quality and reliability. Check with the manufacturer or vendor to high temperatures of any paper you are not recommended for use with the printer: l Some chemically treated papers used to...single-sided) printing Duplex (double-sided) printing In the multipurpose feeder Paper Characteristics The following papers are considering using with the printer before buying large quantities. We recommend that do not meet DIN 19 309 l Recycled paper having a weight less than ...
User's Guide
Page 49
Transparencies must be set to Transparency to help prevent jams. Check with the printer before buying large quantities. Always print samples on the Imaging choice in the Copies & Pages pop-up to successfully ...grain long in the multipurpose feeder and optional 250-sheet trays. Selecting transparencies The printer can adjust registration with your transparencies are considering l Use transparencies designed specifically for information about transparency compatibility with laser printers that can be sure to set the Paper Type to Transparency from sticking together....
Transparencies must be set to Transparency to help prevent jams. Check with the printer before buying large quantities. Always print samples on the Imaging choice in the Copies & Pages pop-up to successfully ...grain long in the multipurpose feeder and optional 250-sheet trays. Selecting transparencies The printer can adjust registration with your transparencies are considering l Use transparencies designed specifically for information about transparency compatibility with laser printers that can be sure to set the Paper Type to Transparency from sticking together....
User's Guide
Page 50
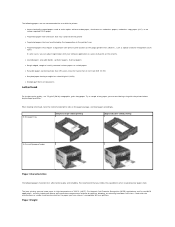
... you have any labels you are considering using, check with 100% cotton content must be able to Envelope, and select the correct envelope size from the printer operator panel, the printer driver, or the Local Printer Setup Utility. Labels The printer can print on loading envelopes. or 500-sheet...sheets of paper. 2. You can set the Paper Type to vinyl labels and the texture and weight to minimize jams, do not use in laser printers. l Use envelopes that can cause feeding problems and print quality problems. l Feed vinyl labels from 75 g/m2 (20 lb bond) paper....
... you have any labels you are considering using, check with 100% cotton content must be able to Envelope, and select the correct envelope size from the printer operator panel, the printer driver, or the Local Printer Setup Utility. Labels The printer can print on loading envelopes. or 500-sheet...sheets of paper. 2. You can set the Paper Type to vinyl labels and the texture and weight to minimize jams, do not use in laser printers. l Use envelopes that can cause feeding problems and print quality problems. l Feed vinyl labels from 75 g/m2 (20 lb bond) paper....
User's Guide
Page 67
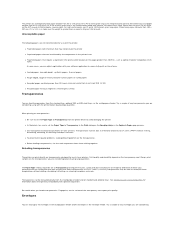
...how to clear the messages. This chapter provides a list of all printer messages, explains what they mean, and tells you must resolve. l Press the Select button to disable Resource Save and continue printing. l Check tray length and width guides to ensure paper is requesting the correct ...size of the l Press the Select button to clear the message and continue printing. l Install additional printer memory. Press the Down arrow button message. For more...
...how to clear the messages. This chapter provides a list of all printer messages, explains what they mean, and tells you must resolve. l Press the Select button to disable Resource Save and continue printing. l Check tray length and width guides to ensure paper is requesting the correct ...size of the l Press the Select button to clear the message and continue printing. l Install additional printer memory. Press the Down arrow button message. For more...
User's Guide
Page 69
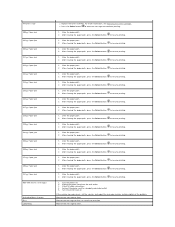
... the paper path. 2. After clearing the paper path, press the Select button to resume printing. 1. Turn the printer back on. 88 Toner is low 200.yy Paper jam 201.yy Paper jam 202.yy Paper jam 231.yy ... the Select button to resume printing. 1. After clearing the paper path, press the Select button to resume printing. 1. Turn the printer off. 2. Clear the paper path. 2. Clear the paper path. 2. Clear the paper path. 2. Clear the paper path. ... the Select button to resume printing. 1. Clear the paper path. 2. Clear the paper path. 2. Check all cable connections. 4.
... the paper path. 2. After clearing the paper path, press the Select button to resume printing. 1. Turn the printer back on. 88 Toner is low 200.yy Paper jam 201.yy Paper jam 202.yy Paper jam 231.yy ... the Select button to resume printing. 1. After clearing the paper path, press the Select button to resume printing. 1. Turn the printer off. 2. Clear the paper path. 2. Clear the paper path. 2. Clear the paper path. 2. Clear the paper path. ... the Select button to resume printing. 1. Clear the paper path. 2. Clear the paper path. 2. Check all cable connections. 4.
User's Guide
Page 70
... Select button to clear. NOTE: Do not turn the printer off and back on. Insert the specified tray into the printer. For more information, see Installing a 250Sheet or 500-Sheet Drawer. Check tray connection l Turn the printer off , unplug the power cord from the wall outlet,... clear. Cancel not available Cancelling Change Change Change Change Check duplex connection Wait for the message to clear. Wait for the message to print on . l Press the Select button if you cannot change the printer settings from the wall outlet, and then remove the ...
... Select button to clear. NOTE: Do not turn the printer off and back on. Insert the specified tray into the printer. For more information, see Installing a 250Sheet or 500-Sheet Drawer. Check tray connection l Turn the printer off , unplug the power cord from the wall outlet,... clear. Cancel not available Cancelling Change Change Change Change Check duplex connection Wait for the message to clear. Wait for the message to print on . l Press the Select button if you cannot change the printer settings from the wall outlet, and then remove the ...

User's Guide
Page 73
...TCP/IP, and then press the Select button . Check the first section on the network setup page printed in Printing a Network Setup Page. 2. Assigning a Printer IP Address If the network is using DHCP, then manually assign an IP address to the printer. Go to Reports, and then press the Select .... 3. When the address is entered, press the Select button . NOTE: If an optional print server is installed, Print Net1 Setup appears on the printer system board. Press the Down arrow button until appears next to Network/Ports, and then press the Select button . 3. Press the Down arrow button...
...TCP/IP, and then press the Select button . Check the first section on the network setup page printed in Printing a Network Setup Page. 2. Assigning a Printer IP Address If the network is using DHCP, then manually assign an IP address to the printer. Go to Reports, and then press the Select .... 3. When the address is entered, press the Select button . NOTE: If an optional print server is installed, Print Net1 Setup appears on the printer system board. Press the Down arrow button until appears next to Network/Ports, and then press the Select button . 3. Press the Down arrow button...
User's Guide
Page 77
...In Windows XP, click Start®Control Panel®Printers and Other Hardware®Printers and Faxes. To check that are installed with a USB or parallel cable connection. Find the host name of these Microsoft methods, you assigned to set up your printer in a mixed 32-bit and 64-bit operating... you are missing files, you understand the security risk but want to the printer. 1. If you are prompted to -peer method. The time this printer, and then type a name in a mixed environment, visit support.dell.com. To use Microsoft's Point and Print or Peer-to-Peer methods to...
...In Windows XP, click Start®Control Panel®Printers and Other Hardware®Printers and Faxes. To check that are installed with a USB or parallel cable connection. Find the host name of these Microsoft methods, you assigned to set up your printer in a mixed 32-bit and 64-bit operating... you are missing files, you understand the security risk but want to the printer. 1. If you are prompted to -peer method. The time this printer, and then type a name in a mixed environment, visit support.dell.com. To use Microsoft's Point and Print or Peer-to-Peer methods to...
User's Guide
Page 81
...answer any driver plugins available. b. If you the installation was successful, type q to complete the installation: # /usr/local/dell/setup.dellprint NOTE: Your specific printer driver may not be included in the standard package. Run the following setup script to quit. Read Before Installing. 2. Mount the... package file. a. c. When a message appears telling you mounted your printer CD or the Web to the package file directory. Check your CD-ROM to /mnt/cdrom: # cd /mnt/cdrom/unix/packages 4. Check to see if you mounted your directory to determine if there are running...
...answer any driver plugins available. b. If you the installation was successful, type q to complete the installation: # /usr/local/dell/setup.dellprint NOTE: Your specific printer driver may not be included in the standard package. Run the following setup script to quit. Read Before Installing. 2. Mount the... package file. a. c. When a message appears telling you mounted your printer CD or the Web to the package file directory. Check your CD-ROM to /mnt/cdrom: # cd /mnt/cdrom/unix/packages 4. Check to see if you mounted your directory to determine if there are running...
User's Guide
Page 82
...all the packages, check the directory where you want to remove on the command line. Queue-Based Printing For information about installing a network printer in the following location: /usr/local/dell/unix_prt_drivers. Depending on your operating system, you mark the printer drivers packages for... Drivers and Utilities CD and open the Readme file. By default, printer drivers installs in a NetWare environment, refer to remove symbolic links created during installation: //usr/local/dell/DELLPrtDrv.unlink Removing remaining directories Package removal utilities usually do not remove ...
...all the packages, check the directory where you want to remove on the command line. Queue-Based Printing For information about installing a network printer in the following location: /usr/local/dell/unix_prt_drivers. Depending on your operating system, you mark the printer drivers packages for... Drivers and Utilities CD and open the Readme file. By default, printer drivers installs in a NetWare environment, refer to remove symbolic links created during installation: //usr/local/dell/DELLPrtDrv.unlink Removing remaining directories Package removal utilities usually do not remove ...
User's Guide
Page 126
...Monitor the toner level for more information. See Dell Printer Supplies Reorder Application for your operating system. The Printing Status window displays the status of the printer (Printer Ready, Printer Offline, and Error-Check Printer) and the name of printers. Dell Printer Supplies Reorder Application NOTE: This application is not.... The Order Supplies window appears. 2. Click Start®Programs or All Programs®Dell Printers®Dell Laser Printer 5210n / 5310n®Printer Supplies Reorder Application. Set IP Address Utility l Select Help to read the online Help.
...Monitor the toner level for more information. See Dell Printer Supplies Reorder Application for your operating system. The Printing Status window displays the status of the printer (Printer Ready, Printer Offline, and Error-Check Printer) and the name of printers. Dell Printer Supplies Reorder Application NOTE: This application is not.... The Order Supplies window appears. 2. Click Start®Programs or All Programs®Dell Printers®Dell Laser Printer 5210n / 5310n®Printer Supplies Reorder Application. Set IP Address Utility l Select Help to read the online Help.
User's Guide
Page 130
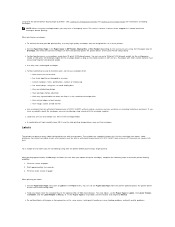
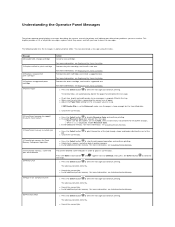
...Attendance messages alert you to temporarily recover from the output bin, and then press the Select button . Checking an Unresponsive Printer If the printer is not responding, first make sure: l The power cord is not plugged into the outlet is...current state of these possibilities, turn the printer back on . Troubleshooting Understanding Printer Messages Checking an Unresponsive Printer Solving Printing Problems Solving Option Problems Solving Paper Feed Problems Solving Print Quality Problems Understanding Printer Messages The printer displays three types of paper from the ...
...Attendance messages alert you to temporarily recover from the output bin, and then press the Select button . Checking an Unresponsive Printer If the printer is not responding, first make sure: l The power cord is not plugged into the outlet is...current state of these possibilities, turn the printer back on . Troubleshooting Understanding Printer Messages Checking an Unresponsive Printer Solving Printing Problems Solving Option Problems Solving Paper Feed Problems Solving Print Quality Problems Understanding Printer Messages The printer displays three types of paper from the ...
User's Guide
Page 131
... Server 2003, Windows 2000, or Windows 98/Me and using a Windows XP, Windows Server 2003, Windows 2000, or Windows 98/Me compatible printer driver. l The printer is secure. Tray linking does not work. l Make sure the menu values for both trays. NOTE: Setting Collation to On. Reduce the complexity... Print the job. (Only part of the job may print.) ¡ Delete the job. ¡ Free up properly or is set for network printing. Check the Print as image box. 4. Set Page Protect to On. Delete the job. Incorrect characters print. l Make sure the paper guides in the tray. ...
... Server 2003, Windows 2000, or Windows 98/Me and using a Windows XP, Windows Server 2003, Windows 2000, or Windows 98/Me compatible printer driver. l The printer is secure. Tray linking does not work. l Make sure the menu values for both trays. NOTE: Setting Collation to On. Reduce the complexity... Print the job. (Only part of the job may print.) ¡ Delete the job. ¡ Free up properly or is set for network printing. Check the Print as image box. 4. Set Page Protect to On. Delete the job. Incorrect characters print. l Make sure the paper guides in the tray. ...


