
User's Guide
Page 3
...Paper capacities...50 Software overview 51 Status Monitor Center...51 Driver Profiler...51 Dell Printer Alert Utility...51 Installing the optional XPS driver...52 Dell Toner Management System...53 Printing Status Window...53 Dell Printer Supplies Reorder Application ...53 Printing 54 Printing a document...54 Printing on specialty... on using labels...57 Tips on using card stock...58 Printing confidential and other held jobs...58 Holding jobs in the printer ...58 Printing confidential and other held jobs...59 Printing information pages...60 Printing a font sample list...60 Printing a directory...
...Paper capacities...50 Software overview 51 Status Monitor Center...51 Driver Profiler...51 Dell Printer Alert Utility...51 Installing the optional XPS driver...52 Dell Toner Management System...53 Printing Status Window...53 Dell Printer Supplies Reorder Application ...53 Printing 54 Printing a document...54 Printing on specialty... on using labels...57 Tips on using card stock...58 Printing confidential and other held jobs...58 Holding jobs in the printer ...58 Printing confidential and other held jobs...59 Printing information pages...60 Printing a font sample list...60 Printing a directory...
User's Guide
Page 5
... Checking the status of supplies from a network computer 126 Ordering supplies...126 Printer attached to a network ...126 Printer attached locally to a computer ...127 Replacing supplies...127 Replacing the toner cartridge ...127 Replacing the photoconductor kit ...129 Moving the printer...132 Moving the printer to another location...132 Administrative support 133 Using the Embedded Web Server...
... Checking the status of supplies from a network computer 126 Ordering supplies...126 Printer attached to a network ...126 Printer attached locally to a computer ...127 Replacing supplies...127 Replacing the toner cartridge ...127 Replacing the photoconductor kit ...129 Moving the printer...132 Moving the printer to another location...132 Administrative support 133 Using the Embedded Web Server...
User's Guide
Page 6
Restoring the factory default settings...136 Troubleshooting 137 Solving basic printer problems...137 Printer control panel display is blank or displays only diamonds 137 Solving printing problems...137 Jobs do not print...137 Confidential and other held jobs do ... images...145 Incorrect margins...146 Paper curl...146 Print is too dark...147 Print is too light ...148 Skewed print...149 Toner fog or background shading appears on the page 149 Toner rubs off...149 Toner specks...150 Transparency print quality is poor...150 Streaked horizontal lines...150 Streaked vertical lines ...151 Contents 6
Restoring the factory default settings...136 Troubleshooting 137 Solving basic printer problems...137 Printer control panel display is blank or displays only diamonds 137 Solving printing problems...137 Jobs do not print...137 Confidential and other held jobs do ... images...145 Incorrect margins...146 Paper curl...146 Print is too dark...147 Print is too light ...148 Skewed print...149 Toner fog or background shading appears on the page 149 Toner rubs off...149 Toner specks...150 Transparency print quality is poor...150 Streaked horizontal lines...150 Streaked vertical lines ...151 Contents 6

User's Guide
Page 45
... Paper smoothness directly affects print quality. Condition paper before buying large quantities. Thick paper may also require a longer conditioning period. Weight The printer trays can cause paper feeding or print quality issues. Paper lighter than 182 x 257 mm (7.2 x 10.1 in its original wrapper in...specialty media. A number of items must be stiff enough to 163 g/m2 (43 lb bond) grain long. If paper is too rough, toner cannot fuse to moisture changes that you are paper, card stock, envelopes, paper labels, and transparencies. Leave paper in .), we recommend 90...
... Paper smoothness directly affects print quality. Condition paper before buying large quantities. Thick paper may also require a longer conditioning period. Weight The printer trays can cause paper feeding or print quality issues. Paper lighter than 182 x 257 mm (7.2 x 10.1 in its original wrapper in...specialty media. A number of items must be stiff enough to 163 g/m2 (43 lb bond) grain long. If paper is too rough, toner cannot fuse to moisture changes that you are paper, card stock, envelopes, paper labels, and transparencies. Leave paper in .), we recommend 90...
User's Guide
Page 47
Before using these requirements; Use inks that are not affected by the resin in toner. When in xerographic copiers. Using recycled paper and other office papers • Low moisture content (4-5%) • Suitable smoothness (100-200 Sheffield ... much rougher papers (such as letterhead must be able to withstand temperatures up to -sheet coefficient of friction (0.4-0.6) • Sufficient bending resistance in laser printers, despite surface texture. Preprinted papers such as premium cotton papers, 200-300 Sheffield units) have been engineered to 230°C (446°F) without...
Before using these requirements; Use inks that are not affected by the resin in toner. When in xerographic copiers. Using recycled paper and other office papers • Low moisture content (4-5%) • Suitable smoothness (100-200 Sheffield ... much rougher papers (such as letterhead must be able to withstand temperatures up to -sheet coefficient of friction (0.4-0.6) • Sufficient bending resistance in laser printers, despite surface texture. Preprinted papers such as premium cotton papers, 200-300 Sheffield units) have been engineered to 230°C (446°F) without...
User's Guide
Page 53
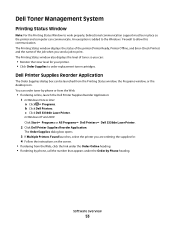
... that appears under the Order by Phone heading. The Printing Status window displays the status of the printer (Printer Ready, Printer Offline, and Error-Check Printer) and the name of toner so you send a job to print. c Click Dell 3330dn Laser Printer. Dell Toner Management System Printing Status Window Note: For the Printing Status Window to work properly, bidirectional communication support...
... that appears under the Order by Phone heading. The Printing Status window displays the status of the printer (Printer Ready, Printer Offline, and Error-Check Printer) and the name of toner so you send a job to print. c Click Dell 3330dn Laser Printer. Dell Toner Management System Printing Status Window Note: For the Printing Status Window to work properly, bidirectional communication support...
User's Guide
Page 64
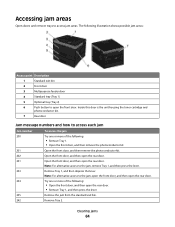
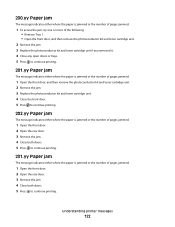
... the front door, and then remove the photoconductor kit. Remove the jam from the standard exit bin. Inside this door is the unit housing the toner cartridge and photoconductor kit. 7 Rear door Jam message numbers and how to access each jam Jam number 200 201 202 231 233 234 235 242...
... the front door, and then remove the photoconductor kit. Remove the jam from the standard exit bin. Inside this door is the unit housing the toner cartridge and photoconductor kit. 7 Rear door Jam message numbers and how to access each jam Jam number 200 201 202 231 233 234 235 242...
User's Guide
Page 65
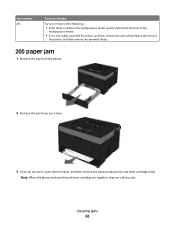
Note: When the photoconductor kit and toner cartridge are together, they are called a unit. Jam number 251 To access the jam Try one or more of the following: • If the sheet is visible in the multipurpose feeder, gently pull it from the front of the printer, and then remove any jammed sheets.... 200 paper jam 1 Remove the tray from the printer. 2 Remove the jam if you see it here. 3 If you do not see it is not visible, open the front door, and then remove the photoconductor kit and toner cartridge (unit). Clearing jams 65 Lift the flap at the front...
Note: When the photoconductor kit and toner cartridge are together, they are called a unit. Jam number 251 To access the jam Try one or more of the following: • If the sheet is visible in the multipurpose feeder, gently pull it from the front of the printer, and then remove any jammed sheets.... 200 paper jam 1 Remove the tray from the printer. 2 Remove the jam if you see it here. 3 If you do not see it is not visible, open the front door, and then remove the photoconductor kit and toner cartridge (unit). Clearing jams 65 Lift the flap at the front...

User's Guide
Page 104
... the contrast enhancement applied to enhance fonts Note: Off is the factory default setting. • Selecting a smaller number can conserve toner by lightening or darkening it. Adjusts the printed output either by lightening the output. Adjusts the contrast of printed objects Note: 0... Both Directions Brightness -6-6 Contrast 0-5 Description Prints a border around each page image when using the Embedded Web Server, type the network printer IP address in a browser window, and from Print Settings, click Quality Menu. Description Specifies the printed output resolution Note: 600 dpi...
... the contrast enhancement applied to enhance fonts Note: Off is the factory default setting. • Selecting a smaller number can conserve toner by lightening or darkening it. Adjusts the printed output either by lightening the output. Adjusts the contrast of printed objects Note: 0... Both Directions Brightness -6-6 Contrast 0-5 Description Prints a border around each page image when using the Embedded Web Server, type the network printer IP address in a browser window, and from Print Settings, click Quality Menu. Description Specifies the printed output resolution Note: 600 dpi...
User's Guide
Page 111
Wait for the message to clear. Cartridge Low The toner cartridge is low. List of the following : • Remove the toner cartridge, shake it, and then reinstall it. Busy ... Canceling Wait for the message to clear. Understanding printer messages 111 Calibrating Wait for the message to clear the message and continue printing. • Remove...
Wait for the message to clear. Cartridge Low The toner cartridge is low. List of the following : • Remove the toner cartridge, shake it, and then reinstall it. Busy ... Canceling Wait for the message to clear. Understanding printer messages 111 Calibrating Wait for the message to clear the message and continue printing. • Remove...

User's Guide
Page 112
Cartridge Life Exceeded The toner cartridge is exhausted. 1 Remove the used toner cartridge, and then install a new one. 2 Press to clear. Clearing job accounting statistics Wait for the message to clear. Understanding printer messages 112 Deleting held jobs Wait for the message to clear the message. Defragmenting... press the down arrow button to print on the display. Warning-Potential Damage: Do not turn the printer off while this message appears on the paper currently in the printer. • Cancel the current print job. • For more information, select Show Me. Close front...
Cartridge Life Exceeded The toner cartridge is exhausted. 1 Remove the used toner cartridge, and then install a new one. 2 Press to clear. Clearing job accounting statistics Wait for the message to clear. Understanding printer messages 112 Deleting held jobs Wait for the message to clear the message. Defragmenting... press the down arrow button to print on the display. Warning-Potential Damage: Do not turn the printer off while this message appears on the paper currently in the printer. • Cancel the current print job. • For more information, select Show Me. Close front...
User's Guide
Page 116
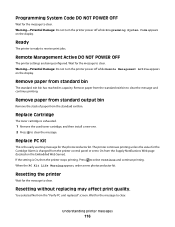
...order a new photoconductor kit. Remove paper from the standard exit bin to clear. The printer continues printing unless the value for the photoconductor kit. If the setting is exhausted. 1 Remove the used toner cartridge, and then install a new one. 2 Press to select Continue and continue ...printing. Warning-Potential Damage: Do not turn the printer power off while Programming System Code appears on the display. Resetting without...
...order a new photoconductor kit. Remove paper from the standard exit bin to clear. The printer continues printing unless the value for the photoconductor kit. If the setting is exhausted. 1 Remove the used toner cartridge, and then install a new one. 2 Press to select Continue and continue ...printing. Warning-Potential Damage: Do not turn the printer power off while Programming System Code appears on the display. Resetting without...
User's Guide
Page 118
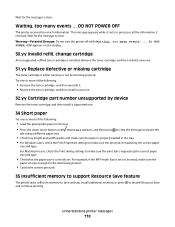
...more of the following : • Remove the toner cartridge, and then reinstall it received. For example, if the MP Feeder Size is correctly set to save settings. Understanding printer messages 118 Warning-Potential Damage: Do not turn the printer off while Waiting, too many events ... Wait for... message to disable Resource Save and continue printing. DO NOT POWER OFF The printer received too much information. This message appears while it sorts or processes all the information it . • Remove the toner cartridge, and then install a new one. 32.yy Cartridge part number unsupported...
...more of the following : • Remove the toner cartridge, and then reinstall it received. For example, if the MP Feeder Size is correctly set to save settings. Understanding printer messages 118 Warning-Potential Damage: Do not turn the printer off while Waiting, too many events ... Wait for... message to disable Resource Save and continue printing. DO NOT POWER OFF The printer received too much information. This message appears while it sorts or processes all the information it . • Remove the toner cartridge, and then install a new one. 32.yy Cartridge part number unsupported...
User's Guide
Page 119
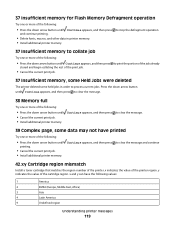
... one or more of the following values: 1 America 2 EMEA (Europe, Middle East, Africa) 3 Asia 4 Latin America 9 Undefined region Understanding printer messages 119 Continue appears, and then press to clear the message. 38 Memory full Try one or more of the following: • Press the ...and then press to clear the message and continue 42.xy Cartridge region mismatch Install a toner cartridge that matches the region number of the printer. y indicates the value of the printer region. to stop the defragment operation 37 Insufficient memory to clear the message. 39 ...
... one or more of the following values: 1 America 2 EMEA (Europe, Middle East, Africa) 3 Asia 4 Latin America 9 Undefined region Understanding printer messages 119 Continue appears, and then press to clear the message. 38 Memory full Try one or more of the following: • Press the ...and then press to clear the message and continue 42.xy Cartridge region mismatch Install a toner cartridge that matches the region number of the printer. y indicates the value of the printer region. to stop the defragment operation 37 Insufficient memory to clear the message. 39 ...
User's Guide
Page 121
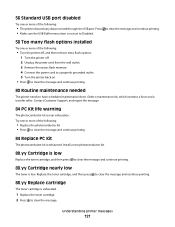
... flash memory. 4 Connect the power cord to a properly grounded outlet. 5 Turn the printer back on. • Press to clear the message and continue printing. 80 Routine maintenance needed The printer needs to have scheduled maintenance done. Contact Customer Support, and report the message. 84 PC... Kit life warning The photoconductor kit is exhausted. Replace the toner cartridge, and then press to clear the message and...
... flash memory. 4 Connect the power cord to a properly grounded outlet. 5 Turn the printer back on. • Press to clear the message and continue printing. 80 Routine maintenance needed The printer needs to have scheduled maintenance done. Contact Customer Support, and report the message. 84 PC... Kit life warning The photoconductor kit is exhausted. Replace the toner cartridge, and then press to clear the message and...
User's Guide
Page 122
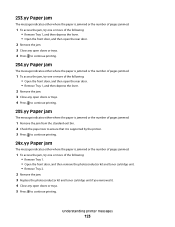
...Remove Tray 1. • Open the front door, and then remove the photoconductor kit and toner cartridge unit. 2 Remove the jam. 3 Replace the photoconductor kit and toner cartridge unit if you removed it. 4 Close any open doors or trays. 5 Press... pages jammed. 1 Open the front door, and then remove the photoconductor kit and toner cartridge unit. 2 Remove the jam. 3 Replace the photoconductor kit and toner cartridge unit. 4 Close the front door. 5 Press to continue printing. 202.yy...rear door. 3 Remove the jam. 4 Close both doors. 5 Press to continue printing. Understanding printer messages 122
...Remove Tray 1. • Open the front door, and then remove the photoconductor kit and toner cartridge unit. 2 Remove the jam. 3 Replace the photoconductor kit and toner cartridge unit if you removed it. 4 Close any open doors or trays. 5 Press... pages jammed. 1 Open the front door, and then remove the photoconductor kit and toner cartridge unit. 2 Remove the jam. 3 Replace the photoconductor kit and toner cartridge unit. 4 Close the front door. 5 Press to continue printing. 202.yy...rear door. 3 Remove the jam. 4 Close both doors. 5 Press to continue printing. Understanding printer messages 122
User's Guide
Page 123
...number of pages jammed. 1 Remove the jam from the standard exit bin. 2 Check the paper size to ensure that it is supported by the printer. 3 Press to continue printing. 24x.yy Paper jam The message indicates either where the paper is jammed or the number of pages jammed. 1... following: • Remove Tray 1. • Open the front door, and then remove the photoconductor kit and toner cartridge unit. • Remove Tray 2. 2 Remove the jam. 3 Replace the photoconductor kit and toner cartridge unit if you removed it. 4 Close any open doors or trays. 5 Press to continue printing. Understanding...
...number of pages jammed. 1 Remove the jam from the standard exit bin. 2 Check the paper size to ensure that it is supported by the printer. 3 Press to continue printing. 24x.yy Paper jam The message indicates either where the paper is jammed or the number of pages jammed. 1... following: • Remove Tray 1. • Open the front door, and then remove the photoconductor kit and toner cartridge unit. • Remove Tray 2. 2 Remove the jam. 3 Replace the photoconductor kit and toner cartridge unit if you removed it. 4 Close any open doors or trays. 5 Press to continue printing. Understanding...
User's Guide
Page 126
... IP address in your Web browser. Conserving supplies Conserving supplies using the printer software If you select to launch the Dell Configuration Web Tool. 2 Click www.dell.com/supplies. The values range from the printer control panel that will help you conserve toner and paper. Checking the status of supplies from a network computer Note: The...
... IP address in your Web browser. Conserving supplies Conserving supplies using the printer software If you select to launch the Dell Configuration Web Tool. 2 Click www.dell.com/supplies. The values range from the printer control panel that will help you conserve toner and paper. Checking the status of supplies from a network computer Note: The...
User's Guide
Page 127
... quality, replace the toner cartridge. Maintaining the printer 127 The Order Toner Cartridges window opens. 3 Choose your printer model from the list. 4 Enter your printer. 5 Click Visit Dell's cartridge ordering website....toner, and then reinsert it and continue printing. Note: You can check to see approximately how much toner is located inside the front cover of the printer and lowering the door. c Click Dell 3330dn Laser Printer. In Windows® XP and 2000, Click Start Programs or All Programs Dell Printers Dell 3330dn Laser Printer. 2 Click Dell Printer...
... quality, replace the toner cartridge. Maintaining the printer 127 The Order Toner Cartridges window opens. 3 Choose your printer model from the list. 4 Enter your printer. 5 Click Visit Dell's cartridge ordering website....toner, and then reinsert it and continue printing. Note: You can check to see approximately how much toner is located inside the front cover of the printer and lowering the door. c Click Dell 3330dn Laser Printer. In Windows® XP and 2000, Click Start Programs or All Programs Dell Printers Dell 3330dn Laser Printer. 2 Click Dell Printer...
User's Guide
Page 128
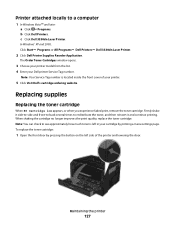
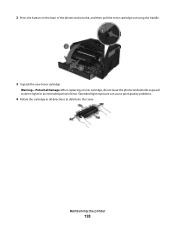
Maintaining the printer 128 Warning-Potential Damage: When replacing a toner cartridge, do not leave the photoconductor kit exposed to distribute the toner. Extended light exposure can cause print quality problems. 4 Rotate the cartridge in all directions to direct light for an extended period of the photoconductor kit, and then pull the toner cartridge out using the handle. 3 Unpack the new toner cartridge. 2 Press the button on the base of time.
Maintaining the printer 128 Warning-Potential Damage: When replacing a toner cartridge, do not leave the photoconductor kit exposed to distribute the toner. Extended light exposure can cause print quality problems. 4 Rotate the cartridge in all directions to direct light for an extended period of the photoconductor kit, and then pull the toner cartridge out using the handle. 3 Unpack the new toner cartridge. 2 Press the button on the base of time.


