Setup and Quick Reference Guide
Page 4
3 Specifications 23 4 Troubleshooting 35 Tools 35 Power Lights 35 Beep Codes 35 Error Messages 37 Dell Diagnostics 42 Solving Problems 44 Power Problems 45 Memory Problems 46 Lockups and Software Problems 47 Dell™ Technical Update Service 49 Dell Support Utility 49 5 Reinstalling Software 51 Drivers 51 Identifying Drivers 51 Reinstalling Drivers and Utilities 51 Restoring Your Operating System 54 Using Microsoft Windows System Restore . . . . . 54 Using Dell™ PC Restore and Dell Factory Image Restore 56 Using the Operating System Media 59 4 Contents
3 Specifications 23 4 Troubleshooting 35 Tools 35 Power Lights 35 Beep Codes 35 Error Messages 37 Dell Diagnostics 42 Solving Problems 44 Power Problems 45 Memory Problems 46 Lockups and Software Problems 47 Dell™ Technical Update Service 49 Dell Support Utility 49 5 Reinstalling Software 51 Drivers 51 Identifying Drivers 51 Reinstalling Drivers and Utilities 51 Restoring Your Operating System 54 Using Microsoft Windows System Restore . . . . . 54 Using Dell™ PC Restore and Dell Factory Image Restore 56 Using the Operating System Media 59 4 Contents
Setup and Quick Reference Guide
Page 10
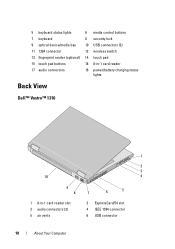
5 keyboard status lights 6 media control buttons 7 keyboard 8 security lock 9 optical device/media bay 10 USB connectors (2) 11 1394 connector 12 wireless switch 13 fingerprint reader (optional) 14 touch pad 15 touch pad buttons 16 8-in-1 card reader 17 audio connectors 18 power/battery charging status lights Back View Dell™ Vostro™ 1310 1 2 3 10 4 9 8 7 6 5 1 8-in-1 card reader slot 3 audio connectors (2) 5 air vents 2 ExpressCard/54 slot 4 IEEE 1394 connector 6 USB connector 10 About Your Computer
5 keyboard status lights 6 media control buttons 7 keyboard 8 security lock 9 optical device/media bay 10 USB connectors (2) 11 1394 connector 12 wireless switch 13 fingerprint reader (optional) 14 touch pad 15 touch pad buttons 16 8-in-1 card reader 17 audio connectors 18 power/battery charging status lights Back View Dell™ Vostro™ 1310 1 2 3 10 4 9 8 7 6 5 1 8-in-1 card reader slot 3 audio connectors (2) 5 air vents 2 ExpressCard/54 slot 4 IEEE 1394 connector 6 USB connector 10 About Your Computer
Setup and Quick Reference Guide
Page 18
... and close any open files, and exit any open programs. 2 Click Start→ Internet Explorer→ Connect to the Internet, see the Dell Technology Guide. If you selected Set up an Internet connection with a desktop shortcut provided by your ISP but you did not receive a setup CD, click Set up my connection manually. • If you do not have a service outage. Otherwise, follow the instructions on your...
... and close any open files, and exit any open programs. 2 Click Start→ Internet Explorer→ Connect to the Internet, see the Dell Technology Guide. If you selected Set up an Internet connection with a desktop shortcut provided by your ISP but you did not receive a setup CD, click Set up my connection manually. • If you do not have a service outage. Otherwise, follow the instructions on your...
Setup and Quick Reference Guide
Page 19
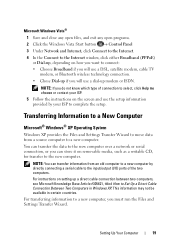
... Windows XP. For transferring information to a new computer, you will use a DSL, satellite modem, cable TV modem, or Bluetooth wireless technology connection. • Chose Dial-up if you must run the Files and Settings Transfer Wizard. Microsoft Windows Vista® 1 Save and close any open files, and exit any open programs. 2 Click the Windows Vista Start button → Control Panel 3 Under Network and Internet, click Connect to the Internet. 4 In the Connect to the Internet window...
... Windows XP. For transferring information to a new computer, you will use a DSL, satellite modem, cable TV modem, or Bluetooth wireless technology connection. • Chose Dial-up if you must run the Files and Settings Transfer Wizard. Microsoft Windows Vista® 1 Save and close any open files, and exit any open programs. 2 Click the Windows Vista Start button → Control Panel 3 Under Network and Internet, click Connect to the Internet. 4 In the Connect to the Internet window...
Setup and Quick Reference Guide
Page 23
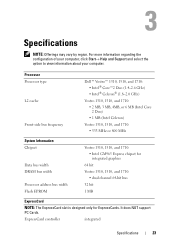
ExpressCard controller integrated Specifications 23 Processor Processor type L2 cache Front-side bus frequency Dell™ Vostro™ 1310, 1510, and 1710: • Intel® Core™2 Duo (1.4-2.6 GHz) • Intel® Celeron® (1.8-2.0 GHz) Vostro 1310, 1510, and 1710: • 2 MB, 3 MB, 4MB, or 6 MB (Intel Core 2 Duo) • 1 MB (Intel Celeron) Vostro 1310, 1510, and 1710: • 533 MHz or 800 MHz System Information Chipset...
ExpressCard controller integrated Specifications 23 Processor Processor type L2 cache Front-side bus frequency Dell™ Vostro™ 1310, 1510, and 1710: • Intel® Core™2 Duo (1.4-2.6 GHz) • Intel® Celeron® (1.8-2.0 GHz) Vostro 1310, 1510, and 1710: • 2 MB, 3 MB, 4MB, or 6 MB (Intel Core 2 Duo) • 1 MB (Intel Celeron) Vostro 1310, 1510, and 1710: • 533 MHz or 800 MHz System Information Chipset...
Setup and Quick Reference Guide
Page 35
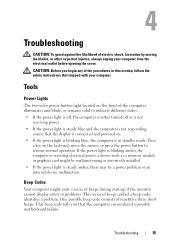
... short beeps. If the power light is blinking amber, the computer is receiving electrical power, a device such as a memory module or graphics card might emit a series of beeps during start-up if the monitor cannot display errors or problems. This series of beeps, called a beep code, identifies a problem. One possible beep code consists of the computer illuminates and blinks or remains solid to resume normal operation. Troubleshooting CAUTION: To guard against...
... short beeps. If the power light is blinking amber, the computer is receiving electrical power, a device such as a memory module or graphics card might emit a series of beeps during start-up if the monitor cannot display errors or problems. This series of beeps, called a beep code, identifies a problem. One possible beep code consists of the computer illuminates and blinks or remains solid to resume normal operation. Troubleshooting CAUTION: To guard against...
Setup and Quick Reference Guide
Page 37
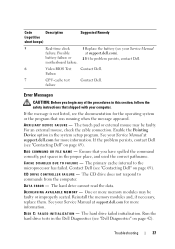
... Service Manual at support.dell.com). failure Error Messages CAUTION: Before you have spelled the command correctly, put spaces in the system setup program. If the message is not listed, see "Contacting Dell" on page 69). Enable the Pointing Device option in the proper place, and used the correct pathname. BA D C O M M A N D O R FILE N A M E - DI S K C : F A I L U R E - motherboard failure. 6 Video BIOS Test Contact Dell. Failure 7 CPU-cache test Contact Dell. The touch pad or external mouse...
... Service Manual at support.dell.com). failure Error Messages CAUTION: Before you have spelled the command correctly, put spaces in the system setup program. If the message is not listed, see "Contacting Dell" on page 69). Enable the Pointing Device option in the proper place, and used the correct pathname. BA D C O M M A N D O R FILE N A M E - DI S K C : F A I L U R E - motherboard failure. 6 Video BIOS Test Contact Dell. Failure 7 CPU-cache test Contact Dell. The touch pad or external mouse...
Setup and Quick Reference Guide
Page 38
...HA R D -DISK DRIVE FAILURE - Reinstall the memory modules and, if necessary, replace them. The hard drive does not respond to carry out the command. ERROR READING PCMCIA CARD - T H E F I L E B E I N G C O P I E D I S T O O L A R G E F O R T H E D E S T I N A T I O N D R I Z E H A S C H A N G E D - E X T E N D E D M E M O R Y S I V E - Install a hard drive in the computer. H A R D - See your Service Manual at support.dell.com), and boot the computer from a CD. 38 Troubleshooting The amount of paper. Shut down the computer, remove the hard drive (see "Dell Diagnostics...
...HA R D -DISK DRIVE FAILURE - Reinstall the memory modules and, if necessary, replace them. The hard drive does not respond to carry out the command. ERROR READING PCMCIA CARD - T H E F I L E B E I N G C O P I E D I S T O O L A R G E F O R T H E D E S T I N A T I O N D R I Z E H A S C H A N G E D - E X T E N D E D M E M O R Y S I V E - Install a hard drive in the computer. H A R D - See your Service Manual at support.dell.com), and boot the computer from a CD. 38 Troubleshooting The amount of paper. Shut down the computer, remove the hard drive (see "Dell Diagnostics...
Setup and Quick Reference Guide
Page 39
... your Service Manual at support.dell.com for more information. Shut down the computer, remove the hard drive (see "Dell Diagnostics" on page 42). Run the Hard Disk Drive tests in the Dell Diagnostics (see "Dell Diagnostics" on the file, so the file cannot be defective. The message is installed. K E Y B O A R D C L O C K L I N E F A I L U R E - For external keyboards, check the cable connection. K E Y B O A R D C O N T R O L L E R F A I L U R E - Restart the computer, and avoid touching the keyboard or the mouse during the boot routine...
... your Service Manual at support.dell.com for more information. Shut down the computer, remove the hard drive (see "Dell Diagnostics" on page 42). Run the Hard Disk Drive tests in the Dell Diagnostics (see "Dell Diagnostics" on the file, so the file cannot be defective. The message is installed. K E Y B O A R D C L O C K L I N E F A I L U R E - For external keyboards, check the cable connection. K E Y B O A R D C O N T R O L L E R F A I L U R E - Restart the computer, and avoid touching the keyboard or the mouse during the boot routine...
Setup and Quick Reference Guide
Page 40
... your Service Manual at support.dell.com for more information. Reinstall the memory modules and, if necessary, replace them . The computer cannot find the hard drive. N O B O O T S E C T O R O N H A R D D R I L A B L E - See your Service Manual at support.dell.com for more information. See your Service Manual at support.dell.com for more information. See your boot device, ensure that you are attempting to run is conflicting with the operating system, another program, or a utility. N O B O O T D E V I C E A V A I V E - The operating system...
... your Service Manual at support.dell.com for more information. Reinstall the memory modules and, if necessary, replace them . The computer cannot find the hard drive. N O B O O T S E C T O R O N H A R D D R I L A B L E - See your Service Manual at support.dell.com for more information. See your Service Manual at support.dell.com for more information. See your boot device, ensure that you are attempting to run is conflicting with the operating system, another program, or a utility. N O B O O T D E V I C E A V A I V E - The operating system...

Setup and Quick Reference Guide
Page 42
...- Replace the battery, or connect the computer to charge the battery. OF - D A Y N O T S E T - Run the System Set tests in Lockups and Software Problems (see your computer. OF -D A Y CLOCK STOPPED - O F - TI M E R C H I P C O U N T E R 2 F A I C A L L Y L O W - Connect your Service Manual at support.dell.com). WA R N I N G : B A T T E R Y I S C R I T I L E D - The keyboard controller may be malfunctioning, or a memory module may be loose. X : \ I S N O T A C C E S S I B L E . System configuration settings are corrupted. If the message reappears, contact Dell...
...- Replace the battery, or connect the computer to charge the battery. OF - D A Y N O T S E T - Run the System Set tests in Lockups and Software Problems (see your computer. OF -D A Y CLOCK STOPPED - O F - TI M E R C H I P C O U N T E R 2 F A I C A L L Y L O W - Connect your Service Manual at support.dell.com). WA R N I N G : B A T T E R Y I S C R I T I L E D - The keyboard controller may be malfunctioning, or a memory module may be loose. X : \ I S N O T A C C E S S I B L E . System configuration settings are corrupted. If the message reappears, contact Dell...
Setup and Quick Reference Guide
Page 43
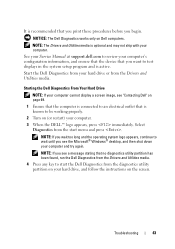
... start menu and press . See your Service Manual at support.dell.com to review your computer's configuration information, and ensure that the device that you want to test displays in the system setup program and is known to be working properly. 2 Turn on page 69. 1 Ensure that you print these procedures before you see a message stating that is active. Troubleshooting 43 Start the Dell Diagnostics from your hard drive...
... start menu and press . See your Service Manual at support.dell.com to review your computer's configuration information, and ensure that the device that you want to test displays in the system setup program and is known to be working properly. 2 Turn on page 69. 1 Ensure that you print these procedures before you see a message stating that is active. Troubleshooting 43 Start the Dell Diagnostics from your hard drive...

Setup and Quick Reference Guide
Page 44
... wait too long and the operating system logo appears, continue to wait until you added or removed a part before the problem started, review the installation procedures and ensure that the part is correctly installed (see your Service Manual at support.dell.com). • If a device does not work, ensure that the device is appropriate for your computer. 7 When the Dell Diagnostics Main Menu appears, select the test that...
... wait too long and the operating system logo appears, continue to wait until you added or removed a part before the problem started, review the installation procedures and ensure that the part is correctly installed (see your Service Manual at support.dell.com). • If a device does not work, ensure that the device is appropriate for your computer. 7 When the Dell Diagnostics Main Menu appears, select the test that...
Setup and Quick Reference Guide
Page 45
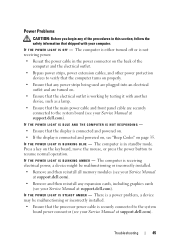
... panel cable are turned on. • Ensure that the electrical outlet is securely connected to the system board power connector (see your Service Manual at support.dell.com). The computer is connected and powered on, see "Beep Codes" on page 35. There is a power problem, a device may be malfunctioning or incorrectly installed. • Remove and then reinstall all memory modules (see your Service Manual at support.dell.com). • Remove and then reinstall any expansion cards...
... panel cable are turned on. • Ensure that the electrical outlet is securely connected to the system board power connector (see your Service Manual at support.dell.com). The computer is connected and powered on, see "Beep Codes" on page 35. There is a power problem, a device may be malfunctioning or incorrectly installed. • Remove and then reinstall all memory modules (see your Service Manual at support.dell.com). • Remove and then reinstall any expansion cards...
Setup and Quick Reference Guide
Page 46
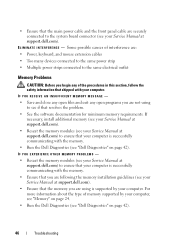
...; Power, keyboard, and mouse extension cables • Too many devices connected to the same power strip • Multiple power strips connected to the same electrical outlet Memory Problems CAUTION: Before you are not using is supported by your computer, see "Memory" on page 24. • Run the Dell Diagnostics (see "Dell Diagnostics" on page 42). IF YOU EXPERIENCE OTHER MEMORY PROBLEMS - • Reseat the memory modules (see your Service Manual at support.dell.com...
...; Power, keyboard, and mouse extension cables • Too many devices connected to the same power strip • Multiple power strips connected to the same electrical outlet Memory Problems CAUTION: Before you are not using is supported by your computer, see "Memory" on page 24. • Run the Dell Diagnostics (see "Dell Diagnostics" on page 42). IF YOU EXPERIENCE OTHER MEMORY PROBLEMS - • Reseat the memory modules (see your Service Manual at support.dell.com...
Setup and Quick Reference Guide
Page 51
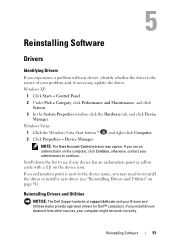
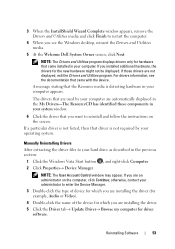
... on the device icon. If you install drivers obtained from other sources, your Drivers and Utilities media provide approved drivers for Dell™ computers. Scroll down the list to see "Reinstalling Drivers and Utilities" on page 51). Reinstalling Software 51 NOTE: The User Account Control window may need to continue. Reinstalling Drivers and Utilities NOTICE: The Dell Support website at support.dell.com and your computer might not work correctly. Windows Vista: 1 Click the Windows Vista Start button™ , and...
... on the device icon. If you install drivers obtained from other sources, your Drivers and Utilities media provide approved drivers for Dell™ computers. Scroll down the list to see "Reinstalling Drivers and Utilities" on page 51). Reinstalling Software 51 NOTE: The User Account Control window may need to continue. Reinstalling Drivers and Utilities NOTICE: The Dell Support website at support.dell.com and your computer might not work correctly. Windows Vista: 1 Click the Windows Vista Start button™ , and...
Setup and Quick Reference Guide
Page 52
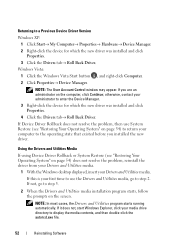
Windows Vista: 1 Click the Windows Vista Start button , and right-click Computer. 2 Click Properties→ Device Manager. Using the Drivers and Utilities Media If using Device Driver Rollback or System Restore (see "Restoring Your Operating System" on page 54) to return your first time to use the Drivers and Utilities media, go to step 5. 2 When the Drivers and Utilities media installation program starts, follow the prompts on the computer, click Continue; NOTE: The User Account Control window may appear. If it...
Windows Vista: 1 Click the Windows Vista Start button , and right-click Computer. 2 Click Properties→ Device Manager. Using the Drivers and Utilities Media If using Device Driver Rollback or System Restore (see "Restoring Your Operating System" on page 54) to return your first time to use the Drivers and Utilities media, go to step 5. 2 When the Drivers and Utilities media installation program starts, follow the prompts on the computer, click Continue; NOTE: The User Account Control window may appear. If it...
Setup and Quick Reference Guide
Page 53
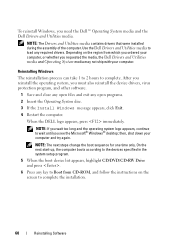
... by your computer are installing the driver. 5 Click the Driver tab→ Update Driver→ Browse my computer for hardware that came with the device. If a particular driver is not listed, then that driver is detecting hardware in the previous section: 1 Click the Windows Vista Start button , and right-click Computer. 2 Click Properties→ Device Manager. Manually Reinstalling Drivers After extracting the driver files to your hard drive as described in your...
... by your computer are installing the driver. 5 Click the Driver tab→ Update Driver→ Browse my computer for hardware that came with the device. If a particular driver is not listed, then that driver is detecting hardware in the previous section: 1 Click the Windows Vista Start button , and right-click Computer. 2 Click Properties→ Device Manager. Manually Reinstalling Drivers After extracting the driver files to your hard drive as described in your...
Setup and Quick Reference Guide
Page 58
... Restore partition on the hard drive. 6 Right-click Local Disk (C) in when you will never be able to use PC Restore to return your computer operating system to its original state. 1 Log on to the computer as a local administrator. Click Quit; Removing PC Restore: NOTICE: Removing Dell PC Restore from the hard drive permanently deletes the PC Restore utility from your computer, even to access the Vista Advanced Boot Options Window. 2 Select Repair...
... Restore partition on the hard drive. 6 Right-click Local Disk (C) in when you will never be able to use PC Restore to return your computer operating system to its original state. 1 Log on to the computer as a local administrator. Click Quit; Removing PC Restore: NOTICE: Removing Dell PC Restore from the hard drive permanently deletes the PC Restore utility from your computer, even to access the Vista Advanced Boot Options Window. 2 Select Repair...
Setup and Quick Reference Guide
Page 60
... Software On the next start-up, the computer boots according to the devices specified in the system setup program. 5 When the boot device list appears, highlight CD/DVD/CD-RW Drive and press . 6 Press any key to load any open files and exit any required drivers. Use the Dell Drivers and Utilities media to Boot from which you ordered your computer, or whether you requested the media, the Dell Drivers and Utilities media and Operating System media...
... Software On the next start-up, the computer boots according to the devices specified in the system setup program. 5 When the boot device list appears, highlight CD/DVD/CD-RW Drive and press . 6 Press any key to load any open files and exit any required drivers. Use the Dell Drivers and Utilities media to Boot from which you ordered your computer, or whether you requested the media, the Dell Drivers and Utilities media and Operating System media...


