Quick Reference Guide
Page 2
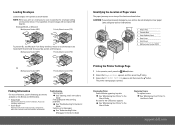
...the User's Guide An alert for printer hardware. Access to clear paper jams using any tools or instruments. 1 3 2 1 Output Tray 2 Transfer Belt 3 Fuser Release Lever 4 Rear Cover 5 Front Cover 6 Multipurpose Feeder (MPF) 4 6 5 Printing the Printer Settings Page 1 In the operator panel, press the (...Your Printer" in the User's Guide Replacing Toners To replace toners Æ See "Maintaining Your Printer" in the User's Guide support.dell.com Multipurpose Feeder (MPF) Priority Sheet Inserter (PSI) C5 Multipurpose Feeder (MPF) Priority Sheet Inserter (PSI) Finding Information For more ...
...the User's Guide An alert for printer hardware. Access to clear paper jams using any tools or instruments. 1 3 2 1 Output Tray 2 Transfer Belt 3 Fuser Release Lever 4 Rear Cover 5 Front Cover 6 Multipurpose Feeder (MPF) 4 6 5 Printing the Printer Settings Page 1 In the operator panel, press the (...Your Printer" in the User's Guide Replacing Toners To replace toners Æ See "Maintaining Your Printer" in the User's Guide support.dell.com Multipurpose Feeder (MPF) Priority Sheet Inserter (PSI) C5 Multipurpose Feeder (MPF) Priority Sheet Inserter (PSI) Finding Information For more ...
User's Guide
Page 11
TCP/IP Settings 200 Printer Maintenance 201 System Settings 201 Paper Density 203 Adjust BTR 203 Adjust Fuser 204 Color Registration Adjustment 205 Adjust Altitude 207 Reset Defaults 207 Non-Dell Toner 208 BTR Refresh Mode 208 TCP/IP Settings 209 Network Settings 209 Diagnosis 210 Chart Print 210 Machine Check 210 Environment...
TCP/IP Settings 200 Printer Maintenance 201 System Settings 201 Paper Density 203 Adjust BTR 203 Adjust Fuser 204 Color Registration Adjustment 205 Adjust Altitude 207 Reset Defaults 207 Non-Dell Toner 208 BTR Refresh Mode 208 TCP/IP Settings 209 Network Settings 209 Diagnosis 210 Chart Print 210 Machine Check 210 Environment...

User's Guide
Page 30
Rear View 12 11 10 9 3 8 4 7 5 6 1 Wall Jack Connector 3 USB Port 5 Security Slot 7 Transfer Roller 9 Paper Feed Roller 11 Fuser Release Lever 2 Rear Cover Release Handle 4 Ethernet Port 6 Rear Cover 8 Paper Chute 10 Transfer Belt Space Requirements Place the printer at a location such that there is adequate space for using the printer feeder and covers. 26 About the Printer
Rear View 12 11 10 9 3 8 4 7 5 6 1 Wall Jack Connector 3 USB Port 5 Security Slot 7 Transfer Roller 9 Paper Feed Roller 11 Fuser Release Lever 2 Rear Cover Release Handle 4 Ethernet Port 6 Rear Cover 8 Paper Chute 10 Transfer Belt Space Requirements Place the printer at a location such that there is adequate space for using the printer feeder and covers. 26 About the Printer

User's Guide
Page 130
... counter measures for curling/separating discharge of the paper. Adjust Fuser Plain Plain Thick Covers Label Coated Envelope Recycled Auto Registration Adjustment Adjust Altitude BTR Refresh Non-Dell Toner Web Link Select Reorder Customization URL Regular Premier Displays the temperature setting of the fuser for cover paper. Displays the altitude of the location...
... counter measures for curling/separating discharge of the paper. Adjust Fuser Plain Plain Thick Covers Label Coated Envelope Recycled Auto Registration Adjustment Adjust Altitude BTR Refresh Non-Dell Toner Web Link Select Reorder Customization URL Regular Premier Displays the temperature setting of the fuser for cover paper. Displays the altitude of the location...

User's Guide
Page 133
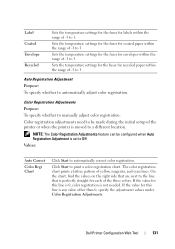
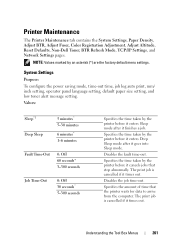
... the password. Paper Density Purpose: To specify the paper density. Dell Printer Configuration Web Tool 129 Printer Maintenance The Printer Maintenance tab contains the Paper Density, Adjust BTR, Adjust Fuser, Auto Registration Adjustment, Color Registration Adjustments, Clean Developer, BTR Refresh..., Maintenance Chart, Reset Defaults, Non-Dell Toner, Adjust Altitude, and Web Link Customization pages. If you change...
... the password. Paper Density Purpose: To specify the paper density. Dell Printer Configuration Web Tool 129 Printer Maintenance The Printer Maintenance tab contains the Paper Density, Adjust BTR, Adjust Fuser, Auto Registration Adjustment, Color Registration Adjustments, Clean Developer, BTR Refresh..., Maintenance Chart, Reset Defaults, Non-Dell Toner, Adjust Altitude, and Web Link Customization pages. If you change...

User's Guide
Page 134
...the temperature. NOTE: The print quality changes depending on all paper types. Sets the temperature settings for the fuser for cover paper within the range of -3 to 3. 130 Dell Printer Configuration Web Tool To increase, set negative values. To lower the temperature, set positive values. Sets... the temperature settings for the fuser for thick plain paper within the range of -3 to 3. Sets the reference ...
...the temperature. NOTE: The print quality changes depending on all paper types. Sets the temperature settings for the fuser for cover paper within the range of -3 to 3. 130 Dell Printer Configuration Web Tool To increase, set negative values. To lower the temperature, set positive values. Sets... the temperature settings for the fuser for thick plain paper within the range of -3 to 3. Sets the reference ...
User's Guide
Page 135
Sets the temperature settings for the fuser for coated paper within the range of -3 to manually adjust color registration. Color Registration Adjustments Purpose: To specify whether to 3. Values: Auto Correct Color Regi Chart Click Start to Off. Dell Printer Configuration Web Tool 131 NOTE: The Color Registration Adjustments feature can be made during...
Sets the temperature settings for the fuser for coated paper within the range of -3 to manually adjust color registration. Color Registration Adjustments Purpose: To specify whether to 3. Values: Auto Correct Color Regi Chart Click Start to Off. Dell Printer Configuration Web Tool 131 NOTE: The Color Registration Adjustments feature can be made during...

User's Guide
Page 161
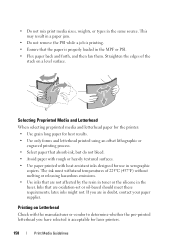
... do not meet DIN 19 309 • Multiple-part forms or documents • Print quality may deteriorate (blank spaces or blotches may appear in the fuser • Preprinted paper that require a registration (the precise print location on the page) greater than ±0.09 inches, such as optical character recognition (OCR) forms...
... do not meet DIN 19 309 • Multiple-part forms or documents • Print quality may deteriorate (blank spaces or blotches may appear in the fuser • Preprinted paper that require a registration (the precise print location on the page) greater than ±0.09 inches, such as optical character recognition (OCR) forms...
User's Guide
Page 162
..., contact your paper supplier. Straighten the edges of 225°C (437°F) without melting or releasing hazardous emissions. • Use inks that are in the fuser. If you have selected is acceptable for use in the MPF or PSI. • Flex paper back and forth, and then fan them. • Do...
..., contact your paper supplier. Straighten the edges of 225°C (437°F) without melting or releasing hazardous emissions. • Use inks that are in the fuser. If you have selected is acceptable for use in the MPF or PSI. • Flex paper back and forth, and then fan them. • Do...

User's Guide
Page 203
...Covers Coated Envelope Label Displays whether to show the alert message when the toner is low. Displays the voltage setting of the fuser for thick plain paper. Displays the temperature setting of the transfer roller for recycled paper. Displays the paper density of the ...transfer roller for coated paper. Displays the voltage setting of plain paper. Displays the temperature setting of the fuser for envelopes. Displays the temperature setting of the fuser for cover paper. Displays the temperature setting of the transfer roller for thick plain paper. Understanding the ...
...Covers Coated Envelope Label Displays whether to show the alert message when the toner is low. Displays the voltage setting of the fuser for thick plain paper. Displays the temperature setting of the transfer roller for recycled paper. Displays the paper density of the ...transfer roller for coated paper. Displays the voltage setting of plain paper. Displays the temperature setting of the fuser for envelopes. Displays the temperature setting of the fuser for cover paper. Displays the temperature setting of the transfer roller for thick plain paper. Understanding the ...
User's Guide
Page 205
... Sleep mode after it times out. Printer Maintenance The Printer Maintenance tab contains the System Settings, Paper Density, Adjust BTR, Adjust Fuser, Color Registration Adjustment, Adjust Altitude, Reset Defaults, Non-Dell Toner, BTR Refresh Mode, TCP/IP Settings, and Network Settings pages. Specifies the time taken by an asterisk (*) are the factory...
... Sleep mode after it times out. Printer Maintenance The Printer Maintenance tab contains the System Settings, Paper Density, Adjust BTR, Adjust Fuser, Color Registration Adjustment, Adjust Altitude, Reset Defaults, Non-Dell Toner, BTR Refresh Mode, TCP/IP Settings, and Network Settings pages. Specifies the time taken by an asterisk (*) are the factory...

User's Guide
Page 208
... Coated Envelope Label Apply New Settings Restart printer to apply new settings 0* -3 - +3 0* -3 - +3 0* -3 - +3 0* -3 - +3 0* -3 - +3 0* -3 - +3 0* -3 - +3 After you select for this item. Adjust Fuser Purpose: To specify the optimum temperature settings for printing for the fuser. When the toner does not fuse on the paper properly, try to apply the changes. To lower the temperature, set...
... Coated Envelope Label Apply New Settings Restart printer to apply new settings 0* -3 - +3 0* -3 - +3 0* -3 - +3 0* -3 - +3 0* -3 - +3 0* -3 - +3 0* -3 - +3 After you select for this item. Adjust Fuser Purpose: To specify the optimum temperature settings for printing for the fuser. When the toner does not fuse on the paper properly, try to apply the changes. To lower the temperature, set...

User's Guide
Page 232
... -3 - +3 0* -3 - +3 0* -3 - +3 0* -3 - +3 Auto Reg Adj Purpose: To specify whether to increase the temperature. NOTE: The print quality changes depending on the values you select for the fuser. Values: 228 Understanding the Printer Menus When the toner does not fuse on all paper types. When the printed paper has curled, try to automatically... adjust color registration. Adjust Fuser Purpose: To specify the optimum temperature settings for printing for this item. To lower the temperature, set positive ...
... -3 - +3 0* -3 - +3 0* -3 - +3 0* -3 - +3 Auto Reg Adj Purpose: To specify whether to increase the temperature. NOTE: The print quality changes depending on the values you select for the fuser. Values: 228 Understanding the Printer Menus When the toner does not fuse on all paper types. When the printed paper has curled, try to automatically... adjust color registration. Adjust Fuser Purpose: To specify the optimum temperature settings for printing for this item. To lower the temperature, set positive ...

User's Guide
Page 282
This may occur along the print media path. 1 3 2 4 6 5 1 Output Tray 2 Transfer Belt 3 Fuser Release Lever 4 Rear Cover 5 Front Cover 6 Multipurpose Feeder (MPF) 278 Clearing Jams Identifying the Location of Paper Jams CAUTION: Do not attempt to clear any jams using tools or instruments. The following illustration shows where paper jams may permanently damage the printer.
This may occur along the print media path. 1 3 2 4 6 5 1 Output Tray 2 Transfer Belt 3 Fuser Release Lever 4 Rear Cover 5 Front Cover 6 Multipurpose Feeder (MPF) 278 Clearing Jams Identifying the Location of Paper Jams CAUTION: Do not attempt to clear any jams using tools or instruments. The following illustration shows where paper jams may permanently damage the printer.

User's Guide
Page 284
... the power cable from the print media path. 1 Push the rear cover release handle and open the rear cover. 2 Lift up the fuser release levers. 280 Clearing Jams The fuser becomes extremely hot during use excessive force on the operator panel, you must clear all print media from the grounded outlet before...
... the power cable from the print media path. 1 Push the rear cover release handle and open the rear cover. 2 Lift up the fuser release levers. 280 Clearing Jams The fuser becomes extremely hot during use excessive force on the operator panel, you must clear all print media from the grounded outlet before...

User's Guide
Page 285
3 Remove any paper jammed from the back of the printer. 4 Lower the fuser release levers to their original position. 5 Close the rear cover. Clearing Jams 281
3 Remove any paper jammed from the back of the printer. 4 Lower the fuser release levers to their original position. 5 Close the rear cover. Clearing Jams 281

User's Guide
Page 286
... the power cable from the print media path. 1 Push the rear cover release handle and open the rear cover. 2 Lift up the fuser release levers. 282 Clearing Jams NOTE: To resolve the error displayed on the operator panel, you must clear all print media from the grounded... outlet before performing maintenance. CAUTION: To avoid burns, do not clear paper jams immediately after printing. The fuser becomes extremely hot during use. Clearing Paper Jams From the Output Tray CAUTION: Before performing any of the following procedures, read and follow the...
... the power cable from the print media path. 1 Push the rear cover release handle and open the rear cover. 2 Lift up the fuser release levers. 282 Clearing Jams NOTE: To resolve the error displayed on the operator panel, you must clear all print media from the grounded... outlet before performing maintenance. CAUTION: To avoid burns, do not clear paper jams immediately after printing. The fuser becomes extremely hot during use. Clearing Paper Jams From the Output Tray CAUTION: Before performing any of the following procedures, read and follow the...

User's Guide
Page 287
Clearing Jams 283 3 Remove any paper jammed out of the printer. If no paper is found in the paper path, then remove any paper jammed from the back of the output tray. 4 Lower the fuser release levers to their original position. 5 Close the rear cover.
Clearing Jams 283 3 Remove any paper jammed out of the printer. If no paper is found in the paper path, then remove any paper jammed from the back of the output tray. 4 Lower the fuser release levers to their original position. 5 Close the rear cover.

User's Guide
Page 296
... Paper Type setting. See "Supported Paper Sizes" on the Printer Maintenance tab. 2 Adjust the fixing temperature by turning up the value for the printer. Contact Dell. 292 Troubleshooting Try The task is changing the Paper Type setting in Printing Preferences of the printer driver, change the plain paper to exit Tool...
... Paper Type setting. See "Supported Paper Sizes" on the Printer Maintenance tab. 2 Adjust the fixing temperature by turning up the value for the printer. Contact Dell. 292 Troubleshooting Try The task is changing the Paper Type setting in Printing Preferences of the printer driver, change the plain paper to exit Tool...

User's Guide
Page 297
The task is complete. Go to action 2. The task is complete. Is the problem recovered? 3 Clean up the fuser unit. The entire output is 1 Load one sheet of paper on facing down, and then print a blank sheet of paper. Troubleshooting 293 The task is ...blank No Go to action 3. Is the problem recovered? If this trouble comes out, contact Dell. Is the problem recovered? 2 If you use non-Dell brand toner cartridges, install Dell brand toner cartridges. print a solid image all over paper. 2 Load the printed sheet with the side to be printed...
The task is complete. Go to action 2. The task is complete. Is the problem recovered? 3 Clean up the fuser unit. The entire output is 1 Load one sheet of paper on facing down, and then print a blank sheet of paper. Troubleshooting 293 The task is ...blank No Go to action 3. Is the problem recovered? If this trouble comes out, contact Dell. Is the problem recovered? 2 If you use non-Dell brand toner cartridges, install Dell brand toner cartridges. print a solid image all over paper. 2 Load the printed sheet with the side to be printed...

