Hardware Guide
Page 3
... Easy Access Buttons 1-5 Using the Windows Logo Key 1-6 Special Mouse Functions 1-6 Serial Number Location 1-7 2 Hardware Upgrades Installation Sequence 2-1 Drawer Installation Method 2-2 Smart Cover Lock 2-3 Using the Smart Cover FailSafe Key 2-3 Removing the Computer Cover 2-5 Installing Additional Memory 2-7 DIMMs 2-7 DDR-SDRAM DIMMs 2-7 Installing DDR-SDRAM DIMMs 2-8 Removing the Expansion Card Cage 2-11 Installing...
... Easy Access Buttons 1-5 Using the Windows Logo Key 1-6 Special Mouse Functions 1-6 Serial Number Location 1-7 2 Hardware Upgrades Installation Sequence 2-1 Drawer Installation Method 2-2 Smart Cover Lock 2-3 Using the Smart Cover FailSafe Key 2-3 Removing the Computer Cover 2-5 Installing Additional Memory 2-7 DIMMs 2-7 DDR-SDRAM DIMMs 2-7 Installing DDR-SDRAM DIMMs 2-8 Removing the Expansion Card Cage 2-11 Installing...
Hardware Guide
Page 19
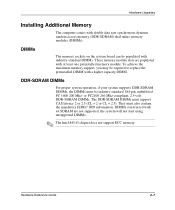
... The DDR-SDRAM DIMMs must be industry-standard 184-pin, unbuffered PC 1600 200 Mhz- Hardware Reference Guide 2-7 To achieve the maximum memory support, you may be populated with at least one preinstalled memory module. DIMMs constructed with x4 SDRAM are populated with industry-standard DIMMs...not supported; the system will not start using unsupported DIMMs. ✎ The Intel 845-G chipset does not support ECC memory. Hardware Upgrades Installing Additional Memory The computer comes with a higher capacity DIMM. DDR-SDRAM DIMMs For proper system operation, if your system supports DDR-...
... The DDR-SDRAM DIMMs must be industry-standard 184-pin, unbuffered PC 1600 200 Mhz- Hardware Reference Guide 2-7 To achieve the maximum memory support, you may be populated with at least one preinstalled memory module. DIMMs constructed with x4 SDRAM are populated with industry-standard DIMMs...not supported; the system will not start using unsupported DIMMs. ✎ The Intel 845-G chipset does not support ECC memory. Hardware Upgrades Installing Additional Memory The computer comes with a higher capacity DIMM. DDR-SDRAM DIMMs For proper system operation, if your system supports DDR-...
Hardware Guide
Page 20
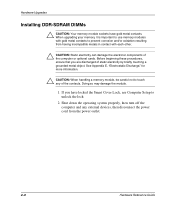
...the operating system properly, then turn off the computer and any of the contacts. Hardware Upgrades Installing DDR-SDRAM DIMMs Ä CAUTION: Your memory module sockets have locked the Smart Cover Lock, use memory modules with each other. Ä CAUTION: Static electricity can damage the electronic components of... the computer or optional cards. When upgrading your memory, it is important to use Computer Setup to prevent corrosion and/or oxidation resulting from the power outlet. 2-8 Hardware...
...the operating system properly, then turn off the computer and any of the contacts. Hardware Upgrades Installing DDR-SDRAM DIMMs Ä CAUTION: Your memory module sockets have locked the Smart Cover Lock, use memory modules with each other. Ä CAUTION: Static electricity can damage the electronic components of... the computer or optional cards. When upgrading your memory, it is important to use Computer Setup to prevent corrosion and/or oxidation resulting from the power outlet. 2-8 Hardware...
Hardware Guide
Page 21
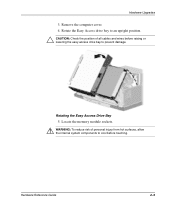
Hardware Upgrades 3. Remove the computer cover. 4. Rotating the Easy Access Drive Bay 5. Locate the memory module sockets. Å WARNING: To reduce risk of all cables and wires before touching. Hardware Reference Guide 2-9 Rotate the Easy Access drive bay to an upright position. Ä CAUTION: Check the position of personal injury from hot surfaces, allow the internal system components to cool before raising or lowering the easy access drive bay to prevent damage.
Hardware Upgrades 3. Remove the computer cover. 4. Rotating the Easy Access Drive Bay 5. Locate the memory module sockets. Å WARNING: To reduce risk of all cables and wires before touching. Hardware Reference Guide 2-9 Rotate the Easy Access drive bay to an upright position. Ä CAUTION: Check the position of personal injury from hot surfaces, allow the internal system components to cool before raising or lowering the easy access drive bay to prevent damage.
Hardware Guide
Page 22
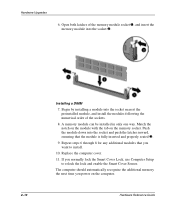
...notch on the module with the tab on the computer. 2-10 Hardware Reference Guide A memory module can be installed in only one way. Push the module down into the socket ...and push the latches inward, ensuring that you power on the memory socket. Replace the computer cover. 11. Begin by installing a module into the socket 2. ...that the module is fully inserted and properly seated 3. 9. Open both latches of the memory module socket 1, and insert the memory module into the socket nearest the preinstalled module, and install the modules following the numerical...
...notch on the module with the tab on the computer. 2-10 Hardware Reference Guide A memory module can be installed in only one way. Push the module down into the socket ...and push the latches inward, ensuring that you power on the memory socket. Replace the computer cover. 11. Begin by installing a module into the socket 2. ...that the module is fully inserted and properly seated 3. 9. Open both latches of the memory module socket 1, and insert the memory module into the socket nearest the preinstalled module, and install the modules following the numerical...
Hardware Guide
Page 62
... panel components 1-2 H hard drive installation guidelines B-1 MultiBay 2-24, 2-25 partitioning and formatting 2-25 upgrading 2-18 I installation sequence 2-1 installing additional drives 2-18 CD-ROM drive 2-22 expansion card 2-12 K keyboard Easy Access keyboard 1-4 identifying keys 1-4 Windows Logo Key 1-6 M memory 2-7 DDR-SDRAM 2-7 mouse 1-6 MultiBay hot-plugging or hot-swapping drives 2-25 inserting drives 2-26...
... panel components 1-2 H hard drive installation guidelines B-1 MultiBay 2-24, 2-25 partitioning and formatting 2-25 upgrading 2-18 I installation sequence 2-1 installing additional drives 2-18 CD-ROM drive 2-22 expansion card 2-12 K keyboard Easy Access keyboard 1-4 identifying keys 1-4 Windows Logo Key 1-6 M memory 2-7 DDR-SDRAM 2-7 mouse 1-6 MultiBay hot-plugging or hot-swapping drives 2-25 inserting drives 2-26...
Troubleshooting Guide
Page 39
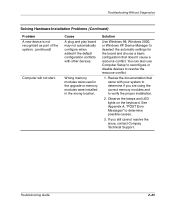
... automatically configure when added if the default configuration conflicts with your system to determine if you still cannot resolve the issue, contact Compaq Technical Support. Review the documentation that doesn't cause a resource conflict. See Appendix A, "POST Error Messages" to resolve the resource... part of the system. (continued) Computer will not start. Wrong memory modules were used in the upgrade or memory modules were installed in the wrong location. If you are using the correct memory modules and to deselect the automatic settings for the board and choose...
... automatically configure when added if the default configuration conflicts with your system to determine if you still cannot resolve the issue, contact Compaq Technical Support. Review the documentation that doesn't cause a resource conflict. See Appendix A, "POST Error Messages" to resolve the resource... part of the system. (continued) Computer will not start. Wrong memory modules were used in the upgrade or memory modules were installed in the wrong location. If you are using the correct memory modules and to deselect the automatic settings for the board and choose...


