

Compaq Armada 110 Series
Page 3
... Applications 1-7 After Software Setup 1-7 2 A Look at the Computer Top Components 2-1 Right Side Component 2-4 Left Side Components 2-5 Rear Panel Components 2-6 Bottom Components 2-8 Additional Standard Components 2-10 3 Keyboard and Pointing Devices Using the TouchPad 3-1 Using Hotkeys 3-2 Hotkeys 3-3 Using the Embedded Numeric Keypad 3-5 Enabling the Numeric Keypad 3-5 Disabling the Numeric Keypad 3-6 Converting the Numeric...
... Applications 1-7 After Software Setup 1-7 2 A Look at the Computer Top Components 2-1 Right Side Component 2-4 Left Side Components 2-5 Rear Panel Components 2-6 Bottom Components 2-8 Additional Standard Components 2-10 3 Keyboard and Pointing Devices Using the TouchPad 3-1 Using Hotkeys 3-2 Hotkeys 3-3 Using the Embedded Numeric Keypad 3-5 Enabling the Numeric Keypad 3-5 Disabling the Numeric Keypad 3-6 Converting the Numeric...
Compaq Armada 110 Series
Page 4
... Audio Features 6-1 Connecting to the Stereo Line-Out /Headphone Jack 6-2 Connecting to the Stereo Line-In Jack 6-3 Adjusting Volume 6-3 7 External Device Connections Connecting an External Keyboard or Pointing Device . . 7-1 Connecting an External Monitor 7-2 Connecting a Serial Printer 7-2 Connecting a Parallel Printer 7-3 Connecting Infrared Equipment 7-3 Infrared Connection Guidelines 7-4 Infrared Configuration Guidelines 7-5 Enabling the Infrared...
... Audio Features 6-1 Connecting to the Stereo Line-Out /Headphone Jack 6-2 Connecting to the Stereo Line-In Jack 6-3 Adjusting Volume 6-3 7 External Device Connections Connecting an External Keyboard or Pointing Device . . 7-1 Connecting an External Monitor 7-2 Connecting a Serial Printer 7-2 Connecting a Parallel Printer 7-3 Connecting Infrared Equipment 7-3 Infrared Connection Guidelines 7-4 Infrared Configuration Guidelines 7-5 Enabling the Infrared...

Compaq Armada 110 Series
Page 15
... the Windows Start menu. 2-2 Hardware Guide Four buttons that provide quick access to the computer; Moves the cursor, selects and activates. Refer to the Chapter 3, "Keyboard and Pointing Devices," for the item beneath the pointer. The right and left buttons function like buttons on the computer.To turn off the computer...
... the Windows Start menu. 2-2 Hardware Guide Four buttons that provide quick access to the computer; Moves the cursor, selects and activates. Refer to the Chapter 3, "Keyboard and Pointing Devices," for the item beneath the pointer. The right and left buttons function like buttons on the computer.To turn off the computer...

Compaq Armada 110 Series
Page 19
... a mouse at the Computer Rear Panel Components Rear Panel Components Component 1 Security slot 2 Stereo line-out/headphone jack 3 Stereo line-in jack 4 Keyboard/mouse connector 5 DC power jack Function Attaches an optional security cable to the computer. Connects any one of the following: s AC Adapter s Optional Automobile Power ...
... a mouse at the Computer Rear Panel Components Rear Panel Components Component 1 Security slot 2 Stereo line-out/headphone jack 3 Stereo line-in jack 4 Keyboard/mouse connector 5 DC power jack Function Attaches an optional security cable to the computer. Connects any one of the following: s AC Adapter s Optional Automobile Power ...

Compaq Armada 110 Series
Page 25
The TouchPad 1 includes left or right button to make a selection or complete an activity. Identifying TouchPad components Hardware Guide 3-1 It functions with any software that supports a Microsoft-compatible mouse. To operate the TouchPad, slide your finger across its surface in the direction you want to move the cursor and click the left 2 and right 3TouchPad buttons for function or application selection. 3 Keyboard and Pointing Devices Using the TouchPad The TouchPad performs the same basic operations as a mouse.
The TouchPad 1 includes left or right button to make a selection or complete an activity. Identifying TouchPad components Hardware Guide 3-1 It functions with any software that supports a Microsoft-compatible mouse. To operate the TouchPad, slide your finger across its surface in the direction you want to move the cursor and click the left 2 and right 3TouchPad buttons for function or application selection. 3 Keyboard and Pointing Devices Using the TouchPad The TouchPad performs the same basic operations as a mouse.

Compaq Armada 110 Series
Page 26
Keyboard and Pointing Devices Using Hotkeys Hotkey Quick Reference Function Switch display and image (switching between the display and external monitor) Standby Adjusts screen brightness Hotkey Fn+F3 Fn+F4 Fn+F7 (decrease) Fn+F8 (increase) Return to Original State Fn+F3 Press any key Fn+F8 (increase) Fn+F7 (decrease) 3-2 Hardware Guide
Keyboard and Pointing Devices Using Hotkeys Hotkey Quick Reference Function Switch display and image (switching between the display and external monitor) Standby Adjusts screen brightness Hotkey Fn+F3 Fn+F4 Fn+F7 (decrease) Fn+F8 (increase) Return to Original State Fn+F3 Press any key Fn+F8 (increase) Fn+F7 (decrease) 3-2 Hardware Guide

Compaq Armada 110 Series
Page 27
Keyboard and Pointing Devices Hotkeys Hotkeys are preset combinations of the Fn key 1 and another key that access or execute frequently used at anytime and from ...
Keyboard and Pointing Devices Hotkeys Hotkeys are preset combinations of the Fn key 1 and another key that access or execute frequently used at anytime and from ...
Compaq Armada 110 Series
Page 28
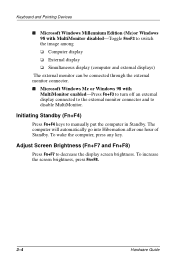
...+F7 to manually put the computer in Standby. To wake the computer, press any key. To increase the screen brightness, press Fn+F8. 3-4 Hardware Guide Keyboard and Pointing Devices s Microsoft Windows Millennium Edition (Me)or Windows 98 with MultiMonitor enabled-Press Fn+F3 to turn off an external display connected to...
...+F7 to manually put the computer in Standby. To wake the computer, press any key. To increase the screen brightness, press Fn+F8. 3-4 Hardware Guide Keyboard and Pointing Devices s Microsoft Windows Millennium Edition (Me)or Windows 98 with MultiMonitor enabled-Press Fn+F3 to turn off an external display connected to...

Compaq Armada 110 Series
Page 29
... character in the keypad are disabled when the keypad is connected to the computer. Identifying the embedded numeric keypad Hardware Guide 3-5 The standard keyboard functions of the keys in the upper right corner of each of the keys indicates the keypad function of 16 keys 1. Enabling the Numeric... Keypad To enable the keypad, press Fn+num lk 2. Keyboard and Pointing Devices Using the Embedded Numeric Keypad The embedded numeric keypad consists of a cluster of that key. The num lock light 3 turns on...
... character in the keypad are disabled when the keypad is connected to the computer. Identifying the embedded numeric keypad Hardware Guide 3-5 The standard keyboard functions of the keys in the upper right corner of each of the keys indicates the keypad function of 16 keys 1. Enabling the Numeric... Keypad To enable the keypad, press Fn+num lk 2. Keyboard and Pointing Devices Using the Embedded Numeric Keypad The embedded numeric keypad consists of a cluster of that key. The num lock light 3 turns on...

Compaq Armada 110 Series
Page 30
s Press and hold Fn to the online help file. Each of button assignments that you program the Easy Access buttons on the computer keyboard to access any Internet addresses or to open any software application or data file on programming the Easy Access buttons, refer to type in uppercase. ... Access Buttons software, preinstalled on the computer, lets you define and that are unique to type in lowercase. Select Start > Settings > Control Panel > Easy Access Keyboard icon. Converting the Numeric Keypad Keys to Standard Keys To use the Easy Access Buttons software to their standard...
s Press and hold Fn to the online help file. Each of button assignments that you program the Easy Access buttons on the computer keyboard to access any Internet addresses or to open any software application or data file on programming the Easy Access buttons, refer to type in uppercase. ... Access Buttons software, preinstalled on the computer, lets you define and that are unique to type in lowercase. Select Start > Settings > Control Panel > Easy Access Keyboard icon. Converting the Numeric Keypad Keys to Standard Keys To use the Easy Access Buttons software to their standard...

Compaq Armada 110 Series
Page 31
Keyboard and Pointing Devices Identifying the Easy Access buttons Hardware Guide 3-7
Keyboard and Pointing Devices Identifying the Easy Access buttons Hardware Guide 3-7

Compaq Armada 110 Series
Page 44
... with the operating system. Connecting an External Keyboard or Pointing Device The keyboard and external pointing devices need software device drivers to the single keyboard/mouse connector, purchase a Y-adapter. To connect both an external keyboard and PS/2 external mouse or external trackball ...between infrared equipped devices. This section provides procedures for connecting external devices to the keyboard/mouse connector on your computer. The adapter connects the single keyboard/mouse connector into two connectors. The necessary drivers are provided by the manufacturer ...
... with the operating system. Connecting an External Keyboard or Pointing Device The keyboard and external pointing devices need software device drivers to the single keyboard/mouse connector, purchase a Y-adapter. To connect both an external keyboard and PS/2 external mouse or external trackball ...between infrared equipped devices. This section provides procedures for connecting external devices to the keyboard/mouse connector on your computer. The adapter connects the single keyboard/mouse connector into two connectors. The necessary drivers are provided by the manufacturer ...

Compaq Armada 110 Series
Page 49
... external power. You will need to purchase the modem and network cables if they are used to connect such low-speed external devices as a USB keyboard, mouse, drive, printer, scanner, or hub to increase the number of USB devices and are not provided with the device. Hubs support varying numbers of...
... external power. You will need to purchase the modem and network cables if they are used to connect such low-speed external devices as a USB keyboard, mouse, drive, printer, scanner, or hub to increase the number of USB devices and are not provided with the device. Hubs support varying numbers of...
Compaq Armada 110 Series
Page 67
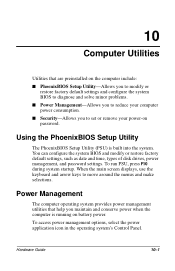
To run PSU, press F10 during system startup. When the main screen displays, use the keyboard and arrow keys to reduce your power-on battery power. To access power management options, select the power application icon in the operating system's Control ...
To run PSU, press F10 during system startup. When the main screen displays, use the keyboard and arrow keys to reduce your power-on battery power. To access power management options, select the power application icon in the operating system's Control ...

Compaq Armada 110 Series
Page 72
..., switching, with hotkey 3-2, 3-3 drives caring for 5-1 CD or DVD drive 5-2 removing/inserting media 5-1 DVD drive. Notebook Products Reference Library CD-ROM 2-11 QuickRestore kit 2-11 Certificate of Authenticity label 1-1, 2-9 changing drive startup sequence 5-4 charging... 4-1 COM port settings 9-3 component installation or removal 8-1 computer connecting 1-3 dimensions 9-2 opening 1-4 turning on 1-5 connecting computer 1-3 external keyboard/pointing device 7-1 external monitor 7-2 infrared equipment 7-3 modem 7-6 NIC 7-6 parallel printer 7-3 serial printer 7-2 USB (Universal Serial Bus) ...
..., switching, with hotkey 3-2, 3-3 drives caring for 5-1 CD or DVD drive 5-2 removing/inserting media 5-1 DVD drive. Notebook Products Reference Library CD-ROM 2-11 QuickRestore kit 2-11 Certificate of Authenticity label 1-1, 2-9 changing drive startup sequence 5-4 charging... 4-1 COM port settings 9-3 component installation or removal 8-1 computer connecting 1-3 dimensions 9-2 opening 1-4 turning on 1-5 connecting computer 1-3 external keyboard/pointing device 7-1 external monitor 7-2 infrared equipment 7-3 modem 7-6 NIC 7-6 parallel printer 7-3 serial printer 7-2 USB (Universal Serial Bus) ...
Compaq Armada 110 Series
Page 73
... connecting 7-3 infrared port component location 2-5 enabling 7-5 initial software setup (caution) 1-6 initiating Standby 3-4 input power 9-3 K keyboard connector 2-6 L left side components diskette drive 2-5 infrared port 2-5 PC Card eject button 2-5 PC Card slot 2-5 lights, top component 2-3 M media, removing/inserting 5-1 memory, amount of, in system 8-2 memory expansion ... only) 2-11 modem specifications 9-4 monitor connector, external 2-7 mouse connector 2-6 N NIC (network interface card) connecting 7-6 installing 8-6 Notebook Products Reference Library CD-ROM 2-11 Hardware Guide Index-3
... connecting 7-3 infrared port component location 2-5 enabling 7-5 initial software setup (caution) 1-6 initiating Standby 3-4 input power 9-3 K keyboard connector 2-6 L left side components diskette drive 2-5 infrared port 2-5 PC Card eject button 2-5 PC Card slot 2-5 lights, top component 2-3 M media, removing/inserting 5-1 memory, amount of, in system 8-2 memory expansion ... only) 2-11 modem specifications 9-4 monitor connector, external 2-7 mouse connector 2-6 N NIC (network interface card) connecting 7-6 installing 8-6 Notebook Products Reference Library CD-ROM 2-11 Hardware Guide Index-3

Compaq Armada 110 Series
Page 74
... light 2-3 numeric keypad, embedded 3-5 O operating environment 9-2 optical disc drive 2-4 P parallel connector 2-7 PC Card eject button 2-5 PC Card slot 2-5 PC Card software (caution) 8-9 PC Cards adding/using 8-9 configuring 8-9 damaging connectors (caution) 8-10, 8-11 inserting 8-10 removing 8-11 ...Q QuickRestore kit 2-11 R RAM, amount of, in system 8-2 rear panel components DC power jack 2-6 external monitor connector 2-7 headphone jack 2-6 keyboard/mouse connector 2-6 parallel connector 2-7 RJ-11 jack 2-7 RJ-45 jack 2-7 security slot 2-6 serial connector 2-7 stereo line-in jack 2-6 stereo ...
... light 2-3 numeric keypad, embedded 3-5 O operating environment 9-2 optical disc drive 2-4 P parallel connector 2-7 PC Card eject button 2-5 PC Card slot 2-5 PC Card software (caution) 8-9 PC Cards adding/using 8-9 configuring 8-9 damaging connectors (caution) 8-10, 8-11 inserting 8-10 removing 8-11 ...Q QuickRestore kit 2-11 R RAM, amount of, in system 8-2 rear panel components DC power jack 2-6 external monitor connector 2-7 headphone jack 2-6 keyboard/mouse connector 2-6 parallel connector 2-7 RJ-11 jack 2-7 RJ-45 jack 2-7 security slot 2-6 serial connector 2-7 stereo line-in jack 2-6 stereo ...

Compaq Armada 110 and Compaq Evo N110 Maintenance and Service Guide
Page 4
... from CD- or DVD-ROM Drive 2-17 2.15 No Audio, Part 1 2-18 2.16 No Audio, Part 2 2-19 2.17 Non-Functioning Device 2-20 2.18 Non-Functioning Keyboard 2-21 2.19 Non-Functioning Pointing Device 2-22 2.20 Network or Modem Connection 2-23 3 Illustrated Parts Catalog 3.1 Serial Number Location 3-1 3.2 Computer System Major Components 3-2 3.3 Plastics Kit...
... from CD- or DVD-ROM Drive 2-17 2.15 No Audio, Part 1 2-18 2.16 No Audio, Part 2 2-19 2.17 Non-Functioning Device 2-20 2.18 Non-Functioning Keyboard 2-21 2.19 Non-Functioning Pointing Device 2-22 2.20 Network or Modem Connection 2-23 3 Illustrated Parts Catalog 3.1 Serial Number Location 3-1 3.2 Computer System Major Components 3-2 3.3 Plastics Kit...
Compaq Armada 110 and Compaq Evo N110 Maintenance and Service Guide
Page 5
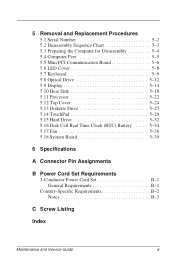
5 Removal and Replacement Procedures 5.1 Serial Number 5-2 5.2 Disassembly Sequence Chart 5-3 5.3 Preparing the Computer for Disassembly 5-4 5.4 Computer Feet 5-5 5.5 Mini PCI Communication Board 5-6 5.6 LED Cover 5-8 5.7 Keyboard 5-9 5.8 Optical Drive 5-12 5.9 Display 5-14 5.10 Heat Sink 5-18 5.11 Processor 5-22 5.12 Top Cover 5-24 5.13 Diskette Drive 5-27 5.14 TouchPad 5-29 5.15 Hard ...
5 Removal and Replacement Procedures 5.1 Serial Number 5-2 5.2 Disassembly Sequence Chart 5-3 5.3 Preparing the Computer for Disassembly 5-4 5.4 Computer Feet 5-5 5.5 Mini PCI Communication Board 5-6 5.6 LED Cover 5-8 5.7 Keyboard 5-9 5.8 Optical Drive 5-12 5.9 Display 5-14 5.10 Heat Sink 5-18 5.11 Processor 5-22 5.12 Top Cover 5-24 5.13 Diskette Drive 5-27 5.14 TouchPad 5-29 5.15 Hard ...

Compaq Armada 110 and Compaq Evo N110 Maintenance and Service Guide
Page 12
...with over 16.8 million colors ❏ 12.1-inch, SVGA, CTFT (800 × 600) display, with over 16.8 million colors I Full-size TouchPad keyboard I Mini PCI 56K V.90 modem or mini PCI V.90 modem plus 10/100 NIC combination card, varying by computer model I Connectors for both 32-...(NiMH) battery pack I Stereo speakers Maintenance and Service Guide 1-7 or 10-GB high-capacity hard drive, varying by computer model I One Type II PC Card slot with support for : ❏ stereo speaker/headphone ❏ microphone ❏ universal serial bus ❏ RJ-45 network (internal network models ...
...with over 16.8 million colors ❏ 12.1-inch, SVGA, CTFT (800 × 600) display, with over 16.8 million colors I Full-size TouchPad keyboard I Mini PCI 56K V.90 modem or mini PCI V.90 modem plus 10/100 NIC combination card, varying by computer model I Connectors for both 32-...(NiMH) battery pack I Stereo speakers Maintenance and Service Guide 1-7 or 10-GB high-capacity hard drive, varying by computer model I One Type II PC Card slot with support for : ❏ stereo speaker/headphone ❏ microphone ❏ universal serial bus ❏ RJ-45 network (internal network models ...


