
Owners Manual
Page 6
... and Files 154 Protecting Files 155 To protect a single file 155 To protect all files in memory 156 Using the FAVORITE Folder 156 To copy a file to the FAVORITE folder 156 To display a file in the FAVORITE folder 158 To delete a file ... Changing the USB Port Protocol 168 Configuring [ ] (REC) and [ ] (PLAY) Power On/Off Functions 169 Formatting Built-in Memory 170 171 USING A MEMORY CARD Using a Memory Card 172 To insert a memory card into the camera 172 To replace the memory card 173 Formatting a Memory Card 174 Copying Files 175 To copy all the files in built-in...
... and Files 154 Protecting Files 155 To protect a single file 155 To protect all files in memory 156 Using the FAVORITE Folder 156 To copy a file to the FAVORITE folder 156 To display a file in the FAVORITE folder 158 To delete a file ... Changing the USB Port Protocol 168 Configuring [ ] (REC) and [ ] (PLAY) Power On/Off Functions 169 Formatting Built-in Memory 170 171 USING A MEMORY CARD Using a Memory Card 172 To insert a memory card into the camera 172 To replace the memory card 173 Formatting a Memory Card 174 Copying Files 175 To copy all the files in built-in...
Owners Manual
Page 7
...Camera with a Windows Computer ......... 189 Using the Camera with a Macintosh Computer ....... 196 Using a Memory Card to Transfer Images to a Computer 200 Memory Data 201 DCF Protocol 201 Memory Folder Structure 202 Image Files Supported by the Camera 203 205 USING THE CAMERA WITH A COMPUTER Using the Camera...Playing a Movie 213 Viewing User Documentation (PDF Files) 214 User Registration 214 Exiting the Menu Application 214 Using the Camera with a Macintosh Computer ....... 215 Selecting the Software You Need 215 Computer System Requirements 216 Managing Images on a ...
...Camera with a Windows Computer ......... 189 Using the Camera with a Macintosh Computer ....... 196 Using a Memory Card to Transfer Images to a Computer 200 Memory Data 201 DCF Protocol 201 Memory Folder Structure 202 Image Files Supported by the Camera 203 205 USING THE CAMERA WITH A COMPUTER Using the Camera...Playing a Movie 213 Viewing User Documentation (PDF Files) 214 User Registration 214 Exiting the Menu Application 214 Using the Camera with a Macintosh Computer ....... 215 Selecting the Software You Need 215 Computer System Requirements 216 Managing Images on a ...
Owners Manual
Page 9
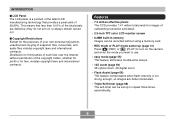
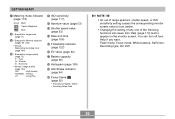
... of outstanding resolution and detail. • 2.5-inch TFT color LCD monitor screen • 8.3MB built-in memory Images can be recorded without using a memory card. • REC mode or PLAY mode power up to repeat three times, automatically. 9 Distribution to turn... on or always remain turned on the camera and enter the mode you want to use. • easy mode (page 55) This feature eliminates troublesome setups. • 12X zoom (page 59) 3X optical zoom, 4X digital zoom...
... of outstanding resolution and detail. • 2.5-inch TFT color LCD monitor screen • 8.3MB built-in memory Images can be recorded without using a memory card. • REC mode or PLAY mode power up to repeat three times, automatically. 9 Distribution to turn... on or always remain turned on the camera and enter the mode you want to use. • easy mode (page 55) This feature eliminates troublesome setups. • 12X zoom (page 59) 3X optical zoom, 4X digital zoom...
Owners Manual
Page 11
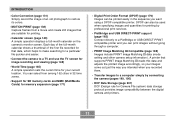
... can also be printed easily in 32 time zones. • Support for SD memory cards and MMC (MultiMedia Cards) for Camera File system) data storage protocol provides image compatibility between the digital camera and printers. 11 Each day of the full-month calendar shows a thumbnail of an...sequence you can be used when specifying images and quantities for printing by connecting the camera (pages 189, 196) • DCF Data Storage (page 201) DCF (Design rule for memory expansion (page 171) • Digital Print Order Format (DPOF) (page 179) Images can print images without going through...
... can also be printed easily in 32 time zones. • Support for SD memory cards and MMC (MultiMedia Cards) for Camera File system) data storage protocol provides image compatibility between the digital camera and printers. 11 Each day of the full-month calendar shows a thumbnail of an...sequence you can be used when specifying images and quantities for printing by connecting the camera (pages 189, 196) • DCF Data Storage (page 201) DCF (Design rule for memory expansion (page 171) • Digital Print Order Format (DPOF) (page 179) Images can print images without going through...
Owners Manual
Page 13
... by transferring them to rough treatment, immediately turn it off . When using the flash, the camera should ever become cracked due to dropping it or otherwise subjecting it to personal computer memory. • Never open the battery cover while an image is prohibited. Always keep backup copies ... while it can also corrupt other image data already stored in file memory. 13 This is too close to your dealer or nearest CASIO authorized service center. • Never use is being recorded. Next, remove the camera's battery and/or unplug the AC power cord from the flash can...
... by transferring them to rough treatment, immediately turn it off . When using the flash, the camera should ever become cracked due to dropping it or otherwise subjecting it to personal computer memory. • Never open the battery cover while an image is prohibited. Always keep backup copies ... while it can also corrupt other image data already stored in file memory. 13 This is too close to your dealer or nearest CASIO authorized service center. • Never use is being recorded. Next, remove the camera's battery and/or unplug the AC power cord from the flash can...
Owners Manual
Page 14
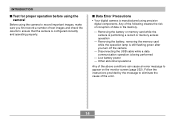
... still flashing green after you first record a number of data in file memory. - I Test for proper operation before using the camera! INTRODUCTION I Data Error Precautions • Your digital camera is manufactured using precision digital components. Before using the camera to ensure that the camera is configured correctly and operating properly. Other abnormal operations Any of the error...
... still flashing green after you first record a number of data in file memory. - I Test for proper operation before using the camera! INTRODUCTION I Data Error Precautions • Your digital camera is manufactured using precision digital components. Before using the camera to ensure that the camera is configured correctly and operating properly. Other abnormal operations Any of the error...
Owners Manual
Page 19
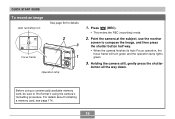
... 7N 06/12/24 12:38 Focus frame 2 3 1 Operation lamp 1. For details about formatting a memory card, see page 174. 19 Holding the camera still, gently press the shutter button all the way down. Point the camera at the subject, use the monitor screen to first format it using a commercially available... memory card, be sure to compose the image, and then press the shutter button half way. • When the camera finishes its Auto Focus operation, the ...
... 7N 06/12/24 12:38 Focus frame 2 3 1 Operation lamp 1. For details about formatting a memory card, see page 174. 19 Holding the camera still, gently press the shutter button all the way down. Point the camera at the subject, use the monitor screen to first format it using a commercially available... memory card, be sure to compose the image, and then press the shutter button half way. • When the camera finishes its Auto Focus operation, the ...
Owners Manual
Page 21
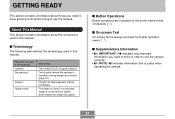
...; NOTE indicates information that is useful when operating the camera. 21 This term as used in order to use the camera. I Terminology The following table defines the terminology used in this manual: "camera" "file memory" "battery" "digital noise" Means this: The CASIO EX-Z70 Digital Camera The location where the camera is always enclosed by the button name inside of brackets...
...; NOTE indicates information that is useful when operating the camera. 21 This term as used in order to use the camera. I Terminology The following table defines the terminology used in this manual: "camera" "file memory" "battery" "digital noise" Means this: The CASIO EX-Z70 Digital Camera The location where the camera is always enclosed by the button name inside of brackets...
Owners Manual
Page 22
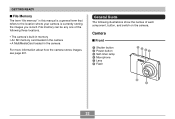
General Guide The following three locations. • The camera's built-in memory • An SD memory card loaded in the camera • A MultiMediaCard loaded in this manual is a general term that refers to the location where your camera is currently storing the images you record. GETTING READY...3 Self-timer lamp 4 Microphone 5 Lens 6 Flash 1 234 6 5 22 Camera I File Memory The term "file memory" in the camera For more information about how the camera stores images, see page 201. File memory can be any one of the following illustrations show the names of each component, button...
General Guide The following three locations. • The camera's built-in memory • An SD memory card loaded in the camera • A MultiMediaCard loaded in this manual is a general term that refers to the location where your camera is currently storing the images you record. GETTING READY...3 Self-timer lamp 4 Microphone 5 Lens 6 Flash 1 234 6 5 22 Camera I File Memory The term "file memory" in the camera For more information about how the camera stores images, see page 201. File memory can be any one of the following illustrations show the names of each component, button...

Owners Manual
Page 23
M Speaker GH ML K J I Battery cover J Battery compartment K USB/AV connector L Tripod screw hole * Use this hole when attaching to a tripod. GETTING READY I Back 78 F E DC 9 : A [̆] B [̇] [̄] 7 Operation lamp 8 Zoom button 9 Strap ring 0 [ ] (PLAY mode) button A [ ] (REC mode) button B C [SET] button D [BS] (BEST SHOT) button E [MENU] button F Monitor Screen [̈] [SET] I Bottom G Memory card slot H Stopper I 23
M Speaker GH ML K J I Battery cover J Battery compartment K USB/AV connector L Tripod screw hole * Use this hole when attaching to a tripod. GETTING READY I Back 78 F E DC 9 : A [̆] B [̇] [̄] 7 Operation lamp 8 Zoom button 9 Strap ring 0 [ ] (PLAY mode) button A [ ] (REC mode) button B C [SET] button D [BS] (BEST SHOT) button E [MENU] button F Monitor Screen [̈] [SET] I Bottom G Memory card slot H Stopper I 23
Owners Manual
Page 26
GETTING READY 7 Metering mode indicator (page 118) None Multi Center Weighted Spot 8 • Snapshots: Image size (page 71) 9 • Snapshots: Memory capacity (pages 53, 234) • Movies: Remaining recording time (page 104) 0 • Snapshots: Image quality (page 72) F : Fine N : Normal E : Economy • Movies: Image quality (page ...
GETTING READY 7 Metering mode indicator (page 118) None Multi Center Weighted Spot 8 • Snapshots: Image size (page 71) 9 • Snapshots: Memory capacity (pages 53, 234) • Movies: Remaining recording time (page 104) 0 • Snapshots: Image quality (page 72) F : Fine N : Normal E : Economy • Movies: Image quality (page ...

Owners Manual
Page 51
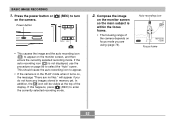
...the image. Press the shutter button carefully, taking care to a memory card if you record are stored on the bottom of the subject. Recording an Image Your camera automatically adjusts shutter speed in memory, or to avoid camera movement. BASIC IMAGE RECORDING • There is a speaker on the... card (page 171). Images you have one loaded in the camera. • When an optionally available SD memory card or MultiMediaCard (MMC) is loaded in the camera, images are stored in the camera's built-in accordance with your hand while holding it (page 174). 51 After ...
...the image. Press the shutter button carefully, taking care to a memory card if you record are stored on the bottom of the subject. Recording an Image Your camera automatically adjusts shutter speed in memory, or to avoid camera movement. BASIC IMAGE RECORDING • There is a speaker on the... card (page 171). Images you have one loaded in the camera. • When an optionally available SD memory card or MultiMediaCard (MMC) is loaded in the camera, images are stored in the camera's built-in accordance with your hand while holding it (page 174). 51 After ...
Owners Manual
Page 52
BASIC IMAGE RECORDING 1. If this happens, press [ ] (REC) to appear. • If the camera is in memory yet. This should cause the auto recording icon to enter the currently selected recording mode. 2. In addition, the icon will appear if you are no ... If the auto recording icon ( ) is within the focus frame. • The focusing range of the display. will be visible at the top of the camera depends on focus mode you do not have any images stored in the PLAY mode when it turns on the...
BASIC IMAGE RECORDING 1. If this happens, press [ ] (REC) to appear. • If the camera is in memory yet. This should cause the auto recording icon to enter the currently selected recording mode. 2. In addition, the icon will appear if you are no ... If the auto recording icon ( ) is within the focus frame. • The focusing range of the display. will be visible at the top of the camera depends on focus mode you do not have any images stored in the PLAY mode when it turns on the...
Owners Manual
Page 53
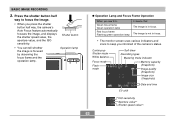
... monitor screen uses various indicators and icons to focus the image. • When you press the shutter button half way, the camera's Auto Focus feature automatically focuses the image, and displays the shutter speed value, the aperture value, and the ISO sensitivity. The...lamp G Operation Lamp and Focus Frame Operation When you informed of the camera's status. BASIC IMAGE RECORDING 3. Continuous Shutter mode White balance Focus mode Flash mode Self-timer Recording types Metering mode indicator Memory capacity (Snapshots) Image quality (Snapshots) Image size (Snapshots) Date and...
... monitor screen uses various indicators and icons to focus the image. • When you press the shutter button half way, the camera's Auto Focus feature automatically focuses the image, and displays the shutter speed value, the aperture value, and the ISO sensitivity. The...lamp G Operation Lamp and Focus Frame Operation When you informed of the camera's status. BASIC IMAGE RECORDING 3. Continuous Shutter mode White balance Focus mode Flash mode Self-timer Recording types Metering mode indicator Memory capacity (Snapshots) Image quality (Snapshots) Image size (Snapshots) Date and...

Owners Manual
Page 57
... of this, you need to guard against camera movement if you may experience some digital noise (graininess) to a standard recording type Select this : Stay in file memory and even lead to malfunction of the camera. • Never remove the memory card while an image is being recorded to... the memory card. • Fluorescent lighting actually flickers at a...
... of this, you need to guard against camera movement if you may experience some digital noise (graininess) to a standard recording type Select this : Stay in file memory and even lead to malfunction of the camera. • Never remove the memory card while an image is being recorded to... the memory card. • Fluorescent lighting actually flickers at a...
Owners Manual
Page 59
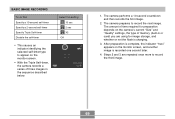
...is equipped with two types of an image can , however, configure the camera to appear in the monitor screen image. • Very bright light inside of zoom: optical zoom and digital zoom. The image saved in file memory has much better resolution and detail than the REC mode monitor screen image.... • Certain levels of subject brightness can cause the response of the camera. This is recorded in the REC mode...
...is equipped with two types of an image can , however, configure the camera to appear in the monitor screen image. • Very bright light inside of zoom: optical zoom and digital zoom. The image saved in file memory has much better resolution and detail than the REC mode monitor screen image.... • Certain levels of subject brightness can cause the response of the camera. This is recorded in the REC mode...
Owners Manual
Page 69
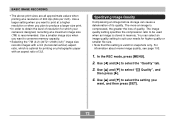
... a 10-second countdown and then records the first image. 2. The amount of time required for preparation depends on the camera's current "Size" and "Quality" settings, the type of three images in or card) you are repeated once more to record the next image. Select this : ... appear on the monitor screen, and another image is complete, the indicator "1sec" appears on the monitor screen. • With the Triple Self-timer, the camera records a series of memory (built-in the sequence described below. BASIC IMAGE RECORDING To do this setting: 10s 10 sec 2s 2 sec x3 X3 Off 1.
... a 10-second countdown and then records the first image. 2. The amount of time required for preparation depends on the camera's current "Size" and "Quality" settings, the type of three images in or card) you are repeated once more to record the next image. Select this : ... appear on the monitor screen, and another image is complete, the indicator "1sec" appears on the monitor screen. • With the Triple Self-timer, the camera records a series of memory (built-in the sequence described below. BASIC IMAGE RECORDING To do this setting: 10s 10 sec 2s 2 sec x3 X3 Off 1.
Owners Manual
Page 72
... to print at a higher resolution or when you plan to produce a larger size print. • In order to conserve memory capacity. • Selecting the "7M (3:2) (3072 × 2048 (3:2))" image size records images with an aspect ratio of ... image size (7M) is recommended. Use [̇] and [̈] to be used when an image is stored in memory. Use a smaller image size when you want to obtain the level of resolution for which is valid for printing on ...you want , and then press [SET]. 72 Use [̆] and [̄] to suit your camera is designed, recording at a resolution of 3:2.
... to print at a higher resolution or when you plan to produce a larger size print. • In order to conserve memory capacity. • Selecting the "7M (3:2) (3072 × 2048 (3:2))" image size records images with an aspect ratio of ... image size (7M) is recommended. Use [̇] and [̈] to be used when an image is stored in memory. Use a smaller image size when you want to obtain the level of resolution for which is valid for printing on ...you want , and then press [SET]. 72 Use [̆] and [̄] to suit your camera is designed, recording at a resolution of 3:2.
Owners Manual
Page 87
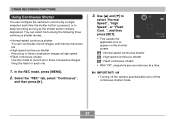
...as the shutter button remains depressed. IMPORTANT! • Turning off the camera automatically turns off the continuous shutter mode. 87 OTHER RECORDING FUNCTIONS Using Continuous Shutter You can continually record images until memory becomes full. • High-speed continuous shutter Record up to three ...MENU]. 2. You can select from among the following three continuous shutter modes. • Normal-speed continuous shutter You can configure the camera to record only a single snapshot each one at high speed. • Flash continuous shutter Use this mode to record up to ...
...as the shutter button remains depressed. IMPORTANT! • Turning off the camera automatically turns off the continuous shutter mode. 87 OTHER RECORDING FUNCTIONS Using Continuous Shutter You can continually record images until memory becomes full. • High-speed continuous shutter Record up to three ...MENU]. 2. You can select from among the following three continuous shutter modes. • Normal-speed continuous shutter You can configure the camera to record only a single snapshot each one at high speed. • Flash continuous shutter Use this mode to record up to ...
Owners Manual
Page 88
...Shooting stops if you release the shutter button before three images are recorded. • Flash is memory available to digital noise than normal. 88 B Flash continuous shutter Holding down the shutter button while high-speed ...continuous shutter is relatively slow. High-speed continuous shutter Holding down the shutter button while flash continuous shutter is turned on the type of the current ISO sensitivity setting. When recording to built-in the camera...
...Shooting stops if you release the shutter button before three images are recorded. • Flash is memory available to digital noise than normal. 88 B Flash continuous shutter Holding down the shutter button while high-speed ...continuous shutter is relatively slow. High-speed continuous shutter Holding down the shutter button while flash continuous shutter is turned on the type of the current ISO sensitivity setting. When recording to built-in the camera...


