Owners Manual
Page 3
... 2 QUICK START BASICS 10 First, charge the battery 10 Configuring Display Language, Date, and Time Settings 12 Using a Memory Card 14 Shooting a Snapshot 16 Viewing Snapshots 18 Shooting a Movie 19 Viewing a Movie 20 Deleting a File 21 INTRODUCTION 22 Features 22 Read this first 24 Precautions during Use 26 GETTING READY 36 Charging the Battery 36 I To load the battery 36 I To charge the battery 37 I Replacing the Battery 41 I Battery Precautions 41 Turning Power On and Off 42 Using a Memory Card 45 I Loading a Memory Card into...
... 2 QUICK START BASICS 10 First, charge the battery 10 Configuring Display Language, Date, and Time Settings 12 Using a Memory Card 14 Shooting a Snapshot 16 Viewing Snapshots 18 Shooting a Movie 19 Viewing a Movie 20 Deleting a File 21 INTRODUCTION 22 Features 22 Read this first 24 Precautions during Use 26 GETTING READY 36 Charging the Battery 36 I To load the battery 36 I To charge the battery 37 I Replacing the Battery 41 I Battery Precautions 41 Turning Power On and Off 42 Using a Memory Card 45 I Loading a Memory Card into...
Owners Manual
Page 5
... Exposure 129 Other Useful Recording Functions 132 I Using Key Customize to Assign Functions [W] and [X] 132 I Displaying an On-screen Grid 133 I Displaying the Image You Just Recorded (Image Review) 134 I Using Icon Help 134 I Using Mode Memory to Configure Power On Default Settings 135 I Resetting the Camera to Its Initial Factory Defaults 137 VIEWING SNAPSHOTS AND MOVIES139 Viewing a Snapshot 139 I Listening to the Audio of an Audio Snapshot 140 Viewing a Movie 141 Playing a Slideshow on the Camera 143 Viewing Camera Images on a TV 147 Zooming the Displayed...
... Exposure 129 Other Useful Recording Functions 132 I Using Key Customize to Assign Functions [W] and [X] 132 I Displaying an On-screen Grid 133 I Displaying the Image You Just Recorded (Image Review) 134 I Using Icon Help 134 I Using Mode Memory to Configure Power On Default Settings 135 I Resetting the Camera to Its Initial Factory Defaults 137 VIEWING SNAPSHOTS AND MOVIES139 Viewing a Snapshot 139 I Listening to the Audio of an Audio Snapshot 140 Viewing a Movie 141 Playing a Slideshow on the Camera 143 Viewing Camera Images on a TV 147 Zooming the Displayed...
Owners Manual
Page 7
... Time 189 I Configuring World Time Settings 189 Changing the Display Language 191 Changing the USB Port Protocol 191 [ ] (REC) and [ ] (PLAY) Button Settings 192 Formatting Built-in Memory 194 PRINTING 195 Types of Printing 195 Using Professional Print Service 196 Using Your Printer to Print Images 197 Using DPOF to Specify Images to be Printed and the Number of Copies 200 I Date Stamping 203 Supported Protocols 204 USING THE CAMERA WITH A COMPUTER 206 What you can do 206 Using the Camera with a Windows Computer . . 207 I Viewing...
... Time 189 I Configuring World Time Settings 189 Changing the Display Language 191 Changing the USB Port Protocol 191 [ ] (REC) and [ ] (PLAY) Button Settings 192 Formatting Built-in Memory 194 PRINTING 195 Types of Printing 195 Using Professional Print Service 196 Using Your Printer to Print Images 197 Using DPOF to Specify Images to be Printed and the Number of Copies 200 I Date Stamping 203 Supported Protocols 204 USING THE CAMERA WITH A COMPUTER 206 What you can do 206 Using the Camera with a Windows Computer . . 207 I Viewing...

Owners Manual
Page 44
... 1. Use [W] and [X] to configure the settings correctly. IMPORTANT! • Failure to set the date and time will cause the wrong date and time data to be recorded with images. • Leaving the camera for about one day with no power supplied will result in the PLAY mode. 30 sec, 1 min, 2 min, Off Auto Power Off Power it turned off (goes into a sleep state) if no operation is preformed for conserving battery power...
... 1. Use [W] and [X] to configure the settings correctly. IMPORTANT! • Failure to set the date and time will cause the wrong date and time data to be recorded with images. • Leaving the camera for about one day with no power supplied will result in the PLAY mode. 30 sec, 1 min, 2 min, Off Auto Power Off Power it turned off (goes into a sleep state) if no operation is preformed for conserving battery power...
Owners Manual
Page 45
...-in memory. FAVORITE folder - Selecting "Off" for test purposes, emergency use, etc. During Voice Recording file playback - In addition to memory card storage, the camera also has built-in memory, which is a connection between the camera's built-in memory for the sleep setting disables the sleep feature. BEST SHOT mode user image information - Mode memory settings - Start-up to you shoot with the camera on a memory card. Use [S] and [T] to hold a few snapshots or a short movie. During movie recording and playback Using a Memory Card You...
...-in memory. FAVORITE folder - Selecting "Off" for test purposes, emergency use, etc. During Voice Recording file playback - In addition to memory card storage, the camera also has built-in memory, which is a connection between the camera's built-in memory for the sleep setting disables the sleep feature. BEST SHOT mode user image information - Mode memory settings - Start-up to you shoot with the camera on a memory card. Use [S] and [T] to hold a few snapshots or a short movie. During movie recording and playback Using a Memory Card You...

Owners Manual
Page 55
With some aspect ratios, black bands may appear above and below, or to the left and right of the display image is being used. Normal I PLAY Mode Screen Layout The PLAY mode screen layout settings let you select how display images are shown on the monitor screen. Layout Type Description With this setting, 100% of the image. Normal GETTING READY 55 IMPORTANT! • Panel (Operation Panel) is not displayed while Voice Recording or Zoom Continuous Shutter is always visible.
With some aspect ratios, black bands may appear above and below, or to the left and right of the display image is being used. Normal I PLAY Mode Screen Layout The PLAY mode screen layout settings let you select how display images are shown on the monitor screen. Layout Type Description With this setting, 100% of the image. Normal GETTING READY 55 IMPORTANT! • Panel (Operation Panel) is not displayed while Voice Recording or Zoom Continuous Shutter is always visible.
Owners Manual
Page 85
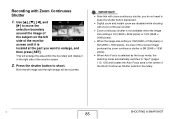
... × 1920 pixels), the size of the zoomed image produced by zoom continuous shutter is 3M (2048 × 1536 pixels). • When Auto Focus is located at the part you do not need to shoot. IMPORTANT! • Note that with zoom continuous shutter, you want to enlarge, and then press [SET]. This will be recorded. Press the shutter button to keep the shutter button depressed. • Digital zoom and instant zoom are disabled while shooting with Zoom Continuous Shutter 1.
... × 1920 pixels), the size of the zoomed image produced by zoom continuous shutter is 3M (2048 × 1536 pixels). • When Auto Focus is located at the part you do not need to shoot. IMPORTANT! • Note that with zoom continuous shutter, you want to enlarge, and then press [SET]. This will be recorded. Press the shutter button to keep the shutter button depressed. • Digital zoom and instant zoom are disabled while shooting with Zoom Continuous Shutter 1.

Owners Manual
Page 117
... during manual focus. 117 ADVANCED SETTINGS Any other functions assigned to adjust the focus setting. For this: Closer focus More distant focus Press this time the image that is selected as shown below to focus the image, as you view the results on the monitor screen as the focus mode, the [W] and [X] keys are not performed when you the focusing range. Press the shutter button to display the enlarged image. 3. IMPORTANT! • While Manual Focus...
... during manual focus. 117 ADVANCED SETTINGS Any other functions assigned to adjust the focus setting. For this: Closer focus More distant focus Press this time the image that is selected as shown below to focus the image, as you view the results on the monitor screen as the focus mode, the [W] and [X] keys are not performed when you the focusing range. Press the shutter button to display the enlarged image. 3. IMPORTANT! • While Manual Focus...
Owners Manual
Page 128
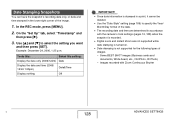
... SHOT images (Business cards and documents, White board, etc., Old Photo, ID Photo) - Images recorded with the camera's clock settings (pages 12, 188) when the snapshot is recorded. • Digital zoom and Instant Zoom are determined in the lower right corner of the image. 1. Use [S] and [T] to specify the Year/ Month/Day format of images. - In the REC mode, press [MENU]. 2. Date Stamping Snapshots You can have the snapshot's recording date only, or date and time stamped...
... SHOT images (Business cards and documents, White board, etc., Old Photo, ID Photo) - Images recorded with the camera's clock settings (pages 12, 188) when the snapshot is recorded. • Digital zoom and Instant Zoom are determined in the lower right corner of the image. 1. Use [S] and [T] to specify the Year/ Month/Day format of images. - In the REC mode, press [MENU]. 2. Date Stamping Snapshots You can have the snapshot's recording date only, or date and time stamped...

Owners Manual
Page 145
... MOVIES This is a good way to enjoy a long slideshow, without worrying about the camera's battery going dead. • Configure slideshow settings (page 143) before performing a button operation. I Playing a Slideshow on the USB Cradle (Photo Stand) You can play back repeatedly within the time specified by "Interval". IMPORTANT! • All button operations are disabled while the slideshow is switching from a computer or an image recorded with a different type of digital camera...
... MOVIES This is a good way to enjoy a long slideshow, without worrying about the camera's battery going dead. • Configure slideshow settings (page 143) before performing a button operation. I Playing a Slideshow on the USB Cradle (Photo Stand) You can play back repeatedly within the time specified by "Interval". IMPORTANT! • All button operations are disabled while the slideshow is switching from a computer or an image recorded with a different type of digital camera...

Owners Manual
Page 148
... adjust it on the TV. • You can use the bundled AV cable. - NOTE • After using the USB cable), you first start displaying images, set the TV volume control at maximum volume. USB cradle: Connect to the VIDEO IN and AUDIO IN terminals. - You can view recorded images on a DVD or video tape. The following . • Press the camera's [ON/OFF] button. • Press the USB cradle's [USB] button. IMPORTANT! • When connecting to a TV to display images...
... adjust it on the TV. • You can use the bundled AV cable. - NOTE • After using the USB cable), you first start displaying images, set the TV volume control at maximum volume. USB cradle: Connect to the VIDEO IN and AUDIO IN terminals. - You can view recorded images on a DVD or video tape. The following . • Press the camera's [ON/OFF] button. • Press the USB cradle's [USB] button. IMPORTANT! • When connecting to a TV to display images...

Owners Manual
Page 173
... [MENU]. 173 USING AUDIO To do this: Do this: Fast forward or fast reverse playback. Voice Recording Playback Controls The following are the different operations you want to play. Jump to start playback. Pause or restart playback Press [SET]. Toggle on-screen indicators on or off Press [DISP]. Press [S] or [T]. Enter the PLAY mode, and then use [W] and [X] to display the Voice Recording file you can adjust volume only while playback is paused. " " is playing. Adjust volume...
... [MENU]. 173 USING AUDIO To do this: Do this: Fast forward or fast reverse playback. Voice Recording Playback Controls The following are the different operations you want to play. Jump to start playback. Pause or restart playback Press [SET]. Toggle on-screen indicators on or off Press [DISP]. Press [S] or [T]. Enter the PLAY mode, and then use [W] and [X] to display the Voice Recording file you can adjust volume only while playback is paused. " " is playing. Adjust volume...

Owners Manual
Page 179
... "Copy" and then press [X]. 4. Turn on the camera, enter the PLAY mode and then press [MENU]. 3. Use [S] and [T] to select "Built-in the FAVORITE folder. Wait until the "Busy... This makes it possible, for example, to perform the following operation copies all files from a memory card to built-in memory to a memory card. Load the memory card to which you recorded with your memory card and insert the other memory card. This starts the copy operation. I Copying All Files...
... "Copy" and then press [X]. 4. Turn on the camera, enter the PLAY mode and then press [MENU]. 3. Use [S] and [T] to select "Built-in the FAVORITE folder. Wait until the "Busy... This makes it possible, for example, to perform the following operation copies all files from a memory card to built-in memory to a memory card. Load the memory card to which you recorded with your memory card and insert the other memory card. This starts the copy operation. I Copying All Files...

Owners Manual
Page 210
... "USB driver B" to establish a connection between the camera and computer before installing the USB driver on a computer running Windows 98SE or 98, be able to install the USB driver. On the menu screen, click the "English" tab. • You could also click another language tab, if you do, the computer will display the menu screen. 2. Do not connect the camera to install the USB driver on the computer. If your computer. • Use the...
... "USB driver B" to establish a connection between the camera and computer before installing the USB driver on a computer running Windows 98SE or 98, be able to install the USB driver. On the menu screen, click the "English" tab. • You could also click another language tab, if you do, the computer will display the menu screen. 2. Do not connect the camera to install the USB driver on the computer. If your computer. • Use the...

Owners Manual
Page 215
... into the USB mode, which is indicated by the USB lamp lighting green. [USB] I Connecting the Camera to Your Computer after the First Time" on . • If you plan to transfer images from the camera's built-in memory to your computer, make sure there is no memory card loaded in memory if there is no card) as a removable disk. 3. Double-click the "DCIM" folder. 4. Windows XP users: Click "Start" and then "My Computer". Windows 2000/Me...
... into the USB mode, which is indicated by the USB lamp lighting green. [USB] I Connecting the Camera to Your Computer after the First Time" on . • If you plan to transfer images from the camera's built-in memory to your computer, make sure there is no memory card loaded in memory if there is no card) as a removable disk. 3. Double-click the "DCIM" folder. 4. Windows XP users: Click "Start" and then "My Computer". Windows 2000/Me...

Owners Manual
Page 233
... folder for English.) I To view the camera user's guide 1. On the CD-ROM, open the "Manual" folder. • Use the CD-ROM that has "User's Guide included" on its label. 2. On the CD-ROM, open the "Manual" folder. • Use the CD-ROM that has "Photo Loader" on its label. 2. Open the "Digital Camera" folder and then open the "English" folder. 3. Open the file named "camera_xx.pdf". • "xx" is the language code (Example: camera_e.pdf is supported. Visit the following CASIO...
... folder for English.) I To view the camera user's guide 1. On the CD-ROM, open the "Manual" folder. • Use the CD-ROM that has "User's Guide included" on its label. 2. On the CD-ROM, open the "Manual" folder. • Use the CD-ROM that has "Photo Loader" on its label. 2. Open the "Digital Camera" folder and then open the "English" folder. 3. Open the file named "camera_xx.pdf". • "xx" is the language code (Example: camera_e.pdf is supported. Visit the following CASIO...

Owners Manual
Page 245
... / Português / / / Sleep 30 sec / 1 min* / 2 min / Off Auto Power Off 2 min* / 5 min REC / PLAY Power On* / Power On/Off / Disable USB Mass Storage (USB DIRECT-PRINT)* / PTP (PictBridge) Video Out NTSC 4:3* / NTSC 16:9 / PAL 4:3 / PAL 16:9 Format Format / Cancel* Reset Reset / Cancel* 245 APPENDIX Saturation +2 / +1 / 0* / -1 / -2 Contrast +2 / +1 / 0* / -1 / -2 Flash Intensity +2 / +1 / 0* / -1 / -2 Flash Assist Auto* / Off Set Up Tab Menu Sounds Startup* / Half Shutter / Shutter / Operation / Operation / Play Startup On (Selectable image) / Off* File No.
... / Português / / / Sleep 30 sec / 1 min* / 2 min / Off Auto Power Off 2 min* / 5 min REC / PLAY Power On* / Power On/Off / Disable USB Mass Storage (USB DIRECT-PRINT)* / PTP (PictBridge) Video Out NTSC 4:3* / NTSC 16:9 / PAL 4:3 / PAL 16:9 Format Format / Cancel* Reset Reset / Cancel* 245 APPENDIX Saturation +2 / +1 / 0* / -1 / -2 Contrast +2 / +1 / 0* / -1 / -2 Flash Intensity +2 / +1 / 0* / -1 / -2 Flash Assist Auto* / Off Set Up Tab Menu Sounds Startup* / Half Shutter / Shutter / Operation / Operation / Play Startup On (Selectable image) / Off* File No.

Owners Manual
Page 254
... camera. Images are not displayed. Digital zoom is disabled while date stamping is increased automatically for dark subjects, in the case of a snapshot, but it is into the lens. The zoom bar indicates zoom only up to a zoom factor of the Sunlight or light from what appears on the monitor screen Shooting a very brightly lit subject can cause a vertical band to illuminate the subject. Playback The color of 3.0. A memory card...
... camera. Images are not displayed. Digital zoom is disabled while date stamping is increased automatically for dark subjects, in the case of a snapshot, but it is into the lens. The zoom bar indicates zoom only up to a zoom factor of the Sunlight or light from what appears on the monitor screen Shooting a very brightly lit subject can cause a vertical band to illuminate the subject. Playback The color of 3.0. A memory card...

Owners Manual
Page 255
.... The camera's monitor screen is not accessing the memory card, disconnect the USB cable. 1) Check the connection between the camera and USB cradle. 2) Check all connections. 3) Install the USB driver (page 210). 4) Press the USB cradle's [USB] button. 1) Check the settings (pages 12, 188). 2) Perform the reset operation to another device. After confirming that the computer is blank. C 255 APPENDIX Display language setting screen appears when the camera is turned off. Action Remove the battery from the camera...
.... The camera's monitor screen is not accessing the memory card, disconnect the USB cable. 1) Check the connection between the camera and USB cradle. 2) Check all connections. 3) Install the USB driver (page 210). 4) Press the USB cradle's [USB] button. 1) Check the settings (pages 12, 188). 2) Perform the reset operation to another device. After confirming that the computer is blank. C 255 APPENDIX Display language setting screen appears when the camera is turned off. Action Remove the battery from the camera...

Owners Manual
Page 256
... some other storage device. Display Messages Battery is connected. IMPORTANT! • Formatting the memory card deletes all its files. Cannot register any more files. If this happens, you have problems installing the USB driver... This will need to recognize the camera when it into the camera. Before formatting, try again. • You are attempting to save a BEST SHOT scene when there are already 999 scenes in the "SCENE" folder (page 97). •...
... some other storage device. Display Messages Battery is connected. IMPORTANT! • Formatting the memory card deletes all its files. Cannot register any more files. If this happens, you have problems installing the USB driver... This will need to recognize the camera when it into the camera. Before formatting, try again. • You are attempting to save a BEST SHOT scene when there are already 999 scenes in the "SCENE" folder (page 97). •...


