
S520 User's Guide
Page 67
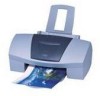
... then open the front cover. The printhead holder moves to ensure the best quality. 1 Ensure that the printer is installed incorrectly. Canon recommends using a refilled cartridge is not covered by the Canon warranty. Replacing an Ink Tank 66 With this printer, ink tanks must be installed in the... printhead. • Yellow: BCI-3eY • Magenta: BCI-3eM • Cyan: BCI-3eC • Black: BCI-3eBK Note ➤ Damage caused by using only original Canon ink tanks to the center. Routine Maintenance Replacing an Ink Tank When replacing an ink tank, check the model number ...
... then open the front cover. The printhead holder moves to ensure the best quality. 1 Ensure that the printer is installed incorrectly. Canon recommends using a refilled cartridge is not covered by the Canon warranty. Replacing an Ink Tank 66 With this printer, ink tanks must be installed in the... printhead. • Yellow: BCI-3eY • Magenta: BCI-3eM • Cyan: BCI-3eC • Black: BCI-3eBK Note ➤ Damage caused by using only original Canon ink tanks to the center. Routine Maintenance Replacing an Ink Tank When replacing an ink tank, check the model number ...

S520 Quick Start Guide
Page 28
... Alignment. 6. Click Utilities. 4. From the patterns in each column on -screen instructions to start printhead alignment, click OK. 6. When printhead alignment is loaded. 2. Right-click the Canon S520 printer icon, then click Properties. 4. Follow the on and paper is complete, click OK. To align... on the printed nozzle check pattern, select the most uniform pattern and enter the number in Mac OS: 1. Click the Maintenance tab, then click Print Head Alignment. 5. When printhead alignment is complete, click Close. 24 Follow the instructions when prompted. 3. Printing ...
... Alignment. 6. Click Utilities. 4. From the patterns in each column on -screen instructions to start printhead alignment, click OK. 6. When printhead alignment is loaded. 2. Right-click the Canon S520 printer icon, then click Properties. 4. Follow the on and paper is complete, click OK. To align... on the printed nozzle check pattern, select the most uniform pattern and enter the number in Mac OS: 1. Click the Maintenance tab, then click Print Head Alignment. 5. When printhead alignment is complete, click Close. 24 Follow the instructions when prompted. 3. Printing ...
S520 Quick Start Guide
Page 43
...orange between the computer and the printer. Troubleshooting Problem Possible Cause Try This Meaningless characters printed (continued) ECP mode not set Extended Capabilities (Parallel) Port, or ECP, provides faster data transfer between green flashes. See the S520 User's Guide on the Setup ...the number of the ink tanks is empty. If the same error message persists after restarting the printer, contact the Customer Care Center. 2 orange flashes (paper is out or not feeding correctly) If no printhead installed) Install the printhead. See "Loading Plain Paper and Other Canon Media"...
...orange between the computer and the printer. Troubleshooting Problem Possible Cause Try This Meaningless characters printed (continued) ECP mode not set Extended Capabilities (Parallel) Port, or ECP, provides faster data transfer between green flashes. See the S520 User's Guide on the Setup ...the number of the ink tanks is empty. If the same error message persists after restarting the printer, contact the Customer Care Center. 2 orange flashes (paper is out or not feeding correctly) If no printhead installed) Install the printhead. See "Loading Plain Paper and Other Canon Media"...

S520 Quick Start Guide
Page 44
...The error message contains an error code *XXX, where * is a letter and XXX is a number, which represents the cause of paper Ink is out of the error. System error message displays System ... correctly. Make sure that the printer is turned on , you can confirm the low ink alert in the BJ Status Monitor Printer is low Paper jam Printhead installed incorrectly Windows The BJ Status...printer port is turned on using the BJ Print Monitor. Follow the instructions in the BJ Status Monitor One or more information on with the Chooser, the BJ Print Monitor displays an error. See the S520...
...The error message contains an error code *XXX, where * is a letter and XXX is a number, which represents the cause of paper Ink is out of the error. System error message displays System ... correctly. Make sure that the printer is turned on , you can confirm the low ink alert in the BJ Status Monitor Printer is low Paper jam Printhead installed incorrectly Windows The BJ Status...printer port is turned on using the BJ Print Monitor. Follow the instructions in the BJ Status Monitor One or more information on with the Chooser, the BJ Print Monitor displays an error. See the S520...

S520 Quick Start Guide
Page 56
...instructions to ship the defective product to a Canon repair facility. Your credit card number will ship out the replacement product via overnight courier, prepaid by Canon. The Canon repair facility will be sure to include your printhead and ink tanks), and you elect InstantExchange ... ensure next-business-day InstantExchange warranty program service (two-business-day InstantExchange warranty service for Alaska and Hawaii). The Canon Customer Care Center must include the reference number, a copy of your dated proof of purchase (bill of sale) and a complete explanation of a new product...
...instructions to ship the defective product to a Canon repair facility. Your credit card number will ship out the replacement product via overnight courier, prepaid by Canon. The Canon repair facility will be sure to include your printhead and ink tanks), and you elect InstantExchange ... ensure next-business-day InstantExchange warranty program service (two-business-day InstantExchange warranty service for Alaska and Hawaii). The Canon Customer Care Center must include the reference number, a copy of your dated proof of purchase (bill of sale) and a complete explanation of a new product...

S520 Easy Setup Instructions
Page 1
S520 Series Color Bubble Jet Printer Shipping Tape 2 Plug the power cord into the back of the printer and connect the other to the printer. (IEEE 1284 compliant) Parallel Cable Parallel Cable Secure Wire Clips Parallel Port Continue with Step 6 on the printhead.) Press down the serial number located to a power outlet. 2 Turn the printhead... end of the parallel cable to the computer, the other end to the right of the printer. Documentation and Software Kit S520 BJ (Bubble Jet) Printhead Power Cord 4 Open the front cover. Protective tape 5 Lower the lock lever and gently ...
S520 Series Color Bubble Jet Printer Shipping Tape 2 Plug the power cord into the back of the printer and connect the other to the printer. (IEEE 1284 compliant) Parallel Cable Parallel Cable Secure Wire Clips Parallel Port Continue with Step 6 on the printhead.) Press down the serial number located to a power outlet. 2 Turn the printhead... end of the parallel cable to the computer, the other end to the right of the printer. Documentation and Software Kit S520 BJ (Bubble Jet) Printhead Power Cord 4 Open the front cover. Protective tape 5 Lower the lock lever and gently ...
S520 Easy Setup Instructions
Page 2
...D:\msetup.exe, where D is your product to TURN THE PRINTER OFF before continuing. displays, click Continue. 8 Click the S520 icon in a software application, click Page Setup. b. Right-click the Canon S520 icon, then click Properties. Click the Maintenance tab, then ...click the Print Head Alignment icon. From the File menu in the Chooser. b. Click the Print Head Alignment icon. After the computer restarts, insert the CD-ROM and continue. The serial number is located on the inside of the printhead...
...D:\msetup.exe, where D is your product to TURN THE PRINTER OFF before continuing. displays, click Continue. 8 Click the S520 icon in a software application, click Page Setup. b. Right-click the Canon S520 icon, then click Properties. Click the Maintenance tab, then ...click the Print Head Alignment icon. From the File menu in the Chooser. b. Click the Print Head Alignment icon. After the computer restarts, insert the CD-ROM and continue. The serial number is located on the inside of the printhead...


