Canon PowerShot G12 Research
View Results Below
Free Canon PowerShot G12 manuals!
Problems with Canon PowerShot G12?
Ask a Question
Free Canon PowerShot G12 manuals!
Problems with Canon PowerShot G12?
Ask a Question
Related Manual Pages


Related Videos

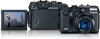
Canon PowerShot G12 Digital Camera
Duration: 6:06
Total Views: 22,134
Duration: 6:06
Total Views: 22,134
Canon Powershot G12 Under Water in Cabo San Lucas Mexico WP-DC34 Dive Scuba Divers 720p 24p
Duration: 5:30
Total Views: 33,324
Duration: 5:30
Total Views: 33,324
Canon PowerShot G12 test videos and example photos
Duration: 9:52
Total Views: 20,234
Duration: 9:52
Total Views: 20,234
Canon Powershot G12 Price @ Canon G12 Reviewss.com
Duration: 2:00
Total Views: 3,892
Duration: 2:00
Total Views: 3,892
Canon Powershot G12 Digital Camera Review @ Canon G12 Reviewss.com
Duration: 1:50
Total Views: 4,264
Duration: 1:50
Total Views: 4,264
Similar Questions

How Do You Take The Date Off The Picture On Canon G12
(Posted by ljohnson122 8 years ago)

Canon S21s Manual 'how Do I Set Up My Camera To Vedio Fireworks?
(Posted by Anonymous-127831 10 years ago)

Everytime I Turn The Camera On And Off It Ask To Set The Date/time.
(Posted by Joannavolger 11 years ago)

Can't Use Full Range Of Iso Settings
No matter what shooting mode I'm in, I can't set the ISO speed to less than 160, or higher than 1600...
No matter what shooting mode I'm in, I can't set the ISO speed to less than 160, or higher than 1600...
(Posted by lutz10610 12 years ago)
Change File Format To Raw Mode
How would I go about changing the settings so all images would be saved a raw and not jpeg?
How would I go about changing the settings so all images would be saved a raw and not jpeg?
(Posted by ahaggerty2 12 years ago)
Related Terms
The following terms were also used when searching for Canon PowerShot G12 Research:- canon powershot g12
- powershot g12
- powershot g12 price
- canon powershot g12 price
- powershot 12.1-megapixel digital camera
- powershot g12 camera
- powershot g12 digital camera
- canon powershot g12 digital camera
- canon powershot g12 camera
- powershot g12 sample
- powershot g12 review
- powershot g12 manual
- powershot g12 video
- powershot g12 release
- canon powershot g12 manual
- canon powershot g12 release
- canon powershot g12 review
- powershot g12 case
- canon powershot g12 case
- powershot g12 canon
- powershot g12 best price
- powershot g12 cnet
- powershot g12 hdr
- powershot g12 specifications
- canon powershot g12 cnet
- powershot g12 amazon
- powershot g12 book
- powershot g12 camera user guide
- powershot g12 digital camera review
- powershot g12 preview
- powershot g12 release date
- 2010 canon powershot g12
- 2010 powershot g12
- canon powershot g12 + macro photography
- canon powershot g12 10.0 mp digital camera
- canon powershot g12 accessories
- canon powershot g12 amazon
- canon powershot g12 august 2010
- canon powershot g12 battery
- canon powershot g12 battery charger
- canon powershot g12 battery life
- canon powershot g12 best buy
- canon powershot g12 best price
- canon powershot g12 black digital camera
- canon powershot g12 bundle
- canon powershot g12 camera user guide
- canon powershot g12 change video format
- canon powershot g12 charger
- canon powershot g12 compact camera
- canon powershot g12 compact digital camera
- canon powershot g12 digital camera review
- canon powershot g12 digital camera reviews
- canon powershot g12 does it have rapid
- canon powershot g12 download
- canon powershot g12 driver
- canon powershot g12 firmware
- canon powershot g12 for sale
- canon powershot g12 instruction manual
- canon powershot g12 instructions
- canon powershot g12 lens
- canon powershot g12 lens error
- canon powershot g12 lens kit
- canon powershot g12 lens won't retract
- canon powershot g12 lenses
- canon powershot g12 macro
- canon powershot g12 manual pdf
- canon powershot g12 manual pdf download
- canon powershot g12 memory card
- canon powershot g12 owners manual
- canon powershot g12 preview
- canon powershot g12 price philippines
- canon powershot g12 prices
- canon powershot g12 problems
- canon powershot g12 reformat memory card
- canon powershot g12 release date
- canon powershot g12 repair
- canon powershot g12 resolution
- canon powershot g12 review cnet
- canon powershot g12 reviews
- canon powershot g12 sale
- canon powershot g12 sd card
- canon powershot g12 shutter speed
- canon powershot g12 software
- canon powershot g12 software download
- canon powershot g12 specifications
- canon powershot g12 specs
- canon powershot g12 telephoto lens
- canon powershot g12 troubleshooting
- canon powershot g12 tutorial
- canon powershot g12 user guide
- canon powershot g12 user manual
- canon powershot g12 video
- canon powershot g12 video volume
- canon powershot g12 vs powershot s95
- canon powershot g12 vs s95
- canon powershot g12 youtube
- new canon powershot g12
- new powershot g12
- powershot g12 + macro photography
- powershot g12 10 megapixel digital camera
- powershot g12 10.0 mp digital camera
- powershot g12 accessories
- powershot g12 at amazon
- powershot g12 august 2010
- powershot g12 auto rotate setting
- powershot g12 battery
- powershot g12 battery charger
- powershot g12 battery life
- powershot g12 best buy
- powershot g12 black digital camera
- powershot g12 bundle
- powershot g12 by canon
- powershot g12 camera window locks up
- powershot g12 change video format
- powershot g12 charger
- powershot g12 communication error
- powershot g12 compact camera
- powershot g12 compact digital camera
- powershot g12 digital camera reviews
- powershot g12 digital zoom not working
- powershot g12 does it have rapid
- powershot g12 download
- powershot g12 driver
- powershot g12 firmware
- powershot g12 firmware update
- powershot g12 for sale
- powershot g12 guide
- powershot g12 instruction manual
- powershot g12 instructions
- powershot g12 lens
- powershot g12 lens accessories
- powershot g12 lens error
- powershot g12 lens kit
- powershot g12 lens won't retract
- powershot g12 lenses
- powershot g12 macro
- powershot g12 manual focus
- powershot g12 manual pdf
- powershot g12 manual pdf download
- powershot g12 memory card
- powershot g12 memory cards
- powershot g12 new
- powershot g12 owners manual
- powershot g12 pdf
- powershot g12 price philippines
- powershot g12 prices
- powershot g12 problems
- powershot g12 reformat memory card
- powershot g12 remote
- powershot g12 repair
- powershot g12 resolution
- powershot g12 review cnet
- powershot g12 reviews
- powershot g12 sale
- powershot g12 sd card
- powershot g12 sensor size
- powershot g12 shutter speed
- powershot g12 software
- powershot g12 software download
- powershot g12 specs
- powershot g12 telephoto lens
- powershot g12 time lapse
- powershot g12 troubleshooting
- powershot g12 tutorial
- powershot g12 underwater
- powershot g12 underwater housing
- powershot g12 user guide
- powershot g12 user manual
- powershot g12 users guide
- powershot g12 video volume
- powershot g12 vs
- powershot g12 vs powershot s95
- powershot g12 vs s95
- powershot g12 webcam
- powershot g12 white balance
- powershot g12 youtube
- powershotg12 amazon
- powershotg12 review
- powershotg12.net
- review powershot g12