FS20 Windows 7 - Canon
Related Manual Pages


Similar Questions

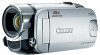
Software Drivers For Zr300 Video Camera For Windows 10 Computer
i need software driver disc for ZR300 video camera using on windows 10 computer
i need software driver disc for ZR300 video camera using on windows 10 computer
(Posted by bravi57 1 year ago)

Canon Vixia Hf R20 How Do I Import Video To Windows Xp?
(Posted by ALLAcarls0 9 years ago)

Do You Have Driver For Windows 7?
(Posted by Anonymous-32302 12 years ago)
Related Terms
The following terms were also used when searching for FS20 Windows 7 - Canon:- canon fs20
- canon fs200
- canon fs200 camcorder
- canon fs20 camcorder
- fs200 camcorder
- fs20 canon
- fs20 camcorder
- canon fs20 driver
- fs200 manual
- fs20 driver
- fs200 software
- fs20 review
- cannon fs20 camcorder
- canon fs200 software
- canon fs20 price
- fs20 software
- fs20 manual
- canon fs20 review
- reviews of canon fs20
- canon fs20 software
- canon fs20 mac
- canon fs20 video camera
- fs20 reviews
- canon fs20 reviews
- fs20 imovie
- fs200 accessories
- canon fs20 imovie
- fs20 price
- canon fs20 manual
- fs20 canon camcorder
- fs20 video camera
- reviews of fs20
- canon fs200 accessories
- fs20 camcorder reviews
- fs20 camcorder software
- canon fs20 sale
- fs20 prices
- fs20 troubleshooting
- canon fs20 + review
- canon fs20 8gb camcorder
- canon fs20 accessories
- canon fs20 battery
- canon fs20 battery charger
- canon fs20 best buy
- canon fs20 camcorder manual
- canon fs20 camcorder power cord
- canon fs20 camcorder review
- canon fs20 camcorder reviews
- canon fs20 camcorder software
- canon fs20 charger
- canon fs20 digital video camcorder
- canon fs20 download
- canon fs20 download to pc
- canon fs20 downloads
- canon fs20 driver download
- canon fs20 drivers
- canon fs20 drivers windows 7
- canon fs20 for sale
- canon fs20 help
- canon fs20 imagemixer
- canon fs20 instructions
- canon fs20 mac compatibility
- canon fs20 manual pdf
- canon fs20 operating system
- canon fs20 or fs200
- canon fs20 pdf manual
- canon fs20 power adapter
- canon fs20 power cord
- canon fs20 prices
- canon fs20 refurbished
- canon fs20 serial number
- canon fs20 serial number location
- canon fs20 software download
- canon fs20 software for mac
- canon fs20 software mac
- canon fs20 switch memory card
- canon fs20 troubleshooting
- canon fs20 user manual
- canon fs20 windows 7
- canon fs200 .digital video software
- canon fs200 a
- canon fs200 battery
- canon fs200 camcorder battery
- canon fs200 camcorder manual
- canon fs200 charging
- canon fs200 digital camcorder
- canon fs200 how to charge
- canon fs200 instruction manual
- canon fs200 manual
- canon fs200 manual pdf
- canon fs200 memory card
- canon fs200 power adapter
- canon fs200 power cord
- canon fs200 user manual
- canon fs200 video camera
- canon fs200.
- fs20 + review
- fs20 8gb camcorder
- fs20 accessories
- fs20 battery
- fs20 battery charger
- fs20 best buy
- fs20 camcorder manual
- fs20 camcorder power cord
- fs20 camcorder review
- fs20 canon manual
- fs20 charger
- fs20 digital video camcorder
- fs20 download
- fs20 download to pc
- fs20 downloads
- fs20 driver download
- fs20 drivers
- fs20 drivers windows 7
- fs20 for sale
- fs20 id card
- fs20 imagemixer
- fs20 instructions
- fs20 mac compatibility
- fs20 manual pdf
- fs20 operating system
- fs20 or fs200
- fs20 pdf manual
- fs20 power adapter
- fs20 power cord
- fs20 refurbished
- fs20 serial number
- fs20 serial number location
- fs20 software download
- fs20 software for mac
- fs20 software mac
- fs20 switch memory card
- fs20 user manual
- fs20 windows 7
- fs200 .digital video software
- fs200 battery
- fs200 camcorder battery
- fs200 camcorder manual
- fs200 charging
- fs200 digital camcorder
- fs200 how to charge
- fs200 instruction manual
- fs200 manual pdf
- fs200 memory card
- fs200 power adapter
- fs200 power cord
- fs200 troubleshooting
- fs200 user manual
- fs200 video camera