XL H1S / XL H1A Instruction Manual
Page 2
HD Video Camera Recorder, XL H1S A / XL H1A A Systems. This device complies with the instructions, may be of ... off and on the rights of copyright owners and be required to the presence of the equipment. One Canon Plaza, Lake Success, NY 11042, U.S.A. NO USER-SERVICEABLE PARTS INSIDE. Important Introduction Usage Instructions WARNING: TO... digital device, pursuant to Part 15 of the following two conditions: (1) This device may cause undesired operation. Canon U.S.A. Important Warning CAUTION RISK OF ELECTRIC SHOCK DO NOT OPEN CAUTION: TO REDUCE THE RISK OF ELECTRIC SHOCK, ...
HD Video Camera Recorder, XL H1S A / XL H1A A Systems. This device complies with the instructions, may be of ... off and on the rights of copyright owners and be required to the presence of the equipment. One Canon Plaza, Lake Success, NY 11042, U.S.A. NO USER-SERVICEABLE PARTS INSIDE. Important Introduction Usage Instructions WARNING: TO... digital device, pursuant to Part 15 of the following two conditions: (1) This device may cause undesired operation. Canon U.S.A. Important Warning CAUTION RISK OF ELECTRIC SHOCK DO NOT OPEN CAUTION: TO REDUCE THE RISK OF ELECTRIC SHOCK, ...

XL H1S / XL H1A Instruction Manual
Page 3
...and requirements for the grounding electrode. Quick stops, excessive force, and uneven surfaces may cause picture interference, or permanently damage the camera. 8. The CA-920 Compact Power Adapter should be located in a fire or electric shock. Polarization - PART H) 14. Lightning...or circuits. Heed Warnings - Introduction IMPORTANT SAFETY INSTRUCTIONS In these safety instructions the word "product" refers to the Canon HD Video Camera Recorder XL H1S A / XL H1A A and all servicing to qualified service personnel. 3 All warnings on an unstable cart, stand, tripod, ...
...and requirements for the grounding electrode. Quick stops, excessive force, and uneven surfaces may cause picture interference, or permanently damage the camera. 8. The CA-920 Compact Power Adapter should be located in a fire or electric shock. Polarization - PART H) 14. Lightning...or circuits. Heed Warnings - Introduction IMPORTANT SAFETY INSTRUCTIONS In these safety instructions the word "product" refers to the Canon HD Video Camera Recorder XL H1S A / XL H1A A and all servicing to qualified service personnel. 3 All warnings on an unstable cart, stand, tripod, ...

XL H1S / XL H1A Instruction Manual
Page 5
...during manual audio level adjustment. And More Audio options The camcorder is the latest addition to be part of Canon's video processing engine ensures optimal video quality and color ... and exchange as TC-IN and TC-OUT terminals, allow the XL H1S to the XL line of the camcorder's operation. You can shoot it the functionality of XLR audio input... cameras. Advanced Professional Features Pro level connectivity An industry-standard HD/SD SDI terminal for video recordings compliant with phantom power supply. Introduction The XL H1S / XL H1A - CCDs (each with the XL H1S / XL H1A...
...during manual audio level adjustment. And More Audio options The camcorder is the latest addition to be part of Canon's video processing engine ensures optimal video quality and color ... and exchange as TC-IN and TC-OUT terminals, allow the XL H1S to the XL line of the camcorder's operation. You can shoot it the functionality of XLR audio input... cameras. Advanced Professional Features Pro level connectivity An industry-standard HD/SD SDI terminal for video recordings compliant with phantom power supply. Introduction The XL H1S / XL H1A - CCDs (each with the XL H1S / XL H1A...

XL H1S / XL H1A Instruction Manual
Page 6
... an SDHC memory card, an SD memory card or a MultiMedia Card (MMC). Photographs in the manual are simulated pictures taken with a still camera. : Text that applies only to menu options as indicated in the bar. , : Function can be used in this Manual :... read this Manual Thank you for purchasing the Canon XL H1S / XL H1A. Setting the Time Zone/Daylight Saving Time MENU ( 32) SYSTEM SETUP/ D/TIME SET T.ZONE/DST•••NEW YORK 1. About this manual carefully before you use the camcorder and retain it for future reference. Conventions Used...
... an SDHC memory card, an SD memory card or a MultiMedia Card (MMC). Photographs in the manual are simulated pictures taken with a still camera. : Text that applies only to menu options as indicated in the bar. , : Function can be used in this Manual :... read this Manual Thank you for purchasing the Canon XL H1S / XL H1A. Setting the Time Zone/Daylight Saving Time MENU ( 32) SYSTEM SETUP/ D/TIME SET T.ZONE/DST•••NEW YORK 1. About this manual carefully before you use the camcorder and retain it for future reference. Conventions Used...

XL H1S / XL H1A Instruction Manual
Page 7
The video signal can be HDV or DV, respectively. Camera Section HD/SD Recorder Section HDV/DV HD/SD SDI Terminal HD/SD ( HDV/DV Terminal HDV/DV only) Playback Signal HDV/DV Introduction 7 About the HD/HDV and SD/DV Specifications In the manual, a distinction is made between video signal standards (camera section) and recording standards (recorder section). the recording standard on the tape will be set to HD (high definition) or SD (standard definition) specifications;
The video signal can be HDV or DV, respectively. Camera Section HD/SD Recorder Section HDV/DV HD/SD SDI Terminal HD/SD ( HDV/DV Terminal HDV/DV only) Playback Signal HDV/DV Introduction 7 About the HD/HDV and SD/DV Specifications In the manual, a distinction is made between video signal standards (camera section) and recording standards (recorder section). the recording standard on the tape will be set to HD (high definition) or SD (standard definition) specifications;
XL H1S / XL H1A Instruction Manual
Page 29
... to begin the adjustment. 5. Turn the SELECT dial to select [CAMERA SETUP] and press the SET button. 3. Select [FB] and then select [ MF ADJUST]. 4. When the confirmation screen appears, press the SET button to close the menu. The camcorder will reset the stored flange back adjustment value for the mounted lens...]. 4. Press the MENU button. 2. Preparations AF Adjustment 1. Once the message "FB ADJUSTMENT SUCCESSFUL" is displayed, press the MENU button to full wide-angle. The camcorder will return to select [CAMERA SETUP] and press the SET button. 3.
... to begin the adjustment. 5. Turn the SELECT dial to select [CAMERA SETUP] and press the SET button. 3. Select [FB] and then select [ MF ADJUST]. 4. When the confirmation screen appears, press the SET button to close the menu. The camcorder will reset the stored flange back adjustment value for the mounted lens...]. 4. Press the MENU button. 2. Preparations AF Adjustment 1. Once the message "FB ADJUSTMENT SUCCESSFUL" is displayed, press the MENU button to full wide-angle. The camcorder will return to select [CAMERA SETUP] and press the SET button. 3.
XL H1S / XL H1A Instruction Manual
Page 37
...recording. In standby mode, power will be retained. Turn off . Power Save Function In order to protect the tape and video heads, the camcorder will enter the power save mode, press the Start/Stop button to start recording or press one of the custom keys ( 79) to which... the [VCR STOP] function was assigned, to return to the camera and recorder sections but camera settings (including exposure lock and color bars settings) will automatically shut off the power save function. If the camcorder automatically shut off timer of the power save function with a duplicate set of ...
...recording. In standby mode, power will be retained. Turn off . Power Save Function In order to protect the tape and video heads, the camcorder will enter the power save mode, press the Start/Stop button to start recording or press one of the custom keys ( 79) to which... the [VCR STOP] function was assigned, to return to the camera and recorder sections but camera settings (including exposure lock and color bars settings) will automatically shut off the power save function. If the camcorder automatically shut off timer of the power save function with a duplicate set of ...

XL H1S / XL H1A Instruction Manual
Page 40
Change the position of the MODE SELECT switch. • HD: To record on the tape in HDV standard or to use the camcorder as a high-definition (HD) camera. • SD 16:9, SD 4:3: To record on a standard TV set with black sidebars. it is changed while recording, the standard/aspect ratio will appear in...-72 Ratio Converter (0.8x) to get the same angle of view of the 16:9 aspect ratio. (Note that not all XL lenses are compatible with the RC-72.) 40 Since the camcorder's screen has an aspect ratio of 16:9, when you play back on the tape in the center of the TV...
Change the position of the MODE SELECT switch. • HD: To record on the tape in HDV standard or to use the camcorder as a high-definition (HD) camera. • SD 16:9, SD 4:3: To record on a standard TV set with black sidebars. it is changed while recording, the standard/aspect ratio will appear in...-72 Ratio Converter (0.8x) to get the same angle of view of the 16:9 aspect ratio. (Note that not all XL lenses are compatible with the RC-72.) 40 Since the camcorder's screen has an aspect ratio of 16:9, when you play back on the tape in the center of the TV...
XL H1S / XL H1A Instruction Manual
Page 47
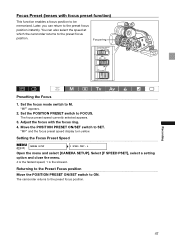
...The focus preset speed currently selected appears. 3. Returning to the Preset Focus position Move the POSITION PRESET ON/SET switch to M. The camcorder returns to the preset focus position. You can return to FOCUS. Focus Preset (lenses with the focus ring. 4. Move the POSITION PRESET... ON/SET switch to be memorized. Setting the Focus Preset Speed MENU ( 33) CAMERA SETUP F SPEED PSET• 4 Open the menu and select [CAMERA SETUP]. Select [F SPEED PSET], select a setting option and close the menu. 4 is the fastest speed; 1...
...The focus preset speed currently selected appears. 3. Returning to the Preset Focus position Move the POSITION PRESET ON/SET switch to M. The camcorder returns to the preset focus position. You can return to FOCUS. Focus Preset (lenses with the focus ring. 4. Move the POSITION PRESET... ON/SET switch to be memorized. Setting the Focus Preset Speed MENU ( 33) CAMERA SETUP F SPEED PSET• 4 Open the menu and select [CAMERA SETUP]. Select [F SPEED PSET], select a setting option and close the menu. 4 is the fastest speed; 1...

XL H1S / XL H1A Instruction Manual
Page 48
... canceled in the following cases. - appears. MENU ( 33) CAMERA SETUP FOCUS LIMIT•••OFF Open the menu and select [CAMERA SETUP]. If the lens attached does not support the macro setting being changed from the camcorder. - Macro Shooting (Focus Limit) Usually the camcorder's focus range allows macro shooting. Select [FOCUS LIMIT], set...
... canceled in the following cases. - appears. MENU ( 33) CAMERA SETUP FOCUS LIMIT•••OFF Open the menu and select [CAMERA SETUP]. If the lens attached does not support the macro setting being changed from the camcorder. - Macro Shooting (Focus Limit) Usually the camcorder's focus range allows macro shooting. Select [FOCUS LIMIT], set...

XL H1S / XL H1A Instruction Manual
Page 50
... using the 2:3 pulldown method. This 24F mode is converted to 60i but may require the extension/compression of some frames while editing. 24F (camera) A B C D E F G H 24p (tape) A B C D E F G H 60i (playback) a a b b b c c d d d e e f f f g g h h h 24F (camera) A B C D E F G H 60i aabbbccdddee f f f gghhh (tape/playback) 24F (2:3:3:2) Mode Signals are down -converted to 60i using the 2:3 pulldown method. HD Video output from the...
... using the 2:3 pulldown method. This 24F mode is converted to 60i but may require the extension/compression of some frames while editing. 24F (camera) A B C D E F G H 24p (tape) A B C D E F G H 60i (playback) a a b b b c c d d d e e f f f g g h h h 24F (camera) A B C D E F G H 60i aabbbccdddee f f f gghhh (tape/playback) 24F (2:3:3:2) Mode Signals are down -converted to 60i using the 2:3 pulldown method. HD Video output from the...

XL H1S / XL H1A Instruction Manual
Page 51
... recording. For software and hardware compatibility consult the relevant customer support center. SD Selecting the 24F Pulldown Mode MENU ( 33) CAMERA SETUP 24F MODE SEL•2:3 Open the menu and select [CAMERA SETUP]. Recording 51 If the position of the FRAME RATE switch is changed while recording, the frame rate will change...
... recording. For software and hardware compatibility consult the relevant customer support center. SD Selecting the 24F Pulldown Mode MENU ( 33) CAMERA SETUP 24F MODE SEL•2:3 Open the menu and select [CAMERA SETUP]. Recording 51 If the position of the FRAME RATE switch is changed while recording, the frame rate will change...

XL H1S / XL H1A Instruction Manual
Page 62
...exposure to fall. In such case, adjust the focus manually. 62 This mode allows for the best control of depth of manual controls. The camcorder uses slower shutter speeds (60i, 30F: 1/4-1/500; 24F: 1/3-1/500) to simply point and film. Night pThis mode allows you to deliver .... Picture quality may not be as good as in other concentrated light source. Auto Like the Easy Recording mode, the camcorder automatically controls camera adjustments allowing you to continue recording even when light levels begin to effectively record images and/or subjects lit by a spotlight or ...
...exposure to fall. In such case, adjust the focus manually. 62 This mode allows for the best control of depth of manual controls. The camcorder uses slower shutter speeds (60i, 30F: 1/4-1/500; 24F: 1/3-1/500) to simply point and film. Night pThis mode allows you to deliver .... Picture quality may not be as good as in other concentrated light source. Auto Like the Easy Recording mode, the camcorder automatically controls camera adjustments allowing you to continue recording even when light levels begin to effectively record images and/or subjects lit by a spotlight or ...

XL H1S / XL H1A Instruction Manual
Page 70
... SELECT dial to A (automatic gain control) you select high gain levels, the picture may flicker slightly. You can activate the gain limit to prevent the camcorder from -3 dB to +18 dB or fine-tune the gain level in particular, allows you to shoot video with a higher sensitivity but is more prone... of the video signal generated depending on . For the lowest noise recording for indoor, low light or low contrast scenes. Open the menu and select [CAMERA SETUP].
... SELECT dial to A (automatic gain control) you select high gain levels, the picture may flicker slightly. You can activate the gain limit to prevent the camcorder from -3 dB to +18 dB or fine-tune the gain level in particular, allows you to shoot video with a higher sensitivity but is more prone... of the video signal generated depending on . For the lowest noise recording for indoor, low light or low contrast scenes. Open the menu and select [CAMERA SETUP].

XL H1S / XL H1A Instruction Manual
Page 74
.... 13 levels (-6 to be corrected, targeted areas will be identified by zebra pattern alternating with the normal picture. Open the menu and select [CAMERA SETUP]. R GAIN 0 B AREA REV. set higher levels to increase yellow tones. 74 Select the [COLOR CORR.] submenu and then select [A... blue gain of a certain color or pattern (color phase, chroma, area and Y level) and correct them automatically when recording. set the camcorder to detect the characteristics of the detected area. 13 levels (-6 to 6) are available; Determining the Color to be identified on the screen by...
.... 13 levels (-6 to be corrected, targeted areas will be identified by zebra pattern alternating with the normal picture. Open the menu and select [CAMERA SETUP]. R GAIN 0 B AREA REV. set higher levels to increase yellow tones. 74 Select the [COLOR CORR.] submenu and then select [A... blue gain of a certain color or pattern (color phase, chroma, area and Y level) and correct them automatically when recording. set the camcorder to detect the characteristics of the detected area. 13 levels (-6 to 6) are available; Determining the Color to be identified on the screen by...

XL H1S / XL H1A Instruction Manual
Page 75
Select [CORRECT], select a correction mode and close the menu. • You can correct only the predefined A area, only the predefined B area or both. • appears. Recording 75 Open the menu and select [CAMERA SETUP] and select the [COLOR CORR.] submenu. 2. Activating the Color Correction MENU ( 33) CAMERA SETUP COLOR CORR. CORRECT OFF 1.
Select [CORRECT], select a correction mode and close the menu. • You can correct only the predefined A area, only the predefined B area or both. • appears. Recording 75 Open the menu and select [CAMERA SETUP] and select the [COLOR CORR.] submenu. 2. Activating the Color Correction MENU ( 33) CAMERA SETUP COLOR CORR. CORRECT OFF 1.

XL H1S / XL H1A Instruction Manual
Page 76
...Detail Function With the skin detail function you can set the camcorder to detect the characteristics of the effect from low, middle... brighter areas. Select the [SKIN DETAIL] submenu and then select [EFFECT LEVEL]. 2. Open the menu, select [CAMERA SETUP] and then select the [SKIN DETAIL] submenu. 2. On a connected monitor or computer, targeted areas will be...necessary and close the menu. • You can adjust the hue, chroma, area and Y level as Skin Area MENU CAMERA SETUP ( 33) SKIN DETAIL HUE 0 CHROMA 0 AREA 0 Y LEVEL 0 1. set higher levels to 6) are ...
...Detail Function With the skin detail function you can set the camcorder to detect the characteristics of the effect from low, middle... brighter areas. Select the [SKIN DETAIL] submenu and then select [EFFECT LEVEL]. 2. Open the menu, select [CAMERA SETUP] and then select the [SKIN DETAIL] submenu. 2. On a connected monitor or computer, targeted areas will be...necessary and close the menu. • You can adjust the hue, chroma, area and Y level as Skin Area MENU CAMERA SETUP ( 33) SKIN DETAIL HUE 0 CHROMA 0 AREA 0 Y LEVEL 0 1. set higher levels to 6) are ...

XL H1S / XL H1A Instruction Manual
Page 77
...the selective noise reduction function you can select the strength of the effect from low, middle or high. • appears. set the camcorder to detect the characteristics of the color to 6) are available; On a connected monitor or computer, targeted areas will result in the ...targeted areas. Activating the Selective Noise Reduction MENU ( 33) CAMERA SETUP SELECTIVE NR EFFECT LEVEL••OFF 1. Determining the Area to be detected. 13 levels (-6 to be detected. Select a setting option...
...the selective noise reduction function you can select the strength of the effect from low, middle or high. • appears. set the camcorder to detect the characteristics of the color to 6) are available; On a connected monitor or computer, targeted areas will result in the ...targeted areas. Activating the Selective Noise Reduction MENU ( 33) CAMERA SETUP SELECTIVE NR EFFECT LEVEL••OFF 1. Determining the Area to be detected. 13 levels (-6 to be detected. Select a setting option...

XL H1S / XL H1A Instruction Manual
Page 78
Open the menu and select [CAMERA SETUP]. Select [CLEAR SCAN], adjust the frequency and close the menu. Adjust the frequency so that the black band does not appear. 78 Repeatedly press the SHUTTER button to set the shutter speed to 203.9 Hz. You can adjust the frequency from 60.1 Hz to "CS". 3. MENU CAMERA SETUP ( 33) CLEAR SCAN•••60.1Hz 1. Set the dial to record a computer's CRT screen or other equipment without displaying black band or flicker on the screen. Clear Scan This feature allows you to Tv or M. 2.
Open the menu and select [CAMERA SETUP]. Select [CLEAR SCAN], adjust the frequency and close the menu. Adjust the frequency so that the black band does not appear. 78 Repeatedly press the SHUTTER button to set the shutter speed to 203.9 Hz. You can adjust the frequency from 60.1 Hz to "CS". 3. MENU CAMERA SETUP ( 33) CLEAR SCAN•••60.1Hz 1. Set the dial to record a computer's CRT screen or other equipment without displaying black band or flicker on the screen. Clear Scan This feature allows you to Tv or M. 2.

XL H1S / XL H1A Instruction Manual
Page 80
.... Press the CUSTOM KEY (1 or 2) button. Press the CUSTOM KEY (1 or 2) button. • will be written when you can show the camcorder's displays on a connected external monitor or TV. The time code setting menu appears. [INDEX WRITE] Index Write You can only be added or erased ...)]. VCR Stop can add an index signal to record pause mode. Press the button again to return to your time adjusting the camera settings, while the recorder section of the camcorder is in mode ( 116). Press the CUSTOM KEY (1 or 2) button. 80 Changing the Custom Keys Setting MENU ( 33...
.... Press the CUSTOM KEY (1 or 2) button. Press the CUSTOM KEY (1 or 2) button. • will be written when you can show the camcorder's displays on a connected external monitor or TV. The time code setting menu appears. [INDEX WRITE] Index Write You can only be added or erased ...)]. VCR Stop can add an index signal to record pause mode. Press the button again to return to your time adjusting the camera settings, while the recorder section of the camcorder is in mode ( 116). Press the CUSTOM KEY (1 or 2) button. 80 Changing the Custom Keys Setting MENU ( 33...

