
Users Guide
Page 2
... may vary depending on your product model, and software version. Before using the Label Printer, make changes without notice. Brother reserves the right to download the latest manuals. Available Manuals Visit the Brother support website at support.brother.com and click Manuals on the country. read all the documents included with troubleshooting tips...
... may vary depending on your product model, and software version. Before using the Label Printer, make changes without notice. Brother reserves the right to download the latest manuals. Available Manuals Visit the Brother support website at support.brother.com and click Manuals on the country. read all the documents included with troubleshooting tips...
Users Guide
Page 5
... 2 Print Using a Computer (P-touch Editor) 8 Install Printer Driver and Software on a Computer 8 Connect the Label Printer to a Computer 8 Print from a Computer ...9 Available Applications...9 Create and Print Labels from Your Computer 9 Attach Labels...10 Install the Printer Driver and Software on a Computer not connected to the Internet......15 Menu Bar ...17 Basic Tab...18 Apply Setting Changes to Multiple Label Printers 18 Printer Setting Tool for Mac ...19 Before Using the Printer Setting Tool 19 Use the Printer Setting Tool for Mac...19 Settings Dialog Box ...20 Basic Tab...21 Apply...
... 2 Print Using a Computer (P-touch Editor) 8 Install Printer Driver and Software on a Computer 8 Connect the Label Printer to a Computer 8 Print from a Computer ...9 Available Applications...9 Create and Print Labels from Your Computer 9 Attach Labels...10 Install the Printer Driver and Software on a Computer not connected to the Internet......15 Menu Bar ...17 Basic Tab...18 Apply Setting Changes to Multiple Label Printers 18 Printer Setting Tool for Mac ...19 Before Using the Printer Setting Tool 19 Use the Printer Setting Tool for Mac...19 Settings Dialog Box ...20 Basic Tab...21 Apply...

Users Guide
Page 6
...42 For Windows...42 For Mac ...44 Section III Appendix 8 Reset the Label Printer 47 Reset Device Settings to the Factory Settings Using the Label Printer Buttons 47 Reset Device Settings Using the Printer Setting Tool 47 9 Maintenance 48 Clean the Exterior of the Unit...48 ...49 LED Indications...50 Printing Problems ...52 Software Version ...55 11 Product Specifications 56 Label Printer Specifications ...56 Operating Environment...56 12 Print Directly from Various Windows Software 57 Setting the Printer Driver ...57 Basic Tab...58 Advanced Tab ...58 Other Tab ...59 Printing from...
...42 For Windows...42 For Mac ...44 Section III Appendix 8 Reset the Label Printer 47 Reset Device Settings to the Factory Settings Using the Label Printer Buttons 47 Reset Device Settings Using the Printer Setting Tool 47 9 Maintenance 48 Clean the Exterior of the Unit...48 ...49 LED Indications...50 Printing Problems ...52 Software Version ...55 11 Product Specifications 56 Label Printer Specifications ...56 Operating Environment...56 12 Print Directly from Various Windows Software 57 Setting the Printer Driver ...57 Basic Tab...58 Advanced Tab ...58 Other Tab ...59 Printing from...

Users Guide
Page 7
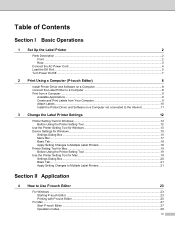
Section I Basic Operations I Set Up the Label Printer 2 Print Using a Computer (P-touch Editor) 8 Change the Label Printer Settings 12
Section I Basic Operations I Set Up the Label Printer 2 Print Using a Computer (P-touch Editor) 8 Change the Label Printer Settings 12

Users Guide
Page 8
1 Set Up the Label Printer 1 1 Parts Description 1 Front 1 5 6 Control Panel Buttons 4 1 Feed Button 2 Cut Button 3 Power Button 12 3 4 Status LED 5 DK Roll Compartment Cover 6 Label Output Slot 2
1 Set Up the Label Printer 1 1 Parts Description 1 Front 1 5 6 Control Panel Buttons 4 1 Feed Button 2 Cut Button 3 Power Button 12 3 4 Status LED 5 DK Roll Compartment Cover 6 Label Output Slot 2

Users Guide
Page 10
For more information, see Product Specifications on page 56. 4 IMPORTANT Do not use your Label Printer in areas where the power source voltage is different from the Label Printer's specified voltage. Set Up the Label Printer Connect the AC Power Cord a Connect the AC Power Cord to the Label Printer. 1 1 b Plug the AC Power Cord into an AC power outlet.
For more information, see Product Specifications on page 56. 4 IMPORTANT Do not use your Label Printer in areas where the power source voltage is different from the Label Printer's specified voltage. Set Up the Label Printer Connect the AC Power Cord a Connect the AC Power Cord to the Label Printer. 1 1 b Plug the AC Power Cord into an AC power outlet.

Users Guide
Page 11
Set Up the Label Printer Load the DK Roll a Hold the Label Printer by the front, and firmly lift the DK Roll Compartment Cover to open it. 1 1 b Place the DK Roll into the Roll Spool Guide (1). • Make sure that the Roll Spool Arm (2) is inserted firmly in the Roll Spool Guide. • Make sure the Stabilizer (3) slides into the notch in the Label Printer. 3 2 1 5
Set Up the Label Printer Load the DK Roll a Hold the Label Printer by the front, and firmly lift the DK Roll Compartment Cover to open it. 1 1 b Place the DK Roll into the Roll Spool Guide (1). • Make sure that the Roll Spool Arm (2) is inserted firmly in the Roll Spool Guide. • Make sure the Stabilizer (3) slides into the notch in the Label Printer. 3 2 1 5

Users Guide
Page 12
... the DK Roll Compartment Cover to prevent dust and debris from accumulating in the Label Printer. Set Up the Label Printer c Thread the DK Roll through the Label Printer. • Align the edge of the DK Roll with the upright edge of the Label Output Slot. • Check that the DK Roll is threaded straight so that...
... the DK Roll Compartment Cover to prevent dust and debris from accumulating in the Label Printer. Set Up the Label Printer c Thread the DK Roll through the Label Printer. • Align the edge of the DK Roll with the upright edge of the Label Output Slot. • Check that the DK Roll is threaded straight so that...

Users Guide
Page 13
IMPORTANT • If you are using a DK Die-cut label, the end of the label is aligned automatically after you press the (Power Button). • If a different label is set, press the Feed Button to align the end of the label. The Status LED turns green. Off: Press and hold the (Power Button) to turn the Label Printer On. Set Up the Label Printer Turn Power On/Off On: Press the (Power Button) to turn the Label Printer Off. 1 1 7
IMPORTANT • If you are using a DK Die-cut label, the end of the label is aligned automatically after you press the (Power Button). • If a different label is set, press the Feed Button to align the end of the label. The Status LED turns green. Off: Press and hold the (Power Button) to turn the Label Printer On. Set Up the Label Printer Turn Power On/Off On: Press the (Power Button) to turn the Label Printer Off. 1 1 7
Users Guide
Page 14
...a Visit our website (install.brother) and download the Software Installer for Mac: Printer Driver, P-touch Editor, P-touch Update Software, and Printer Setting Tool Note If the computer is not connected to the Internet, see the Install the Printer Driver and Software on a ...screen instructions to proceed with the installation. a Make sure the Label Printer is complete. c Turn the Label Printer On. 8 Software for Windows: Printer Driver, P-touch Editor, P-touch Address Book, P-touch Update Software, and Printer Setting Tool Software for the latest software and manuals. c Close...
...a Visit our website (install.brother) and download the Software Installer for Mac: Printer Driver, P-touch Editor, P-touch Update Software, and Printer Setting Tool Note If the computer is not connected to the Internet, see the Install the Printer Driver and Software on a ...screen instructions to proceed with the installation. a Make sure the Label Printer is complete. c Turn the Label Printer On. 8 Software for Windows: Printer Driver, P-touch Editor, P-touch Address Book, P-touch Update Software, and Printer Setting Tool Software for the latest software and manuals. c Close...
Users Guide
Page 15
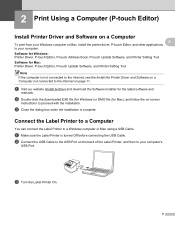
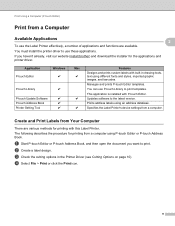
... then open the document you haven't already, visit our website (install.brother) and download the installer for printing from a computer using P-touch Editor or P-touch Address Book. Print Using a Computer (P-touch Editor) Print from a Computer 2 Available Applications To use the Label Printer effectively, a number of applications and functions are various methods for printing...
... then open the document you haven't already, visit our website (install.brother) and download the installer for printing from a computer using P-touch Editor or P-touch Address Book. Print Using a Computer (P-touch Editor) Print from a Computer 2 Available Applications To use the Label Printer effectively, a number of applications and functions are various methods for printing...

Users Guide
Page 16
.... Print Using a Computer (P-touch Editor) Cutting Options 2 Cutting Options allow you want the label to surfaces that are wet, dirty, or uneven. In the Printer Driver, select Auto Cut and Cut at End Label Exiting the Label Printer No Yes ABC ABC No No ABC ABC Yes Yes or No ABC ABC Attach... Labels 2 a Peel the backing from these surfaces. 10 The labels may be difficult to attach to print and ...
.... Print Using a Computer (P-touch Editor) Cutting Options 2 Cutting Options allow you want the label to surfaces that are wet, dirty, or uneven. In the Printer Driver, select Auto Cut and Cut at End Label Exiting the Label Printer No Yes ABC ABC No No ABC ABC Yes Yes or No ABC ABC Attach... Labels 2 a Peel the backing from these surfaces. 10 The labels may be difficult to attach to print and ...
Users Guide
Page 17
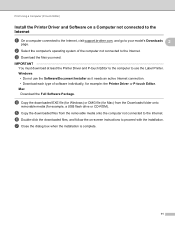
...needs an active Internet connection. • Download each type of the computer not connected to the Internet. Windows • Do not use the Label Printer. d Copy the downloaded EXE file (for Windows) or DMG file (for Mac) from the removable media onto the computer not connected to... Double-click the downloaded files, and follow the on a Computer not connected to the Internet 2 a On a computer connected to the Internet, visit support.brother.com, and go to your model's Downloads page. 2 b Select the computer's operating system of software individually, for example, a USB flash drive or...
...needs an active Internet connection. • Download each type of the computer not connected to the Internet. Windows • Do not use the Label Printer. d Copy the downloaded EXE file (for Windows) or DMG file (for Mac) from the removable media onto the computer not connected to... Double-click the downloaded files, and follow the on a Computer not connected to the Internet 2 a On a computer connected to the Internet, visit support.brother.com, and go to your model's Downloads page. 2 b Select the computer's operating system of software individually, for example, a USB flash drive or...

Users Guide
Page 18
... outlet. Make sure the printer driver has been installed correctly and that you can print. Connect the Label Printer to specify the Label Printer's device and P-touch Template settings. 3 Note Install the Printer Setting Tool using the Software/Documentation Installer. 3 Change the Label Printer Settings 3 Printer Setting Tool for Windows 3 Use the Printer Setting Tool, installed on page 8.
... outlet. Make sure the printer driver has been installed correctly and that you can print. Connect the Label Printer to specify the Label Printer's device and P-touch Template settings. 3 Note Install the Printer Setting Tool using the Software/Documentation Installer. 3 Change the Label Printer Settings 3 Printer Setting Tool for Windows 3 Use the Printer Setting Tool, installed on page 8.

Users Guide
Page 19
...settings dialog boxes, see Device Settings for Windows a Connect the Label Printer you want to configure appears next to Printer. c Check that the Label Printer you want to configure to change, and then specify or ...Label Printer appears, select the Label Printer you want from the drop-down list. b Start the Printer Setting Tool. For Windows 10: Click Start > Brother > Printer Setting Tool. For Windows 8 / Windows 8.1: On the Apps screen, click the Printer Setting Tool. For Windows 7: Click Start > All Programs > Brother > Labels & Mobile Printer > Printer...
...settings dialog boxes, see Device Settings for Windows a Connect the Label Printer you want to configure appears next to Printer. c Check that the Label Printer you want to configure to change, and then specify or ...Label Printer appears, select the Label Printer you want from the drop-down list. b Start the Printer Setting Tool. For Windows 10: Click Start > Brother > Printer Setting Tool. For Windows 8 / Windows 8.1: On the Apps screen, click the Printer Setting Tool. For Windows 7: Click Start > All Programs > Brother > Labels & Mobile Printer > Printer...

Users Guide
Page 20
Change the Label Printer Settings e Click Exit. IMPORTANT Use the Printer Setting Tool to configure it while it is idle. The Label Printer may malfunction if you try to configure the Label Printer only when the Label Printer is processing or printing a print job. 3 14
Change the Label Printer Settings e Click Exit. IMPORTANT Use the Printer Setting Tool to configure it while it is idle. The Label Printer may malfunction if you try to configure the Label Printer only when the Label Printer is processing or printing a print job. 3 14

Users Guide
Page 21
...the same settings to configure. 15 Change the Label Printer Settings Device Settings for Windows 3 Use Device Settings in the Printer Setting Tool, more advanced settings can you change printer settings when connecting the Label Printer and computer with a USB Cable. If ...8 1 Menu Bar Commands are categorized under each menu by using Device Settings in the Printer Setting Tool to specify or change the device settings for one Label Printer, but you want to multiple Label Printers. Not only can be retrieved, the previous settings are retrieved and displayed. however, by ...
...the same settings to configure. 15 Change the Label Printer Settings Device Settings for Windows 3 Use Device Settings in the Printer Setting Tool, more advanced settings can you change printer settings when connecting the Label Printer and computer with a USB Cable. If ...8 1 Menu Bar Commands are categorized under each menu by using Device Settings in the Printer Setting Tool to specify or change the device settings for one Label Printer, but you want to multiple Label Printers. Not only can be retrieved, the previous settings are retrieved and displayed. however, by ...

Users Guide
Page 22
...selected, changed. To display the current settings, select Check Setting from the currently-connected Label Printer and displays them in the tab will not be applied to the Label Printer. Change the Label Printer Settings 3 Settings Tabs Contains settings that tab cannot be changed . appears on tabs...command. 6 Parameters Displays the current settings. 7 Exit Exits Device Settings and returns to the Printer Setting Tool's main window. 8 Apply Applies the settings to the Label Printer even if you use the Save in Command File or Export commands. 3 4 Current Settings Retrieves...
...selected, changed. To display the current settings, select Check Setting from the currently-connected Label Printer and displays them in the tab will not be applied to the Label Printer. Change the Label Printer Settings 3 Settings Tabs Contains settings that tab cannot be changed . appears on tabs...command. 6 Parameters Displays the current settings. 7 Exit Exits Device Settings and returns to the Printer Setting Tool's main window. 8 Apply Applies the settings to the Label Printer even if you use the Save in Command File or Export commands. 3 4 Current Settings Retrieves...

Users Guide
Page 23
... 3 Displays the current settings. • Import Imports an exported file. • Export Saves the current settings in a file. Change the Label Printer Settings Menu Bar 3 File • Apply Settings to the Printer Applies the settings to the factory settings. • Option Settings If the Do not display an error message if the current...
... 3 Displays the current settings. • Import Imports an exported file. • Export Saves the current settings in a file. Change the Label Printer Settings Menu Bar 3 File • Apply Settings to the Printer Applies the settings to the factory settings. • Option Settings If the Do not display an error message if the current...

Users Guide
Page 24
... the period of time that were applied to the first Label Printer are applied to the second Label Printer. c for Windows on automatically when the AC Power Cord is erased after printing. Change the Label Printer Settings Basic Tab 3 • Auto Power On Specifies whether the Label Printer turns on page 15. 18 c Click Apply. The same settings...
... the period of time that were applied to the first Label Printer are applied to the second Label Printer. c for Windows on automatically when the AC Power Cord is erased after printing. Change the Label Printer Settings Basic Tab 3 • Auto Power On Specifies whether the Label Printer turns on page 15. 18 c Click Apply. The same settings...


