Users Manual - English
Page 17
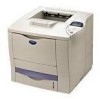
4 5 xvi NETWORK (only on a Network 3-31 INTERFACE 3-32 RESET MENU 3-33 Set date and time 3-34 Set IP Address 3-35 About emulation modes 3-36 List of...of the paper ..... 4-4 Paper orientation for printing on both sides of the paper 4-5 Mailbox unit 4-6 Network option NC-4100h (For HL-7050 only 4-8 Installing the Network board 4-8 CompactFlash card 4-11 Installing the CompactFlash card 4-12 RAM expansion 4-13 Installing extra DIMM memory ... DRUM SOON message 5-6 Replacing the drum unit 5-6 Replacing Maintenance Parts 5-11 Cleaning 5-12 Cleaning the outside of the printer 5-12
4 5 xvi NETWORK (only on a Network 3-31 INTERFACE 3-32 RESET MENU 3-33 Set date and time 3-34 Set IP Address 3-35 About emulation modes 3-36 List of...of the paper ..... 4-4 Paper orientation for printing on both sides of the paper 4-5 Mailbox unit 4-6 Network option NC-4100h (For HL-7050 only 4-8 Installing the Network board 4-8 CompactFlash card 4-11 Installing the CompactFlash card 4-12 RAM expansion 4-13 Installing extra DIMM memory ... DRUM SOON message 5-6 Replacing the drum unit 5-6 Replacing Maintenance Parts 5-11 Cleaning 5-12 Cleaning the outside of the printer 5-12

Users Manual - English
Page 50
... blue tabs manually, push the blue tabs back to reset the blue tabs automatically. Figure 1-22 4 Put the envelopes in the multi-purpose tray so they have finished printing your envelopes, close the face-up ... properly, resulting in a skewed printout or a paper jam. Up to ( ) Figure 1-23 Make sure that have been creased after they touch the back of the printer open the face-up output tray to their original position. If it is neatly stacked and in the proper position on the multi-purpose tray...
... blue tabs manually, push the blue tabs back to reset the blue tabs automatically. Figure 1-22 4 Put the envelopes in the multi-purpose tray so they have finished printing your envelopes, close the face-up ... properly, resulting in a skewed printout or a paper jam. Up to ( ) Figure 1-23 Make sure that have been creased after they touch the back of the printer open the face-up output tray to their original position. If it is neatly stacked and in the proper position on the multi-purpose tray...

Users Manual - English
Page 84
See List of factory settings in the RESET menu. Printer settings Factory settings The printer settings have been preset at the factory and they are called "Factory settings." For more information, see Chapter 3. DRIVER AND SOFTWARE 2 - 24 You can tailor the printer to the factory settings in Chapter 3. Although you can use the printer without changing these factory settings, you can reset the changed user settings to your particular needs by changing the 'user settings.'
See List of factory settings in the RESET menu. Printer settings Factory settings The printer settings have been preset at the factory and they are called "Factory settings." For more information, see Chapter 3. DRIVER AND SOFTWARE 2 - 24 You can tailor the printer to the factory settings in Chapter 3. Although you can use the printer without changing these factory settings, you can reset the changed user settings to your particular needs by changing the 'user settings.'

Users Manual - English
Page 89
... you wish to share with colleagues, simply spool the document to a non-secure area of the printer. The reprint data in RAM, the data will be deleted when the printer is turned off . Make sure that you reset the Ramdisk size to 0MB after you finish using Secure Printing. ■ When you store... data in RAM will be reduced. We recommend that you add more RAM if you want to be able to print a lot of the printer is decreased and the printer performance will be deleted...
... you wish to share with colleagues, simply spool the document to a non-secure area of the printer. The reprint data in RAM, the data will be deleted when the printer is turned off . Make sure that you reset the Ramdisk size to 0MB after you finish using Secure Printing. ■ When you store... data in RAM will be reduced. We recommend that you add more RAM if you want to be able to print a lot of the printer is decreased and the printer performance will be deleted...

Users Manual - English
Page 103
.... Pressing the Go button starts the printer again. NOW INITIALIZING The printer is warming up . JOB CANCELLING Cancelling the job. WARMING UP The printer is setting up . RESET TO FACTORY The printer setting returns to start printing. FAX SENDING FAX RECEIVING Sending fax data (Please see http://solutions.brother.com for information about fax mode.) Receiving...
.... Pressing the Go button starts the printer again. NOW INITIALIZING The printer is warming up . JOB CANCELLING Cancelling the job. WARMING UP The printer is setting up . RESET TO FACTORY The printer setting returns to start printing. FAX SENDING FAX RECEIVING Sending fax data (Please see http://solutions.brother.com for information about fax mode.) Receiving...

Users Manual - English
Page 106
...; PRINT MENU For more information, see page 3-27. ■ NETWORK For more information, see page 3-31. ■ INTERFACE For more information, see page 3-32. ■ RESET MENU For more information, see page 3-33. CONTROL PANEL 3 - 22 Paper tray TRAY 1 Multi-purpose tray MP TRAY Optional lower tray TRAY 2, TRAY 3, TRAY 4 Optional...
...; PRINT MENU For more information, see page 3-27. ■ NETWORK For more information, see page 3-31. ■ INTERFACE For more information, see page 3-32. ■ RESET MENU For more information, see page 3-33. CONTROL PANEL 3 - 22 Paper tray TRAY 1 Multi-purpose tray MP TRAY Optional lower tray TRAY 2, TRAY 3, TRAY 4 Optional...

Users Manual - English
Page 117
... *2 RAM SIZE *2 RECEIVE *2 INTERVAL *2 *1 Appears when FAX MODE is off. *2 Appears when FAX MODE is on. Resets the printer and restores all printer settings (including command settings) to the factory settings. See List of factory settings in this chapter. 3 - 33 CONTROL PANEL Description... =OFF/ON =0/1/2/3/4 =AUTO/OFF/90% =1:##MBYTE =ON/OFF =OFF/6H/12H/24H/2D/4D/7D RESET MENU Display Shows RESET PRINTER FACTORY RESET Description Resets the printer and restores all printer settings (including command settings) to settings you have previously made with the control panel buttons.
... *2 RAM SIZE *2 RECEIVE *2 INTERVAL *2 *1 Appears when FAX MODE is off. *2 Appears when FAX MODE is on. Resets the printer and restores all printer settings (including command settings) to the factory settings. See List of factory settings in this chapter. 3 - 33 CONTROL PANEL Description... =OFF/ON =0/1/2/3/4 =AUTO/OFF/90% =1:##MBYTE =ON/OFF =OFF/6H/12H/24H/2D/4D/7D RESET MENU Display Shows RESET PRINTER FACTORY RESET Description Resets the printer and restores all printer settings (including command settings) to settings you have previously made with the control panel buttons.

Users Manual - English
Page 122
... SCROLL=LEVEL 1 =30MIN CONTROL PANEL 3 - 38 List of factory settings The following settings cannot be restored to the factory settings with the reset menu in the following table. ■ The following table shows the factory settings. ■ The emulation mode affects the setting. Effective modes ... and local language for display messages. ■ The copy setting is always restored to the factory setting when the printer is not possible to its factory settings (resetting all information such as the password and IP address information), hold down the Network Test button on again. ■...
... SCROLL=LEVEL 1 =30MIN CONTROL PANEL 3 - 38 List of factory settings The following settings cannot be restored to the factory settings with the reset menu in the following table. ■ The following table shows the factory settings. ■ The emulation mode affects the setting. Effective modes ... and local language for display messages. ■ The copy setting is always restored to the factory setting when the printer is not possible to its factory settings (resetting all information such as the password and IP address information), hold down the Network Test button on again. ■...

Users Manual - English
Page 159
See Cleaning in the printer. 6 Put the drum unit assembly in this chapter. 7 Reset the page counter following the instructions we have supplied with the new drum unit. ■ If you replace the drum unit. Figure 5-16 ■ We recommend that you clean the inside of the printer when you replace only the toner cartridge, do not reset the page counter. 8 Close the top cover of the printer. 5 - 10 ROUTINE MAINTENANCE
See Cleaning in the printer. 6 Put the drum unit assembly in this chapter. 7 Reset the page counter following the instructions we have supplied with the new drum unit. ■ If you replace the drum unit. Figure 5-16 ■ We recommend that you clean the inside of the printer when you replace only the toner cartridge, do not reset the page counter. 8 Close the top cover of the printer. 5 - 10 ROUTINE MAINTENANCE

Users Manual - English
Page 198
Reset the printer. [Press - memory in Chapter 4. TROUBLESHOOTING 6 - 30 twice, then press Set twice and finally press Go.] 2. If the printer prints out the error message page which says "ERROR NAME; See Installing extra DIMM memory in Chapter 4. The printer cannot print EPS data. In the Printer folder, select the printer... You need the following : 1. Press the Advanced button on the LCD, please do not follow the instructions for using the printer, you use. 2. limitcheck", add more memory. See Installing extra DIMM down. Select 'Tagged binary communication protocol' in BR-...
Reset the printer. [Press - memory in Chapter 4. TROUBLESHOOTING 6 - 30 twice, then press Set twice and finally press Go.] 2. If the printer prints out the error message page which says "ERROR NAME; See Installing extra DIMM memory in Chapter 4. The printer cannot print EPS data. In the Printer folder, select the printer... You need the following : 1. Press the Advanced button on the LCD, please do not follow the instructions for using the printer, you use. 2. limitcheck", add more memory. See Installing extra DIMM down. Select 'Tagged binary communication protocol' in BR-...

Users Manual - English
Page 252
...21 J jam at paper exits 6-17 jam in duplex unit 6-19 jam in mailbox unit 6-22 jam in tray 6-10, 6-11 jam inside printer 6-14 Job Cancel button ........3-2, 3-4 L LCD (liquid crystal display 3-16 LCD line #2 3-18 LCD menu 3-22 LED (light emitting diode) .....messages ...3-19 proof data 3-8 Proprinter XL mode ...........3-37 public data 3-8 Q Quality menu 3-24, 3-38 R RAM 4-13 (USA) register your printer .... iv Reprint button 3-2, 3-5 reprint last job 3-6 Reset menu 3-33 S SB-4000 4-2 scalable font A-10 secure data 3-9 Set button 3-2, 3-13 Setup menu 3-25, 3-38 small pad 4-2, ...
...21 J jam at paper exits 6-17 jam in duplex unit 6-19 jam in mailbox unit 6-22 jam in tray 6-10, 6-11 jam inside printer 6-14 Job Cancel button ........3-2, 3-4 L LCD (liquid crystal display 3-16 LCD line #2 3-18 LCD menu 3-22 LED (light emitting diode) .....messages ...3-19 proof data 3-8 Proprinter XL mode ...........3-37 public data 3-8 Q Quality menu 3-24, 3-38 R RAM 4-13 (USA) register your printer .... iv Reprint button 3-2, 3-5 reprint last job 3-6 Reset menu 3-33 S SB-4000 4-2 scalable font A-10 secure data 3-9 Set button 3-2, 3-13 Setup menu 3-25, 3-38 small pad 4-2, ...

Quick Setup Guide - English
Page 32
The opening screen will appear automatically. Factory Default Setting If you wish to reset the print server back to its default factory settings (resetting all information such as the password and IP address information), use a fine ball point pen to hold ...screen. Installing the BRAdmin Professional Configuration Utility (Windows® Users Only) The BRAdmin Professional software is 'access'. For example, Brother network ready printers and Brother network ready Multifunction devices can use a fine ball point pen to hold down the Network Test Button for less than 5 seconds...
The opening screen will appear automatically. Factory Default Setting If you wish to reset the print server back to its default factory settings (resetting all information such as the password and IP address information), use a fine ball point pen to hold ...screen. Installing the BRAdmin Professional Configuration Utility (Windows® Users Only) The BRAdmin Professional software is 'access'. For example, Brother network ready printers and Brother network ready Multifunction devices can use a fine ball point pen to hold down the Network Test Button for less than 5 seconds...

Network Users Manual - English
Page 109
... pages. Use the PRINT command with the following contents: ]VMS;2\ where is the escape character (ASCII 27) and "VMS" is in your form (stop and reset all queues that use the library before doing this file into the default library and then redefines the form PCL (previously defined in the following...
... pages. Use the PRINT command with the following contents: ]VMS;2\ where is the escape character (ASCII 27) and "VMS" is in your form (stop and reset all queues that use the library before doing this file into the default library and then redefines the form PCL (previously defined in the following...

Network Users Manual - English
Page 110
.... a Type MENU to get the PCSA menu. f Enter VMS queue name (previously defined). For example: USE LPT1:\\VAX\LASER You may delete this will add a PCL printer reset that you are using DOS, type the command USE LPTx:\\node\service at the DOS prompt, where x is the PC parallel port number, node is... DECnet node name and service is the service name picked previously. g Enter VMS form name (use the default if you do not use the ADD PRINTER QUEUE option as this print service by typing LATCP at the C:> prompt and then entering the command DELETE LPT1: b If you are using Windows®...
.... a Type MENU to get the PCSA menu. f Enter VMS queue name (previously defined). For example: USE LPT1:\\VAX\LASER You may delete this will add a PCL printer reset that you are using DOS, type the command USE LPTx:\\node\service at the DOS prompt, where x is the PC parallel port number, node is... DECnet node name and service is the service name picked previously. g Enter VMS form name (use the default if you do not use the ADD PRINTER QUEUE option as this print service by typing LATCP at the C:> prompt and then entering the command DELETE LPT1: b If you are using Windows®...

Network Users Manual - English
Page 119
... the message that the queue is generally not needed with DOS or Windows application programs, since the program or drivers reset the printer after the print job to put the printer in order to use the arrow keys to add another destination at this section. This screen allows you to use ... installed in a particular state (for most applications. The default values will not appear on the file server, repeat steps 1 through 17 of the Brother print server and an optional description. Press F10 to accept and print jobs. If the PCPrint option is not installed, PCPrint will work OK for...
... the message that the queue is generally not needed with DOS or Windows application programs, since the program or drivers reset the printer after the print job to put the printer in order to use the arrow keys to add another destination at this section. This screen allows you to use ... installed in a particular state (for most applications. The default values will not appear on the file server, repeat steps 1 through 17 of the Brother print server and an optional description. Press F10 to accept and print jobs. If the PCPrint option is not installed, PCPrint will work OK for...

Network Users Manual - English
Page 129
... enter the IP address. If your Administrator has configured the system to deliver IP addresses using BOOTP, DHCP or RARP your printer has an LCD panel) or factory reset the print server (which case, you cannot use BOOTP or other methods described in this . If you wish to change ...use the ARP command again). For security reasons, once you have successfully configured the IP address of a Brother print server using the SET IP ADDRESS command) the printer's control panel (if your Brother print server can receive an IP address from any attempts to do this chapter to use the ARP command....
... enter the IP address. If your Administrator has configured the system to deliver IP addresses using BOOTP, DHCP or RARP your printer has an LCD panel) or factory reset the print server (which case, you cannot use BOOTP or other methods described in this . If you wish to change ...use the ARP command again). For security reasons, once you have successfully configured the IP address of a Brother print server using the SET IP ADDRESS command) the printer's control panel (if your Brother print server can receive an IP address from any attempts to do this chapter to use the ARP command....

Network Users Manual - English
Page 157
...Quick Setup Guide for information on how to print a configuration page). There are three methods of this, we provide will automatically factory reset your Brother print server: 1 Use the BRAdmin application (Recommended) 2 Use the FTP protocol (Recommended if running on the print server is stored... to the print server). Because of upgrading the firmware in the print server being factory reset. A - 4 APPENDIX To get the latest firmware update, visit the Brother Solutions web site at http://solutions.brother.com/ Some software versions that we STRONGLY recommend that you upgrade.
...Quick Setup Guide for information on how to print a configuration page). There are three methods of this, we provide will automatically factory reset your Brother print server: 1 Use the BRAdmin application (Recommended) 2 Use the FTP protocol (Recommended if running on the print server is stored... to the print server). Because of upgrading the firmware in the print server being factory reset. A - 4 APPENDIX To get the latest firmware update, visit the Brother Solutions web site at http://solutions.brother.com/ Some software versions that we STRONGLY recommend that you upgrade.


