
Users Manual - English
Page 73
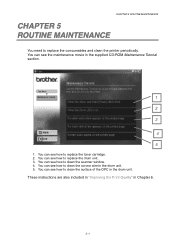
...These instructions are also included in "Improving the Print Quality" in the drum unit. You can see how to replace the toner cartridge. 2. You can see the maintenance movie in the drum unit. 5. You can see how to clean the corona wire in the supplied CD-ROM Maintenance Tutorial section. 1... 2 3 4 5 1. You can see how to replace the consumables and clean the printer periodically. You can see how to clean the surface of the OPC...
...These instructions are also included in "Improving the Print Quality" in the drum unit. You can see how to replace the toner cartridge. 2. You can see the maintenance movie in the drum unit. 5. You can see how to clean the corona wire in the supplied CD-ROM Maintenance Tutorial section. 1... 2 3 4 5 1. You can see how to replace the consumables and clean the printer periodically. You can see how to clean the surface of the OPC...
Users Manual - English
Page 79
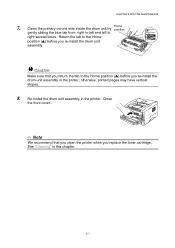
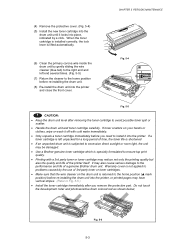
... to the Home position (L) before you re-install the drum unit assembly in the printer. otherwise, printed pages may have vertical stripes. 8. Re-install the drum unit assembly in the printer; Home Clean the primary corona wire inside the drum unit by position gently sliding the blue tab from right... to left and left to the Home position (L) before you re-install the drum unit assembly. ! Return the tab ...
... to the Home position (L) before you re-install the drum unit assembly in the printer. otherwise, printed pages may have vertical stripes. 8. Re-install the drum unit assembly in the printer; Home Clean the primary corona wire inside the drum unit by position gently sliding the blue tab from right... to left and left to the Home position (L) before you re-install the drum unit assembly. ! Return the tab ...
Users Manual - English
Page 80
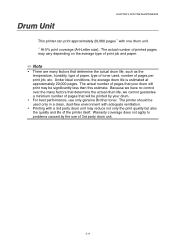
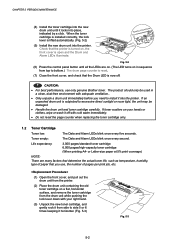
...significantly less than this estimate. Warranty coverage does not apply to problems caused by your drum will be printed by the use only genuine Brother toner. Under ideal conditions, the average drum life is estimated at approximately 20,000 pages. Because we have no control over ... quality but also the quality and life of toner used only in a clean, dust-free environment with one drum unit. *1 At 5% print coverage (A4-Letter size). y For best performance, use of pages that your drum. Drum Unit CHAPTER 5 ROUTINE MAINTENANCE This printer can print approximately 20,000 pages ...
...significantly less than this estimate. Warranty coverage does not apply to problems caused by your drum will be printed by the use only genuine Brother toner. Under ideal conditions, the average drum life is estimated at approximately 20,000 pages. Because we have no control over ... quality but also the quality and life of toner used only in a clean, dust-free environment with one drum unit. *1 At 5% print coverage (A4-Letter size). y For best performance, use of pages that your drum. Drum Unit CHAPTER 5 ROUTINE MAINTENANCE This printer can print approximately 20,000 pages ...

Users Manual - English
Page 81
See "Cleaning" in the print quality. ™ Change Drum Message CHAPTER 5 ROUTINE MAINTENANCE If the Drum LED is on, it may contain toner. • You should clean the printer when you replace the drum unit with a new one before there is near the end of its life. Caution • While removing the drum unit, handle it carefully because it means the drum unit is a noticeable deterioration in this chapter. 5-9 Drum Ready Paper Alarm Toner Data ! We recommend that you replace the drum unit.
See "Cleaning" in the print quality. ™ Change Drum Message CHAPTER 5 ROUTINE MAINTENANCE If the Drum LED is on, it may contain toner. • You should clean the printer when you replace the drum unit with a new one before there is near the end of its life. Caution • While removing the drum unit, handle it carefully because it means the drum unit is a noticeable deterioration in this chapter. 5-9 Drum Ready Paper Alarm Toner Data ! We recommend that you replace the drum unit.
Users Manual - English
Page 84
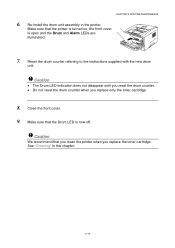
...MAINTENANCE 6. Caution • The Drum LED indication does not disappear until you reset the drum counter. • Do not reset the drum counter when you replace the toner cartridge. Reset the drum counter referring to the instructions supplied with the new drum unit. ! See "Cleaning" in the printer. Caution We... cover is now off. ! Make sure that the Drum LED is open and the Drum and Alarm LEDs are illuminated. 7. Re-install the drum unit assembly in this chapter. 5-12 Close the front cover. 9. Make sure that you clean the printer when you replace only the toner cartridge....
...MAINTENANCE 6. Caution • The Drum LED indication does not disappear until you reset the drum counter. • Do not reset the drum counter when you replace the toner cartridge. Reset the drum counter referring to the instructions supplied with the new drum unit. ! See "Cleaning" in the printer. Caution We... cover is now off. ! Make sure that the Drum LED is open and the Drum and Alarm LEDs are illuminated. 7. Re-install the drum unit assembly in this chapter. 5-12 Close the front cover. 9. Make sure that you clean the printer when you replace only the toner cartridge....
Users Manual - English
Page 85
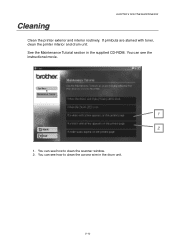
Cleaning CHAPTER 5 ROUTINE MAINTENANCE Clean the printer exterior and interior routinely. You can see how to clean the corona wire in the supplied CD-ROM. You can see how to clean the scanner window. 2. You can see the instructional movie. 1 2 1. If printouts are stained with toner, clean the printer interior and drum unit. See the Maintenance Tutorial section in the drum unit. 5-13
Cleaning CHAPTER 5 ROUTINE MAINTENANCE Clean the printer exterior and interior routinely. You can see how to clean the corona wire in the supplied CD-ROM. You can see how to clean the scanner window. 2. You can see the instructional movie. 1 2 1. If printouts are stained with toner, clean the printer interior and drum unit. See the Maintenance Tutorial section in the drum unit. 5-13
Users Manual - English
Page 99
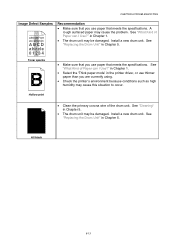
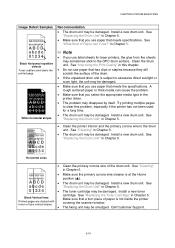
... the specifications. See "What Kind of Paper can I Use?" Hollow print • Clean the primary corona wire of Paper can I Use?" See "What Kind of the drum unit. in Chapter 1. • Select the 'Thick paper mode' in Chapter 1. • The drum unit may cause this situation to occur. CHAPTER 6 TROUBLESHOOTING Image Defect Samples...
... the specifications. See "What Kind of Paper can I Use?" Hollow print • Clean the primary corona wire of Paper can I Use?" See "What Kind of the drum unit. in Chapter 1. • Select the 'Thick paper mode' in Chapter 1. • The drum unit may cause this situation to occur. CHAPTER 6 TROUBLESHOOTING Image Defect Samples...
Users Manual - English
Page 100
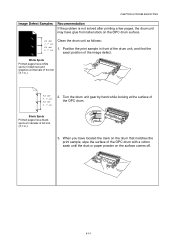
...paper powder on the OPC drum surface. 94 mm 3.7 in. 94 mm 3.7 in. Turn the drum unit gear by hand while looking at the surface of the image defect. Black Spots Printed pages have glue from label stock on the surface comes off. 6-14 Clean the drum unit as follows: 1. ...Position the print sample in front of the drum unit, and find the exact position of the OPC drum. CHAPTER 6 TROUBLESHOOTING Image Defect Samples Recommendation If the problem is not solved after...
...paper powder on the OPC drum surface. 94 mm 3.7 in. 94 mm 3.7 in. Turn the drum unit gear by hand while looking at the surface of the image defect. Black Spots Printed pages have glue from label stock on the surface comes off. 6-14 Clean the drum unit as follows: 1. ...Position the print sample in front of the drum unit, and find the exact position of the OPC drum. CHAPTER 6 TROUBLESHOOTING Image Defect Samples Recommendation If the problem is not solved after...
Users Manual - English
Page 101
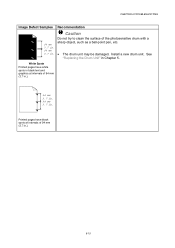
Install a new drum unit. Printed pages have white spots in black text and graphics at intervals of 94 mm (3.7 in . Caution Do not try to clean the surface of 94 mm (3.7 in.). 94 mm 3.7 in. 94 mm 3.7 in .). 6-15 See "Replacing the Drum Unit" in . CHAPTER 6 TROUBLESHOOTING Image Defect Samples 94 mm 3.7 in. 94 mm 3.7 in Chapter 5. Recommendation ! White Spots Printed pages have black spots at intervals of the photosensitive drum with a sharp object, such as a ball-point pen, etc. • The drum unit may be damaged.
Install a new drum unit. Printed pages have white spots in black text and graphics at intervals of 94 mm (3.7 in . Caution Do not try to clean the surface of 94 mm (3.7 in.). 94 mm 3.7 in. 94 mm 3.7 in .). 6-15 See "Replacing the Drum Unit" in . CHAPTER 6 TROUBLESHOOTING Image Defect Samples 94 mm 3.7 in. 94 mm 3.7 in Chapter 5. Recommendation ! White Spots Printed pages have black spots at intervals of the photosensitive drum with a sharp object, such as a ball-point pen, etc. • The drum unit may be damaged.
Users Manual - English
Page 102
...may be damaged. • Make sure that you use label sheets for a long time. • The drum unit may be damaged. Install a new drum unit. See "Cleaning" in Chapter 5. Try printing multiple pages to clear this chapter. • Do not use paper that has... 6 TROUBLESHOOTING Image Defect Samples ABCDEFGH abcdefghijk ABCD abcde 01234 Black Horizontal repetitive defects Toner scatters and stains the printed page. Clean the drum unit. See "Replacing the Drum Unit" in the printer driver. • The problem may be smudged. See "Replacing the Toner Cartridge" in Chapter ...
...may be damaged. • Make sure that you use label sheets for a long time. • The drum unit may be damaged. Install a new drum unit. See "Cleaning" in Chapter 5. Try printing multiple pages to clear this chapter. • Do not use paper that has... 6 TROUBLESHOOTING Image Defect Samples ABCDEFGH abcdefghijk ABCD abcde 01234 Black Horizontal repetitive defects Toner scatters and stains the printed page. Clean the drum unit. See "Replacing the Drum Unit" in the printer driver. • The problem may be smudged. See "Replacing the Toner Cartridge" in Chapter ...

Service Manual
Page 80
As a result, the image is visible on the paper. (2) Cleaning process of the paper. The negative charge applied to the paper causes the positively charged toner to leave the drum, and adhere to the back of transfer roller If the toner is not transferred onto the paper perfectly ...Transfer (1) Transfer process After the drum has been charged and exposed, and has received a developed image, the toner formed is transferred onto the paper by applying a negative charge to the paper. The transfer voltage changes to the paper by static electricity is cleaned by heat and pressure when passing...
As a result, the image is visible on the paper. (2) Cleaning process of the paper. The negative charge applied to the paper causes the positively charged toner to leave the drum, and adhere to the back of transfer roller If the toner is not transferred onto the paper perfectly ...Transfer (1) Transfer process After the drum has been charged and exposed, and has received a developed image, the toner formed is transferred onto the paper by applying a negative charge to the paper. The transfer voltage changes to the paper by static electricity is cleaned by heat and pressure when passing...
Service Manual
Page 134
... at 5% print coverage) NOTE: There are on. (The LED turns on in a clean, dust-free environment with adequate ventilation.. • Only unpack a drum unit immediately before you use only genuine Brother toner. When the toner cartridge is installed correctly, the lock lever is subjected to excessive direct... sunlight or room light, the unit may be used in sequence from the drum unit while pushing the lock...
... at 5% print coverage) NOTE: There are on. (The LED turns on in a clean, dust-free environment with adequate ventilation.. • Only unpack a drum unit immediately before you use only genuine Brother toner. When the toner cartridge is installed correctly, the lock lever is subjected to excessive direct... sunlight or room light, the unit may be used in sequence from the drum unit while pushing the lock...
Service Manual
Page 135
...cleaner to excessive direct sunlight or room light, the unit may reduce not only the printing quality but also the quality and life of a genuine Brother drum unit. Fig. 5-4 Fig. 5-5 ! If a toner cartridge is not applied to problems caused by the use of 3rd party toner or toner ... the printer. When the toner cartridge is installed correctly, the lock lever is lifted automatically. (6) Clean the primary corona wire inside the drum unit by a click. If toner scatters on the drum unit is specially formulated to ensure top print quality. • Printing with cold water immediately. &#...
...cleaner to excessive direct sunlight or room light, the unit may reduce not only the printing quality but also the quality and life of a genuine Brother drum unit. Fig. 5-4 Fig. 5-5 ! If a toner cartridge is not applied to problems caused by the use of 3rd party toner or toner ... the printer. When the toner cartridge is installed correctly, the lock lever is lifted automatically. (6) Clean the primary corona wire inside the drum unit by a click. If toner scatters on the drum unit is specially formulated to ensure top print quality. • Printing with cold water immediately. &#...
Service Manual
Page 137
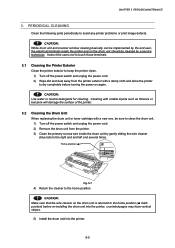
...5-7 4) Return the cleaner to avoid any printer problems or print image defects. ! Cleaning with volatile liquids such as thinners or benzene will damage the surface of the printer. 3.2 Cleaning the Drum Unit When replacing the drum unit or toner cartridge with a damp cloth and allow the printer to the home position... should be sure to the right end and left end several times. CAUTION: While drum unit and scanner window cleaning basically can be implemented by gently sliding the wire cleaner (blue tab) to clean the drum unit. 1) Turn off the power switch and unplug the power cord. 2) Wipe...
...5-7 4) Return the cleaner to avoid any printer problems or print image defects. ! Cleaning with volatile liquids such as thinners or benzene will damage the surface of the printer. 3.2 Cleaning the Drum Unit When replacing the drum unit or toner cartridge with a damp cloth and allow the printer to the home position... should be sure to the right end and left end several times. CAUTION: While drum unit and scanner window cleaning basically can be implemented by gently sliding the wire cleaner (blue tab) to clean the drum unit. 1) Turn off the power switch and unplug the power cord. 2) Wipe...

Service Manual
Page 138
... and unplug the power cord. 2) Remove the drum unit from the printer. 3) Wipe the electrical terminals as shown in the figures below with a soft dry cloth. Fig. 5-8 ! CHAPTER 5 PERIODIC MAINTENANCE 3.3 Cleaning the Scanner Window When replacing the drum unit or toner cartridge with a new one, ...be sure to clean the scanner window. 1) Turn off the power switch and unplug the power cord. 2) Remove the...
... and unplug the power cord. 2) Remove the drum unit from the printer. 3) Wipe the electrical terminals as shown in the figures below with a soft dry cloth. Fig. 5-8 ! CHAPTER 5 PERIODIC MAINTENANCE 3.3 Cleaning the Scanner Window When replacing the drum unit or toner cartridge with a new one, ...be sure to clean the scanner window. 1) Turn off the power switch and unplug the power cord. 2) Remove the...


