Network Users Manual - English
Page 55
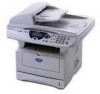
... OK (New Port on Windows NT®4.0) tab and push the Add Port button. Adding a Second Brother Internet Port You should not re-run the install program to a printer on the Internet or on a home or office network and then enter the following in the URL field: http://printer_ip_address:631/ipp (Where..., select Settings, and open the Printers window. In the Add Port dialog, select the Other radio button (Windows® 95/ 98/Me only) and then Brother Internet Port. Any unique name can be given here as long as it will see the Welcome to the Add Printer Wizard screen. 2 You are...
... OK (New Port on Windows NT®4.0) tab and push the Add Port button. Adding a Second Brother Internet Port You should not re-run the install program to a printer on the Internet or on a home or office network and then enter the following in the URL field: http://printer_ip_address:631/ipp (Where..., select Settings, and open the Printers window. In the Add Port dialog, select the Other radio button (Windows® 95/ 98/Me only) and then Brother Internet Port. Any unique name can be given here as long as it will see the Welcome to the Add Printer Wizard screen. 2 You are...
Users Manual - English
Page 58
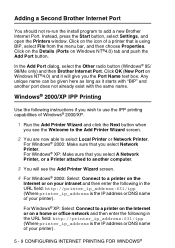
...hours before automatically switching off as they leave the office, or late at night at home. This is automatically reset when the DCP receives PC data, or makes a copy. You can turn off the scanner lamp...off until the next time you want to turn the lamp off to preserve the life of time the DCP is idle. The scanner lamp will reduce the lamp's life. Please note that turning the lamp off ...1 Press Menu, 1, 4, 2. 2 Use the Numeric keys to enter the length of the lamp. While the DCP is in sleep mode, you try to print or copy in Step 2. If you will see Sleep on for ...
...hours before automatically switching off as they leave the office, or late at night at home. This is automatically reset when the DCP receives PC data, or makes a copy. You can turn off the scanner lamp...off until the next time you want to turn the lamp off to preserve the life of time the DCP is idle. The scanner lamp will reduce the lamp's life. Please note that turning the lamp off ...1 Press Menu, 1, 4, 2. 2 Use the Numeric keys to enter the length of the lamp. While the DCP is in sleep mode, you try to print or copy in Step 2. If you will see Sleep on for ...

Users Manual - English
Page 239
... that you use paper that meets our specifications. Put in the printer Properties tab of the driver. -OR- Turn off Toner Save mode in the DCP itself. (See Toner Save on page 4-4.) Try installing a new toner cartridge. (See Replacing the toner cartridge on page 14-24.) Try installing a new drum ...-surfaced paper or thick print media may cause this print fault. (See Choosing a location on page x.) If the whole page is not connected to the home position (▲). (See Cleaning the drum unit on page 14-23.) The drum unit may be damaged. Rough-surfaced paper may cause the problem. (See...
... that you use paper that meets our specifications. Put in the printer Properties tab of the driver. -OR- Turn off Toner Save mode in the DCP itself. (See Toner Save on page 4-4.) Try installing a new toner cartridge. (See Replacing the toner cartridge on page 14-24.) Try installing a new drum ...-surfaced paper or thick print media may cause this print fault. (See Choosing a location on page x.) If the whole page is not connected to the home position (▲). (See Cleaning the drum unit on page 14-23.) The drum unit may be damaged. Rough-surfaced paper may cause the problem. (See...

Users Manual - English
Page 241
... may be damaged. If you use paper that a torn piece of paper is at the home position (▲). Try printing multiple pages to clear this problem, especially if the printer has not been used for laser printers, the glue from the sheets may sometimes stick to load paper on page 2-1.) TROUBLESHOOTING AND...
... may be damaged. If you use paper that a torn piece of paper is at the home position (▲). Try printing multiple pages to clear this problem, especially if the printer has not been used for laser printers, the glue from the sheets may sometimes stick to load paper on page 2-1.) TROUBLESHOOTING AND...

Users Manual - English
Page 248
... (▼), printed pages may have vertical stripes. 3 Reinstall the drum unit and toner cartridge assembly into the Home position (▼). Cleaning the drum unit We recommend placing the drum unit and toner cartridge assembly on a cloth or large disposable paper to avoid spilling ... inside the drum unit by gently sliding the blue tab from right to left several times. 2 Return the blue tab and snap it into the DCP. (See Replacing the drum unit on page 14-30.) 4 Close the front cover. 5 Plug in the power cord. 14 - 23 TROUBLESHOOTING AND ROUTINE MAINTENANCE...
... (▼), printed pages may have vertical stripes. 3 Reinstall the drum unit and toner cartridge assembly into the Home position (▼). Cleaning the drum unit We recommend placing the drum unit and toner cartridge assembly on a cloth or large disposable paper to avoid spilling ... inside the drum unit by gently sliding the blue tab from right to left several times. 2 Return the blue tab and snap it into the DCP. (See Replacing the drum unit on page 14-30.) 4 Close the front cover. 5 Plug in the power cord. 14 - 23 TROUBLESHOOTING AND ROUTINE MAINTENANCE...

Users Manual - English
Page 254
Return the blue tab to left several times. Home Position(▼) Tab Corona Wire 8 Reinstall the drum unit and toner cartridge assembly and close the front cover. 14 - 29 TROUBLESHOOTING AND ROUTINE MAINTENANCE 7 Clean the primary corona wire inside the drum unit by gently sliding the blue tab from right to the Home position (▼) before reinstalling the drum unit and toner cartridge assembly.
Return the blue tab to left several times. Home Position(▼) Tab Corona Wire 8 Reinstall the drum unit and toner cartridge assembly and close the front cover. 14 - 29 TROUBLESHOOTING AND ROUTINE MAINTENANCE 7 Clean the primary corona wire inside the drum unit by gently sliding the blue tab from right to the Home position (▼) before reinstalling the drum unit and toner cartridge assembly.


