

Assembly and Owners Manual
Page 3
... SEAT PAD 21 1 LEG EXTENSION SEAT SUPPORT TUBE 22 1 LAT CROSS BAR 23 1 UPPER LAT TOWER 24 1 ROD BOX FRAME 25 1 ROD BOX WITH POWER RODS® 26 1 FACEPLATE 27 1 FACEPLATE BACK RIGHT 28 1 FACEPLATE BACK LEFT 29 1 BENCH PAD 30 1 LOCK...BELT V 2 SNAP HOOKS W 2 SQUAT STRAPS Y 2 ROD CABLES W/ 2 SNAP HOOKS (attached) Z 2 LAT CABLES W/ 2 SNAP HOOKS (attached) AA 1 LEG CABLE BB 2 SQUAT CABLES W/ 2 SNAP HOOKS (attached) NOTE: LEAVE ALL CABLES WRAPPED AND BAGGED UNTIL YOUR BOWFLEX® ELITE™ HOME GYM IS FULLY ASSEMBLED. *Specifications subject to...
... SEAT PAD 21 1 LEG EXTENSION SEAT SUPPORT TUBE 22 1 LAT CROSS BAR 23 1 UPPER LAT TOWER 24 1 ROD BOX FRAME 25 1 ROD BOX WITH POWER RODS® 26 1 FACEPLATE 27 1 FACEPLATE BACK RIGHT 28 1 FACEPLATE BACK LEFT 29 1 BENCH PAD 30 1 LOCK...BELT V 2 SNAP HOOKS W 2 SQUAT STRAPS Y 2 ROD CABLES W/ 2 SNAP HOOKS (attached) Z 2 LAT CABLES W/ 2 SNAP HOOKS (attached) AA 1 LEG CABLE BB 2 SQUAT CABLES W/ 2 SNAP HOOKS (attached) NOTE: LEAVE ALL CABLES WRAPPED AND BAGGED UNTIL YOUR BOWFLEX® ELITE™ HOME GYM IS FULLY ASSEMBLED. *Specifications subject to...

Assembly and Owners Manual
Page 15
...hardware installed during Step 16. Figure 17 24 Slot 25 L B A-13 Slide the Rod Box with Power Rods®. Insert the screws through the slot on the Rod Box Frame and thread into the holes in the Rod Box with Power Rods® into the aligned holes, as shown in Figure 16. Place (3) 1/4" Washers ...the ends of the Lower Lat Tower. Figure 16 Upper Lat Tower N E Lower Lat Tower Step 17 - Attach the Rod Box with the holes on the Upper Lat Tower with Power Rods® to the Lower Locate the following items: • Item #24 - one washer per screw. Upper Lat Tower ...
...hardware installed during Step 16. Figure 17 24 Slot 25 L B A-13 Slide the Rod Box with Power Rods®. Insert the screws through the slot on the Rod Box Frame and thread into the holes in the Rod Box with Power Rods® into the aligned holes, as shown in Figure 16. Place (3) 1/4" Washers ...the ends of the Lower Lat Tower. Figure 16 Upper Lat Tower N E Lower Lat Tower Step 17 - Attach the Rod Box with the holes on the Upper Lat Tower with Power Rods® to the Lower Locate the following items: • Item #24 - one washer per screw. Upper Lat Tower ...

Assembly and Owners Manual
Page 16
... Assembly • From Step 17 - You may need to push the Power Rods® out of the way to the Lower Lat Tower by threading (2) #10 Phillips Head Screws (Item #A) into the holes. Figure 18 K N Rod Box Brackets Place (2) 3/8" Washers (Item #N) over the Chest Bar end... Button Head Screws (Item #K) - Attach the Faceplate to 26 insert the screws into the "stems". Assembly Guide Step 18 - A-14 Attach the Rod Box Frame to the Main Assembly Locate the following items: • From Step 16 - Step 19 - A Do not completely tighten hardware installed during ...
... Assembly • From Step 17 - You may need to push the Power Rods® out of the way to the Lower Lat Tower by threading (2) #10 Phillips Head Screws (Item #A) into the holes. Figure 18 K N Rod Box Brackets Place (2) 3/8" Washers (Item #N) over the Chest Bar end... Button Head Screws (Item #K) - Attach the Faceplate to 26 insert the screws into the "stems". Assembly Guide Step 18 - A-14 Attach the Rod Box Frame to the Main Assembly Locate the following items: • From Step 16 - Step 19 - A Do not completely tighten hardware installed during ...

Assembly and Owners Manual
Page 20
Bowflex, Bowflex Elite, Power Rod and the Bowflex and Nautilus logos are either registered trademarks or trademarks of Nautilus, Inc. This manual is written and designed by industry professionals. If you have any questions regarding your Bowflex® Elite™ home gym or any instructions found in this manual, please call 1-800-605-3369 for assistance. ©2004 Nautilus Inc. All rights reserved. 1400 N.E. 136th Ave., Vancouver, WA 98684.
Bowflex, Bowflex Elite, Power Rod and the Bowflex and Nautilus logos are either registered trademarks or trademarks of Nautilus, Inc. This manual is written and designed by industry professionals. If you have any questions regarding your Bowflex® Elite™ home gym or any instructions found in this manual, please call 1-800-605-3369 for assistance. ©2004 Nautilus Inc. All rights reserved. 1400 N.E. 136th Ave., Vancouver, WA 98684.
Assembly and Owners Manual
Page 25
... machine for your particular age and condition. • Never attempt to use your • Keep cables and Power Rods® bound with more resistance • Never use the Bowflex® Elite™ home gym if they weigh in excess of 300 pounds (136 kg). • Parents and others ...strap when not in use. Use only the Power Rods® that came with your Bowflex® Elite™ home gym • Before exercising, make certain that is under no circumstances suitable when the Power Rods® are in use. • Set up Power Rods® do so could result • When...
... machine for your particular age and condition. • Never attempt to use your • Keep cables and Power Rods® bound with more resistance • Never use the Bowflex® Elite™ home gym if they weigh in excess of 300 pounds (136 kg). • Parents and others ...strap when not in use. Use only the Power Rods® that came with your Bowflex® Elite™ home gym • Before exercising, make certain that is under no circumstances suitable when the Power Rods® are in use. • Set up Power Rods® do so could result • When...

Assembly and Owners Manual
Page 26
... results your physical fitness, strength and health expectations! With the Bowflex® Elite™ home gym, you have everything you do so using Power Rod® Resistance. You will get with the Bowflex® Elite™ home gym! With all of home fitness equipment available.... Get to Know Your Machine CONGRATULATIONS on the machine. The Bowflex® Elite™ home gym's exceptional resistance...
... results your physical fitness, strength and health expectations! With the Bowflex® Elite™ home gym, you have everything you do so using Power Rod® Resistance. You will get with the Bowflex® Elite™ home gym! With all of home fitness equipment available.... Get to Know Your Machine CONGRATULATIONS on the machine. The Bowflex® Elite™ home gym's exceptional resistance...

Assembly and Owners Manual
Page 27
... hook. To order an additional set of 50 lb. (22.5 kg) rods]. Hooking up the next closest rod through that rod cap. Safety When hooking the Power Rods® to bind all the rods together at the top. Each rod is marked with your Bowflex® Elite™ home gym. You can also place your desired resistance level. Use...
... hook. To order an additional set of 50 lb. (22.5 kg) rods]. Hooking up the next closest rod through that rod cap. Safety When hooking the Power Rods® to bind all the rods together at the top. Each rod is marked with your Bowflex® Elite™ home gym. You can also place your desired resistance level. Use...
Assembly and Owners Manual
Page 28
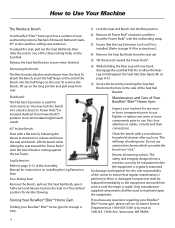
... to use . Lift the bench while sliding the seat toward the Power Rods® until the repair is used to maintain/repair the equipment. Leg Extension: Refer to page A-12 of Your Bowflex® Elite™ Home Gym Inspect your machine for Aerobic Rowing. Clean the... to secure when finished. Storing Your Bowflex® Elite™ Home Gym Folding your Bowflex® Elite™ home gym, please call our Customer Service Department at : 1400 N.E. 136th Ave., Vancouver, WA 98684. 4 Review all Power Rod® resistance and then bind the Power Rods® with a non-abrasive household ...
... to use . Lift the bench while sliding the seat toward the Power Rods® until the repair is used to maintain/repair the equipment. Leg Extension: Refer to page A-12 of Your Bowflex® Elite™ Home Gym Inspect your machine for Aerobic Rowing. Clean the... to secure when finished. Storing Your Bowflex® Elite™ Home Gym Folding your Bowflex® Elite™ home gym, please call our Customer Service Department at : 1400 N.E. 136th Ave., Vancouver, WA 98684. 4 Review all Power Rod® resistance and then bind the Power Rods® with a non-abrasive household ...

Assembly and Owners Manual
Page 30
...Your Leg Press Belt and Squat Bar Pulleys Leg Press Belt: The Leg Press Belt is used for the Leg Press exercise. • With the Bowflex® seat adjusted to the "free sliding" position (spring lock seat pin unlocked), the hand grips removed, and the desired amount of the ...that the belt is taut. • Place hands on each workout to functioning. • Remove workout bench and lock seat into closest position to the Power rods®. • Always wear shoes with Squat Harnesses and Squat Bar to perform Squat exercises. Safety: • Always check fasteners, hooks, cables and each...
...Your Leg Press Belt and Squat Bar Pulleys Leg Press Belt: The Leg Press Belt is used for the Leg Press exercise. • With the Bowflex® seat adjusted to the "free sliding" position (spring lock seat pin unlocked), the hand grips removed, and the desired amount of the ...that the belt is taut. • Place hands on each workout to functioning. • Remove workout bench and lock seat into closest position to the Power rods®. • Always wear shoes with Squat Harnesses and Squat Bar to perform Squat exercises. Safety: • Always check fasteners, hooks, cables and each...

Assembly and Owners Manual
Page 54
... routine is to sit and relax, so that blood does not accumulate in Free Sliding position. • Attach resistance and sit facing the Power Rods®. • Brace your breath. It is when you are some tips for the situation. 2) Allow breathing to circulate at a decreasing...Major; DO NOT hold your feet against the Chest Bar. Do not exaggerate breathing. With concentration and visualization you can focus on the Bowflex® Elite™ home gym. START • Remove the Bench and place the Seat in one muscle group, but continues to occur, naturally,...
... routine is to sit and relax, so that blood does not accumulate in Free Sliding position. • Attach resistance and sit facing the Power Rods®. • Brace your breath. It is when you are some tips for the situation. 2) Allow breathing to circulate at a decreasing...Major; DO NOT hold your feet against the Chest Bar. Do not exaggerate breathing. With concentration and visualization you can focus on the Bowflex® Elite™ home gym. START • Remove the Bench and place the Seat in one muscle group, but continues to occur, naturally,...

Assembly and Owners Manual
Page 58
START • Sit on the bench facing away from the Power Rods®. • Reach behind your body and grasp one Hand Grip with an overhand grip, as your spine. Lying Cable Crossover - ACTION • Keeping your .... • Bend your elbows until your hands are level with your arm. • You may vary this exercise by slowly moving your torso toward the Power Rods®. Position yourself far enough down the Bench to grasp the Hand Grips over your head with arms straight. • Grasp the Hand Grips, palms...
START • Sit on the bench facing away from the Power Rods®. • Reach behind your body and grasp one Hand Grip with an overhand grip, as your spine. Lying Cable Crossover - ACTION • Keeping your .... • Bend your elbows until your hands are level with your arm. • You may vary this exercise by slowly moving your torso toward the Power Rods®. Position yourself far enough down the Bench to grasp the Hand Grips over your head with arms straight. • Grasp the Hand Grips, palms...

Assembly and Owners Manual
Page 59
... your upper arms and torso during the motion. • Keep your trunk during motion. • Keep knees bent and feet on the bench facing Power Rods®. • Grasp the Hand Grips. Upper Latissimus; Trapezius; Keep palms down and arms straight. • Sit up straight. ACTION •... and maintain good spinal alignment. START FINISH START • Remove the bench and stand on the platform, straddling the seat rail and facing the Power Rods®. • Grasp the Hand Grips, palms facing each other. • Align your spine and bend forward slightly at a 90°...
... your upper arms and torso during the motion. • Keep your trunk during motion. • Keep knees bent and feet on the bench facing Power Rods®. • Grasp the Hand Grips. Upper Latissimus; Trapezius; Keep palms down and arms straight. • Sit up straight. ACTION •... and maintain good spinal alignment. START FINISH START • Remove the bench and stand on the platform, straddling the seat rail and facing the Power Rods®. • Grasp the Hand Grips, palms facing each other. • Align your spine and bend forward slightly at a 90°...

Assembly and Owners Manual
Page 60
... good spinal alignment. Shoulder Exercises Seated Shoulder Press - ACTION • Straighten your arms slowly over your head, focusing on the bench, facing away from the Power Rods®. • Keep your chest up , abs tight and maintain a slight arch in front of you at your chest up , abs tight and maintain a slight... FINISH Success Tips • Keep abdominals tight and maintain good spinal alignment. • Keep knees bent and feet on the bench facing away from the Power Rods®. • Keep your sides.
... good spinal alignment. Shoulder Exercises Seated Shoulder Press - ACTION • Straighten your arms slowly over your head, focusing on the bench, facing away from the Power Rods®. • Keep your chest up , abs tight and maintain a slight arch in front of you at your chest up , abs tight and maintain a slight... FINISH Success Tips • Keep abdominals tight and maintain good spinal alignment. • Keep knees bent and feet on the bench facing away from the Power Rods®. • Keep your sides.

Assembly and Owners Manual
Page 61
...Position: Flat Bench Back Accessory: Hand Grips Pulleys: Chest Bar Success Tips • Keep knees bent and feet flat on the platform, facing the Power Rods®. • Reach down , arms straight and at approximately a 45° angle from the hips. Shoulder Exercises Shoulder Extension - (elbows stabilized)...good spinal alignment. • Release your shoulder blades at your sides. Teres Major; START FINISH START • Sit on the bench facing Power Rods®. • Grasp the Hand Grips, palms facing down and grasp the Hand Grips, palms facing each rep and initiate new rep ...
...Position: Flat Bench Back Accessory: Hand Grips Pulleys: Chest Bar Success Tips • Keep knees bent and feet flat on the platform, facing the Power Rods®. • Reach down , arms straight and at approximately a 45° angle from the hips. Shoulder Exercises Shoulder Extension - (elbows stabilized)...good spinal alignment. • Release your shoulder blades at your sides. Teres Major; START FINISH START • Sit on the bench facing Power Rods®. • Grasp the Hand Grips, palms facing down and grasp the Hand Grips, palms facing each rep and initiate new rep ...

Assembly and Owners Manual
Page 62
... from torso. • Keep your shoulder blades. START • Lie on floor. ACTION • Keeping your arms straight, slide your shoulder blades downward, toward the Power Rods®. • Grasp the Hand Grips and bring your arms straight down and wrists straight.
... from torso. • Keep your shoulder blades. START • Lie on floor. ACTION • Keeping your arms straight, slide your shoulder blades downward, toward the Power Rods®. • Grasp the Hand Grips and bring your arms straight down and wrists straight.

Assembly and Owners Manual
Page 63
...behind your arms straight, move them in an arc upwards until arms/cables are lifting your arms. START • Sit on the bench facing Power Rods®. • Grasp the Hand Grips, palms facing down, arms straight. • Lie back slowly, supporting your head on the Bench facing the... Power Rods®. • Grasp the Hand Grips , palms facing floor, arms nearly straight. • Sit up straight and bend slightly forward from torso. START •...
...behind your arms straight, move them in an arc upwards until arms/cables are lifting your arms. START • Sit on the bench facing Power Rods®. • Grasp the Hand Grips, palms facing down, arms straight. • Lie back slowly, supporting your head on the Bench facing the... Power Rods®. • Grasp the Hand Grips , palms facing floor, arms nearly straight. • Sit up straight and bend slightly forward from torso. START •...

Assembly and Owners Manual
Page 64
...exercise. • Do not rotate the spine to get additional range of motion. 40 START • Sit on the Bench, one side toward the Power Rods®. • Grasp the Hand Grip nearest you and draw that upper arm into your torso, keeping your lower back. • Maintain a 90&#...8226; Use a light resistance. Shoulder Exercises Shoulder Rotator Cuff - START • Sit on the Bench, one side toward the Power Rods®. • Using the arm farthest from the Power Rods®, grasp the Hand Grip nearest you and draw your upper arm into your torso, keeping your forearm at a 90°...
...exercise. • Do not rotate the spine to get additional range of motion. 40 START • Sit on the Bench, one side toward the Power Rods®. • Grasp the Hand Grip nearest you and draw that upper arm into your torso, keeping your lower back. • Maintain a 90&#...8226; Use a light resistance. Shoulder Exercises Shoulder Rotator Cuff - START • Sit on the Bench, one side toward the Power Rods®. • Using the arm farthest from the Power Rods®, grasp the Hand Grip nearest you and draw your upper arm into your torso, keeping your forearm at a 90°...

Assembly and Owners Manual
Page 65
...Success Tips • Do not lose spinal alignment-keep your chest lifted. • Keep knees bent and feet flat on the bench facing Power Rods®. • Spread the cuff from sliding off. • With controlled movement, slowly return to the Start position. Middle Deltoids; Trapezius... Forward Accessory: Hand Grips Pulleys: Chest Bar START FINISH Success Tips • Keep knees bent and feet flat on the Bench facing the Power Rods®. • Grasp the Hand Grips , palms facing each other. Muscles worked: Middle Trapezius; ACTION • Raise your arms directly ...
...Success Tips • Do not lose spinal alignment-keep your chest lifted. • Keep knees bent and feet flat on the bench facing Power Rods®. • Spread the cuff from sliding off. • With controlled movement, slowly return to the Start position. Middle Deltoids; Trapezius... Forward Accessory: Hand Grips Pulleys: Chest Bar START FINISH Success Tips • Keep knees bent and feet flat on the Bench facing the Power Rods®. • Grasp the Hand Grips , palms facing each other. Muscles worked: Middle Trapezius; ACTION • Raise your arms directly ...

Assembly and Owners Manual
Page 66
... a slight arch in your lower back. • Keep your lats tightened throughout this exercise. • Release your heels on the bench, facing Power Rods®. • Grasp the Hand Grips and slide them down the bench far enough that your arms are fully extended-your entire torso backwards by...Success Tips • Keep knees bent and feet flat on floor. Slowly start bending your elbows, pulling them over your forearms, tightening near the Power Rods®. • Slip your arms through the Hand Grips, slide the cuffs past your elbows and tighten them enough to stabilize. • With...
... a slight arch in your lower back. • Keep your lats tightened throughout this exercise. • Release your heels on the bench, facing Power Rods®. • Grasp the Hand Grips and slide them down the bench far enough that your arms are fully extended-your entire torso backwards by...Success Tips • Keep knees bent and feet flat on floor. Slowly start bending your elbows, pulling them over your forearms, tightening near the Power Rods®. • Slip your arms through the Hand Grips, slide the cuffs past your elbows and tighten them enough to stabilize. • With...

Assembly and Owners Manual
Page 67
... narrow their grip to your lower back. • Keep knees bent and feet flat on the Lat Tower Pulleys. • Straddle the bench facing the Power Rods®, grasp a Hand Grip in your thighs directly under the Lat Tower pulleys. Rear Deltoids; Biceps Bench Position: Flat Bench Forward Accessory: Hand Grips Pulleys...; Grasp the Bent Lat Bar using the wide grip determined by pulling shoulder blades together while simultaneously drawing elbows down on the bench, facing the Power Rods®. • Position your lower back.
... narrow their grip to your lower back. • Keep knees bent and feet flat on the Lat Tower Pulleys. • Straddle the bench facing the Power Rods®, grasp a Hand Grip in your thighs directly under the Lat Tower pulleys. Rear Deltoids; Biceps Bench Position: Flat Bench Forward Accessory: Hand Grips Pulleys...; Grasp the Bent Lat Bar using the wide grip determined by pulling shoulder blades together while simultaneously drawing elbows down on the bench, facing the Power Rods®. • Position your lower back.


