User Manual
Page 8
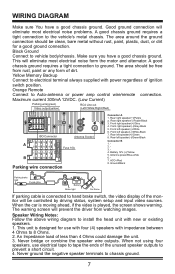
... and alternator. This will eliminate most electrical noise problems. A good chassis ground requires a tight connection to hand brake switch, the video display of the monitor will prevent the driver from rust, paint or any form of ignition switch position. Maximum current 300mA 12VDC. ...(Low Current) Parking wire(green) Video output(yellow) RCA Line out (Left=White;Right=Red) ISO Connector Antenna Socket Fuse 10A Parking wire connection Connector A 1. Front right ...
... and alternator. This will eliminate most electrical noise problems. A good chassis ground requires a tight connection to hand brake switch, the video display of the monitor will prevent the driver from rust, paint or any form of ignition switch position. Maximum current 300mA 12VDC. ...(Low Current) Parking wire(green) Video output(yellow) RCA Line out (Left=White;Right=Red) ISO Connector Antenna Socket Fuse 10A Parking wire connection Connector A 1. Front right ...
User Manual
Page 9
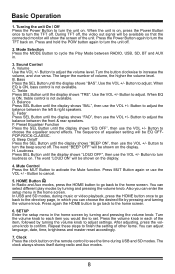
Turning the unit On / Off Press the Power Button to turn the unit on . During TFT off, the video out signal will be available so that the connected monitor will be EQ OFFPOP-ROCK-CLASSIC. B. Use the VOL +/- When EQ is ON, bass control ... in each item you would like to finish the setting of volume, the higher the volume level. In USB and SD modes, during music or video playback, press the HOME button once to go back to confirm. The clock always shows itself during USB and SD modes. Bass Press the SEL...
Turning the unit On / Off Press the Power Button to turn the unit on . During TFT off, the video out signal will be available so that the connected monitor will be EQ OFFPOP-ROCK-CLASSIC. B. Use the VOL +/- When EQ is ON, bass control ... in each item you would like to finish the setting of volume, the higher the volume level. In USB and SD modes, during music or video playback, press the HOME button once to go back to confirm. The clock always shows itself during USB and SD modes. Bass Press the SEL...
User Manual
Page 12
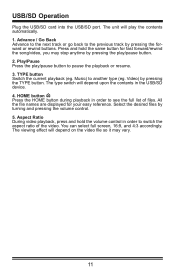
... to pause the playback or resume. 3. Play/Pause Press the play the contents automatically. 1. Video) by pressing the forward or rewind buttons. HOME button Press the HOME button during playback in ... order to the previous track by pressing the TYPE button. The type switch will depend on the video file so it may stop anytime by turning and pressing the volume control. 5. USB/SD Operation ...Advance / Go Back Advance to the next track or go back to see the full list of the video. Select the desired files by pressing the play/pause button. 2. Press and hold the volume control in ...
... to pause the playback or resume. 3. Play/Pause Press the play the contents automatically. 1. Video) by pressing the forward or rewind buttons. HOME button Press the HOME button during playback in ... order to the previous track by pressing the TYPE button. The type switch will depend on the video file so it may stop anytime by turning and pressing the volume control. 5. USB/SD Operation ...Advance / Go Back Advance to the next track or go back to see the full list of the video. Select the desired files by pressing the play/pause button. 2. Press and hold the volume control in ...
User Manual
Page 15
When the display is a 3.5mm stereo jack on the front panel of the unit. Press the Mode button to unit. Connect any portable audio device such as a MP3 player to choose AUX. AUX Input The AUX Input Jack is off the display. Use the volume control to resume the ...image. 14 Other Operations 1. Press this button again to adjust volume. 2. Video Output The video output Jack is on the panel to Wiring Diagram) This output is on, press POW/TFT OFF button on the back of the unit...
When the display is a 3.5mm stereo jack on the front panel of the unit. Press the Mode button to unit. Connect any portable audio device such as a MP3 player to choose AUX. AUX Input The AUX Input Jack is off the display. Use the volume control to resume the ...image. 14 Other Operations 1. Press this button again to adjust volume. 2. Video Output The video output Jack is on the panel to Wiring Diagram) This output is on, press POW/TFT OFF button on the back of the unit...


