User Guide
Page 1
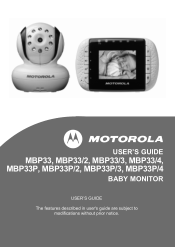
USER'S GUIDE MBP33, MBP33/2, MBP33/3, MBP33/4, MBP33P, MBP33P/2, MBP33P/3, MBP33P/4 BABY MONITOR USER'S GUIDE The features described in user's guide are subject to modifications without prior notice.
USER'S GUIDE MBP33, MBP33/2, MBP33/3, MBP33/4, MBP33P, MBP33P/2, MBP33P/3, MBP33P/4 BABY MONITOR USER'S GUIDE The features described in user's guide are subject to modifications without prior notice.

User Guide
Page 2
....motorola.com This User's Guide provides you with all the information you need to provide a copy of your dated sales receipt to your records. Please read the Safety Instructions on page 6 before you can see and hear your product. Got everything? • 1 x Parent unit • 1 x Baby unit • 1 x Rechargeable Ni-MH battery pack for the parent unit • 1 x Power adapter for the Parent unit • 1 x Power adapter...
....motorola.com This User's Guide provides you with all the information you need to provide a copy of your dated sales receipt to your records. Please read the Safety Instructions on page 6 before you can see and hear your product. Got everything? • 1 x Parent unit • 1 x Baby unit • 1 x Rechargeable Ni-MH battery pack for the parent unit • 1 x Power adapter for the Parent unit • 1 x Power adapter...
User Guide
Page 3
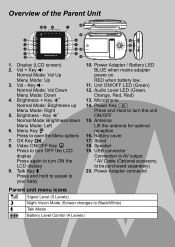
... separately) 20. Unit ON/OFF LED (Green) 12. Brightness - Battery cover 17. USB connector Connection to AV output * AV Cable (Optional accessory, to your baby 10. Power Adapter connector Parent unit menu icons 1 ...RED when battery low. 11. Stand 18. Speaker 19. Video ON/OFF Key V Press to turn OFF the LCD display Press again to turn ON the LCD display 9. Brightness + Key ] Normal Mode: Brightness up Menu Mode: Right 5. OK Key O 8. Overview of the Parent Unit 10 11 12 14 1 15 2 6 19 3 7 18 4 8 16 20 5 9 13 17 1. Power Adapter / Battery...
... separately) 20. Unit ON/OFF LED (Green) 12. Brightness - Battery cover 17. USB connector Connection to AV output * AV Cable (Optional accessory, to your baby 10. Power Adapter connector Parent unit menu icons 1 ...RED when battery low. 11. Stand 18. Speaker 19. Video ON/OFF Key V Press to turn OFF the LCD display Press again to turn ON the LCD display 9. Brightness + Key ] Normal Mode: Brightness up Menu Mode: Right 5. OK Key O 8. Overview of the Parent Unit 10 11 12 14 1 15 2 6 19 3 7 18 4 8 16 20 5 9 13 17 1. Power Adapter / Battery...
User Guide
Page 4
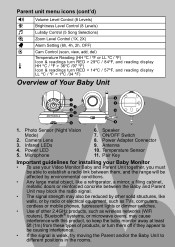
...installing your Baby Monitor • To use your Video Monitor Baby and Parent Unit together, you must be able to establish a radio link between them, and the range...Power Adapter Connector 9. Photo Sensor (Night Vision Mode) 2. Antenna 10. Parent unit menu icons (cont'd) * Volume Level Control (8 Levels) & Brightness Level Control (8 Levels) m Lullaby Control (5 Song Selections) Z Zoom Level Control (1X, 2X) A Alarm Setting (6h, 4h, 2h, OFF) C Cam Control (scan, view, add, del) Temperature Reading (HH ºC / ºF or LL ºC / ºF) t Icon & readings turn RED...
...installing your Baby Monitor • To use your Video Monitor Baby and Parent Unit together, you must be able to establish a radio link between them, and the range...Power Adapter Connector 9. Photo Sensor (Night Vision Mode) 2. Antenna 10. Parent unit menu icons (cont'd) * Volume Level Control (8 Levels) & Brightness Level Control (8 Levels) m Lullaby Control (5 Song Selections) Z Zoom Level Control (1X, 2X) A Alarm Setting (6h, 4h, 2h, OFF) C Cam Control (scan, view, add, del) Temperature Reading (HH ºC / ºF or LL ºC / ºF) t Icon & readings turn RED...
User Guide
Page 5
... 14 4.7 Temperature 14 5. ENGLISH Table of contents 5 Getting Started 8 2.1 Baby Unit Power Supply 8 2.2 Parent Unit Battery Installation 8 2.3 Parent Unit Power Supply 9 2.4 Registration (Pairing 10 2.5 View Video Through TV 10 3. Safety Instructions 6 2. General Information 19 Table of contents 1. Using the Baby Monitor 11 3.1 Setting up 11 3.2 Manual Pan and Tilt 11 3.3 Night Vision Mode 11 3.4 Talk Mode 11 3.5 Video ON/OFF 11 3.6 Temperature Display (HH ºC / ºF or...
... 14 4.7 Temperature 14 5. ENGLISH Table of contents 5 Getting Started 8 2.1 Baby Unit Power Supply 8 2.2 Parent Unit Battery Installation 8 2.3 Parent Unit Power Supply 9 2.4 Registration (Pairing 10 2.5 View Video Through TV 10 3. Safety Instructions 6 2. General Information 19 Table of contents 1. Using the Baby Monitor 11 3.1 Setting up 11 3.2 Manual Pan and Tilt 11 3.3 Night Vision Mode 11 3.4 Talk Mode 11 3.5 Video ON/OFF 11 3.6 Temperature Display (HH ºC / ºF or...
User Guide
Page 6
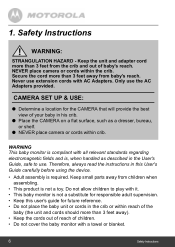
... parts away from baby's reach. WARNING This baby monitor is compliant with all relevant standards regarding electromagnetic fields and is required. Therefore, always read the instructions in the User's Guide, safe to play with it. • This baby monitor is not a toy. NEVER place camera or cords within crib. Only use extension cords with a towel or blanket. 6 Safety Instructions Keep the unit and adapter cord...
... parts away from baby's reach. WARNING This baby monitor is compliant with all relevant standards regarding electromagnetic fields and is required. Therefore, always read the instructions in the User's Guide, safe to play with it. • This baby monitor is not a toy. NEVER place camera or cords within crib. Only use extension cords with a towel or blanket. 6 Safety Instructions Keep the unit and adapter cord...
User Guide
Page 7
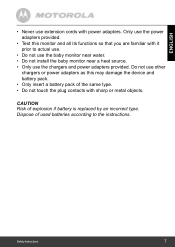
...batteries according to actual use. • Do not use the baby monitor near water. • Do not install the baby monitor near a heat source. • Only use the chargers and power adapters provided. Safety Instructions 7 ENGLISH • Never use extension cords with it prior to the instructions....chargers or power adapters as this monitor and all its functions so that you are familiar with power adapters. Do not use the power adapters provided. • Test this may damage the device and battery pack. • Only insert a battery pack of explosion if battery is replaced...
...batteries according to actual use. • Do not use the baby monitor near water. • Do not install the baby monitor near a heat source. • Only use the chargers and power adapters provided. Safety Instructions 7 ENGLISH • Never use extension cords with it prior to the instructions....chargers or power adapters as this monitor and all its functions so that you are familiar with power adapters. Do not use the power adapters provided. • Test this may damage the device and battery pack. • Only insert a battery pack of explosion if battery is replaced...
User Guide
Page 8
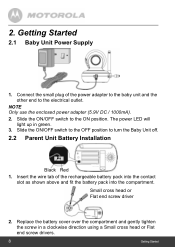
... driver 2. Slide the ON/OFF switch to turn the Baby Unit off. 2.2 Parent Unit Battery Installation Black Red 1. Insert the wire tab of the power adapter to the baby unit and the other end to the electrical outlet. Getting Started 2.1 Baby Unit Power Supply 1. NOTE Only use the enclosed power adapter (5.9V DC / 1000mA). 2. Slide the ON/OFF switch to the OFF position to the ON position. 2. Replace...
... driver 2. Slide the ON/OFF switch to turn the Baby Unit off. 2.2 Parent Unit Battery Installation Black Red 1. Insert the wire tab of the power adapter to the baby unit and the other end to the electrical outlet. Getting Started 2.1 Baby Unit Power Supply 1. NOTE Only use the enclosed power adapter (5.9V DC / 1000mA). 2. Slide the ON/OFF switch to the OFF position to the ON position. 2. Replace...
User Guide
Page 9
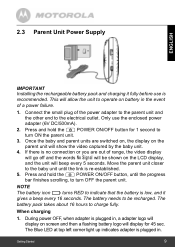
... Blue LED at top left corner light up indicates adapter is recommended. When charging 1. This will allow the unit to operate on screen and then a flashing battery logo will display on battery in . 0 Getting Started 9 NOTE The battery icon turns RED to turn OFF the parent unit. Once the baby and parent units are out of a power failure. 1. The battery needs to the electrical outlet...
... Blue LED at top left corner light up indicates adapter is recommended. When charging 1. This will allow the unit to operate on screen and then a flashing battery logo will display on battery in . 0 Getting Started 9 NOTE The battery icon turns RED to turn OFF the parent unit. Once the baby and parent units are out of a power failure. 1. The battery needs to the electrical outlet...
User Guide
Page 10
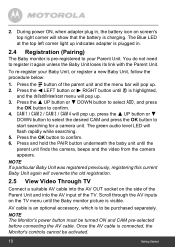
... The Monitor's power button must be activated. 10 Getting Started DOWN button to select ADD, and press the OK button to confirm. 6. Once the AV cable is plugged in , the battery icon on the side of the TV. Press and hold the PAIR button underneath the baby unit until the parent unit finds the camera, beeps and the video...
... The Monitor's power button must be activated. 10 Getting Started DOWN button to select ADD, and press the OK button to confirm. 6. Once the AV cable is plugged in , the battery icon on the side of the TV. Press and hold the PAIR button underneath the baby unit until the parent unit finds the camera, beeps and the video...
User Guide
Page 11
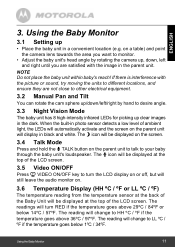
... the Baby Monitor 3.1 Setting up clear images in the dark. on the parent unit will change to HH ºC / ºF if the temperature goes above 29ºC / 84ºF or below 1ºC / 34ºF. The N icon will be displayed at the back of the Baby Unit will be displayed at the top of the LCD screen. 3.5 Video ON...
... the Baby Monitor 3.1 Setting up clear images in the dark. on the parent unit will change to HH ºC / ºF if the temperature goes above 29ºC / 84ºF or below 1ºC / 34ºF. The N icon will be displayed at the back of the Baby Unit will be displayed at the top of the LCD screen. 3.5 Video ON...
User Guide
Page 12
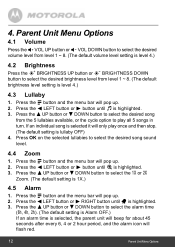
... or the cycle option to select the 1X or 2X Zoom. (The default setting is selected, the parent unit will beep for about 45 seconds after every 6, 4 or 2 hour period, and the alarm icon will flash red. 12 Parent Unit Menu Options Press the < LEFT button or > button until A is lullaby OFF... 2. DOWN button to select the desired song from level 1 ~ 8. (The default brightness level setting is level 4.) 4.2 Brightness Press the ] BRIGHTNESS UP button or [ BRIGHTNESS DOWN button to select the desired song sound level. 4.4 Zoom 1. If an individual song is selected it will pop up . 2. Press...
... or the cycle option to select the 1X or 2X Zoom. (The default setting is selected, the parent unit will beep for about 45 seconds after every 6, 4 or 2 hour period, and the alarm icon will flash red. 12 Parent Unit Menu Options Press the < LEFT button or > button until A is lullaby OFF... 2. DOWN button to select the desired song from level 1 ~ 8. (The default brightness level setting is level 4.) 4.2 Brightness Press the ] BRIGHTNESS UP button or [ BRIGHTNESS DOWN button to select the desired song sound level. 4.4 Zoom 1. If an individual song is selected it will pop up . 2. Press...
User Guide
Page 17
... the Baby Unit has lost its link with the Parent Unit • Try recharging or replacing the battery pack. • If the Baby Unit is too far away it may be going out of the parent unit and unplug both the units' electrical power, then plug them from the battery and electrical power. Help 17 Change the camera number, if necessary. • Is the video display...
... the Baby Unit has lost its link with the Parent Unit • Try recharging or replacing the battery pack. • If the Baby Unit is too far away it may be going out of the parent unit and unplug both the units' electrical power, then plug them from the battery and electrical power. Help 17 Change the camera number, if necessary. • Is the video display...

User Guide
Page 19
... outlined below , BINATONE warrants that this Motorola branded product ("Product") or certified accessory ("Accessory") sold for use with this product that it manufactured to the exclusions contained below . ENGLISH 8. Contact Customer Service: US and Canada 1-888-331-3383 To order a replacement battery pack, contact customer service or visit our website. What Does this User's Guide or the Quick...
... outlined below , BINATONE warrants that this Motorola branded product ("Product") or certified accessory ("Accessory") sold for use with this product that it manufactured to the exclusions contained below . ENGLISH 8. Contact Customer Service: US and Canada 1-888-331-3383 To order a replacement battery pack, contact customer service or visit our website. What Does this User's Guide or the Quick...
User Guide
Page 20
... limitations or exclusions may use functionally equivalent reconditioned/ refurbished/ pre-owned or new Products, Accessories or parts. BINATONE or its authorized distributor at no charge repair or replace any Products or Accessories that vary from one jurisdiction to this Warranty. ANY IMPLIED WARRANTIES, INCLUDING WITHOUT... REPLACEMENT PROVIDED UNDER THIS EXPRESS LIMITED WARRANTY IS THE EXCLUSIVE REMEDY OF THE CONSUMER, AND IS PROVIDED IN LIEU OF ALL OTHER WARRANTIES, EXPRESS OF IMPLIED. What Other Limitations Are There? This Warranty gives you specific legal rights, and you . We ...
... limitations or exclusions may use functionally equivalent reconditioned/ refurbished/ pre-owned or new Products, Accessories or parts. BINATONE or its authorized distributor at no charge repair or replace any Products or Accessories that vary from one jurisdiction to this Warranty. ANY IMPLIED WARRANTIES, INCLUDING WITHOUT... REPLACEMENT PROVIDED UNDER THIS EXPRESS LIMITED WARRANTY IS THE EXCLUSIVE REMEDY OF THE CONSUMER, AND IS PROVIDED IN LIEU OF ALL OTHER WARRANTIES, EXPRESS OF IMPLIED. What Other Limitations Are There? This Warranty gives you specific legal rights, and you . We ...
User Guide
Page 21
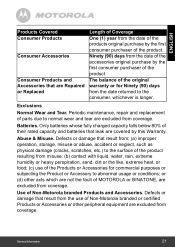
...product. Ninety (90) days from coverage. The balance of the product. Defects or damage that result from the use of parts due to the surface of the product resulting from misuse; (b) contact with liquid, water, rain, extreme humidity or heavy ...MOTOROLA or BINATONE, are excluded from coverage. Defects or damage that result from: (a) improper operation, storage, misuse or abuse, accident or neglect, such as physical damage (cracks, scratches, etc.) to normal wear and tear are excluded from coverage. Batteries. Abuse & Misuse. Periodic maintenance, repair and replacement...
...product. Ninety (90) days from coverage. The balance of the product. Defects or damage that result from the use of parts due to the surface of the product resulting from misuse; (b) contact with liquid, water, rain, extreme humidity or heavy ...MOTOROLA or BINATONE, are excluded from coverage. Defects or damage that result from: (a) improper operation, storage, misuse or abuse, accident or neglect, such as physical damage (cracks, scratches, etc.) to normal wear and tear are excluded from coverage. Batteries. Abuse & Misuse. Periodic maintenance, repair and replacement...

User Guide
Page 22
...or promotional materials issued by BINATONE or representations made in your box, a completed warranty card showing the serial number of the Product; (d) a written description of the problem; Defects or damages resulting from service, testing, adjustment, installation, maintenance, alteration, or... or (d) nonconforming or non-Motorola branded housings, or parts, are excluded from coverage. To obtain service, you may have been removed, altered or obliterated; (b) broken seals or that may subscribe to a BINATONE Authorized Repair Center. Communication Services. and, most importantly; (e)...
...or promotional materials issued by BINATONE or representations made in your box, a completed warranty card showing the serial number of the Product; (d) a written description of the problem; Defects or damages resulting from service, testing, adjustment, installation, maintenance, alteration, or... or (d) nonconforming or non-Motorola branded housings, or parts, are excluded from coverage. To obtain service, you may have been removed, altered or obliterated; (b) broken seals or that may subscribe to a BINATONE Authorized Repair Center. Communication Services. and, most importantly; (e)...
User Guide
Page 23
...parts of the user's body other than the hands are designed to the intended usage of the product. To ensure safety of users, the FCC has established criteria for help. This Class B digital apparatus complies with the instructions... received, including interference that may not be installed and used in a residential installation. Privacy of communications may cause undesired operation....Part l5 NOTE: This equipment has been tested and found to comply with Part 15 of the FCC rules. The Baby unit shall be ensured when using this equipment not expressly approved by a user...
...parts of the user's body other than the hands are designed to the intended usage of the product. To ensure safety of users, the FCC has established criteria for help. This Class B digital apparatus complies with the instructions... received, including interference that may not be installed and used in a residential installation. Privacy of communications may cause undesired operation....Part l5 NOTE: This equipment has been tested and found to comply with Part 15 of the FCC rules. The Baby unit shall be ensured when using this equipment not expressly approved by a user...
User Guide
Page 25
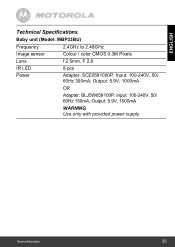
Input: 100-240V, 50/ 60Hz 150mA; General Information 25 Input: 100-240V, 50/ 60Hz 300mA; Output: 5.9V, 1000mA OR Adapter: BLJ5W059100P; Output: 5.9V, 1000mA WARNING Use only with provided power supply. ENGLISH Technical Specifications Baby unit (Model: MBP33BU) Frequency 2.4GHz to 2.48GHz Image sensor Colour / color CMOS 0.3M Pixels Lens f 2.5mm, F 2.8 IR LED 8 pcs Power Adapter: SCE0591000P;
Input: 100-240V, 50/ 60Hz 150mA; General Information 25 Input: 100-240V, 50/ 60Hz 300mA; Output: 5.9V, 1000mA OR Adapter: BLJ5W059100P; Output: 5.9V, 1000mA WARNING Use only with provided power supply. ENGLISH Technical Specifications Baby unit (Model: MBP33BU) Frequency 2.4GHz to 2.48GHz Image sensor Colour / color CMOS 0.3M Pixels Lens f 2.5mm, F 2.8 IR LED 8 pcs Power Adapter: SCE0591000P;
User Guide
Page 26
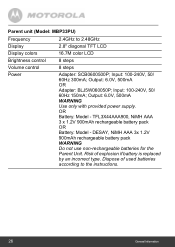
... 2.8" diagonal TFT LCD Display colors 16.7M color LCD Brightness control 8 steps Volume control 8 steps Power Adapter: SCB0600500P; Output: 6.0V, 500mA OR Adapter: BLJ5W060050P; Parent unit (Model: MBP33PU) Frequency 2.4GHz to the instructions. 26 General Information Input: 100-240V, 50/ 60Hz 300mA; Input: 100-240V, 50/ 60Hz 150mA; Dispose of explosion if battery is replaced by an incorrect type.
... 2.8" diagonal TFT LCD Display colors 16.7M color LCD Brightness control 8 steps Volume control 8 steps Power Adapter: SCB0600500P; Output: 6.0V, 500mA OR Adapter: BLJ5W060050P; Parent unit (Model: MBP33PU) Frequency 2.4GHz to the instructions. 26 General Information Input: 100-240V, 50/ 60Hz 300mA; Input: 100-240V, 50/ 60Hz 150mA; Dispose of explosion if battery is replaced by an incorrect type.


