
Z87M-PLUS User's Manual
Page 2
... manual, including the products and software described in it from http://support.asus.com/download or (2) for identification or explanation and to obtain the corresponding source code and your request please provide the name, model number and version, as the corresponding binary/object code. Product warranty or service will be extended if: (1) the product is repaired, modified or altered, unless such repair...
... manual, including the products and software described in it from http://support.asus.com/download or (2) for identification or explanation and to obtain the corresponding source code and your request please provide the name, model number and version, as the corresponding binary/object code. Product warranty or service will be extended if: (1) the product is repaired, modified or altered, unless such repair...
Z87M-PLUS User's Manual
Page 5
... Network iControl 4-8 USB Charger 4-10 System Information 4-11 ASUS Update 4-12 Audio configurations 4-13 ASUS Boot Setting 4-14 Chapter 5: RAID support 5.1 RAID configurations 5-1 5.1.1 RAID definitions 5-1 5.1.2 Installing Serial ATA hard disks 5-2 5.1.3 Setting the RAID item in BIOS 5-2 5.1.4 Intel® Rapid Storage Technology Option ROM utility 5-3 5.2 Creating a RAID driver disk 5-7 5.2.1 Creating a RAID driver disk without entering the OS 5-7 5.2.2 Creating a RAID driver disk in Windows 5-8 5.2.3 Installing the RAID driver during Windows® OS installation...
... Network iControl 4-8 USB Charger 4-10 System Information 4-11 ASUS Update 4-12 Audio configurations 4-13 ASUS Boot Setting 4-14 Chapter 5: RAID support 5.1 RAID configurations 5-1 5.1.1 RAID definitions 5-1 5.1.2 Installing Serial ATA hard disks 5-2 5.1.3 Setting the RAID item in BIOS 5-2 5.1.4 Intel® Rapid Storage Technology Option ROM utility 5-3 5.2 Creating a RAID driver disk 5-7 5.2.1 Creating a RAID driver disk without entering the OS 5-7 5.2.2 Creating a RAID driver disk in Windows 5-8 5.2.3 Installing the RAID driver during Windows® OS installation...

Z87M-PLUS User's Manual
Page 9
... 8-channel high definition audio CODEC - Z87M-PLUS specifications summary CPU LGA1150 socket for Intel® 4th Generation Core™ i7 / Core™ i5 / Core™ i3, Pentium®, and Celeron® processors Supports 22nm CPU Supports Intel® Turbo Boost Technology 2.0* Chipset Memory * The Intel® Turbo Boost Technology 2.0 support depends on the CPU types. ** Refer to www.asus.com or this user manual for Intel® CPU support list. Integrated Graphics Processor - Intel® HD Graphics support Multi-VGA output support: HDMI/DVI-D/RGB port Supports HDMI...
... 8-channel high definition audio CODEC - Z87M-PLUS specifications summary CPU LGA1150 socket for Intel® 4th Generation Core™ i7 / Core™ i5 / Core™ i3, Pentium®, and Celeron® processors Supports 22nm CPU Supports Intel® Turbo Boost Technology 2.0* Chipset Memory * The Intel® Turbo Boost Technology 2.0 support depends on the CPU types. ** Refer to www.asus.com or this user manual for Intel® CPU support list. Integrated Graphics Processor - Intel® HD Graphics support Multi-VGA output support: HDMI/DVI-D/RGB port Supports HDMI...

Z87M-PLUS User's Manual
Page 11
... Fan connectors 1 x Front panel audio connector (AAFP) 1 x S/PDIF out header 1 x 24-pin EATX Power connector 1 x 8-pin EATX 12V Power connector 1 x MemOK! vDRAM Bus: 191-step Memory voltage control - button 1 x GPU Boost switch 1 x Clear CMOS jumper 1 x TPM header 1 x COM port 64 Mb Flash ROM, UEFI AMI BIOS, PnP, DMI 2.0, WfM 2.0, SM BIOS 2.7, ACPI 4.0a, Multi-language BIOS, ASUS EZ Flash 2, ASUS CrashFree BIOS 3, My Favorites, Quick Note, Last Modified Log, F12 PrintScreen function, F3 Shortcut functions, and ASUS DRAM SPD (Serial Presence Detect) memory information WfM 2.0, DMI 2.0, WOL...
... Fan connectors 1 x Front panel audio connector (AAFP) 1 x S/PDIF out header 1 x 24-pin EATX Power connector 1 x 8-pin EATX 12V Power connector 1 x MemOK! vDRAM Bus: 191-step Memory voltage control - button 1 x GPU Boost switch 1 x Clear CMOS jumper 1 x TPM header 1 x COM port 64 Mb Flash ROM, UEFI AMI BIOS, PnP, DMI 2.0, WfM 2.0, SM BIOS 2.7, ACPI 4.0a, Multi-language BIOS, ASUS EZ Flash 2, ASUS CrashFree BIOS 3, My Favorites, Quick Note, Last Modified Log, F12 PrintScreen function, F3 Shortcut functions, and ASUS DRAM SPD (Serial Presence Detect) memory information WfM 2.0, DMI 2.0, WOL...
Z87M-PLUS User's Manual
Page 16
...® Smart Connect Technology Your computer can adjust CPU PWM voltages and frequencies for selected applications, even when the system is in sleep mode, saving wait time and power usage. 1.1.2 DIGI+ VRM Digital Power Design DIGI+ VRM All-new digital CPU power controls work perfectly together to match digital power signal (SVID) requests from the CPU, with accurate input through a simple onboard switch or AI Suite II utility. Users can...
...® Smart Connect Technology Your computer can adjust CPU PWM voltages and frequencies for selected applications, even when the system is in sleep mode, saving wait time and power usage. 1.1.2 DIGI+ VRM Digital Power Design DIGI+ VRM All-new digital CPU power controls work perfectly together to match digital power signal (SVID) requests from the CPU, with accurate input through a simple onboard switch or AI Suite II utility. Users can...
Z87M-PLUS User's Manual
Page 33
... motherboard may cause system boot failure, and the DRAM_LED near the MemOK! A message will appear during the tuning process, the system continues memory tuning after turning on a bare or open-case system. button Installing DIMMs that you download and update to the latest BIOS version from the ASUS website at www.asus.com. • If you to section 1.2.8 Onboard LEDs for the exact location of failsafe settings. switch lights continuously. button...
... motherboard may cause system boot failure, and the DRAM_LED near the MemOK! A message will appear during the tuning process, the system continues memory tuning after turning on a bare or open-case system. button Installing DIMMs that you download and update to the latest BIOS version from the ASUS website at www.asus.com. • If you to section 1.2.8 Onboard LEDs for the exact location of failsafe settings. switch lights continuously. button...
Z87M-PLUS User's Manual
Page 38
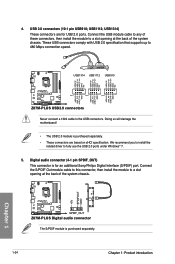
... Z87M-PLUS USB2.0 connectors Never connect a 1394 cable to fully use the USB 2.0 ports under Windows® 7. 5. Connect the S/PDIF Out module cable to this connector, then install the module to 480 Mbps connection speed. Doing so will damage the motherboard! • The USB 2.0 module is purchased separately. 1-24 Chapter 1: Product introduction We recommend you to install the related driver to the USB connectors. USB 2.0 connectors (10-1 pin USB910; 4. USB1112; These USB connectors comply with USB 2.0 specification that supports...
... Z87M-PLUS USB2.0 connectors Never connect a 1394 cable to fully use the USB 2.0 ports under Windows® 7. 5. Connect the S/PDIF Out module cable to this connector, then install the module to 480 Mbps connection speed. Doing so will damage the motherboard! • The USB 2.0 module is purchased separately. 1-24 Chapter 1: Product introduction We recommend you to install the related driver to the USB connectors. USB 2.0 connectors (10-1 pin USB910; 4. USB1112; These USB connectors comply with USB 2.0 specification that supports...
Z87M-PLUS User's Manual
Page 41
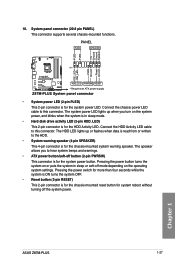
... turning off the system power. Chapter 1 ASUS Z87M-PLUS 1-27 The system power LED lights up or flashes when data is read from or written to hear system beeps and warnings. • ATX power button/soft-off mode depending on or puts the system in sleep mode. • Hard disk drive activity LED (2-pin HDD_LED) This 2-pin connector is for the chassis-mounted reset button for the system power button. Connect the chassis power LED cable to this connector. 10. Connect the HDD Activity LED cable to this connector. PANEL...
... turning off the system power. Chapter 1 ASUS Z87M-PLUS 1-27 The system power LED lights up or flashes when data is read from or written to hear system beeps and warnings. • ATX power button/soft-off mode depending on or puts the system in sleep mode. • Hard disk drive activity LED (2-pin HDD_LED) This 2-pin connector is for the chassis-mounted reset button for the system power button. Connect the chassis power LED cable to this connector. 10. Connect the HDD Activity LED cable to this connector. PANEL...
Z87M-PLUS User's Manual
Page 84
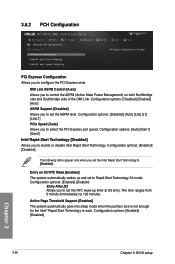
...to [Enabled]. Configuration options: [Disabled] [Auto] [L0s] [L1] [L0sL1] PCIe Speed [Auto] Allows you to set the Intel Rapid Start Technology to enable or disable Intel Rapid Start Technology. Active Page Threshold Support [Enabled] The system automatically goes into sleep mode when the partition size is not enough for the Intel® Rapid Start Technology to 120 minutes. Configuration options: [Enabled] [Disabled] 3-26 Chapter 3: BIOS setup Chapter 3 Configuration options: [Disabled] [Enabled] [Auto] ASPM Support [Disabled] Allows you to configure the PCI Express slots...
...to [Enabled]. Configuration options: [Disabled] [Auto] [L0s] [L1] [L0sL1] PCIe Speed [Auto] Allows you to set the Intel Rapid Start Technology to enable or disable Intel Rapid Start Technology. Active Page Threshold Support [Enabled] The system automatically goes into sleep mode when the partition size is not enough for the Intel® Rapid Start Technology to 120 minutes. Configuration options: [Enabled] [Disabled] 3-26 Chapter 3: BIOS setup Chapter 3 Configuration options: [Disabled] [Enabled] [Auto] ASPM Support [Disabled] Allows you to configure the PCI Express slots...
Z87M-PLUS User's Manual
Page 87
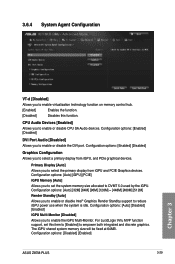
...Configuration options: [Disabled] [Enabled] ASUS Z87M-PLUS 3-29 Chapter 3 CPU Audio Devices [Enabled] Allows you to enable the iGPU Multi-Monitor. Configuration options: [Auto] [Disabled] [Enabled] iGPU Multi-Monitor [Disabled] Allows you to enable or disable CPU SA Audio devices. 3.6.4 System Agent Configuration VT-d [Disabled] Allows you to enable virtualization technology function on memory control hub. [Enabled] Enables the function. [Disabled] Disables this item to [Enabled] to empower both integrated and discrete graphics. For LucidLogix Virtu MVP function support...
...Configuration options: [Disabled] [Enabled] ASUS Z87M-PLUS 3-29 Chapter 3 CPU Audio Devices [Enabled] Allows you to enable the iGPU Multi-Monitor. Configuration options: [Auto] [Disabled] [Enabled] iGPU Multi-Monitor [Disabled] Allows you to enable or disable CPU SA Audio devices. 3.6.4 System Agent Configuration VT-d [Disabled] Allows you to enable virtualization technology function on memory control hub. [Enabled] Enables the function. [Disabled] Disables this item to [Enabled] to empower both integrated and discrete graphics. For LucidLogix Virtu MVP function support...
Z87M-PLUS User's Manual
Page 88
... Configuration options: [Disabled] [L0s] [L1] [L0sL1] PEG - Memory Scrambler [Enabled] Allows you to enable or disable the control of Active State Power Management on SA side of the DMI Link. Configuration options: [Auto] [Enabled] [Disabled] NB PCIe Configuration Allows you to enable remapping the memory above 4GB. ASPM [Disabled] Allows you to control ASPM support for slot 1. Configuration options: [Enabled] [Disabled] Memory Remap [Enabled] Allows you to configure the NB PCI Express settings. Configuration options: [Enabled] [Disabled] Chapter 3 3-30 Chapter 3: BIOS setup...
... Configuration options: [Disabled] [L0s] [L1] [L0sL1] PEG - Memory Scrambler [Enabled] Allows you to enable or disable the control of Active State Power Management on SA side of the DMI Link. Configuration options: [Auto] [Enabled] [Disabled] NB PCIe Configuration Allows you to enable remapping the memory above 4GB. ASPM [Disabled] Allows you to control ASPM support for slot 1. Configuration options: [Enabled] [Disabled] Memory Remap [Enabled] Allows you to configure the NB PCI Express settings. Configuration options: [Enabled] [Disabled] Chapter 3 3-30 Chapter 3: BIOS setup...
Z87M-PLUS User's Manual
Page 92
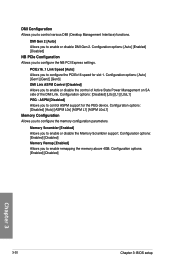
... motherboard. The following item appears only when you to enable or disable the serial port (COM). IRQ=4] Allows you set the Realtek LAN Controller item to set the serial port configuration. IRQ=3] Chapter 3 3-34 Chapter 3: BIOS setup Realtek LAN Controller [Enabled] [Enabled] Enables the Realtek® LAN controller. [Disabled] Disables the Realtek® LAN controller. PCI Express x16_2 slot (dark brown) bandwidth [X2 mode] [X2 mode] PCIe x16_2 slot runs at X2 mode with all slots enabled. [X4 mode] PCIe x16_2 slot runs at X4 mode for high performance support. Serial Port...
... motherboard. The following item appears only when you to enable or disable the serial port (COM). IRQ=4] Allows you set the Realtek LAN Controller item to set the serial port configuration. IRQ=3] Chapter 3 3-34 Chapter 3: BIOS setup Realtek LAN Controller [Enabled] [Enabled] Enables the Realtek® LAN controller. [Disabled] Disables the Realtek® LAN controller. PCI Express x16_2 slot (dark brown) bandwidth [X2 mode] [X2 mode] PCIe x16_2 slot runs at X2 mode with all slots enabled. [X4 mode] PCIe x16_2 slot runs at X4 mode for high performance support. Serial Port...

Z87M-PLUS User's Manual
Page 107
... 3 ASUS Z87M-PLUS 3-49 However, BIOS updating is no problem using the current version of the original motherboard BIOS file to a USB flash disk in the system's failure to provide enhancements on system stability, compatibility, or performance. The following utilities allow you to manage, save, and update the motherboard BIOS in Windows® environment. • ASUS Update requires an Internet connection either through a network or an ISP (Internet Service Provider). • This utility is available in the support DVD...
... 3 ASUS Z87M-PLUS 3-49 However, BIOS updating is no problem using the current version of the original motherboard BIOS file to a USB flash disk in the system's failure to provide enhancements on system stability, compatibility, or performance. The following utilities allow you to manage, save, and update the motherboard BIOS in Windows® environment. • ASUS Update requires an Internet connection either through a network or an ISP (Internet Service Provider). • This utility is available in the support DVD...
Z87M-PLUS User's Manual
Page 113
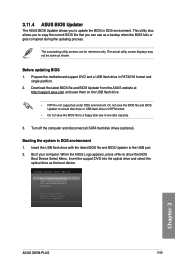
... a floppy disk due to copy the current BIOS file that you can use as a backup when the BIOS fails or gets corrupted during the updating process. Boot your computer. Turn off the computer and disconnect all SATA hard disk drives (optional). Insert the support DVD into the optical drive and select the optical drive as shown. The actual utility screen displays may not be same as the boot device. Before updating BIOS 1. Please select boot device: SATA: XXXXXXXXXXXXXXXX USB...
... a floppy disk due to copy the current BIOS file that you can use as a backup when the BIOS fails or gets corrupted during the updating process. Boot your computer. Turn off the computer and disconnect all SATA hard disk drives (optional). Insert the support DVD into the optical drive and select the optical drive as shown. The actual utility screen displays may not be same as the boot device. Before updating BIOS 1. Please select boot device: SATA: XXXXXXXXXXXXXXXX USB...
Z87M-PLUS User's Manual
Page 117
... motherboard supports Windows® 7 32/64-bit and Windows® 8 32/64-bit operating systems (OS). • Motherboard settings and hardware options vary. The AHCI/RAID Driver The Manual menu contains menu contains items to the list of the support DVD are for reference only. Click the Contact tab to open driver disk. Click an item to display the ASUS contact information. Double-click the ASSETUP.EXE to install. Refer to locate the file ASSETUP...
... motherboard supports Windows® 7 32/64-bit and Windows® 8 32/64-bit operating systems (OS). • Motherboard settings and hardware options vary. The AHCI/RAID Driver The Manual menu contains menu contains items to the list of the support DVD are for reference only. Click the Contact tab to open driver disk. Click an item to display the ASUS contact information. Double-click the ASSETUP.EXE to install. Refer to locate the file ASSETUP...

Z87M-PLUS User's Manual
Page 134
5.1.2 Installing Serial ATA hard disks The motherboard supports Serial ATA hard disk drives. Connect the SATA signal cables. 3. To do this: 1. To install the SATA hard disks for details on each drive. 5.1.3 Setting the RAID item in BIOS You must enable the RAID function in the BIOS Setup before creating RAID sets using SATA HDDs. Save your changes, and then exit the BIOS Setup. Install the SATA hard disks into the drive bays. 2. Set the SATA Mode item to the power connector on entering and navigating through the BIOS Setup Due to chipset limitation, when SATA ports are set to the...
5.1.2 Installing Serial ATA hard disks The motherboard supports Serial ATA hard disk drives. Connect the SATA signal cables. 3. To do this: 1. To install the SATA hard disks for details on each drive. 5.1.3 Setting the RAID item in BIOS You must enable the RAID function in the BIOS Setup before creating RAID sets using SATA HDDs. Save your changes, and then exit the BIOS Setup. Install the SATA hard disks into the drive bays. 2. Set the SATA Mode item to the power connector on entering and navigating through the BIOS Setup Due to chipset limitation, when SATA ports are set to the...
Z87M-PLUS User's Manual
Page 139
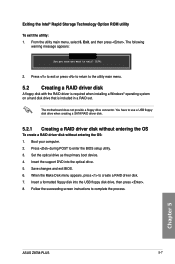
... a SATA RAID driver disk. 5.2.1 Creating a RAID driver disk without entering the OS To create a RAID driver disk without entering the OS: 1. Insert the support DVD into the USB floppy disk drive, then press . 8. You have to the utility main menu. 5.2 Creating a RAID driver disk A floppy disk with the RAID driver is required when installing a Windows® operating system on a hard disk drive that is included in a RAID set. From the utility main menu, select 5. Boot your computer. 2. Chapter 5 ASUS Z87M-PLUS 5-7 Exiting the Intel® Rapid Storage Technology Option ROM utility To...
... a SATA RAID driver disk. 5.2.1 Creating a RAID driver disk without entering the OS To create a RAID driver disk without entering the OS: 1. Insert the support DVD into the USB floppy disk drive, then press . 8. You have to the utility main menu. 5.2 Creating a RAID driver disk A floppy disk with the RAID driver is required when installing a Windows® operating system on a hard disk drive that is included in a RAID set. From the utility main menu, select 5. Boot your computer. 2. Chapter 5 ASUS Z87M-PLUS 5-7 Exiting the Intel® Rapid Storage Technology Option ROM utility To...
Z87M-PLUS User's Manual
Page 140
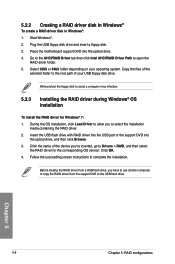
... USB floppy disk drive. Follow the succeeding screen instructions to select the installation media containing the RAID driver. 2. During the OS installation, click Load Driver to allow you have to use another computer to copy the RAID driver from the support DVD to the root path of the selected folder to the USB flash drive. Plug the USB floppy disk drive and insert a floppy disk. 3. Insert the USB flash drive with RAID driver into the USB port or the support DVD into the optical drive. 4. 5.2.2 Creating a RAID driver disk in Windows...
... USB floppy disk drive. Follow the succeeding screen instructions to select the installation media containing the RAID driver. 2. During the OS installation, click Load Driver to allow you have to use another computer to copy the RAID driver from the support DVD to the root path of the selected folder to the USB flash drive. Plug the USB floppy disk drive and insert a floppy disk. 3. Insert the USB flash drive with RAID driver into the USB port or the support DVD into the optical drive. 4. 5.2.2 Creating a RAID driver disk in Windows...
Z87M-PLUS User's Manual
Page 148
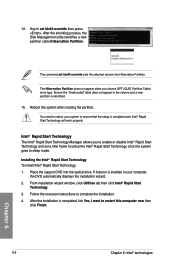
..., the DVD automatically displays the installation wizard. 2. Chapter 6 6-8 Chapter 6: Intel® technologies The command set id=84 override sets the selected volume into the optical drive. Reboot the system after creating the partition. Place the support DVD into Hibernation Partition. Intel® Rapid Start Technology The Intel® Rapid Start Technology Manager allows you choose GPT (GUID Partition Table) store type. If Autorun is enabled in...
..., the DVD automatically displays the installation wizard. 2. Chapter 6 6-8 Chapter 6: Intel® technologies The command set id=84 override sets the selected volume into the optical drive. Reboot the system after creating the partition. Place the support DVD into Hibernation Partition. Intel® Rapid Start Technology The Intel® Rapid Start Technology Manager allows you choose GPT (GUID Partition Table) store type. If Autorun is enabled in...
Z87M-PLUS User's Manual
Page 152
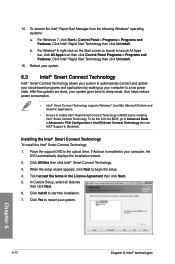
... the License Agreement then click Next. 5. Click Install to enable Intel® Rapid Smart Connect Technology in your system. For Windows 7, click Start > Control Panel > Programs > Programs and Features. 14. Click Utilities then click Intel® Smart Connect Technology. 3. Chapter 6 6-12 Chapter 6: Intel® technologies To remove the Intel® Rapid Start Manager from the BIOS, go to Advanced Mode > Advanced > PCH Configuration > Intel(R) Smart Connect Technology then set ISCT Support to a low power state.
... the License Agreement then click Next. 5. Click Install to enable Intel® Rapid Smart Connect Technology in your system. For Windows 7, click Start > Control Panel > Programs > Programs and Features. 14. Click Utilities then click Intel® Smart Connect Technology. 3. Chapter 6 6-12 Chapter 6: Intel® technologies To remove the Intel® Rapid Start Manager from the BIOS, go to Advanced Mode > Advanced > PCH Configuration > Intel(R) Smart Connect Technology then set ISCT Support to a low power state.


