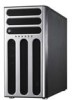
TS300-E7/PS4 User Manual
Page 11
Product introduction Chapter 1 This chapter describes the general features of the server, including sections on front panel and rear panel specifications. ASUS TS300-E7/PS4
TS300-E7/PS4 User Manual
Page 13
... SAS RAID card 4 x Hot-swap 3.5" HDD Bays 4 x Intel® 82574L + 1 x Mgmt LAN Aspeed AST2050 16MB (continued on the next page) ASUS TS300-E7/PS4 1-3 1.3 System specifications The ASUS TS300-E7/PS4 is a 5U barebone server system featuring the ASUS P8B-E/4L server board. The server supports Intel® LGA1155 Xeon® E3-1200 / Core™ i3-2100 processors, plus...
TS300-E7/PS4 User Manual
Page 15
... drive, and USB 2.0 ports are located on the front panel. The power and reset buttons, LED indicators, optical drive, and two USB ports are available. ASUS TS300-E7/PS4 1-5 The function of 5.25-inch devices, two drive bays are located on the front panel. 1.4 Front panel features The barebone server displays a simple yet stylish...
TS300-E7/PS4 User Manual
Page 17
... front or rear panel if you need to use a floppy disk or a optical disc. *WARNING HAZARDOUS MOVING PARTS KEEP FINGERS AND OTHER BODY PARTS AWAY ASUS TS300-E7/PS4 1-7 1.6 Internal features The barebone server includes the basic components as shown. 1 6 7 2 10 8 4 3 5 9 1. 500W(80+) Bronze Single Power supply unit: 2. 120mm x 38mm system fan (ARX FD1212...
TS300-E7/PS4 User Manual
Page 19
1.7.2 Rear panel LEDs ACT/LINK LED SPEED LED ACT/LINK LED SPEED LED ACT/LINK LED SPEED LED ACT/LINK LED SPEED LED ACT/LINK LED Status Description OFF No link GREEN Linked BLINKING Data activity SPEED LED Status Description OFF 10 Mbps connection ORANGE 100 Mbps connection GREEN 1 Gbps connection ASUS TS300-E7/PS4 1-9
TS300-E7/PS4 User Manual
Page 21
ASUS TS300-E7/PS4 Hardware setup Chapter 2 This chapter lists the hardware setup procedures that you have to perform when installing or removing system components.
TS300-E7/PS4 User Manual
Page 23
Match and insert the lower sliding edge of the side cover to the chassis. 3. Drive in place. 1 3 4. Position the side cover to the corresponding chassis edge. 2. 2.1.2 Reinstalling the side cover To reinstall the side cover 1. Slide the side cover toward the front panel until it snaps in the two screws you removed earlier to secure the side cover. ASUS TS300-E7/PS4 4 4 2-3
TS300-E7/PS4 User Manual
Page 25
... one correct orientation. DO NOT force the CPU into the CPU notches. PnP cap Cap tab 5. 3. Load plate 4. Gold triangle mark Alignment keys CPU notches ASUS TS300-E7/PS4 2-5 Remove the PnP cap from the CPU socket by lifting the tab only.
TS300-E7/PS4 User Manual
Page 27
Place the heatsink on top of the installed CPU, ensuring that the CPU fan cable is closest to the CPU fan connector. 3. ASUS TS300-E7/PS4 2-7 A B A A B 1 B A 1 Orient the heatsink and fan assembly such that the four fasteners match the holes on the motherboard labeled CPU_FAN1. Hardware monitoring errors can occur if ...
TS300-E7/PS4 User Manual
Page 29
... optimum compatibility, it is recommended that you obtain memory modules from slot A2 and B2 (orange). • Always install DIMMs with the same CAS latency. ASUS TS300-E7/PS4 2-9 2.3 System memory 2.3.1 Overview The motherboard comes with ECC DDR3 DIMMs into the DIMM sockets using the memory configurations in this section. UDIMM DIMM Slot Per...
TS300-E7/PS4 User Manual
Page 31
...;e��d�t�a�b�s��o�n��th��e�c�h��a�s�s�is� side rail. 2. ASUS TS300-E7/PS4 2-11 Shift the hooked tabs and take off the front bezel. 2.4.2 Reinstalling the front panel assembly To reinstall the front panel assembly: 1. Swing the front...
TS300-E7/PS4 User Manual
Page 33
An HDD module cage comes with a SATA or SAS backplane. Level the HDD module cage latch counterclockwise. 3 3. ASUS TS300-E7/PS4 5 2-13 Lock the cage latch properly. 6. Connect the appropriate cables to access the drive trays by simply opening the front bezel. Ensure of the type ...
TS300-E7/PS4 User Manual
Page 35
.... Refer to section 2.8.1 Motherboard connections for the exact location of the SGPIO3 connector and section 2.8.2 SATA/SAS backplane connections for details. Install a ASUS PIKE RAID card to section 2.7.2 Installing ASUS PIKE RAID card for the exact locations of the SGPIO cable to pin 2-3. 10. Refer to the motherboard. Move the SGPIO_SEL1 jumper.... 8-1 pin cable end 10-1 pin cable end 11. Connect the 8-1 pin end of the SGPIO cable to the SAS connectors on the first SAS backplane. 7. ASUS TS300-E7/PS4 2-15
TS300-E7/PS4 User Manual
Page 37
ASUS TS300-E7/PS4 2-17 Each side has three holes to the depth of the bay until just a small fraction of hard disk drives. Use two screws on the ...
TS300-E7/PS4 User Manual
Page 39
...! 2.7.1 Installing an expansion card 1. Align the card golden fingers with it and make the necessary hardware settings for you wish to install an expansion card. 5. ASUS TS300-E7/PS4 2-19 Before installing the expansion card, read the documentation that came with the slot, and then press firmly until the card is designed with an...
TS300-E7/PS4 User Manual
Page 41
3. Orient and press the ASMB5 management card in place. ASUS TS300-E7/PS4 2-21 Locate the BMC_FW header on your motherboard. 1. Connect the SAS cable to the SAS connectors on the motherboard. 2.7.3 Installing ASMB5 management board Follow the steps below to install an optional ASMB5 management board on the motherboard. 2.
TS300-E7/PS4 User Manual
Page 43
... you will remove pre‑installed components to install additional devices. • Refer to SATA/SAS backplane) 9. USB connector (from motherboard to Chapter 4 for ASUS PIKE only; 2.8 2.8.1 3 Cable connections • The bundled system cables are pre-connected before shipment. Motherboard connections 1 2 9 5 4 6 7 9...SGPIO2 connector SAS: from rear chassis intrusion switch to SATA/SAS backplane SGPIO3 connector) ASUS TS300-E7/PS4 2-23 Chassis Intrusion connector (from motherboard SGPIO3 to motherboard) 7. SAS connectors (for detailed information on the connectors.
TS300-E7/PS4 User Manual
Page 45
... the motherboard Move the SGPIO_SEL1 jumper on the SATA/SAS backplane to 4-pin plug of the SATA/SAS backplane faces the rear panel when installed. ASUS TS300-E7/PS4 2-25
TS300-E7/PS4 User Manual
Page 47
... these footpads if you wish to install the system to a rack (Refer to Chapter 3: Installation options of the chassis for instructions) To remove the footpads 1. ASUS TS300-E7/PS4 2-27 Follow the previous instructions in reverse to reinstall the rear system fan. 2.9.2 Chassis footpads The barebone server system is shipped with a Philips (cross) screwdriver...
TS300-E7/PS4 User Manual
Page 49
Installation options Chapter 3 This chapter describes how to install the optional components and devices into the barebone server. ASUS TS300-E7/PS4