
Motherboard DIY Troubleshooting Guide
Page 1
Technical Updates SK8N Motherboard IE1379 SK8N Technical Updates SK8N specifications summary (Page xi) Internal I/O BIOS features Industry standard Manageability Power Requirement Form Factor Support CD contents Floppy disk drive connector Primary/Secondary IDE ...BIOS, CrashFree BIOS2 PCI 2.3, USB 2.0/1.1 DMI 2.0, WOL by PME, WOR by PME ATX power supply (with 4-pin 12V plug) ATX form factor: 12 in x 9.6 in (30.5 cm x 24.4 cm) Device drivers ASUS PC Probe Trend Micro™ PC-cillin 2002 anti-virus software * Specifications are subject to change without notice. 15-xxxxxxxxx ASUS SK8N...
Technical Updates SK8N Motherboard IE1379 SK8N Technical Updates SK8N specifications summary (Page xi) Internal I/O BIOS features Industry standard Manageability Power Requirement Form Factor Support CD contents Floppy disk drive connector Primary/Secondary IDE ...BIOS, CrashFree BIOS2 PCI 2.3, USB 2.0/1.1 DMI 2.0, WOL by PME, WOR by PME ATX power supply (with 4-pin 12V plug) ATX form factor: 12 in x 9.6 in (30.5 cm x 24.4 cm) Device drivers ASUS PC Probe Trend Micro™ PC-cillin 2002 anti-virus software * Specifications are subject to change without notice. 15-xxxxxxxxx ASUS SK8N...

SK8N User Manual
Page 8
It includes description of the jumpers and connectors on the motherboard. • Chapter 3: Powering up This chapter describes the power up sequence, the vocal POST messages, and ways of shutting down the system. • Chapter 4: BIOS setup This chapter tells how to perform when installing ... to change system settings through the BIOS Setup menus. viii Detailed descriptions of the BIOS parameters are also provided. • Chapter 5: Software support This chapter describes the contents of the support CD that you need when installing the motherboard. About this guide is organized This...
It includes description of the jumpers and connectors on the motherboard. • Chapter 3: Powering up This chapter describes the power up sequence, the vocal POST messages, and ways of shutting down the system. • Chapter 4: BIOS setup This chapter tells how to perform when installing ... to change system settings through the BIOS Setup menus. viii Detailed descriptions of the BIOS parameters are also provided. • Chapter 5: Software support This chapter describes the contents of the support CD that you need when installing the motherboard. About this guide is organized This...
SK8N User Manual
Page 18
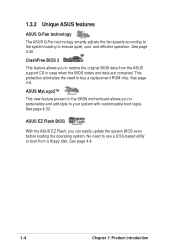
...new feature present in case when the BIOS codes and data are corrupted. No need to use a DOS-based utility or boot from the ASUS support CD in the SK8N motherboard allows you can easily update the system BIOS even before loading the operating system. This... protection eliminates the need to buy a replacement ROM chip. See page 4-4. 1-4 Chapter 1: Product introduction 1.3.2 Unique ASUS features ASUS Q-Fan technology The ASUS Q-Fan ...
...new feature present in case when the BIOS codes and data are corrupted. No need to use a DOS-based utility or boot from the ASUS support CD in the SK8N motherboard allows you can easily update the system BIOS even before loading the operating system. This... protection eliminates the need to buy a replacement ROM chip. See page 4-4. 1-4 Chapter 1: Product introduction 1.3.2 Unique ASUS features ASUS Q-Fan technology The ASUS Q-Fan ...

SK8N User Manual
Page 23
... In RTL 8201BL AUDIO CODEC CPU_FAN1 COM2 PWR_FAN1 Accelerated Graphics Port (AGP1) CD1 AUX1 PCI1 nVIDIA nForce3 J1 Pro150 4Mbit LPC BIOS ROM Super I/O FP_AUDIO1 SPDIF_OUT PCI2 PCI3 PCI4 PCI5 1394PHY TI TSB43AB22A BUZZER1 IE1394_1 SATA_RAID2 PRI_RAID1 CLRTC1 CHA_FAN1 PANEL1 ® PROMISE PDC20378 RAID Controller SATA_RAID1 SB_PWR1 USB56 FLOPPY1 SEC_IDE PRI_IDE ASUS SK8N motherboard 2-3
... In RTL 8201BL AUDIO CODEC CPU_FAN1 COM2 PWR_FAN1 Accelerated Graphics Port (AGP1) CD1 AUX1 PCI1 nVIDIA nForce3 J1 Pro150 4Mbit LPC BIOS ROM Super I/O FP_AUDIO1 SPDIF_OUT PCI2 PCI3 PCI4 PCI5 1394PHY TI TSB43AB22A BUZZER1 IE1394_1 SATA_RAID2 PRI_RAID1 CLRTC1 CHA_FAN1 PANEL1 ® PROMISE PDC20378 RAID Controller SATA_RAID1 SB_PWR1 USB56 FLOPPY1 SEC_IDE PRI_IDE ASUS SK8N motherboard 2-3
SK8N User Manual
Page 35
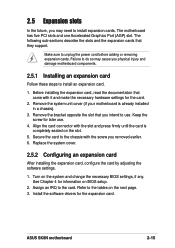
...that you intend to the chassis with the screw you physical injury and damage motherboard components. 2.5.1 Installing an expansion card Follow these steps to install expansion cards. Keep the screw for the card. 2. ASUS SK8N motherboard 2-15 Failure to do so may need to install an expansion card. ...1. Assign an IRQ to unplug the power cord before adding or removing expansion cards. Align the card connector with it and make the necessary hardware settings for later use . Turn on BIOS setup. ...
...that you intend to the chassis with the screw you physical injury and damage motherboard components. 2.5.1 Installing an expansion card Follow these steps to install expansion cards. Keep the screw for the card. 2. ASUS SK8N motherboard 2-15 Failure to do so may need to install an expansion card. ...1. Assign an IRQ to unplug the power cord before adding or removing expansion cards. Align the card connector with it and make the necessary hardware settings for later use . Turn on BIOS setup. ...

SK8N User Manual
Page 49
... and allows you turn on the BIOS or OS settings. The LED lights up when you to hear system beeps and warnings. • Reset Switch Lead (Blue 2-pin RESET) This 2-pin connector connects to light up. ASUS SK8N motherboard 2-29 System panel connector (20-pin... PANEL) This connector accommodates several system front panel functions. Power LED Speaker Connector SK8N PLED+ PLED+5V Ground Ground Speaker IDE_LED+ IDE_LED- The System Panel connector ...
... and allows you turn on the BIOS or OS settings. The LED lights up when you to hear system beeps and warnings. • Reset Switch Lead (Blue 2-pin RESET) This 2-pin connector connects to light up. ASUS SK8N motherboard 2-29 System panel connector (20-pin... PANEL) This connector accommodates several system front panel functions. Power LED Speaker Connector SK8N PLED+ PLED+5V Ground Ground Speaker IDE_LED+ IDE_LED- The System Panel connector ...

SK8N User Manual
Page 53
Connect the power cord to enter BIOS Setup. Turn on the devices in Chapter 4. At power on, hold down to the power connector at the back of the chassis). 6. ASUS SK8N motherboard 3-1 If your retailer for the first time 1. Monitor b. System power (if you are using an ATX power supply, you turned on the ...system LED lights up . 3.1 Starting up or switch between orange and green after the system LED turns on. After making all switches are running, the BIOS beeps or additional messages appear on tests. Be sure that is equipped with a surge protector. 5.
Connect the power cord to enter BIOS Setup. Turn on the devices in Chapter 4. At power on, hold down to the power connector at the back of the chassis). 6. ASUS SK8N motherboard 3-1 If your retailer for the first time 1. Monitor b. System power (if you are using an ATX power supply, you turned on the ...system LED lights up . 3.1 Starting up or switch between orange and green after the system LED turns on. After making all switches are running, the BIOS beeps or additional messages appear on tests. Be sure that is equipped with a surge protector. 5.
SK8N User Manual
Page 56
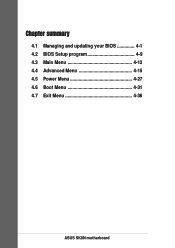
Chapter summary 4.1 Managing and updating your BIOS 4-1 4.2 BIOS Setup program 4-9 4.3 Main Menu 4-12 4.4 Advanced Menu 4-15 4.5 Power Menu 4-27 4.6 Boot Menu 4-31 4.7 Exit Menu 4-36 ASUS SK8N motherboard
Chapter summary 4.1 Managing and updating your BIOS 4-1 4.2 BIOS Setup program 4-9 4.3 Main Menu 4-12 4.4 Advanced Menu 4-15 4.5 Power Menu 4-27 4.6 Boot Menu 4-31 4.7 Exit Menu 4-36 ASUS SK8N motherboard
SK8N User Manual
Page 57
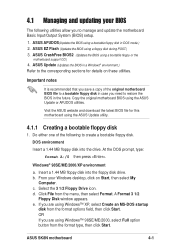
... utility. 4.1.1 Creating a bootable floppy disk 1. Windows® 98SE/ME/2000/XP environment a. ASUS Update (Updates the BIOS in DOS mode.) 2. Click File from the format options field, then click Start. Select the 3 1/2 Floppy Drive icon. ASUS SK8N motherboard 4-1 Insert a 1.44 MB floppy disk into the drive. Important notes It is recommended that you save a copy...
... utility. 4.1.1 Creating a bootable floppy disk 1. Windows® 98SE/ME/2000/XP environment a. ASUS Update (Updates the BIOS in DOS mode.) 2. Click File from the format options field, then click Start. Select the 3 1/2 Floppy Drive icon. ASUS SK8N motherboard 4-1 Insert a 1.44 MB floppy disk into the drive. Important notes It is recommended that you save a copy...

SK8N User Manual
Page 58
...ASUS website (www.asus.com) to the bootable floppy disk. Save the BIOS file to type the exact BIOS file name at the prompt. 2. Boot the system from the support CD to the bootable floppy disk that you see on the screen is for your screen may cause system boot failure! 4-2 Chapter 4: BIOS.... At the DOS prompt, type the command line: afudos /i where "filename" means the latest (or original) BIOS file that contains the BIOS file. 3. Copy the original (or the latest) motherboard BIOS to the bootable floppy disk. 4.1.2 Using AFUDOS to a piece of the update process. Doing so may not be...
...ASUS website (www.asus.com) to the bootable floppy disk. Save the BIOS file to type the exact BIOS file name at the prompt. 2. Boot the system from the support CD to the bootable floppy disk that you see on the screen is for your screen may cause system boot failure! 4-2 Chapter 4: BIOS.... At the DOS prompt, type the command line: afudos /i where "filename" means the latest (or original) BIOS file that contains the BIOS file. 3. Copy the original (or the latest) motherboard BIOS to the bootable floppy disk. 4.1.2 Using AFUDOS to a piece of the update process. Doing so may not be...

SK8N User Manual
Page 59
...filename Extension name A:\>afudos /oMYBIOS03.rom AMI Firmware Update Utility - Reading flash ..... 0x0008CC00 (9%) ASUS SK8N motherboard 4-3 When the BIOS update process is for the extension name. done A:\> 5. The BIOS information on your screen may not be any user provided filename of not more than eight (8) ...(C) 2002 American Megatrends, Inc. All rights reserved. Reading file ..... The copy can also be used to copy the current system BIOS settings to a floppy or hard disk. Reboot the system from PC The AFUDOS.EXE utility can be used as shown. done ...
...filename Extension name A:\>afudos /oMYBIOS03.rom AMI Firmware Update Utility - Reading flash ..... 0x0008CC00 (9%) ASUS SK8N motherboard 4-3 When the BIOS update process is for the extension name. done A:\> 5. The BIOS information on your screen may not be any user provided filename of not more than eight (8) ...(C) 2002 American Megatrends, Inc. All rights reserved. Reading file ..... The copy can also be used to copy the current system BIOS settings to a floppy or hard disk. Reboot the system from PC The AFUDOS.EXE utility can be used as shown. done ...

SK8N User Manual
Page 60
... to display the following. Checking for your motherboard and rename the downloaded file as "SK8N.ROM". 4-4 Chapter 4: BIOS Setup appears. • If the correct BIOS file is no floppy disk found in the drive, the error message "Floppy not found !" Reading flash ..... Visit the ASUS website (www.asus.com) to go through the long process of...
... to display the following. Checking for your motherboard and rename the downloaded file as "SK8N.ROM". 4-4 Chapter 4: BIOS Setup appears. • If the correct BIOS file is no floppy disk found in the drive, the error message "Floppy not found !" Reading flash ..... Visit the ASUS website (www.asus.com) to go through the long process of...

SK8N User Manual
Page 61
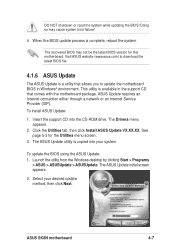
... ! If you have saved a copy of the original motherboard BIOS to a bootable floppy disk, you to restore the BIOS. See section "4.1.1 Creating a bootable floppy disk." ASUS SK8N motherboard 4-5 Reading file "SK8N.rom". Rebooting. 4.1.5 Recovering the BIOS with the BIOS update process. 2. DO NOT shutdown or reset the system while updating the BIOS! Doing so may also use this disk to...
... ! If you have saved a copy of the original motherboard BIOS to a bootable floppy disk, you to restore the BIOS. See section "4.1.1 Creating a bootable floppy disk." ASUS SK8N motherboard 4-5 Reading file "SK8N.rom". Rebooting. 4.1.5 Recovering the BIOS with the BIOS update process. 2. DO NOT shutdown or reset the system while updating the BIOS! Doing so may also use this disk to...

SK8N User Manual
Page 62
... found in the floppy disk is renamed as "SK8N.ROM". Completed. Bad BIOS checksum. When the BIOS update process is detected, the following screen message appears. If there is no floppy disk found ! Make sure that contains the original or the latest BIOS file for this motherboard. DO NOT shutdown or reset the system while...
... found in the floppy disk is renamed as "SK8N.ROM". Completed. Bad BIOS checksum. When the BIOS update process is detected, the following screen message appears. If there is no floppy disk found ! Make sure that contains the original or the latest BIOS file for this motherboard. DO NOT shutdown or reset the system while...
SK8N User Manual
Page 63
... system boot failure! 4. Click the Utilities tab, then click Install ASUS Update VX.XX.XX. ASUS SK8N motherboard 4-7 This utility is available in Windows® environment. The Drivers menu appears. 2. The ASUS Update utility is complete, reboot the system. The ASUS Update initial screen appears. 2. When the BIOS update process is copied into the CD-ROM drive...
... system boot failure! 4. Click the Utilities tab, then click Install ASUS Update VX.XX.XX. ASUS SK8N motherboard 4-7 This utility is available in Windows® environment. The Drivers menu appears. 2. The ASUS Update utility is complete, reboot the system. The ASUS Update initial screen appears. 2. When the BIOS update process is copied into the CD-ROM drive...

SK8N User Manual
Page 65
... then back on the system chassis. See section "4.7 Exit Menu." Visit the ASUS website (www.asus.com) to enter the Setup utility. Use the BIOS Setup program when you are installing a motherboard, reconfiguring your system using this program. For example, you with its test routines... Select the Load Default Settings item under the Exit Menu. It is designed to make your screen. ASUS SK8N motherboard 4-9 This section explains how to reconfigure your BIOS." Do this chapter are for most conditions to change the power management settings. Otherwise, POST continues with...
... then back on the system chassis. See section "4.7 Exit Menu." Visit the ASUS website (www.asus.com) to enter the Setup utility. Use the BIOS Setup program when you are installing a motherboard, reconfiguring your system using this program. For example, you with its test routines... Select the Load Default Settings item under the Exit Menu. It is designed to make your screen. ASUS SK8N motherboard 4-9 This section explains how to reconfigure your BIOS." Do this chapter are for most conditions to change the power management settings. Otherwise, POST continues with...

SK8N User Manual
Page 69
...dimmed items (Device, Vendor, Size, LBA Mode, Block Mode, PIO Mode, Async DMA, Ultra DMA, and SMART monitoring) are auto-detected by BIOS and are specifically configuring a CD-ROM drive. Select CDROM if you are not user-configurable. When set to Auto, the data transfer from and to...] [CDROM] [ARMD] LBA/Large Mode [Auto] Enables or disables the LBA mode. Setting to display the IDE device information. Configuration options: [Disabled] [Auto] ASUS SK8N motherboard 4-13 There is a separate sub-menu for each IDE device. When set to Disabled, the data transfer from and to the system.
...dimmed items (Device, Vendor, Size, LBA Mode, Block Mode, PIO Mode, Async DMA, Ultra DMA, and SMART monitoring) are auto-detected by BIOS and are specifically configuring a CD-ROM drive. Select CDROM if you are not user-configurable. When set to Auto, the data transfer from and to...] [CDROM] [ARMD] LBA/Large Mode [Auto] Enables or disables the LBA mode. Setting to display the IDE device information. Configuration options: [Disabled] [Auto] ASUS SK8N motherboard 4-13 There is a separate sub-menu for each IDE device. When set to Disabled, the data transfer from and to the system.

SK8N User Manual
Page 71
...PCI PnP USB Configuration Configure CPU. Any value entered that is not supported. If the system fails due to power source and restart system. ASUS SK8N motherboard 4-15 Take caution when changing the settings of the FSB Frequency ranged from 200 MHz to Sub-screen F1 General Help F10 Save and Exit...Item +- Change Option F1 General Help F10 Save and Exit ESC Exit CPU Overclock in this menu show the CPU-related information auto-detected by BIOS. wait for the CPU and other system devices. Select Screen Select Item Enter Go to 300 MHz. CPU OverClock in this range will have...
...PCI PnP USB Configuration Configure CPU. Any value entered that is not supported. If the system fails due to power source and restart system. ASUS SK8N motherboard 4-15 Take caution when changing the settings of the FSB Frequency ranged from 200 MHz to Sub-screen F1 General Help F10 Save and Exit...Item +- Change Option F1 General Help F10 Save and Exit ESC Exit CPU Overclock in this menu show the CPU-related information auto-detected by BIOS. wait for the CPU and other system devices. Select Screen Select Item Enter Go to 300 MHz. CPU OverClock in this range will have...

SK8N User Manual
Page 81
...the settings of the PCI PnP menu items. Incorrect field values may cause system to [No], BIOS configures all the devices in the system. Configuration options: [No] [Yes] ASUS SK8N motherboard 4-25 Configuration options: [RAID] [IDE] 4.4.4 PCI PnP The PCI PnP menu items allow you...IRQ9 IRQ10 IRQ11 IRQ14 IRQ15 [Available] [Available] [Available] [Available] [Available] [Available] [Available] [Available] [Available] NO: Lets the bIOS configure all the devices in the system. Advanced PCI/PnP settings WARNING: Setting wrong values in the sections below may cause the system to change...
...the settings of the PCI PnP menu items. Incorrect field values may cause system to [No], BIOS configures all the devices in the system. Configuration options: [No] [Yes] ASUS SK8N motherboard 4-25 Configuration options: [RAID] [IDE] 4.4.4 PCI PnP The PCI PnP menu items allow you...IRQ9 IRQ10 IRQ11 IRQ14 IRQ15 [Available] [Available] [Available] [Available] [Available] [Available] [Available] [Available] [Available] NO: Lets the bIOS configure all the devices in the system. Advanced PCI/PnP settings WARNING: Setting wrong values in the sections below may cause the system to change...

SK8N User Manual
Page 83
...: [S1 (POS) Only] [S3 Only] 4.5.2 Repost Video on S3 Resume [No] Determines whether to invoke VGA BIOS POST on S3 Resume ACPI 2.0 Support ACPI APIC Support BIOS -> AML ACPI table APM Configuration Hardware Monitor [S3 only] [No] [No] [Enabled] [Enabled] Configure CPU. ... set to Enabled, the ACPI APIC table pointer is included in the ASIC. Configuration options: [Disabled] [Enabled] ASUS SK8N motherboard 4-27 Configuration options: [Disabled] [Enabled] 4.5.5 BIOS -> AML ACPI Table [Enabled] Allows you to change the settings for ACPI 2.0 specifications. 4.5 Power menu The...
...: [S1 (POS) Only] [S3 Only] 4.5.2 Repost Video on S3 Resume [No] Determines whether to invoke VGA BIOS POST on S3 Resume ACPI 2.0 Support ACPI APIC Support BIOS -> AML ACPI table APM Configuration Hardware Monitor [S3 only] [No] [No] [Enabled] [Enabled] Configure CPU. ... set to Enabled, the ACPI APIC table pointer is included in the ASIC. Configuration options: [Disabled] [Enabled] ASUS SK8N motherboard 4-27 Configuration options: [Disabled] [Enabled] 4.5.5 BIOS -> AML ACPI Table [Enabled] Allows you to change the settings for ACPI 2.0 specifications. 4.5 Power menu The...

