
User Manual
Page 13
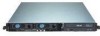
RAID 0, RAID 1, and JBOD configurations Management ASUS Server Web-based Management (ASWM) Monitoring Voltage, temperature, and fan speed monitoring Automatic System Restart (ASR) feature P o w e r r e q u i r e m e n t 500 W power supply, 100~240 VAC, 47~63 Hz Dimensions 663 mm (l) x 444 mm (w) x 43.6 mm (h) ASUS RS161-E2/PA2 1-3 1.2 System specifications The ASUS RS161-E2 (PA2) is a 1U barebone server system featuring the ASUS...VGA controller with 8 MB display memory Expansion slots 2 x PCI Express™ x16 slots (x8 link) 1 x mini-PCI socket for ASUS® Server Management ...
RAID 0, RAID 1, and JBOD configurations Management ASUS Server Web-based Management (ASWM) Monitoring Voltage, temperature, and fan speed monitoring Automatic System Restart (ASR) feature P o w e r r e q u i r e m e n t 500 W power supply, 100~240 VAC, 47~63 Hz Dimensions 663 mm (l) x 444 mm (w) x 43.6 mm (h) ASUS RS161-E2/PA2 1-3 1.2 System specifications The ASUS RS161-E2 (PA2) is a 1U barebone server system featuring the ASUS...VGA controller with 8 MB display memory Expansion slots 2 x PCI Express™ x16 slots (x8 link) 1 x mini-PCI socket for ASUS® Server Management ...

User Manual
Page 55
... SATA4 GND RSATA_TXP4 RSATA_TXN4 GND RSATA_RXN4 RSATA_RXP4 GND K8N-DRE SATA connectors SATA3 GND RSATA_TXP3 RSATA_TXN3 GND RSATA_RXN3 RSATA_RXP3 GND ASUS RS161-E2 (PA2) 4-9 If you installed Serial ATA hard disk drives, you can create a RAID 0, RAID 1, or JBOD configuration. Serial ATA connectors (7-pin SATA1, SATA2, SATA3, SATA4) Supported by the NVIDIA® nForce4™ chipset...
... SATA4 GND RSATA_TXP4 RSATA_TXN4 GND RSATA_RXN4 RSATA_RXP4 GND K8N-DRE SATA connectors SATA3 GND RSATA_TXP3 RSATA_TXN3 GND RSATA_RXN3 RSATA_RXP3 GND ASUS RS161-E2 (PA2) 4-9 If you installed Serial ATA hard disk drives, you can create a RAID 0, RAID 1, or JBOD configuration. Serial ATA connectors (7-pin SATA1, SATA2, SATA3, SATA4) Supported by the NVIDIA® nForce4™ chipset...

User Manual
Page 77
... IDE controllers. ASUS RS161-E2/PA2 5-15 Change Field Tab Select Field F1 General Help F10 Save and Exit ESC Exit V00.00 (C)Copyright 1985-2004, American Megatrends, Inc. Configuration options: [Disabled] [Enabled] Configuration nVidia RAID ROM Main Configuration nVidia RAID ROM RAID Option ROM BIOS... Select Screen ↑↓ Select Item +- Main BIOS SETUP UTILITY IDE Configuration OnBoard PCI IDE Controller IDE DMA Transfer Configuration nVidia RAID ROM [Both] [Enabled] →← Select Screen ↑↓ Select Item +- Change Field Tab Select Field F1 General ...
... IDE controllers. ASUS RS161-E2/PA2 5-15 Change Field Tab Select Field F1 General Help F10 Save and Exit ESC Exit V00.00 (C)Copyright 1985-2004, American Megatrends, Inc. Configuration options: [Disabled] [Enabled] Configuration nVidia RAID ROM Main Configuration nVidia RAID ROM RAID Option ROM BIOS... Select Screen ↑↓ Select Item +- Main BIOS SETUP UTILITY IDE Configuration OnBoard PCI IDE Controller IDE DMA Transfer Configuration nVidia RAID ROM [Both] [Enabled] →← Select Screen ↑↓ Select Item +- Change Field Tab Select Field F1 General ...

User Manual
Page 103
ASUS RS161-E2/PA2 RAID configuration Chapter 6 This chapter provides instructions for setting up, creating, and configuring RAID sets using the available utilities.
ASUS RS161-E2/PA2 RAID configuration Chapter 6 This chapter provides instructions for setting up, creating, and configuring RAID sets using the available utilities.
User Manual
Page 105
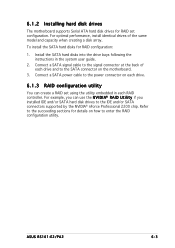
... motherboard. 3. Connect a SATA signal cable to the succeeding sections for RAID set using the utility embedded in the system user guide. 2. For example, you can create a RAID set configuration. ASUS RS161-E2/PA2 6-3 Install the SATA hard disks into the drive bays following the instructions... in each RAID controller. Refer to the signal connector at the back of the same model and...
... motherboard. 3. Connect a SATA signal cable to the succeeding sections for RAID set using the utility embedded in the system user guide. 2. For example, you can create a RAID set configuration. ASUS RS161-E2/PA2 6-3 Install the SATA hard disks into the drive bays following the instructions... in each RAID controller. Refer to the signal connector at the back of the same model and...

User Manual
Page 107
... the NVIDIA® RAID Utility To enter the NVIDIA® RAID Utility: 1. NVIDIA RAID Utility Oct 5 2004 - These keys allow you to display the utility main menu. RAID Mode: Striping Striping ...Block: Optimal Free Disks Loc Disk Model Name Array Disks Loc Disk Model Name 1.0.M 1.1.M 2.0.M 2.1.M XXXXXXXXXXXXXXXXXX XXXXXXXXXXXXXXXXXX XXXXXXXXXXXXXXXXXX XXXXXXXXXXXXXXXXXX [→] Add [←] Del [F6] Back [F7] Finish [TAB] Navigate [↑↓] Select [ENTER] Popup At the bottom section of the screen are the navigation keys. ASUS RS161-E2/PA2...
... the NVIDIA® RAID Utility To enter the NVIDIA® RAID Utility: 1. NVIDIA RAID Utility Oct 5 2004 - These keys allow you to display the utility main menu. RAID Mode: Striping Striping ...Block: Optimal Free Disks Loc Disk Model Name Array Disks Loc Disk Model Name 1.0.M 1.1.M 2.0.M 2.1.M XXXXXXXXXXXXXXXXXX XXXXXXXXXXXXXXXXXX XXXXXXXXXXXXXXXXXX XXXXXXXXXXXXXXXXXX [→] Add [←] Del [F6] Back [F7] Finish [TAB] Navigate [↑↓] Select [ENTER] Popup At the bottom section of the screen are the navigation keys. ASUS RS161-E2/PA2...

User Manual
Page 109
... No Id Status 4 Healthy Vendor NVIDIA Array Model Name STRIPING XXX.XXG [Ctrl-X]Exit [↑↓]Select [B]Set Boot [N]New Array [ENTER]Detail ASUS RS161-E2/PA2 6-7 A pop-up window appears. NVIDIA RAID Utility Oct 5 2004 - Clear disk data? [Y] YES [N] Cancel 8. Array List - After selecting the hard disk drives, press to save your settings and...
... No Id Status 4 Healthy Vendor NVIDIA Array Model Name STRIPING XXX.XXG [Ctrl-X]Exit [↑↓]Select [B]Set Boot [N]New Array [ENTER]Detail ASUS RS161-E2/PA2 6-7 A pop-up window appears. NVIDIA RAID Utility Oct 5 2004 - Clear disk data? [Y] YES [N] Cancel 8. Array List - After selecting the hard disk drives, press to save your settings and...

User Manual
Page 111
... Oct 5 2004 - A confirmation message appears. Rebuild array? [Enter] OK [Esc] Cancel ASUS RS161-E2/PA2 6-9 RAID Mode: Striping Striping Width: 1 Striping Block: 64K Adapt Channel M/S 2 1 1 0 Master Master Index Disk Model Name 0 XXXXXXXXXXXXXXXXX 1 ..., then press . Array Detail - Array 1 : NVIDIA MIRROR XXX.XXG - The RAID set : 1. Press to start rebuilding the array, or to rebuild, then press . 6.2.5 Rebuilding a RAID set To rebuild a RAID set details appear. The A r r a y L i s t screen displays the RAID set you want to cancel. From the A r r a y L i s ...
... Oct 5 2004 - A confirmation message appears. Rebuild array? [Enter] OK [Esc] Cancel ASUS RS161-E2/PA2 6-9 RAID Mode: Striping Striping Width: 1 Striping Block: 64K Adapt Channel M/S 2 1 1 0 Master Master Index Disk Model Name 0 XXXXXXXXXXXXXXXXX 1 ..., then press . Array Detail - Array 1 : NVIDIA MIRROR XXX.XXG - The RAID set : 1. Press to start rebuilding the array, or to rebuild, then press . 6.2.5 Rebuilding a RAID set To rebuild a RAID set details appear. The A r r a y L i s t screen displays the RAID set you want to cancel. From the A r r a y L i s ...

User Manual
Page 113
Clear disk data? [Y] Yes [N] Cancel ASUS RS161-E2/PA2 6-11 Press to clear the disk data, or press to cancel.Press to select a RAID set details appear. To clear the disk data: 1. When the array details appear, select the hard disk drive you ...- The following confirmation message appears. 6.2.7 Clearing the disk data You will lose all data when you want to clear, then press . The RAID set , then press . RAID Mode: Striping Striping Width: 1 Striping Block: 64K Adapt Channel M/S 2 1 1 0 Master Master Index Disk Model Name 0 XXXXXXXXXXXXXXXXX 1 ...
Clear disk data? [Y] Yes [N] Cancel ASUS RS161-E2/PA2 6-11 Press to clear the disk data, or press to cancel.Press to select a RAID set details appear. To clear the disk data: 1. When the array details appear, select the hard disk drive you ...- The following confirmation message appears. 6.2.7 Clearing the disk data You will lose all data when you want to clear, then press . The RAID set , then press . RAID Mode: Striping Striping Width: 1 Striping Block: 64K Adapt Channel M/S 2 1 1 0 Master Master Index Disk Model Name 0 XXXXXXXXXXXXXXXXX 1 ...

User Manual
Page 117
... drive. 3. Install an operating system to press the F 6 key if you like to select, then press . ASUS RS161-E2/PA2 7-3 Place the motherboard support CD in Windows®: 1. The RAID drivers are installing a third-party RAID driver. 2. After creating a RAID driver disk, eject the floppy disk, then write-protect it to the floppy disk. Type the letter...
... drive. 3. Install an operating system to press the F 6 key if you like to select, then press . ASUS RS161-E2/PA2 7-3 Place the motherboard support CD in Windows®: 1. The RAID drivers are installing a third-party RAID driver. 2. After creating a RAID driver disk, eject the floppy disk, then write-protect it to the floppy disk. Type the letter...