
User Manual
Page 1
Motherboard P7P55D Premium
Motherboard P7P55D Premium

User Manual
Page 3
...vii Safety information...viii About this guide...ix P7P55D Premium specifications summary xi Chapter 1: Product introduction 1.1 Welcome!...1-1 1.2 Package contents 1-1 1.3 Special features 1-2 1.3.1 Product highlights 1-2 1.3.2 ASUS Xtreme Design-Hybrid Processor 1-3 1.3.3 ASUS Xtreme Design-Hybrid Phase 1-3 1.3.4 ASUS Xtreme Design-Hybrid OS 1-3 1.3.5 ASUS Exclusive Features 1-4 Chapter 2: Hardware information 2.1 Before you proceed 2-1 2.2 Motherboard overview 2-2 2.2.1 Motherboard layout 2-2 2.2.2 Layout contents 2-3 2.2.3 Placement direction 2-4 2.2.4 Screw...
...vii Safety information...viii About this guide...ix P7P55D Premium specifications summary xi Chapter 1: Product introduction 1.1 Welcome!...1-1 1.2 Package contents 1-1 1.3 Special features 1-2 1.3.1 Product highlights 1-2 1.3.2 ASUS Xtreme Design-Hybrid Processor 1-3 1.3.3 ASUS Xtreme Design-Hybrid Phase 1-3 1.3.4 ASUS Xtreme Design-Hybrid OS 1-3 1.3.5 ASUS Exclusive Features 1-4 Chapter 2: Hardware information 2.1 Before you proceed 2-1 2.2 Motherboard overview 2-2 2.2.1 Motherboard layout 2-2 2.2.2 Layout contents 2-3 2.2.3 Placement direction 2-4 2.2.4 Screw...

User Manual
Page 7
... dealer or an experienced radio/TV technician for compliance could void the user's authority to radio communications. DO NOT throw the motherboard in municipal waste. DO NOT throw the mercury-containing button cell battery in municipal waste. If this unit not expressly approved by...in a residential installation. However, there is subject to provide reasonable protection against harmful interference in our products at ASUS REACH website at http://green.asus.com/english/REACH.htm. REACH Complying with Canadian ICES-003. This product has been designed to which can radiate...
... dealer or an experienced radio/TV technician for compliance could void the user's authority to radio communications. DO NOT throw the motherboard in municipal waste. DO NOT throw the mercury-containing button cell battery in municipal waste. If this unit not expressly approved by...in a residential installation. However, there is subject to provide reasonable protection against harmful interference in our products at ASUS REACH website at http://green.asus.com/english/REACH.htm. REACH Complying with Canadian ICES-003. This product has been designed to which can radiate...

User Manual
Page 8
...8226; Before using an adapter or extension cord. If you add a device. • Before connecting or removing signal cables from the motherboard, ensure that all power cables are unplugged. • Seek professional assistance before using the product, ensure all cables are correctly connected ...and release harmful substances into the environment. • Never dispose of the battery in your retailer. Operation safety • Before installing the motherboard and adding devices on a stable surface. • If you are connected. Do not place the product in your power supply is ...
...8226; Before using an adapter or extension cord. If you add a device. • Before connecting or removing signal cables from the motherboard, ensure that all power cables are unplugged. • Seek professional assistance before using the product, ensure all cables are correctly connected ...and release harmful substances into the environment. • Never dispose of the battery in your retailer. Operation safety • Before installing the motherboard and adding devices on a stable surface. • If you are connected. Do not place the product in your power supply is ...

User Manual
Page 9
... describes the features of the support DVD that may include optional documentation, such as warranty flyers, that comes with the motherboard package and the software. • Chapter 5: Multiple GPU technology support This chapter describes how to install and configure multiple...2: Hardware information This chapter lists the hardware setup procedures that you need when installing and configuring the motherboard. ASUS websites The ASUS website provides updated information on the motherboard. • Chapter 3: BIOS setup This chapter tells how to change system settings through the BIOS...
... describes the features of the support DVD that may include optional documentation, such as warranty flyers, that comes with the motherboard package and the software. • Chapter 5: Multiple GPU technology support This chapter describes how to install and configure multiple...2: Hardware information This chapter lists the hardware setup procedures that you need when installing and configuring the motherboard. ASUS websites The ASUS website provides updated information on the motherboard. • Chapter 3: BIOS setup This chapter tells how to change system settings through the BIOS...

User Manual
Page 15
.../s label 1 x Ultra DMA 133/ 100/66 cable 1 x 2-port USB 2.0 and 1-port eSATA module 1 x TurboV Remote 1 x ASUS SLI bridge connector 1 x ASUS Q-Shield 1 x 2-in-1 ASUS Q-Connector kit • If any of ASUS quality motherboards! ASUS P7P55D Premium 1-1 Before you for buying an ASUS® P7P55D Premium motherboard! The motherboard delivers a host of new features and latest technologies, making it , check the items in the long...
.../s label 1 x Ultra DMA 133/ 100/66 cable 1 x 2-port USB 2.0 and 1-port eSATA module 1 x TurboV Remote 1 x ASUS SLI bridge connector 1 x ASUS Q-Shield 1 x 2-in-1 ASUS Q-Connector kit • If any of ASUS quality motherboards! ASUS P7P55D Premium 1-1 Before you for buying an ASUS® P7P55D Premium motherboard! The motherboard delivers a host of new features and latest technologies, making it , check the items in the long...
User Manual
Page 16
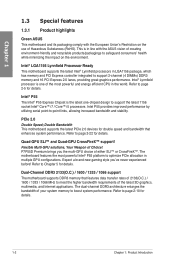
Chapter 1 1.3 Special features 1.3.1 Product highlights Green ASUS This motherboard and its packaging comply with the ASUS vision of creating environment-friendly and recyclable products/packagings to safeguard consumers' health while minimizing the impact on the use of .... P7P55D Premium brings you 've never experienced before! Refer to page 2-10 for double speed and bandwidth that features data transfer rates of 2133(O.C.) / 1600 / 1333 / 1066 MHz to meet the higher bandwidth requirements of your system memory to boost system performance. Double Bandwidth This motherboard supports...
Chapter 1 1.3 Special features 1.3.1 Product highlights Green ASUS This motherboard and its packaging comply with the ASUS vision of creating environment-friendly and recyclable products/packagings to safeguard consumers' health while minimizing the impact on the use of .... P7P55D Premium brings you 've never experienced before! Refer to page 2-10 for double speed and bandwidth that features data transfer rates of 2133(O.C.) / 1600 / 1333 / 1066 MHz to meet the higher bandwidth requirements of your system memory to boost system performance. Double Bandwidth This motherboard supports...
User Manual
Page 17
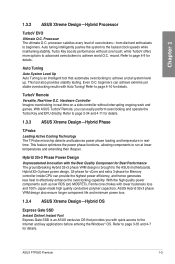
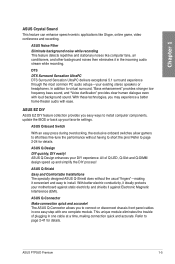
... to page 4-10 for details. Refer to achieve world O.C. Hardware Controller Imagine overclocking in realtime. Instant Fun! ASUS P7P55D Premium 1-3 Chapter 1 1.3.2 ASUS Xtreme Design-Hybrid Processor TurboV EVO Ultimate O.C. Processor The ultimate O.C. processor satisfies every level of overclockers-from die... perform overclocking and operate the Turbo Key and EPU directly. TurboV Remote Versatile, Real-time O.C. Refer to the ASUS motherboards. Hybrid 32+3 Phase Power Design Unprecedented Innovation with Auto Tuning! Express Gate SSD is brought to page 2-34 ...
... to page 4-10 for details. Refer to achieve world O.C. Hardware Controller Imagine overclocking in realtime. Instant Fun! ASUS P7P55D Premium 1-3 Chapter 1 1.3.2 ASUS Xtreme Design-Hybrid Processor TurboV EVO Ultimate O.C. Processor The ultimate O.C. processor satisfies every level of overclockers-from die... perform overclocking and operate the Turbo Key and EPU directly. TurboV Remote Versatile, Real-time O.C. Refer to the ASUS motherboards. Hybrid 32+3 Phase Power Design Unprecedented Innovation with Auto Tuning! Express Gate SSD is brought to page 2-34 ...
User Manual
Page 18
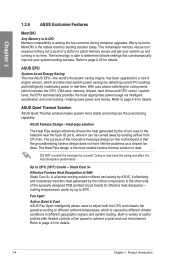
... can dramatically improve your system up to date. Up to the other side of the innovative heat pipe design on this motherboard is a fanless cooling solution offered exclusively by yourself. It effectively and noiselessly transfers heat generated by the critical components to ...to determine failsafe settings that the groundbreaking fanless design does not have lifetime problems as a chipset fan does. Chapter 1 1.3.5 ASUS Exclusive Features MemOK! Memory compatibility is able to different ambient temperature, which provides total system power savings by existing airflow from CPU...
... can dramatically improve your system up to date. Up to the other side of the innovative heat pipe design on this motherboard is a fanless cooling solution offered exclusively by yourself. It effectively and noiselessly transfers heat generated by the critical components to ...to determine failsafe settings that the groundbreaking fanless design does not have lifetime problems as a chipset fan does. Chapter 1 1.3.5 ASUS Exclusive Features MemOK! Memory compatibility is able to different ambient temperature, which provides total system power savings by existing airflow from CPU...
User Manual
Page 19
...install. With better electric conductivity, it ideally protects your favorite settings. Refer to short the pins! ASUS P7P55D Premium 1-5 ASUS Q-Shield Easy and Comfortable Installations The specially designed ASUS Q-Shield does without having to page 2-24 for details. ASUS Q-Connector Make connection quick and accurate! With these technologies, you to page 2-41 for details....or back up and simplify the DIY process! This unique module eliminates the trouble of Q-LED, Q-Slot and Q-DIMM design speed up your motherboard against Electronic Magnetic Interference (EMI).
...install. With better electric conductivity, it ideally protects your favorite settings. Refer to short the pins! ASUS P7P55D Premium 1-5 ASUS Q-Shield Easy and Comfortable Installations The specially designed ASUS Q-Shield does without having to page 2-24 for details. ASUS Q-Connector Make connection quick and accurate! With these technologies, you to page 2-41 for details....or back up and simplify the DIY process! This unique module eliminates the trouble of Q-LED, Q-Slot and Q-DIMM design speed up your motherboard against Electronic Magnetic Interference (EMI).
User Manual
Page 20
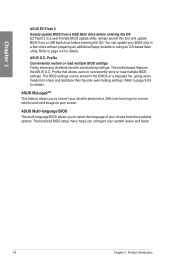
Simply launch this tool and update BIOS from the available options. The motherboard features the ASUS O.C. ASUS MyLogo2™ This feature allows you to convert your favorite photo into a 256-color boot logo for a more colorful and vivid image on your ... details. The BIOS settings can update your choice from a USB flash drive before entering the OS EZ Flash 2 is a user-friendly BIOS update utility. ASUS Multi-language BIOS The multi-language BIOS allows you configure your screen. Refer to share and distribute their favorite overclocking settings. Refer to conveniently store...
Simply launch this tool and update BIOS from the available options. The motherboard features the ASUS O.C. ASUS MyLogo2™ This feature allows you to convert your favorite photo into a 256-color boot logo for a more colorful and vivid image on your ... details. The BIOS settings can update your choice from a USB flash drive before entering the OS EZ Flash 2 is a user-friendly BIOS update utility. ASUS Multi-language BIOS The multi-language BIOS allows you configure your screen. Refer to share and distribute their favorite overclocking settings. Refer to conveniently store...

User Manual
Page 21
ASUS P7P55D Premium 2-1 Chapter 2: Chapter 2 2.1 Before you proceed Hardware information Take note of the following precautions before you install or..., place it on a grounded antistatic pad or in the bag that came with the component. • Before you install motherboard components or change any motherboard settings. • Unplug the power cord from the wall socket before touching any component. • Before handling components, use... case, to avoid damaging them due to static electricity. • Hold components by the edges to the motherboard, peripherals, or components.
ASUS P7P55D Premium 2-1 Chapter 2: Chapter 2 2.1 Before you proceed Hardware information Take note of the following precautions before you install or..., place it on a grounded antistatic pad or in the bag that came with the component. • Before you install motherboard components or change any motherboard settings. • Unplug the power cord from the wall socket before touching any component. • Before handling components, use... case, to avoid damaging them due to static electricity. • Hold components by the edges to the motherboard, peripherals, or components.

User Manual
Page 22
2.2 Motherboard overview 2.2.1 Motherboard layout Chapter 2 Refer to 2.7 Connectors for more information about rear panel connectors and internal connectors. 2-2 Chapter 2: Hardware information
2.2 Motherboard overview 2.2.1 Motherboard layout Chapter 2 Refer to 2.7 Connectors for more information about rear panel connectors and internal connectors. 2-2 Chapter 2: Hardware information

User Manual
Page 24
2.2.3 Placement direction When installing the motherboard, ensure that you place it into the chassis in the image below. 2.2.4 Screw holes Place nine screws into the holes indicated by circles to secure the motherboard to the rear part of the chassis Chapter 2 2-4 Chapter 2: Hardware information Doing so can damage the motherboard. Place this side towards the rear of the chassis as indicated in the correct orientation. DO NOT overtighten the screws! The edge with external ports goes to the chassis.
2.2.3 Placement direction When installing the motherboard, ensure that you place it into the chassis in the image below. 2.2.4 Screw holes Place nine screws into the holes indicated by circles to secure the motherboard to the rear part of the chassis Chapter 2 2-4 Chapter 2: Hardware information Doing so can damage the motherboard. Place this side towards the rear of the chassis as indicated in the correct orientation. DO NOT overtighten the screws! The edge with external ports goes to the chassis.

User Manual
Page 25
...retailer immediately if the PnP cap is shipment/ transit-related. • Keep the cap after installing the motherboard. ASUS will process Return Merchandise Authorization (RMA) requests only if the motherboard comes with the cap on the LGA1156 socket. • The product warranty does not cover damage to...: 1. Press the load lever with a surface mount LGA1156 socket designed for the Intel® Core™ i7 / Core™ i5 Processors. ASUS P7P55D Premium Load lever A B Retention tab 2-5 To prevent damage to the socket pins, do not remove the PnP cap unless you see any damage to ...
...retailer immediately if the PnP cap is shipment/ transit-related. • Keep the cap after installing the motherboard. ASUS will process Return Merchandise Authorization (RMA) requests only if the motherboard comes with the cap on the LGA1156 socket. • The product warranty does not cover damage to...: 1. Press the load lever with a surface mount LGA1156 socket designed for the Intel® Core™ i7 / Core™ i5 Processors. ASUS P7P55D Premium Load lever A B Retention tab 2-5 To prevent damage to the socket pins, do not remove the PnP cap unless you see any damage to ...

User Manual
Page 28
... fan assembly such that the Thermal Interface Material is incompatible with the LGA775 and LGA1366 sockets in size and dimension. Place the heatsink on the motherboard. 2. Ensure that the four fasteners match the holes on top of the installed CPU, ensuring that you have installed the... motherboard to the chassis before you install the CPU fan and heatsink assembly. Chapter 2 2.3.2 Installing the CPU heatsink and fan The Intel® LGA1156 processor requires a ...
... fan assembly such that the Thermal Interface Material is incompatible with the LGA775 and LGA1366 sockets in size and dimension. Place the heatsink on the motherboard. 2. Ensure that the four fasteners match the holes on top of the installed CPU, ensuring that you have installed the... motherboard to the chassis before you install the CPU fan and heatsink assembly. Chapter 2 2.3.2 Installing the CPU heatsink and fan The Intel® LGA1156 processor requires a ...

User Manual
Page 29
... on the motherboard labeled CPU_FAN. Disconnect the CPU fan cable from the motherboard. Pull up two fasteners at a time in a B diagonal sequence to the connector on the motherboard. 2. Chapter... 2 DO NOT forget to plug this connector. 2.3.3 Uninstalling the CPU heatsink and fan To uninstall the CPU heatsink and fan: 1. 3. Carefully remove the heatsink and fan assembly from the motherboard. Rotate each fastener counterclockwise. 3. ASUS P7P55D Premium...
... on the motherboard labeled CPU_FAN. Disconnect the CPU fan cable from the motherboard. Pull up two fasteners at a time in a B diagonal sequence to the connector on the motherboard. 2. Chapter... 2 DO NOT forget to plug this connector. 2.3.3 Uninstalling the CPU heatsink and fan To uninstall the CPU heatsink and fan: 1. 3. Carefully remove the heatsink and fan assembly from the motherboard. Rotate each fastener counterclockwise. 3. ASUS P7P55D Premium...

User Manual
Page 30
2.4 System memory 2.4.1 Overview The motherboard comes with less power consumption. A DDR3 module has the same physical dimensions as a single-channel operation. Two DIMMs (dual-channel operation): Four DIMMs (dual-channel ...
2.4 System memory 2.4.1 Overview The motherboard comes with less power consumption. A DDR3 module has the same physical dimensions as a single-channel operation. Two DIMMs (dual-channel operation): Four DIMMs (dual-channel ...
User Manual
Page 31
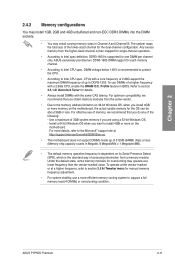
...ASUS P7P55D Premium 2-11 For effective use of the lower-sized channel for details. • Always install DIMMs with a 2.66G CPU, enable the DRAM O.C. Under the default state, some memory modules for each memory channel. • According to support a full memory load (4 DIMMs) or overclocking condition. To use a more on the motherboard...use DIMMs of up of 512Mb (64MB) chips or less (Memory chip capacity counts in BIOS. For more memory on the motherboard. Profile feature in Megabit, 8 Megabit/Mb = 1 Megabyte/MB). • The default memory operation frequency is dependent on ...
...ASUS P7P55D Premium 2-11 For effective use of the lower-sized channel for details. • Always install DIMMs with a 2.66G CPU, enable the DRAM O.C. Under the default state, some memory modules for each memory channel. • According to support a full memory load (4 DIMMs) or overclocking condition. To use a more on the motherboard...use DIMMs of up of 512Mb (64MB) chips or less (Memory chip capacity counts in BIOS. For more memory on the motherboard. Profile feature in Megabit, 8 Megabit/Mb = 1 Megabyte/MB). • The default memory operation frequency is dependent on ...

User Manual
Page 32
...BE 2GB DS Elixir N2CB1G80AN-BE 7 • • • WINTEC 3DU3191A-10 1GB DS Qimonda IDSH51-03A1F1C-10F 7 • • • P7P55D Premium Motherboard Qualified Vendors Lists (QVL) DDR3-1333MHz capability for CPU at 2.66, 2.8 and 2.93GHz Vendor Part No. Size SS/ Chip DS Brand A-DATA A-DATA ...1.8 J1108BABG-DJ-E 9(1333-9-9-9-24) •• 2-12 Chapter 2: Hardware information Size SS/ DS Chip Brand Chip NO. Chapter 2 P7P55D Premium Motherboard Qualified Vendors Lists (QVL) DDR3-1067MHz capability for CPU at 2.66, 2.8 and 2.93GHz Vendor Part No.
...BE 2GB DS Elixir N2CB1G80AN-BE 7 • • • WINTEC 3DU3191A-10 1GB DS Qimonda IDSH51-03A1F1C-10F 7 • • • P7P55D Premium Motherboard Qualified Vendors Lists (QVL) DDR3-1333MHz capability for CPU at 2.66, 2.8 and 2.93GHz Vendor Part No. Size SS/ Chip DS Brand A-DATA A-DATA ...1.8 J1108BABG-DJ-E 9(1333-9-9-9-24) •• 2-12 Chapter 2: Hardware information Size SS/ DS Chip Brand Chip NO. Chapter 2 P7P55D Premium Motherboard Qualified Vendors Lists (QVL) DDR3-1067MHz capability for CPU at 2.66, 2.8 and 2.93GHz Vendor Part No.


