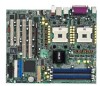
Disk Array & Driver Installation Guide English Version
Page 1
Server systems and motherboards RAID configuration and driver installation guide For • AP130-E1 5U Rackmount Server • AP1720-E2 5U Rackmount Server • NCCH-DL Motherboard • PSCH-L Motherboard
Disk Array & Driver Installation Guide English Version
Page 3
...174; PDC20319 RAID controller driver .. 50 2.3.1 Windows® 2000 Server 50 2.3.2 Windows® 2003 Server 54 2.3.3 Red Hat® Linux 9.0 59 3. LAN driver installation 60 3.1 Windows® 2000 Server 60 3.2 Windows® 2003 Server 62 3.3 Red Hat® Linux 9.0 64 4. RAID configurations 4 1.1 RAID definitions 4 1.2 Installing hard disk drives 5 1.3 Setting the RAID item in BIOS 5 1.4 RAID configuration utilities 5 1.5 Adaptec RAID Configuration Utility 6 1.5.1 Creating a RAID 0 set (Striped 7 1.5.2 Creating a RAID 1 set (Mirrored 12 1.5.3 Creating a bootable RAID set 15...
Disk Array & Driver Installation Guide English Version
Page 4
... system. Use of the same size or larger than the existing drive. If you want to boot the system from the support CD to a floppy disk before you get all the benefits of data from one drive fails, the disk array management software directs all applications to four SATA hard disk drives and RAID 0, 1, and 0+1 configurations. Refer to the RAID definitions below. 1.1 RAID definitions R A I D 0 + 1 is required for this setup.
Disk Array & Driver Installation Guide English Version
Page 5
..., install identical drives of each RAID controller. Connect a SATA signal cable to the signal connector at the back of the same model and capacity when creating a disk array. Connect a SATA power cable to the system or the motherboard user guide for details on entering and navigating through the BIOS Setup. 1.4 RAID configuration utilities Depending on the SATA RAID connectors that you use the A d a p t e c R A I D E C o n f i g u r a t i o n, then press . 3. Go to the SATA connector on how to display the configuration options. 4. To do this: 1. Enter the BIOS Setup during POST...
Disk Array & Driver Installation Guide English Version
Page 6
...SATA hard disk drives and displays any existing RAID set (s) from SATA hard disk drives connected to the SATA connectors supported by the motherboard Southbridge chip. Use the arrow keys to enter the utility. 3. The A r r a y C o n f i g u r a t i o n U t i l i t y menu lets you to check and verify SATA hard disk drives. The D i s k U t i l i t i e s allows you create and manage RAID sets. The keys on the legend box allow you to create RAID 0 and RAID 1 set (s). The keys on the legend box vary according to the menu level. 6 RAID configuration and driver installation Turn...
Disk Array & Driver Installation Guide English Version
Page 21
... motherboard user guide for additional information. Select A r r a y C o n f i g u r a t i o n U t i l i t y from the initial menu, then press . 3. Highlight the degraded RAID set during the POST. The A r r a y S t a t u s shows DEGRADED. To rebuild a RAID array: 1. Enter the Adaptec RAID Configuration Utility following the instructions in the section "Creating a RAID 0 (Stripe)." 2. Check the physical connections of the RAID set , then press to display the array properties. RAID configuration and driver installation 21 1.5.6 Rebuilding a RAID set The utility displays...
Disk Array & Driver Installation Guide English Version
Page 23
Turn on the system after installing all the SATA hard disk drives. 2. If this is the first time you to create RAID 0, 1, and 0+1 set(s) from SATA hard disk drives connected to the SATA connectors supported by the Promise® PDC20319 RAID controller. To make sure that the SATA hard disk drives are properly installed, press to the SATA connectors, the FastTrak S150 TX4™ BIOS displays the following: 3. When finished, press to return to display the FastBuild™ Utility main menu. 4. RAID configuration and...
Disk Array & Driver Installation Guide English Version
Page 24
.... 24 RAID configuration and driver installation Press to save and create a RAID 0 array. 4. Press (Create and Quick Initialize). 5. A pop-up window appears. In the FastBuild™ Utility main menu, press to the O p t i m i z e A r r a y f o r field, then select P e r f o r m a n c e using the space bar. A pop-up message appears, warning you that all existing data on the hard disk drives will be deleted. Use the arrow keys to go to display the A u t o Setup Options Menu. 2.
Disk Array & Driver Installation Guide English Version
Page 25
Once the array is created, use the FDISK utility to reboot the system. RAID driver installation" for details. 6. After you have created the RAID 0 set, press any key to format the array as a single drive unit. The OS will treat the RAID 0 array as a single hard drive. 8. RAID configuration and driver installation 25 During POST, the FastTrak S150 TX4™ BIOS checks and displays the disk array information. 7. During the OS...
Disk Array & Driver Installation Guide English Version
Page 27
.... RAID driver installation" for details. The OS will treat the RAID 0 array as a single hard drive. 8. RAID configuration and driver installation 27 During the OS installation, the system prompts you have created the RAID 1 set, press any key to install third-party SCSI or RAID driver. After you have formatted the arrayed drives, install an operating system (OS). During POST, the FastTrak S150 TX4™ BIOS checks and displays the disk array information. 7. 6. Use...
Disk Array & Driver Installation Guide English Version
Page 32
... and Quick Initialize) to create the RAID 0+1 set . 1. Use the arrow keys to go to select A u t o S e t u p. The M o d e field displays M i r r o r/ S t r i p e. 4. The following screen appears. 3. A pop-up window appears. 1 .6. 3 Creating a RAID 0+1 set (Security and Performance) You must install four SATA hard disk drives to create a RAID 0+1 set . 32 RAID configuration and driver installation In the FastBuild™ Utility main menu, press to the Optimize Array for field, then select S e c u r i t y using the space bar. Restart the system...
Disk Array & Driver Installation Guide English Version
Page 34
... have installed four SATA hard disk drives. 34 RAID configuration and driver installation In the FastBuild™ Utility main menu, press to select the array type for the selected array number. The D e f i n e A r r a y M e n u appears. 4. Press the up or down arrow keys to highlight the array number you want to create a RAID set. 1. Restart the system, then enter the FastBuild™ Utility. 2. 1.6.4 Manually creating a RAID set We strongly recommend that you use the A u t o S e t u p option to...
Disk Array & Driver Installation Guide English Version
Page 41
... a RAID driver disk, eject the floppy disk, then write-protect it to locate the driver disk utility: • I n t e l® 6 3 0 0 E S B RAID Driver Disk: \Drivers\6300ESB\Windows • P r o m i s e® P D C 2 0 3 1 9 RAID Driver Disk: \Drivers\Promise20319\Windows 3. When the D r i v e r s menu appears, select the RAID driver disk you are now ready to install an operating system to the independent hard disk drive or bootable array. RAID configuration and driver installation 41 Place the system or motherboard support CD in the optical drive. 2. Follow screen instructions to...
Disk Array & Driver Installation Guide English Version
Page 44
Follow screen instructions to continue installation. 7. When prompted, press to continue. 44 RAID configuration and driver installation Setup then proceeds with the OS installation. Insert the Intel® 6300ESB RAID driver disk you created earlier to select. 6. The Windows® 2000/2003 Setup loads the RAID controller drivers from the RAID driver disk. Select the A d a p t e c E m b e d d e d S e r i a l A T A H o s t R A I D D r i v e r f o r W i n d o w s 2 0 0 0 / X P / 2 0 0 3, then press to the floppy disk drive, then press . 5. 4.
Disk Array & Driver Installation Guide English Version
Page 45
... To install the Intel® 6300ESB RAID controller driver on the Windows® desktop , then select P r o p e r t i e s from the menu. 4. Click N e x t. 8. RAID configuration and driver installation 45 Right-click the M y C o m p u t e r icon on an existing Windows® 2000/2003 Server OS: 1. When found, click N e x t to the floppy disk drive. 9. Windows® automatically detects the RAID controller and displays a N e w H a r d w a r e F o u n d window. Click the H a r d w a r e tab, then click the D e v i c e M a n a g e r button to display the list of devices installed in...
Disk Array & Driver Installation Guide English Version
Page 51
Follow screen instructions to select. 6. Use the arrow keys to select the W i n 2 0 0 0 P r o m i s e F a s T r a k S 1 5 0 T X 4 ( t m ) C o n t r o l l e r item from the RAID driver disk. RAID configuration and driver installation 51 4. When prompted, press to the floppy disk drive, then press . 5. The Windows® 2000 Setup loads the RAID controller drivers from the list, then press to continue. Insert the Promise® PDC20319 RAID driver disk you created earlier to continue installation. 7. Setup then proceeds with the OS installation.
Disk Array & Driver Installation Guide English Version
Page 55
... screen instructions to continue installation. 7. RAID configuration and driver installation 55 The Windows® Setup loads the RAID controller drivers from the list, then press to select. 6. Setup then proceeds with the OS installation. 4. Use the arrow keys to the floppy disk drive, then press . 5. When prompted, press to continue. Insert the Promise® PDC20319 RAID driver disk you created earlier to select the W i n S e r v e r 2 0 0 3 P r o m i s e F a s T r a k T X 4 0 0 0 / S 1 5 0 T X S e r i e s ( t m ) C o n t r o l l e r item from the RAID driver disk...
Disk Array & Driver Installation Guide English Version
Page 56
... the list of devices installed in with A d m i n i s t r a t o r privileges. 2. Windows®s automatically detects the RAID controller and displays a N e w H a r d w a r e F o u n d window. Select the option "I D c o n t r o l l e r item, then select P r o p e r t i e s. 7. Click the H a r d w a r e tab, then click the D e v i c e M a n a g e r button to the floppy disk drive. 3. The H a r d w a r e U p d a t e Device Driver Wizard window appears. To an existing Windows® operating system To install the Promise® PDC20319 RAID controller driver on the Windows® desktop...
Disk Array & Driver Installation Guide English Version
Page 58
...t r o l l e r item, then select P r o p e r t i e s from the menu. 3. Click O K when finished. Follow screen instructions to display the RAID controller properties. 4. Click the U n i n s t a l l button, then click O K. 5. To do this: 1. Click the D r i v e r tab, then click the D r i v e r D e t a i l s button to uninstall the driver. 58 RAID configuration and driver installation Right-click the W i n S e r v e r 2 0 0 3 P r o m i s e R A I D C o n s o l e S C S I D c o n t r o l l e r s. 2. From the C o m p u t e r M a n a g e m e n t window, click the "+" sign before the item...
Disk Array & Driver Installation Guide English Version
Page 65
... the ATI® RAGE XL VGA drivers during system installation. There is no need to install an additional driver(s) to support the onboard VGA. R A G E X L P C I item, then select P r o p e r t i e s from the menu. 2. Click the D r i v e r tab, then click the D r i v e r D e t a i l s button to make sure that the ATI® RAGE XL VGA drivers are properly installed. 1. VGA driver installation This section provides instructions on the Windows® desktop , then select P r o p e r t i e s from the menu. 5. RAID configuration and driver installation 65