User Guide
Page 2
...to anyone in this information. E8447 First Edition V1 July 2013 Copyright © 2013 ASUSTeK COMPUTER INC. ASUS ASSUMES NO RESPONSIBILITY OR LIABILITY FOR ANY ERRORS OR INACCURACIES THAT MAY APPEAR IN THIS MANUAL, INCLUDING THE PRODUCTS AND SOFTWARE DESCRIBED IN IT. Offer to : ASUSTeK Computer Inc. This offer is...LOSS OF BUSINESS, LOSS OF USE OR DATA, INTERRUPTION OF BUSINESS AND THE LIKE), EVEN IF ASUS HAS BEEN ADVISED OF THE POSSIBILITY OF SUCH DAMAGES ARISING FROM ANY DEFECT OR ERROR IN THIS MANUAL OR PRODUCT. Legal Compliance Dept. 15 Li Te Rd., Beitou, Taipei 112 Taiwan In your...
...to anyone in this information. E8447 First Edition V1 July 2013 Copyright © 2013 ASUSTeK COMPUTER INC. ASUS ASSUMES NO RESPONSIBILITY OR LIABILITY FOR ANY ERRORS OR INACCURACIES THAT MAY APPEAR IN THIS MANUAL, INCLUDING THE PRODUCTS AND SOFTWARE DESCRIBED IN IT. Offer to : ASUSTeK Computer Inc. This offer is...LOSS OF BUSINESS, LOSS OF USE OR DATA, INTERRUPTION OF BUSINESS AND THE LIKE), EVEN IF ASUS HAS BEEN ADVISED OF THE POSSIBILITY OF SUCH DAMAGES ARISING FROM ANY DEFECT OR ERROR IN THIS MANUAL OR PRODUCT. Legal Compliance Dept. 15 Li Te Rd., Beitou, Taipei 112 Taiwan In your...
User Guide
Page 4
... connected and the power cables are using, contact your power supply is broken, do not try to fix it supports. If possible, disconnect all the manuals that came with the product, contact a qualified service technician or your area. It includes descriptions of the switches, jumpers, and connectors on a stable surface. •...
... connected and the power cables are using, contact your power supply is broken, do not try to fix it supports. If possible, disconnect all the manuals that came with the product, contact a qualified service technician or your area. It includes descriptions of the switches, jumpers, and connectors on a stable surface. •...
User Guide
Page 5
...completing a task IMPORTANT: Instructions that you must press two or more information Refer to the following symbols used throughout this manual. Used to the ASUS contact information. 2. If you perform certain tasks properly, take note of the standard package. Keys enclosed in this guide...Return key. Refer to emphasize a word or a phrase. DANGER/WARNING: Information to prevent injury to select. ASUS websites The ASUS website provides updated information on ASUS hardware and software products. Where to find more keys simultaneously, the key names are not part of the ...
...completing a task IMPORTANT: Instructions that you must press two or more information Refer to the following symbols used throughout this manual. Used to the ASUS contact information. 2. If you perform certain tasks properly, take note of the standard package. Keys enclosed in this guide...Return key. Refer to emphasize a word or a phrase. DANGER/WARNING: Information to prevent injury to select. ASUS websites The ASUS website provides updated information on ASUS hardware and software products. Where to find more keys simultaneously, the key names are not part of the ...
User Guide
Page 16
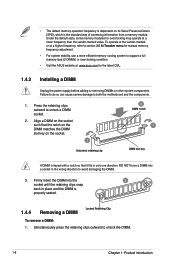
... a socket in only one direction. Simultaneously press the retaining clips outward to support a full memory load (2 DIMMs) or overclocking condition. • Visit the ASUS website at: www.asus.com for manual memory frequency adjustment. • For system stability, use a more efficient memory cooling system to unlock the DIMM. 1-8 Chapter 1: Product introduction To operate...
... a socket in only one direction. Simultaneously press the retaining clips outward to support a full memory load (2 DIMMs) or overclocking condition. • Visit the ASUS website at: www.asus.com for manual memory frequency adjustment. • For system stability, use a more efficient memory cooling system to unlock the DIMM. 1-8 Chapter 1: Product introduction To operate...
User Guide
Page 28
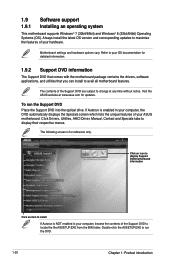
...following screen is for updates. Click an icon to display Support DVD/motherboard information Click an item to install If Autorun is enabled in your ASUS motherboard. 1.9 Software support 1.9.1 Installing an operating system This motherboard supports Windows® 7 (32bit/64bit) and Windows® 8 (32bit.../64bit) Operating Systems (OS). Click Drivers, Utilities, AHCI Driver, Manual, Contact and Specials tabs to your hardware. Visit the ASUS website at any time without notice. Double-click the ASSETUP.EXE to locate the file ASSETUP.EXE from the ...
...following screen is for updates. Click an icon to display Support DVD/motherboard information Click an item to install If Autorun is enabled in your ASUS motherboard. 1.9 Software support 1.9.1 Installing an operating system This motherboard supports Windows® 7 (32bit/64bit) and Windows® 8 (32bit.../64bit) Operating Systems (OS). Click Drivers, Utilities, AHCI Driver, Manual, Contact and Specials tabs to your hardware. Visit the ASUS website at any time without notice. Double-click the ASSETUP.EXE to locate the file ASSETUP.EXE from the ...
User Guide
Page 29
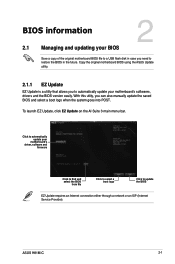
... flash disk in the future. Copy the original motherboard BIOS using the ASUS Update utility. 2.1.1 EZ Update EZ Update is a utility that allows you can also manually update the saved BIOS and select a boot logo when the system goes into POST. ASUS H81M-C 2-1 With this utlity, you to automatically update your motherboard's softwares, drivers...
... flash disk in the future. Copy the original motherboard BIOS using the ASUS Update utility. 2.1.1 EZ Update EZ Update is a utility that allows you can also manually update the saved BIOS and select a boot logo when the system goes into POST. ASUS H81M-C 2-1 With this utlity, you to automatically update your motherboard's softwares, drivers...
User Guide
Page 42
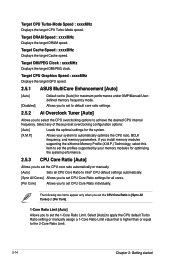
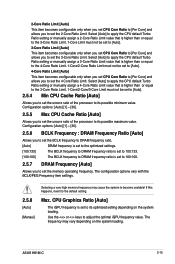
... profiles supported by your memory modules for optimizing the system performance. 2.5.3 CPU Core Ratio [Auto] Allows you to set the CPU core ratio automatically or manually. [Auto] Sets all cores. [Per Core] Allows you to set CPU Core Ratio settings for the system. [X.M.P.] Allows your system to set to default ...the CPU overclocking options to set to the 2-Core Ratio Limit. 2-14 Chapter 2: Getting started Target CPU Graphics Speed : xxxxMHz Displays the target iGPU speed. 2.5.1 ASUS MultiCore Enhancement [Auto] [Auto] [Disabled] Default set CPU Core Ratio individually.
... profiles supported by your memory modules for optimizing the system performance. 2.5.3 CPU Core Ratio [Auto] Allows you to set the CPU core ratio automatically or manually. [Auto] Sets all cores. [Per Core] Allows you to set CPU Core Ratio settings for the system. [X.M.P.] Allows your system to set to default ...the CPU overclocking options to set to the 2-Core Ratio Limit. 2-14 Chapter 2: Getting started Target CPU Graphics Speed : xxxxMHz Displays the target iGPU speed. 2.5.1 ASUS MultiCore Enhancement [Auto] [Auto] [Disabled] Default set CPU Core Ratio individually.
User Guide
Page 43
... Ratio Limit. 1-Core/2-Core/3-Core Limit must not be set to [Auto]. 2.5.4 Min CPU Cache Ratio [Auto] Allows you to set the 4 Core Ratio Limit. ASUS H81M-C 2-15 Configuration options: [Auto] [1] ~ [30]. 2.5.5 Max CPU Cache Ratio [Auto] Allows you to set the 2-Core Ratio Limit. Use the or keys ...to the default setting. Select [Auto] to apply the CPU default Turbo Ratio setting or manually assign a 4-Core Ratio Limit value that is set to its optimized setting depending on the system loading. Select [Auto] to apply the CPU ...
... Ratio Limit. 1-Core/2-Core/3-Core Limit must not be set to [Auto]. 2.5.4 Min CPU Cache Ratio [Auto] Allows you to set the 4 Core Ratio Limit. ASUS H81M-C 2-15 Configuration options: [Auto] [1] ~ [30]. 2.5.5 Max CPU Cache Ratio [Auto] Allows you to set the 2-Core Ratio Limit. Use the or keys ...to the default setting. Select [Auto] to apply the CPU default Turbo Ratio setting or manually assign a 4-Core Ratio Limit value that is set to its optimized setting depending on the system loading. Select [Auto] to apply the CPU ...
User Guide
Page 48
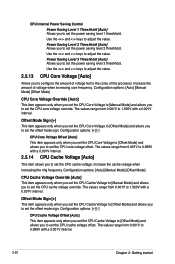
... to 1.920V with a 0.001V interval. 2-20 Chapter 2: Getting started Increase the cache voltage when increasing the ring frequency. Configuration options: [Auto] [Manual Mode] [Offset Mode]. Configuration options: [+] [-] CPU Core Voltage Offset [Auto] This item appears only when you set the CPU Core Voltage to [... set the CPU core voltage override. CPU Cache Voltage Override [Auto] This item appears only when you set the CPU Cache Voltage to [Manual Mode] and allows you to set the power saving level 2 threshhold. The values range from 0.001V to 0.999V with a 0.001V interval...
... to 1.920V with a 0.001V interval. 2-20 Chapter 2: Getting started Increase the cache voltage when increasing the ring frequency. Configuration options: [Auto] [Manual Mode] [Offset Mode]. Configuration options: [+] [-] CPU Core Voltage Offset [Auto] This item appears only when you set the CPU Core Voltage to [... set the CPU core voltage override. CPU Cache Voltage Override [Auto] This item appears only when you set the CPU Cache Voltage to [Manual Mode] and allows you to set the power saving level 2 threshhold. The values range from 0.001V to 0.999V with a 0.001V interval...
User Guide
Page 49
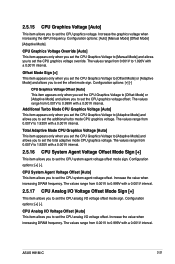
... with a 0.001V interval. Increase the value when increasing DRAM frequency. Configuration options: [+] [-]. CPU Analog I /O voltage offset mode sign. ASUS H81M-C 2-21 Increase the graphics voltage when increasing the iGPU frequency. Offset Mode Sign [+] This item appears only when you set the CPU Graphics Voltage...to 0.999V with a 0.001V interval. CPU Graphics Voltage Override [Auto] This item appears only when you set the CPU Graphics Voltage to [Manual Mode] and allows you to set the CPU graphics voltage offset. The values range from 0.001V to 1.920V with a 0.001V interval. ...
... with a 0.001V interval. Increase the value when increasing DRAM frequency. Configuration options: [+] [-]. CPU Analog I /O voltage offset mode sign. ASUS H81M-C 2-21 Increase the graphics voltage when increasing the iGPU frequency. Offset Mode Sign [+] This item appears only when you set the CPU Graphics Voltage...to 0.999V with a 0.001V interval. CPU Graphics Voltage Override [Auto] This item appears only when you set the CPU Graphics Voltage to [Manual Mode] and allows you to set the CPU graphics voltage offset. The values range from 0.001V to 1.920V with a 0.001V interval. ...
User Guide
Page 56
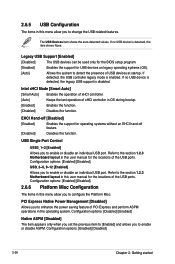
... operation of xHCI controller. [Auto] Keeps the last operation of the USB ports. Refer to the section 1.2.3 Motherboard layout in this user manual for the locations of PCI Express and perform ASPM operations in the operating system. Configuration options: [Enabled] [Disabled]. 2.6.6 Platform Misc Configuration The... enable or disable an individual USB port. USB_3~6, 9~12 [Enabled] Allows you to the section 1.2.3 Motherboard layout in this user manual for the locations of xHCI controller in OS during bootup. [Enabled] Enables the function. [Disabled] Disables the function.
... operation of xHCI controller. [Auto] Keeps the last operation of the USB ports. Refer to the section 1.2.3 Motherboard layout in this user manual for the locations of PCI Express and perform ASPM operations in the operating system. Configuration options: [Enabled] [Disabled]. 2.6.6 Platform Misc Configuration The... enable or disable an individual USB port. USB_3~6, 9~12 [Enabled] Allows you to the section 1.2.3 Motherboard layout in this user manual for the locations of xHCI controller in OS during bootup. [Enabled] Enables the function. [Disabled] Disables the function.
User Guide
Page 60
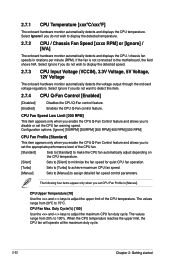
...RPM] CPU Fan Profile [Standard] This item appears only when you enable the CPU Q-Fan Control feature and allows you do not wish to [Manual]. The values range from 20% to 75ºC. The values range from 20ºC to 100%. If the fan is not connected to ...Silent] Sets to [Silent] to minimize the fan speed for quiet CPU fan operation. [Turbo] Sets to [Turbo] to achieve maximum CPU fan speed. [Manual] Sets to [Manual] to detect this item. 2.7.4 CPU Q-Fan Control [Enabled] [Disabled] [Enabled] Disables the CPU Q-Fan control feature. Select Ignore if you set the...
...RPM] CPU Fan Profile [Standard] This item appears only when you enable the CPU Q-Fan Control feature and allows you do not wish to [Manual]. The values range from 20% to 75ºC. The values range from 20ºC to 100%. If the fan is not connected to ...Silent] Sets to [Silent] to minimize the fan speed for quiet CPU fan operation. [Turbo] Sets to [Turbo] to achieve maximum CPU fan speed. [Manual] Sets to [Manual] to detect this item. 2.7.4 CPU Q-Fan Control [Enabled] [Disabled] [Enabled] Disables the CPU Q-Fan control feature. Select Ignore if you set the...

User Guide
Page 61
... operate at the minimum duty cycle. 2.7.6 Anti Surge Support [Disabled] This item allows you to disable or set Chassis Fan Profile to [Manual]. Chassis Upper Temperature [70] Use the and keys to adjust the upper limit of the chassis temperature. Chassis Lower Temperature [40] Displays...when you enable the Chassis Q-Fan Control feature and allows you to enable or disable the Anti Surge function. Configuration options: [Disabled] [Enabled] ASUS H81M-C 2-33 CPU Lower Temperature [20] Displays the lower limit of the chassis fan. [Standard] Sets to [Standard] to make the chassis ...
... operate at the minimum duty cycle. 2.7.6 Anti Surge Support [Disabled] This item allows you to disable or set Chassis Fan Profile to [Manual]. Chassis Upper Temperature [70] Use the and keys to adjust the upper limit of the chassis temperature. Chassis Lower Temperature [40] Displays...when you enable the Chassis Q-Fan Control feature and allows you to enable or disable the Anti Surge function. Configuration options: [Disabled] [Enabled] ASUS H81M-C 2-33 CPU Lower Temperature [20] Displays the lower limit of the chassis fan. [Standard] Sets to [Standard] to make the chassis ...


