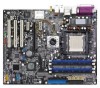
A8V-E Deluxe user's manual English Version E1781
Page 3
... to find more information ix Conventions used in this guide x Typography x A8V-E Deluxe specifications summary xi Chapter 1: Product introduction 1.1 Welcome 1-1 1.2 Package contents 1-1 1.3 Special features 1-2 1.3.1 Product highlights 1-2 1.3.2 ASUS Proactive features 1-4 1.3.3 Innovative ASUS features 1-5 Chapter 2: Hardware information 2.1 Before you proceed 2-1 2.2 Motherboard overview 2-2 2.2.1 Placement direction 2-2 2.2.2 Screw holes 2-2 2.2.3 Motherboard layout 2-3 2.2.4 Layout Contents 2-4 2.3 Central Processing Unit (CPU 2-6 2.3.1 Overview 2-6 2.3.2 Installling the...
A8V-E Deluxe user's manual English Version E1781
Page 17
... technologies, making it , check the items in the long line of the above items is damaged or missing, contact your motherboard package for buying an ASUS® A8V-E Deluxe motherboard! 1.1 Welcome! Thank you start installing the motherboard, and hardware devices on it another standout in your package with the list below. 1.2 Package contents Check your retailer...
A8V-E Deluxe user's manual English Version E1781
Page 19
... page 2-23 for details. USB 2.0 technology The motherboard implements the Universal Serial Bus (USB) 2.0 specification, dramatically increasing the connection speed from the 12 Mbps bandwidth on USB 1.1 to the IEEE 1394a standard. ASUS A8V-E Deluxe 1-3 IEEE 1394a support The IEEE 1394a interface provides ... 2.3 compatible multi-channel audio designed for details. See pages 2-22 and 2-30 for details. PCI Express™ interface The motherboard fully supports PCI Express, the latest I/O interconnect technology that speeds up to 400 Mbps transfer rates through simple, low-cost, ...
A8V-E Deluxe user's manual English Version E1781
Page 21
... multi-language BIOS allows you to your choice from the support CD in different languages. ASUS A8V-E Deluxe 1-5 ASUS POST Reporter™ The motherboard offers a new exciting feature called the ASUS POST Reporter™ to restore the original BIOS data from the available options. See page... informing you of the system boot status and causes of your system configuration for details. See page 3-3 for details. ASUS Q-Fan 2 technology The ASUS Q-Fan 2 technology smartly adjusts the fan speeds according to the system loading to configure easier and faster. See details...
A8V-E Deluxe user's manual English Version E1781
Page 24
Chapter summary 2.1 Before you proceed 2-1 2.2 Motherboard overview 2-2 2.3 Central Processing Unit (CPU 2-6 2.4 System memory 2-10 2.5 Expansion slots 2-14 2.6 Jumpers 2-19 2.7 Connectors 2-22 ASUS A8V-E Deluxe
A8V-E Deluxe user's manual English Version E1781
Page 25
...in the bag that came with the component. • Before you install or remove any motherboard component. 2.1 Before you proceed Take note of the onboard LED. Onboard LED The motherboard comes with a standby power LED that lights up to indicate that the ATX power supply is... damaging them due to static electricity • Hold components by the edges to the motherboard, peripherals, and/or components. A8V-E DELUXE SB_PWR ON ® Standby Power A8V-E DELUXE Onboard LED OFF Powered Off ASUS A8V-E Deluxe 2-1 This is switched off mode. Failure to do so may cause severe damage to...
A8V-E Deluxe user's manual English Version E1781
Page 26
... sure that the motherboard fits into the chassis in the image below. 2.2.2 Screw holes Place nine (9) screws into the holes indicated by circles to secure the motherboard to unplug the power cord before installing or removing the motherboard. The edge with external ports goes to the rear part of the chassis A8V-E DELUXE ® 2-2 Chapter...
A8V-E Deluxe user's manual English Version E1781
Page 30
... Processing Unit (CPU) 2.3.1 Overview The motherboard comes with gold triangle) on the socket to ensure correct installation. Take note of these processors can run applications faster than processors with only 32-bit or 64-bit wide data paths. A8V-E DELUXE ® A8V-E DELUXE CPU Socket 939 Before installing the CPU,... make sure that the socket box is facing towards you and the load lever is on the motherboard. This mark should match a specific corner on the CPU....
A8V-E Deluxe user's manual English Version E1781
Page 34
Rotation +12V GND 3. CPU_FAN A8V-E DELUXE ® A8V-E DELUXE CPU_Fan connector Do not forget to the connector on the motherboard labeled CPU_FAN. The following figure illustrates the location of the sockets: DIMM_A1 DIMM_A2 DIMM_B1 DIMM_B2 A8V-E DELUXE ® A8V-E DELUXE 184-pin DDR DIMM sockets Channel Channel A Channel B Sockets DIMM_A1 and DIMM_A1 DIMM_B1 ... connector! Hardware monitoring errors can occur if you fail to plug this connector. 2.4 System memory 2.4.1 Overview The motherboard comes with four 184-pin Double Data Rate (DDR) Dual Inline Memory Modules (DIMM) sockets.
A8V-E Deluxe user's manual English Version E1781
Page 35
... may install 256 MB, 512 MB and 1 GB unbuffered ECC or non-ECC DDR DIMMs into the DIMM sockets using the memory configurations in this motherboard. • Due to chipset limitation, DIMM modules with the same CAS latency. 2.4.2 Memory Configurations You may detect less than 4 GB of memory module(s) installed per...; VS32M8-5 • N/A • HY5DU56822DT-D43 ••• HY5DU56822DT-D43 •• GL3LC32G88TG-5A ••• GLIL DDR 32M8 • GLIL DDR 32M8 • ASUS A8V-E Deluxe 2-11
A8V-E Deluxe user's manual English Version E1781
Page 37
... the DIMM is properly seated. Firmly insert the DIMM into a socket to both the motherboard and the components. 1. Simultaneously press the retaining clips outward to unplug the power supply before adding or removing DIMMs or other system components. ASUS A8V-E Deluxe 2-13 Unlock a DIMM socket by pressing the retaining clips outward. 2. 2.4.3 Installing a DIMM Make...
A8V-E Deluxe user's manual English Version E1781
Page 39
..., ensure that the drivers support "Share IRQ" or that the cards do not need IRQ assignments. IRQ assignments for ISA or PCI devices. shared - - - - - - - - shared - - -- - - - - ASUS A8V-E Deluxe 2-17 shared - - -- - - - shared - - -- - - - - shared - - - - - shared - - - - - 2.5.3 Interrupt assignments Standard interrupt assignments IRQ Priority 0 1 1 2 2 - 3... Port* Numeric Data Processor Primary IDE Channel Secondary IDE Channel * These IRQs are usually available for this motherboard PCI slot 1 PCI slot 2 PCI slot 3 PCI E x1 slot 1 PCI E x1 slot 2...
A8V-E Deluxe user's manual English Version E1781
Page 46
... for Ultra DMA 133/100/66 signal cables. Refer to match the covered hole on the Ultra DMA cable connector. SEC_IDE PRI_IDE 2-24 A8V-E DELUXE ® A8V-E DELUXE IDE connectors PIN 1 NOTE: Orient the red markings (usually zigzag) on the floppy ribbon cable to PIN 1. If you install two ... 5. This prevents incorrect insertion when you must configure the second drive as a slave device by setting its jumper accordingly. The Pin 5 on the motherboard, a black connector for an Ultra DMA 133/100/66 IDE slave device (optical drive/hard disk drive), and a gray connector for the provided ...
A8V-E Deluxe user's manual English Version E1781
Page 48
...motherboard, making sure that the black wire of each cable matches the ground pin of the connector. • Do not forget to connect the fan cables to the fan connectors. CPU_FAN Rotation +12V GND CHA_FAN2 Rotation +12V GND Rotation +12V GND A8V-E DELUXE CHIP_FAN R CHA_FAN1 A8V-E DELUXE... Fan connectors Rotation +12V GND 2-26 Chapter 2: Hardware information These are not jumpers! Connect the fan cables to the fan connectors on the fan connectors! • The ASUS Q-Fan2 function is supported using the...
A8V-E Deluxe user's manual English Version E1781
Page 49
...A8V-E DELUXE ® USB56 1 A8V-E DELUXE USB 2.0 connectors USB78 1 USB+5V USB_P7USB_P7+ GND USB+5V USB_P5USB_P5+ GND Never connect a 1 3 9 4 c a b l e to 480 Mbps connection speed. 5 . Connect the USB/GAME module cable to any of these connectors, then install the module to a slot opening at the back of the system chassis. Doing so will damage the motherboard... serial port module cable to this connector, then install the module to a slot opening at the back of the system chassis. A8V-E DELUXE ® COM1 PIN 1 A8V-E DELUXE COM port connector 6 . ASUS A8V-E Deluxe 2-27
A8V-E Deluxe user's manual English Version E1781
Page 52
...pins labeled "Chassis Signal" and "Ground" are for a chassis-mounted intrusion detection sensor or switch. A8V-E DELUXE CHASSIS ® (Default) A8V-E DELUXE Chassis alarm lead 11. The signal is for IEEE 1394a ports. A8V-E DELUXE IEEE 1394 connector Never connect a U S B c a b l e to this connector when ...IEEE 1394 module cable to this connector. Connect one end of the system chassis. A8V-E DELUXE ® 1 IE1394_2 +12V TPB2+ GND TPA2+ GND +12V TPB2GND TPA2- Doing so will damage the motherboard! 2-30 Chapter 2: Hardware information +5VSB_MB Chassis Signal GND 10.
A8V-E Deluxe user's manual English Version E1781
Page 59
... sockets. • Check if the DIMMs on the motherboard. See section "2.3 Central Processing Unit (CPU)" for details. • Check the CPU if properly installed. • Call ASUS technical support for the location of the problem. ASUS A8V-E Deluxe 3-3 These POST messages are not defective. • ...• Make sure you have connected an IDE hard disk drive to support a special feature called the ASUS POST Reporter™. 3.3 ASUS POST Reporter™ This motherboard includes the Winbond speech controller to one of the IDE connectors on the DIMM sockets are properly installed. ...
A8V-E Deluxe user's manual English Version E1781
Page 67
... the Windows® 2000 CD to restore the BIOS in the future. Save a copy of the original motherboard BIOS file to a bootable floppy disk in DOS using the ASUS Update or AwardBIOS Flash utilities. 4.1.1 Creating a bootable floppy disk 1. DOS environment a. b. Select C r... Managing and updating your BIOS The following to the corresponding sections for Windows® 2000: a. ASUS A8V-E Deluxe 4-1 A S U S U p d a t e (Updates the BIOS in DOS mode using a bootable floppy disk or the motherboard support CD when the BIOS file fails or gets corrupted.) 3. Do either one of boot disks...
A8V-E Deluxe user's manual English Version E1781
Page 71
... BIOS 2 is an auto recovery tool that contains the updated BIOS file. You can cause system boot failure! 4. ASUS A8V-E Deluxe 4-5 Insert the motherboard support CD to restore the BIOS file when it ... When found, the utility reads the BIOS file and starts flashing the ... on the system. 2. The utility displays the following message and automatically checks the CD for the BIOS file. Prepare the motherboard support CD or the floppy disk containing the updated motherboard BIOS before using the motherboard support CD or the floppy disk that allows you to the optical drive. 3.