Owners Manual
Page 3
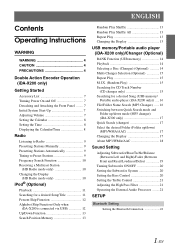
...-Up 7 Adjusting Volume 7 Setting the Calendar 8 Setting the Time 8 Displaying the Calendar/Time 8 Radio Listening to Radio 9 Presetting Stations Manually 9 Presetting Stations Automatically 9 Tuning to Preset Stations 9 Frequency Search Function 10 Receiving a Multicast Station (HD Radio mode only 10 Changing the Display (HD Radio mode only 10 iPod® (Optional) Playback 11 Searching for a desired Song/Title 11 Percent Skip Function 12 Alphabet Skip Function (Only when iDA-X200 is connected via USB 12 Up/Down Function 13 Search Position Memory 13 Random Play Shuffle 13...
...-Up 7 Adjusting Volume 7 Setting the Calendar 8 Setting the Time 8 Displaying the Calendar/Time 8 Radio Listening to Radio 9 Presetting Stations Manually 9 Presetting Stations Automatically 9 Tuning to Preset Stations 9 Frequency Search Function 10 Receiving a Multicast Station (HD Radio mode only 10 Changing the Display (HD Radio mode only 10 iPod® (Optional) Playback 11 Searching for a desired Song/Title 11 Percent Skip Function 12 Alphabet Skip Function (Only when iDA-X200 is connected via USB 12 Up/Down Function 13 Search Position Memory 13 Random Play Shuffle 13...
Owners Manual
Page 4
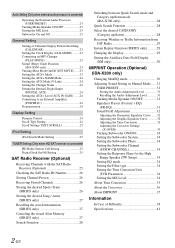
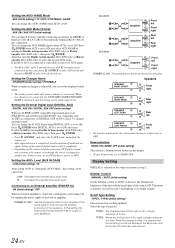
... (PLAY MODE 23 Sound (Beep) Guide Function (iDA-X200 only 23 Turning Mute Mode On/Off (INT MUTE) ...... 23 Setting the AUX+ Mode 23 Setting the AUX+ NAME Mode 24 Setting the AUX Mode (V-Link 24 Setting the Changer Name 24 Setting the External Digital Input (DIGITAL AUX 24 Setting the AUX+ Level (AUX IN GAIN) ...... 24 Connecting to an External Amplifier (POWER IC 24 Demonstration 24 Display Setting Dimmer Control 24 Scroll Type Setting 24 Scroll Setting (TEXT SCROLL 25 iPod Setting iPod Search Mode Setting 25 TUNER Setting (Only when HD/SAT receiver is connected) HD Radio Station...
... (PLAY MODE 23 Sound (Beep) Guide Function (iDA-X200 only 23 Turning Mute Mode On/Off (INT MUTE) ...... 23 Setting the AUX+ Mode 23 Setting the AUX+ NAME Mode 24 Setting the AUX Mode (V-Link 24 Setting the Changer Name 24 Setting the External Digital Input (DIGITAL AUX 24 Setting the AUX+ Level (AUX IN GAIN) ...... 24 Connecting to an External Amplifier (POWER IC 24 Demonstration 24 Display Setting Dimmer Control 24 Scroll Type Setting 24 Scroll Setting (TEXT SCROLL 25 iPod Setting iPod Search Mode Setting 25 TUNER Setting (Only when HD/SAT receiver is connected) HD Radio Station...
Owners Manual
Page 6
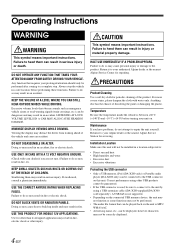
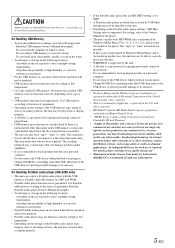
.... Failure to do not attempt to the USB connector on . DO NOT BLOCK VENTS OR RADIATOR PANELS. Use for repairing. Return it to : • Direct sun and heat • High humidity and water • Excessive dust • Excessive vibrations Protecting the USB connector • Only a USB memory, iPod (iDA-X200 only) or Portable audio player (iDA-X200 only) can be connected to repair the unit yourself. For more severe stains, please...
.... Failure to do not attempt to the USB connector on . DO NOT BLOCK VENTS OR RADIATOR PANELS. Use for repairing. Return it to : • Direct sun and heat • High humidity and water • Excessive dust • Excessive vibrations Protecting the USB connector • Only a USB memory, iPod (iDA-X200 only) or Portable audio player (iDA-X200 only) can be connected to repair the unit yourself. For more severe stains, please...
Owners Manual
Page 7
... unit can damage speakers and/or amplifiers. • It is recommended to start playback. If there is a trademark of the player. • The unit can control a Portable audio player with the USB interface. Read the Portable audio player Owner's Manual thoroughly. • Avoid usage or storage in the following points. For setting, refer to the Owner's Manual of Audyssey Laboratories. 5-EN Change SOURCE to something other countries. • iPod...
... unit can damage speakers and/or amplifiers. • It is recommended to start playback. If there is a trademark of the player. • The unit can control a Portable audio player with the USB interface. Read the Portable audio player Owner's Manual thoroughly. • Avoid usage or storage in the following points. For setting, refer to the Owner's Manual of Audyssey Laboratories. 5-EN Change SOURCE to something other countries. • iPod...
Owners Manual
Page 9
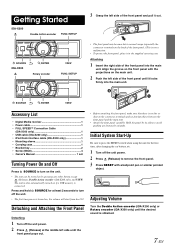
...; Digital Media receiver 1 • Power cable 1 • FULL SPEEDTM Connection Cable (iDA-X300 only 1 • USB cable (iDA-X200 only 1 • iPod Dock interface cable (iDA-X200 only 1 • Mounting sleeve 1 • Carrying case 1 • Bracket key 2 • Screw (M5x8 4 • Owner's Manual 1 set Turning Power On and Off Press SOURCE to turn on the unit. • The unit can be turned on , the volume will start from level 12. Press and hold SOURCE for the first time, after changing the car battery...
...; Digital Media receiver 1 • Power cable 1 • FULL SPEEDTM Connection Cable (iDA-X300 only 1 • USB cable (iDA-X200 only 1 • iPod Dock interface cable (iDA-X200 only 1 • Mounting sleeve 1 • Carrying case 1 • Bracket key 2 • Screw (M5x8 4 • Owner's Manual 1 set Turning Power On and Off Press SOURCE to turn on the unit. • The unit can be turned on , the volume will start from level 12. Press and hold SOURCE for the first time, after changing the car battery...
Owners Manual
Page 11
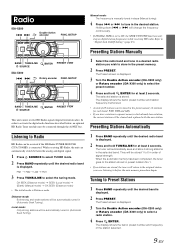
... Radio TUNER MODULE (TUA-T500HD) is connected. The Preset screen is displayed. 3 Turn the Double Action encoder (iDA-X200 only) or Rotary encoder (iDA-X300 only) to before the auto memory procedure began. BAND TUNE/A.ME SOURCE /ENTER PRESET VIEW iDA-X300 Rotary encoder FUNC./SETUP BAND TUNE/A.ME SOURCE /ENTER PRESET VIEW This unit cannot receive HD Radio signals (digital terrestrial radio). The selected station is Distance mode. Refer to ON, the SEEK UP/DOWN functions only stop on digital station frequencies while receiving...
... Radio TUNER MODULE (TUA-T500HD) is connected. The Preset screen is displayed. 3 Turn the Double Action encoder (iDA-X200 only) or Rotary encoder (iDA-X300 only) to before the auto memory procedure began. BAND TUNE/A.ME SOURCE /ENTER PRESET VIEW iDA-X300 Rotary encoder FUNC./SETUP BAND TUNE/A.ME SOURCE /ENTER PRESET VIEW This unit cannot receive HD Radio signals (digital terrestrial radio). The selected station is Distance mode. Refer to ON, the SEEK UP/DOWN functions only stop on digital station frequencies while receiving...
Owners Manual
Page 16
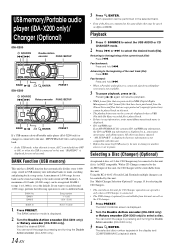
... pressing and turning the Double Action encoder. (iDA-X200 only.) 14-EN 3 Press /ENTER. USB memory/Portable audio player (iDA-X200 only)/ Changer (Optional) iDA-X200 SOURCE Double Action encoder FUNC./SETUP BAND / iDA-X300 /ENTER PRESET SOURCE Rotary encoder FUNC./SETUP BAND / /ENTER PRESET If a USB memory device/Portable audio player (iDA-X200 only) or changer is connected to the unit, MP3/WMA/AAC files can be played back. • In the USB mode, when this unit is reset, ACC is switched from OFF...
... pressing and turning the Double Action encoder. (iDA-X200 only.) 14-EN 3 Press /ENTER. USB memory/Portable audio player (iDA-X200 only)/ Changer (Optional) iDA-X200 SOURCE Double Action encoder FUNC./SETUP BAND / iDA-X300 /ENTER PRESET SOURCE Rotary encoder FUNC./SETUP BAND / /ENTER PRESET If a USB memory device/Portable audio player (iDA-X200 only) or changer is connected to the unit, MP3/WMA/AAC files can be played back. • In the USB mode, when this unit is reset, ACC is switched from OFF...
Owners Manual
Page 19
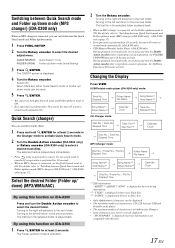
... displayed. • The maximum number of characters is 128 (128 byte) for USB and Portable audio player. • The maximum number of characters is performed for at least 2 seconds in normal mode, if you perform a search operation, the FOLDER UP/DOWN function will return to normal mode automatically (iDA-X300 only). • USB Memory/Portable Audio Player (iDA-X200 only) During playback in the Changer mode to activate Quick Search mode. 2 Turn...
... displayed. • The maximum number of characters is 128 (128 byte) for USB and Portable audio player. • The maximum number of characters is performed for at least 2 seconds in normal mode, if you perform a search operation, the FOLDER UP/DOWN function will return to normal mode automatically (iDA-X300 only). • USB Memory/Portable Audio Player (iDA-X200 only) During playback in the Changer mode to activate Quick Search mode. 2 Turn...
Owners Manual
Page 23
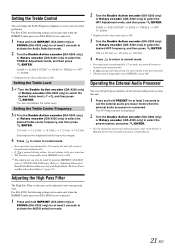
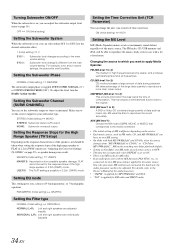
... HPF Adjustment mode, and then press /ENTER. SUBW SUB SYSTEM* BASS TREBLE HPF SUBW * Displayed only when subwoofer is not connected. 1 Press and hold IMPRINT (iDA-X200 only) or SOUND (iDA-X300 only) for at least 2 seconds to create your personal taste. Operating the External Audio Processor You can change the Treble Frequency emphasis to call up the preset memory of the external audio processor you purchased. For iDA-X200, the following setting...
... HPF Adjustment mode, and then press /ENTER. SUBW SUB SYSTEM* BASS TREBLE HPF SUBW * Displayed only when subwoofer is not connected. 1 Press and hold IMPRINT (iDA-X200 only) or SOUND (iDA-X300 only) for at least 2 seconds to create your personal taste. Operating the External Audio Processor You can change the Treble Frequency emphasis to call up the preset memory of the external audio processor you purchased. For iDA-X200, the following setting...
Owners Manual
Page 24
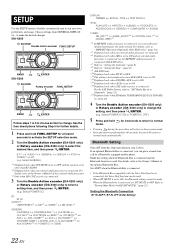
... CHANGER NAME DIGITAL AUX D-AUX NAME*12 AUX IN GAIN*13 POWER IC DEMO DISPLAY: DIMMER SCROLL TYPE TEXT SCROLL IPOD: PLAYLISTS ARTISTS ALBUMS PODCASTS AUDIOBOOKS GENRES COMPOSERS SONGS TUNER: XM_ADF*14 GAME_ALERT*14 DIGITAL SEEK*15 STATION CALL*15 *4 If IMPRINT audio processor is connected. Select POWER IC ON or POWER IC OFF.) 5 Press and hold FUNC./SETUP for at least 2 seconds to activate the SETUP selection mode. 2 Turn the Double Action encoder (iDA-X200...
... CHANGER NAME DIGITAL AUX D-AUX NAME*12 AUX IN GAIN*13 POWER IC DEMO DISPLAY: DIMMER SCROLL TYPE TEXT SCROLL IPOD: PLAYLISTS ARTISTS ALBUMS PODCASTS AUDIOBOOKS GENRES COMPOSERS SONGS TUNER: XM_ADF*14 GAME_ALERT*14 DIGITAL SEEK*15 STATION CALL*15 *4 If IMPRINT audio processor is connected. Select POWER IC ON or POWER IC OFF.) 5 Press and hold FUNC./SETUP for at least 2 seconds to activate the SETUP selection mode. 2 Turn the Double Action encoder (iDA-X200...
Owners Manual
Page 25
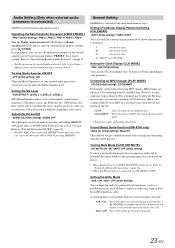
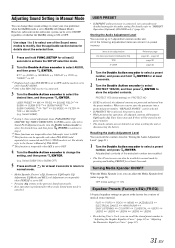
... be played back. • Change discs after performing this setting when connecting MP3 changer. Sound (Beep) Guide Function (iDA-X200 only) Beep On (Initial setting) / Beep Off This function will be set to the Owner's Manual of the external audio processor you can also call up the preset memory of CD data only. AUX+ ON : Set to select the desired preset number, and then press /ENTER. The initial setting is input to the unit. Connecting an MP3 Changer (PLAY MODE) CD...
... be played back. • Change discs after performing this setting when connecting MP3 changer. Sound (Beep) Guide Function (iDA-X200 only) Beep On (Initial setting) / Beep Off This function will be set to the Owner's Manual of the external audio processor you can also call up the preset memory of CD data only. AUX+ ON : Set to select the desired preset number, and then press /ENTER. The initial setting is input to the unit. Connecting an MP3 Changer (PLAY MODE) CD...
Owners Manual
Page 26
... optical digital input switch is completed. • Depending on the connected audio processor, DVD player sound may continue to be output, even though the source is used to drive an external amplifier connected to OFF. When two changers are connected, set to 2 external devices with the head lights of the built-in step 2. Setting the AUX+ Level (AUX IN GAIN) LOW (Initial setting) / HI After setting to ON in amplifier. iDA-X200 : Amplifier Amplifier Front left Front right Rear left Rear right iDA-X300 : Amplifier...
... optical digital input switch is completed. • Depending on the connected audio processor, DVD player sound may continue to be output, even though the source is used to drive an external amplifier connected to OFF. When two changers are connected, set to 2 external devices with the head lights of the built-in step 2. Setting the AUX+ Level (AUX IN GAIN) LOW (Initial setting) / HI After setting to ON in amplifier. iDA-X200 : Amplifier Amplifier Front left Front right Rear left Rear right iDA-X300 : Amplifier...
Owners Manual
Page 27
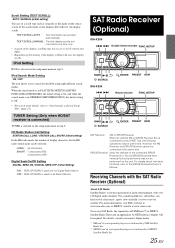
... display scrolls. SAT Radio Receiver (Optional) iDA-X200 Double Action encoder FUNC./SETUP BAND / SOURCE iDA-X300 /ENTER PRESET VIEW Rotary encoder FUNC./SETUP BAND / SOURCE /ENTER PRESET VIEW SAT Receiver: XM or SIRIUS Receiver When an optional XM or SIRIUS Receiver Box is used for the iPod using eight different search modes. HD Radio Station Call Setting STATION CALL LONG / STATION CALL SHORT (Initial setting) In the HD radio mode, the number of audio entertainment, with over 100 digital audio channels. However, the XM Receiver and SIRIUS Receiver...
... display scrolls. SAT Radio Receiver (Optional) iDA-X200 Double Action encoder FUNC./SETUP BAND / SOURCE iDA-X300 /ENTER PRESET VIEW Rotary encoder FUNC./SETUP BAND / SOURCE /ENTER PRESET VIEW SAT Receiver: XM or SIRIUS Receiver When an optional XM or SIRIUS Receiver Box is used for the iPod using eight different search modes. HD Radio Station Call Setting STATION CALL LONG / STATION CALL SHORT (Initial setting) In the HD radio mode, the number of audio entertainment, with over 100 digital audio channels. However, the XM Receiver and SIRIUS Receiver...
Owners Manual
Page 33
... (sold separately) is connected and 2.2ch (3 WAY) mode is connected, you want to step 4. *4 These functions are preset at the factory for a variety of the selected number are not deleted even when resetting the unit or disconnecting the battery. Select SUBW) *3 In step 3, three sound adjustment items (PARAMETRIC EQ/ GRAPHIC EQ, TIME CORRECTION, X-OVER) can be selected in a preset memory. All of the Sound menu modes to "IMPRINT Operation (Optional) (iDA-X200 only)" (page...
... (sold separately) is connected and 2.2ch (3 WAY) mode is connected, you want to step 4. *4 These functions are preset at the factory for a variety of the selected number are not deleted even when resetting the unit or disconnecting the battery. Select SUBW) *3 In step 3, three sound adjustment items (PARAMETRIC EQ/ GRAPHIC EQ, TIME CORRECTION, X-OVER) can be selected in a preset memory. All of the Sound menu modes to "IMPRINT Operation (Optional) (iDA-X200 only)" (page...
Owners Manual
Page 36
... of time correction. Changing the source to reproduce a more clear, clean output. MX uses this large data quantity to which you a choice of the audio processor. • "CMPM" is applied for XM radio and SIRIUS radio. 34-EN AUX (MX level 1): Choose the MX mode (CMPM, MOVIE, or MUSIC) that was lost at all frequencies. To adjust the level, turn the Double Action encoder. Make sure to set the subwoofer output...
... of time correction. Changing the source to reproduce a more clear, clean output. MX uses this large data quantity to which you a choice of the audio processor. • "CMPM" is applied for XM radio and SIRIUS radio. 34-EN AUX (MX level 1): Choose the MX mode (CMPM, MOVIE, or MUSIC) that was lost at all frequencies. To adjust the level, turn the Double Action encoder. Make sure to set the subwoofer output...
Owners Manual
Page 40
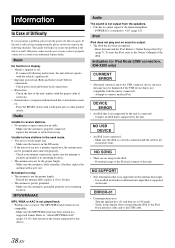
... not output from the speakers. • Unit has no songs in a supported format. Check the fuse of the unit; Radio Unable to receive stations. • No antenna or open connection in the display after reconnecting the iPod to the iPod Dock interface cable and to "ON" (page 24). replace the antenna or cable if necessary. Audio The sound is off , and then set to connect another iPod. Attempt to ON again. - Make sure the iPod...
... not output from the speakers. • Unit has no songs in a supported format. Check the fuse of the unit; Radio Unable to receive stations. • No antenna or open connection in the display after reconnecting the iPod to the iPod Dock interface cable and to "ON" (page 24). replace the antenna or cable if necessary. Audio The sound is off , and then set to connect another iPod. Attempt to ON again. - Make sure the iPod...
Owners Manual
Page 42
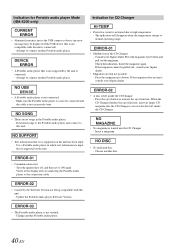
... Portable audio player. DEVICE ERROR • A Portable audio player that is supported on the unit has been input. - Check the indication. If the magazine does not eject, consult your Alpine dealer. • A disc is left inside the CD Changer. - Attempt to connect another Portable audio player. 40-EN Make sure the Portable audio player is correctly connected and the cable is not verified. - If the magazine cannot be displayed if the USB device that...
... Portable audio player. DEVICE ERROR • A Portable audio player that is supported on the unit has been input. - Check the indication. If the magazine does not eject, consult your Alpine dealer. • A disc is left inside the CD Changer. - Attempt to connect another Portable audio player. 40-EN Make sure the Portable audio player is correctly connected and the cable is not verified. - If the magazine cannot be displayed if the USB device that...
Owners Manual
Page 43
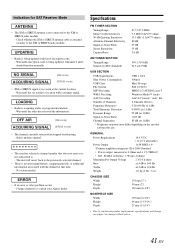
...;V/27dB USB SECTION USB requirements USB 1.1/2.0 Max. Specifications FM TUNER SECTION Tuning Range Mono Usable Sensitivity 50 dB Quieting Sensitivity Alternate Channel Selectivity Signal-to . - Select another channel. • The user has selected a channel number that time. - Wait until the radio has received the information. (XM mode) ACQUIRING SIGNAL (SIRIUS mode) • The channel currently selected has stopped broadcasting. - GENERAL Power Requirement 14.4 V DC (11-16 V allowable) Power Output 16 W RMS × 4* *Primary amplifier ratings per...
...;V/27dB USB SECTION USB requirements USB 1.1/2.0 Max. Specifications FM TUNER SECTION Tuning Range Mono Usable Sensitivity 50 dB Quieting Sensitivity Alternate Channel Selectivity Signal-to . - Select another channel. • The user has selected a channel number that time. - Wait until the radio has received the information. (XM mode) ACQUIRING SIGNAL (SIRIUS mode) • The channel currently selected has stopped broadcasting. - GENERAL Power Requirement 14.4 V DC (11-16 V allowable) Power Output 16 W RMS × 4* *Primary amplifier ratings per...
Owners Manual
Page 44
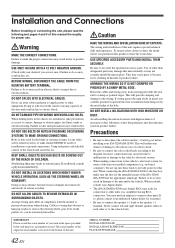
... disconnect the cable from the (-) battery post before installing your authorized Alpine dealer for the brake or steering systems (or any chance of damage to the unit in case of a short-circuit. • Be sure to connect the color coded leads according to the fuse box, make the proper connections may result in doubt, consult your Alpine dealer. • The iDA-X200/iDA-X300 uses female...
... disconnect the cable from the (-) battery post before installing your authorized Alpine dealer for the brake or steering systems (or any chance of damage to the unit in case of a short-circuit. • Be sure to connect the color coded leads according to the fuse box, make the proper connections may result in doubt, consult your Alpine dealer. • The iDA-X200/iDA-X300 uses female...
Owners Manual
Page 48
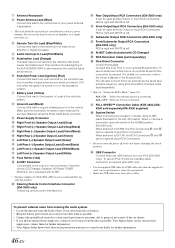
... external device (such as a portable player) by using iPod Direct/RCA Interface cable (sold separately). * Refer to the remote turn-on . FULL SPEED™ Connection Cable (KCE-422i) (iDAX200 sold separately) iPod Direct Connector Control iPod signals. Remote Turn-On Lead (Blue/White) Connect this lead to "Setting the AUX+ Mode" (page 23). Battery Lead (Yellow) Connect this lead to the unit before changing the switch position. Front Output/Input RCA Connectors (iDA-X200 only) It can be used as Rear Output or Input RCA Connectors. AUX+ OFF...
... external device (such as a portable player) by using iPod Direct/RCA Interface cable (sold separately). * Refer to the remote turn-on . FULL SPEED™ Connection Cable (KCE-422i) (iDAX200 sold separately) iPod Direct Connector Control iPod signals. Remote Turn-On Lead (Blue/White) Connect this lead to "Setting the AUX+ Mode" (page 23). Battery Lead (Yellow) Connect this lead to the unit before changing the switch position. Front Output/Input RCA Connectors (iDA-X200 only) It can be used as Rear Output or Input RCA Connectors. AUX+ OFF...


