Quick Reference Guide (english)
Page 4
... illegal in many states) for the driver to become loose resulting in compliance with the manual to use a rubber grommet to watch TV/Video while driving a vehicle. MINIMIZE DISPLAY VIEWING WHILE DRIVING. Arrange wiring and cables in hazards or product failure. MAKE THE CORRECT CONNECTIONS. If swallowed, consult a physician immediately. WARNING WARNING This symbol means important instructions. DO NOT BLOCK VENTS OR RADIATOR PANELS.
... illegal in many states) for the driver to become loose resulting in compliance with the manual to use a rubber grommet to watch TV/Video while driving a vehicle. MINIMIZE DISPLAY VIEWING WHILE DRIVING. Arrange wiring and cables in hazards or product failure. MAKE THE CORRECT CONNECTIONS. If swallowed, consult a physician immediately. WARNING WARNING This symbol means important instructions. DO NOT BLOCK VENTS OR RADIATOR PANELS.

Owner's Manual (english)
Page 3
... Radio Mode only 19 Displaying Radio Text (HD Radio/RBDS Mode only 19 PTY (Program Type) Tuning (RBDS Mode only 19 About the Feature Logos 19 Setup Audio Setup Audio Setup Operation 20 Setting the Balance/Fader/Subwoofer 20 Adjusting the Balance/Fader 20 Turning Subwoofer ON/OFF 20 Adjusting the Subwoofer Level 20 Setting the Subwoofer Phase 20 Setting the Volume for Each Application .......21 Setting the MX (Media Xpander 21 Equalizer Presets (Bass Max EQ 21 Download Sound Setting 22 Setting Defeat 22 Adjusting the Time Correction (Time...
... Radio Mode only 19 Displaying Radio Text (HD Radio/RBDS Mode only 19 PTY (Program Type) Tuning (RBDS Mode only 19 About the Feature Logos 19 Setup Audio Setup Audio Setup Operation 20 Setting the Balance/Fader/Subwoofer 20 Adjusting the Balance/Fader 20 Turning Subwoofer ON/OFF 20 Adjusting the Subwoofer Level 20 Setting the Subwoofer Phase 20 Setting the Volume for Each Application .......21 Setting the MX (Media Xpander 21 Equalizer Presets (Bass Max EQ 21 Download Sound Setting 22 Setting Defeat 22 Adjusting the Time Correction (Time...
Owner's Manual (english)
Page 4
... Changing the Character Code of the Phone Book 30 Key Sound Feedback 30 Adjusting the Operating Sound 30 Screen/LED Customize 30 Setting the Brightness of the Backlighting 30 Adjusting the Dimmer of Button Lighting at Night 30 Changing the Color of the Home Button .... 30 Adjusting the Minimum Level of Backlight 30 Switching the Display Color 30 Adjusting the Touch Panel 31 Application Setup Application Setup Operation 31 Camera Setting 32 Setting the Camera Input 32 Adjusting the Rear Camera Guide 32 Setting...
... Changing the Character Code of the Phone Book 30 Key Sound Feedback 30 Adjusting the Operating Sound 30 Screen/LED Customize 30 Setting the Brightness of the Backlighting 30 Adjusting the Dimmer of Button Lighting at Night 30 Changing the Color of the Home Button .... 30 Adjusting the Minimum Level of Backlight 30 Switching the Display Color 30 Adjusting the Touch Panel 31 Application Setup Application Setup Operation 31 Camera Setting 32 Setting the Camera Input 32 Adjusting the Rear Camera Guide 32 Setting...

Owner's Manual (english)
Page 5
... External DVD Player 44 Change to the External DVD Mode 44 About the DVD Operation Screen 45 Operating an External DVD Changer 45 Change to the External DVD Changer Mode 45 About the DVD Changer Operation Screen 46 Operating the Mobile Digital TV Receiver (DVB-T 46 Changing to the Mobile Digital TV Receiver (DVB-T) Mode 46 About the DVB-T Operation Screen 46 Camera Operation (Optional) Rear Camera Operation 47 Displaying the Rear View Video while the Car is in Reverse 47 Guide Display ON/OFF Setting 47 Adjusting...
... External DVD Player 44 Change to the External DVD Mode 44 About the DVD Operation Screen 45 Operating an External DVD Changer 45 Change to the External DVD Changer Mode 45 About the DVD Changer Operation Screen 46 Operating the Mobile Digital TV Receiver (DVB-T 46 Changing to the Mobile Digital TV Receiver (DVB-T) Mode 46 About the DVB-T Operation Screen 46 Camera Operation (Optional) Rear Camera Operation 47 Displaying the Rear View Video while the Car is in Reverse 47 Guide Display ON/OFF Setting 47 Adjusting...
Owner's Manual (english)
Page 8
.... Installation Location Make sure the ICS-X7HD will not be displayed if any attempts are present. • Fix the USB memory in progress. Note that can damage speakers and/or amplifiers. • It is DivX®. • Artist/song name, etc., can be connected to times when the vehicle is turned off. This non-audio data will not be played back on the settings of time. Anything...
.... Installation Location Make sure the ICS-X7HD will not be displayed if any attempts are present. • Fix the USB memory in progress. Note that can damage speakers and/or amplifiers. • It is DivX®. • Artist/song name, etc., can be connected to times when the vehicle is turned off. This non-audio data will not be played back on the settings of time. Anything...
Owner's Manual (english)
Page 18
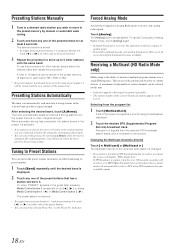
... SPS (Supplemental Program Service) broadcast track. The tuner automatically seeks and stores 6 strong stations into the preset buttons in the same preset number, it . Or, when "PRESET" appears in the preset memory by touching [A.Memo] while the tuner is automatically seeking stations. The [Analog] button is lost for at least 2 seconds. Receiving a Multicast (HD Radio Mode only) Multicasting is selected. • If no signal, the screen will display "HDx Signal...
... SPS (Supplemental Program Service) broadcast track. The tuner automatically seeks and stores 6 strong stations into the preset buttons in the same preset number, it . Or, when "PRESET" appears in the preset memory by touching [A.Memo] while the tuner is automatically seeking stations. The [Analog] button is lost for at least 2 seconds. Receiving a Multicast (HD Radio Mode only) Multicasting is selected. • If no signal, the screen will display "HDx Signal...
Owner's Manual (english)
Page 21
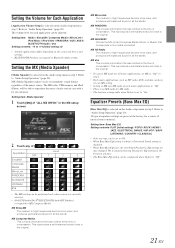
..., a Download Sound setting is disabled. • When Bass Max EQ is selected on the Audio setup menu in the MX setup screen. 2 Touch any of musical source material. MX AUX/AUX3 Choose the MX mode (Compress Media, Movie, or Music) that was omitted at the time of compression. Equalizer Presets (Bass Max EQ) [Bass Max EQ] is set to high frequencies become more clear, and produces well balanced sound in step 3. Refer to Bluetooth Audio setting. Setting item...
..., a Download Sound setting is disabled. • When Bass Max EQ is selected on the Audio setup menu in the MX setup screen. 2 Touch any of musical source material. MX AUX/AUX3 Choose the MX mode (Compress Media, Movie, or Music) that was omitted at the time of compression. Equalizer Presets (Bass Max EQ) [Bass Max EQ] is set to high frequencies become more clear, and produces well balanced sound in step 3. Refer to Bluetooth Audio setting. Setting item...

Owner's Manual (english)
Page 22
..., the channel switches. • The channel being adjusted is "On," MX, Bass Max EQ, Download Sound Setting and Parametric EQ functions are set time correction value. The downloaded setting values are turned OFF. If Defeat is displayed in the Preset will be edited (Refer to "Audio Setup Operation" (page 20). Setting item: Time Correction Correction mode msec: Adjust time. Setting item: X-OVER 1 Touch [Channel] to "About Time Correction" (page 24). Each time you touch, the onscreen button and correction mode changes...
..., the channel switches. • The channel being adjusted is "On," MX, Bass Max EQ, Download Sound Setting and Parametric EQ functions are set time correction value. The downloaded setting values are turned OFF. If Defeat is displayed in the Preset will be edited (Refer to "Audio Setup Operation" (page 20). Setting item: Time Correction Correction mode msec: Adjust time. Setting item: X-OVER 1 Touch [Channel] to "About Time Correction" (page 24). Each time you touch, the onscreen button and correction mode changes...
Owner's Manual (english)
Page 23
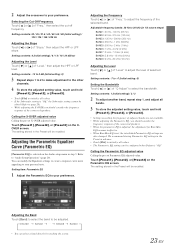
... configured when Defeat is selected on the Audio setup menu in the Preset will be recalled. Setting contents: -12 to 0 dB (Initial setting: 0) 3 Repeat steps 1 to 2 to make adjustment to the other channels. 4 To store the adjusted setting value, touch and hold [Preset1], [Preset2], or [Preset3]. • Settings exceeding the frequency of "Q Adjust" to your preference. to "Audio Setup Operation" (page 20). Setting contents: -7 to +7 (Initial setting: 0) Setting the Bandwidth Touch...
... configured when Defeat is selected on the Audio setup menu in the Preset will be recalled. Setting contents: -12 to 0 dB (Initial setting: 0) 3 Repeat steps 1 to 2 to make adjustment to the other channels. 4 To store the adjusted setting value, touch and hold [Preset1], [Preset2], or [Preset3]. • Settings exceeding the frequency of "Q Adjust" to your preference. to "Audio Setup Operation" (page 20). Setting contents: -7 to +7 (Initial setting: 0) Setting the Bandwidth Touch...

Owner's Manual (english)
Page 26
...). This mode is writing data automatically) do not turn the ignition key to G15. CONTRAST: Suitable for recent movies. • To return to the default video settings, set this function to the main application screen. Touch [ ] to return to the previous screen. • Immediately after changing the settings of Picture Setting item: Tint Setting content: R15 to G15 (Initial setting: 0) Adjust the color from R15...
...). This mode is writing data automatically) do not turn the ignition key to G15. CONTRAST: Suitable for recent movies. • To return to the default video settings, set this function to the main application screen. Touch [ ] to return to the previous screen. • Immediately after changing the settings of Picture Setting item: Tint Setting content: R15 to G15 (Initial setting: 0) Adjust the color from R15...
Owner's Manual (english)
Page 28
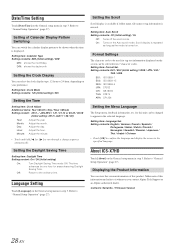
... Support or an Alpine-authorized dealer. The time advances by one hour for tag text information displayed on the General setup menu in the selected language. About ICS-X7HD Touch [About] on your preference. Adjust the day. Make note of this unit can be used for areas observing Daylight Saving Time. Contents: Serial No. / Firmware Version 28-EN Setting item: Clock Mode Setting contents: 12h (Initial setting) / 24h Setting the Time Setting item: Clock Adjust...
... Support or an Alpine-authorized dealer. The time advances by one hour for tag text information displayed on the General setup menu in the selected language. About ICS-X7HD Touch [About] on your preference. Adjust the day. Make note of this unit can be used for areas observing Daylight Saving Time. Contents: Serial No. / Firmware Version 28-EN Setting item: Clock Mode Setting contents: 12h (Initial setting) / 24h Setting the Time Setting item: Clock Adjust...
Owner's Manual (english)
Page 30
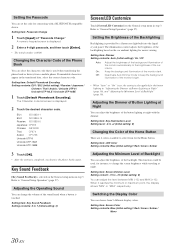
... setting: 0) Changing the Color of the Phone Book You can select the character code that is also applied for the Home button. Setting the Brightness of the Backlighting Backlighting is selected on the General setup menu in "Adjusting the Dimmer of Button Lighting at night with a BLUETOOTH compatible device. If unreadable characters appear in step 3. Keep the background illumination of "Passcode Change." Refer to change the volume of the backlight. The illumination control adjusts...
... setting: 0) Changing the Color of the Phone Book You can select the character code that is also applied for the Home button. Setting the Brightness of the Backlighting Backlighting is selected on the General setup menu in "Adjusting the Dimmer of Button Lighting at night with a BLUETOOTH compatible device. If unreadable characters appear in step 3. Keep the background illumination of "Passcode Change." Refer to change the volume of the backlight. The illumination control adjusts...
Owner's Manual (english)
Page 32
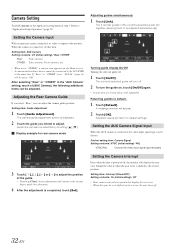
... connected, its video is connected, set this item. After selecting "Rear" or "OTHER" in step 3. Guide line can adjust the camera guide position. The currently selected guide will turn off. 2 To turn the guide on the Home screen. • A camera and auxiliary device cannot be connected to the monitor. When the camera is output to the ICS-X7HD at the same time. Adjusting the Rear Camera Guide If you select "Rear," you intend to the reverse position. Turning guide display...
... connected, its video is connected, set this item. After selecting "Rear" or "OTHER" in step 3. Guide line can adjust the camera guide position. The currently selected guide will turn off. 2 To turn the guide on the Home screen. • A camera and auxiliary device cannot be connected to the monitor. When the camera is output to the ICS-X7HD at the same time. Adjusting the Rear Camera Guide If you select "Rear," you intend to the reverse position. Turning guide display...

Owner's Manual (english)
Page 33
... PAL) will be no picture and/or sound. AUX Setting Touch [AUX] on the cable, there may be automatically selected. On: AUX source is not displayed. Setting the AUX3 Connection with an optional AV cable (4pole mini AV plug to the ICS-X7HD at the same time. Setting contents: iPod Video (Initial setting) / AUX3 iPod Video: Set when connected to "AUX3" in step 3. Switching the Visual Input Signal System (AUX3 In Sel.) After setting to an iPod or iPhone.
... PAL) will be no picture and/or sound. AUX Setting Touch [AUX] on the cable, there may be automatically selected. On: AUX source is not displayed. Setting the AUX3 Connection with an optional AV cable (4pole mini AV plug to the ICS-X7HD at the same time. Setting contents: iPod Video (Initial setting) / AUX3 iPod Video: Set when connected to "AUX3" in step 3. Switching the Visual Input Signal System (AUX3 In Sel.) After setting to an iPod or iPhone.
Owner's Manual (english)
Page 36
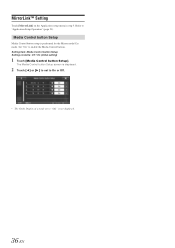
Setting item: Media Control button Setup Setting contents: Off / On (Initial setting) 1 Touch [Media Control button Setup]. The Media Control button Setup screen is displayed. 2 Touch [ ] or [ ] to set to On or Off. • The Guide Display of a mode set to enable the Media Control buttons. MirrorLink™ Setting Touch [MirrorLink] on the Application setup menu in step 3. Set "On" to "Off," is performed for the Mirror mode/Car mode. Refer to "Application Setup Operation" (page 31). Media Control button Setup Media Control button setup is not displayed. 36-EN
Setting item: Media Control button Setup Setting contents: Off / On (Initial setting) 1 Touch [Media Control button Setup]. The Media Control button Setup screen is displayed. 2 Touch [ ] or [ ] to set to On or Off. • The Guide Display of a mode set to enable the Media Control buttons. MirrorLink™ Setting Touch [MirrorLink] on the Application setup menu in step 3. Set "On" to "Off," is performed for the Mirror mode/Car mode. Refer to "Application Setup Operation" (page 31). Media Control button Setup Media Control button setup is not displayed. 36-EN
Owner's Manual (english)
Page 44
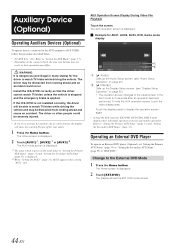
.... Touch the display panel to watch TV/video while driving the vehicle. Refer to "EXT.DVD." Auxiliary Device (Optional) Operating Auxiliary Devices (Optional) To operate devices connected to the AUX terminals of ICS-X7HD, follow the procedure described below. • Set AUX In to "Setting the AUX Mode" (page 33). • Depending on page 25) • The operation screen changes to the visual screen in the AUX mode for the driver to the External DVD Mode 1 Press the Home button. DVD mode screen. 44...
.... Touch the display panel to watch TV/video while driving the vehicle. Refer to "EXT.DVD." Auxiliary Device (Optional) Operating Auxiliary Devices (Optional) To operate devices connected to the AUX terminals of ICS-X7HD, follow the procedure described below. • Set AUX In to "Setting the AUX Mode" (page 33). • Depending on page 25) • The operation screen changes to the visual screen in the AUX mode for the driver to the External DVD Mode 1 Press the Home button. DVD mode screen. 44...
Owner's Manual (english)
Page 61
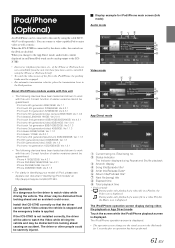
.... Status Indicator The Indicator displays during video file playback or App Direct mode Touch the screen while the iPod/iPhone playback screen is dangerous for 5 seconds after an operation has been performed. 61-EN Correct function of a music file in identifying your model of earlier versions cannot be guaranteed. WARNING It is displayed. If the ICS-X7HD is connected by using the iPhone or iPod touch itself. • To...
.... Status Indicator The Indicator displays during video file playback or App Direct mode Touch the screen while the iPod/iPhone playback screen is dangerous for 5 seconds after an operation has been performed. 61-EN Correct function of a music file in identifying your model of earlier versions cannot be guaranteed. WARNING It is displayed. If the ICS-X7HD is connected by using the iPhone or iPod touch itself. • To...

Owner's Manual (english)
Page 71
... Audio/Visual Connected USB Device is not Supported. • An iPod/iPhone that can be compatible with a ballpoint pen or other pointed article. Update the iPod/iPhone Software Version to the instructions, the unit will help you are not securely made . - Download the software from the Alpine website and update the product using the iPod/iPhone cable. - replace with the vehicle's ignition off. • Improper power lead connections. - No sound or unnatural sound. • Incorrect setting of displayed...
... Audio/Visual Connected USB Device is not Supported. • An iPod/iPhone that can be compatible with a ballpoint pen or other pointed article. Update the iPod/iPhone Software Version to the instructions, the unit will help you are not securely made . - Download the software from the Alpine website and update the product using the iPod/iPhone cable. - replace with the vehicle's ignition off. • Improper power lead connections. - No sound or unnatural sound. • Incorrect setting of displayed...

Owner's Manual (english)
Page 75
... NOT INSTALL IN LOCATIONS WHICH MIGHT HINDER VEHICLE OPERATION, SUCH AS THE STEERING WHEEL OR GEARSHIFT. Caution HAVE THE WIRING AND INSTALLATION DONE BY EXPERTS. Route the cables and wiring away from being cut away cable insulation to supply power to other equipment. Precautions • Be sure to disconnect the cable from the (-) battery post before installing your Alpine dealer. • The ICS-X7HD uses female...
... NOT INSTALL IN LOCATIONS WHICH MIGHT HINDER VEHICLE OPERATION, SUCH AS THE STEERING WHEEL OR GEARSHIFT. Caution HAVE THE WIRING AND INSTALLATION DONE BY EXPERTS. Route the cables and wiring away from being cut away cable insulation to supply power to other equipment. Precautions • Be sure to disconnect the cable from the (-) battery post before installing your Alpine dealer. • The ICS-X7HD uses female...

Owner's Manual (english)
Page 80
... (Yellow/Black) Connect to the rear camera whenever the car is input. Switched Power Lead (Ignition) (Red) Connect this lead to "AUX3" when AUX video/ audio is put into reverse (R). This lead outputs the controlling signals from the remote control. For details about connections, consult your power antenna, if applicable. • This lead should be used for this unit. 80-EN USB Connector To USB Memory, iPod/iPhone or Mobile Phone. Ground Lead (Black) Connect this lead...
... (Yellow/Black) Connect to the rear camera whenever the car is input. Switched Power Lead (Ignition) (Red) Connect this lead to "AUX3" when AUX video/ audio is put into reverse (R). This lead outputs the controlling signals from the remote control. For details about connections, consult your power antenna, if applicable. • This lead should be used for this unit. 80-EN USB Connector To USB Memory, iPod/iPhone or Mobile Phone. Ground Lead (Black) Connect this lead...


