
User Manual
Page 9
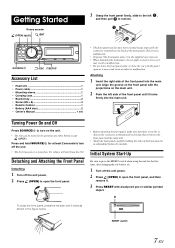
... the front panel, and then remove it locks firmly into the main unit. SOURCE/ /ESC F/SETUP Accessory List • Head unit 1 • Power cable 1 • Mounting sleeve 1 • Carrying case 1 • Bracket key 2 • Screw (M5 × 8 4 • Remote Control 1 • Battery (AAA size 2 • Owner's Manual 1 set • The front panel...
... the front panel, and then remove it locks firmly into the main unit. SOURCE/ /ESC F/SETUP Accessory List • Head unit 1 • Power cable 1 • Mounting sleeve 1 • Carrying case 1 • Bracket key 2 • Screw (M5 × 8 4 • Remote Control 1 • Battery (AAA size 2 • Owner's Manual 1 set • The front panel...
User Manual
Page 47
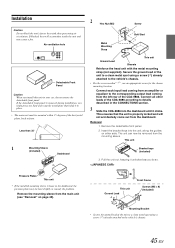
...the main unit (see "Removal" on either side. Connect all other leads of the CDA-9886 according to the vehicle's chassis. • For the screw marked "*2", use an appropriate screw for the chosen mounting location. Remove the detachable front panel. 2. Insert the bracket keys into the dashboard ...to a clean metal spot using a screw (*1) already attached to details described in the dashboard, the pressure plates may cause a fire. Remove the mounting sleeve from the left rear of the unit to a clean metal spot using a screw (*3) already attached to the vehicle's chassis. 45-EN Less ...
...the main unit (see "Removal" on either side. Connect all other leads of the CDA-9886 according to the vehicle's chassis. • For the screw marked "*2", use an appropriate screw for the chosen mounting location. Remove the detachable front panel. 2. Insert the bracket keys into the dashboard ...to a clean metal spot using a screw (*1) already attached to details described in the dashboard, the pressure plates may cause a fire. Remove the mounting sleeve from the left rear of the unit to a clean metal spot using a screw (*3) already attached to the vehicle's chassis. 45-EN Less ...


