Owners Manual
Page 2
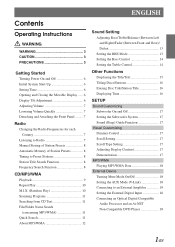
...Country 7 Listening to Radio 7 Manual Storing of Station Presets 8 Automatic Memory of Station Presets 8 Tuning to Preset Stations 8 Station Title Search Function 8 Frequency Search Function 8 CD/MP3/WMA Playback 9 Repeat Play 10 M.I.X. (Random Play 10 Scanning Programs 11 Searching from CD Text 11 File/Folder...Title 16 Displaying Time 16 SETUP Sound Customizing Subwoofer On and Off 17 Setting the Subwoofer System 17 Sound (Beep) Guide Function 17 Visual Customizing Dimmer Control 17 Scroll Setting 17 Scroll Type Setting 17 Adjusting Display Contrast 17 Demonstration 17 MP3...
...Country 7 Listening to Radio 7 Manual Storing of Station Presets 8 Automatic Memory of Station Presets 8 Tuning to Preset Stations 8 Station Title Search Function 8 Frequency Search Function 8 CD/MP3/WMA Playback 9 Repeat Play 10 M.I.X. (Random Play 10 Scanning Programs 11 Searching from CD Text 11 File/Folder...Title 16 Displaying Time 16 SETUP Sound Customizing Subwoofer On and Off 17 Setting the Subwoofer System 17 Sound (Beep) Guide Function 17 Visual Customizing Dimmer Control 17 Scroll Setting 17 Scroll Type Setting 17 Adjusting Display Contrast 17 Demonstration 17 MP3...
Owners Manual
Page 18
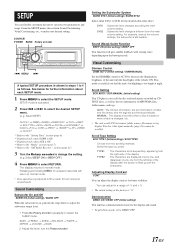
... of the display after the screen is ON. *4 Refer to the "Radio" section (page 7) *5 Refer to the "SAT Radio Receiver" section (page 21) 3 Turn the Rotary encoder to change is... at the factory is activated. 2 Press g or f to select the desired SETUP menu. (e.g. AUTO : The CD text information, the text information of - 5 and + 5. • The initial setting at night. You can ...to 4 as the text information of the display. : The characters are scrolled automatically. Sound (Beep) Guide Function BEEP ON (Initial setting) / BEEP OFF This function will return to normal mode. • ...
... of the display after the screen is ON. *4 Refer to the "Radio" section (page 7) *5 Refer to the "SAT Radio Receiver" section (page 21) 3 Turn the Rotary encoder to change is... at the factory is activated. 2 Press g or f to select the desired SETUP menu. (e.g. AUTO : The CD text information, the text information of - 5 and + 5. • The initial setting at night. You can ...to 4 as the text information of the display. : The characters are scrolled automatically. Sound (Beep) Guide Function BEEP ON (Initial setting) / BEEP OFF This function will return to normal mode. • ...
Owners Manual
Page 27
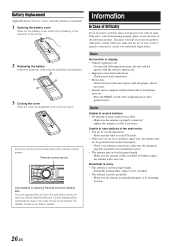
.... 3 Closing the cover Slide the cover as illustrated until a click is poorly grounded. - For details, contact your antenna connections; This guide will not operate with a ballpoint pen or other pointed article. Check the fuse of Difficulty If you are in cable. - Unable to ... switch with the vehicle's ignition off. • Improper power lead connections. - Radio Unable to Steering Remote Control Interface Box You can operate this unit from the vehicle's control unit when an Alpine Steering Remote Control Interface Box (optional) (for sale in the following instructions, the...
.... 3 Closing the cover Slide the cover as illustrated until a click is poorly grounded. - For details, contact your antenna connections; This guide will not operate with a ballpoint pen or other pointed article. Check the fuse of Difficulty If you are in cable. - Unable to ... switch with the vehicle's ignition off. • Improper power lead connections. - Radio Unable to Steering Remote Control Interface Box You can operate this unit from the vehicle's control unit when an Alpine Steering Remote Control Interface Box (optional) (for sale in the following instructions, the...
Owners Manual
Page 32
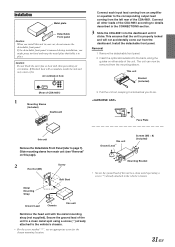
...left rear of the unit to a clean metal spot using a screw (*1) already attached to details described in the CONNECTlONS section. 3 Slide the CDA-9851 into the back, along the guides on this page). 2 Hex Nut (M5) Screw *2 Bolt Stud this unit Ground Lead*3 Screws (M5 × 8) (Included) Mounting ...Bracket • Secure the ground lead of the CDA-9851. Caution Do not block the unit's fan or heat sink, thus preventing air circulation....
...left rear of the unit to a clean metal spot using a screw (*1) already attached to details described in the CONNECTlONS section. 3 Slide the CDA-9851 into the back, along the guides on this page). 2 Hex Nut (M5) Screw *2 Bolt Stud this unit Ground Lead*3 Screws (M5 × 8) (Included) Mounting ...Bracket • Secure the ground lead of the CDA-9851. Caution Do not block the unit's fan or heat sink, thus preventing air circulation....

