Owners Manual
Page 18
... select two AUX names. • Via KCA-410C, up to 2 external devices with the head lights of the unit are used to drive an external amplifier connected to decrease the illumination brightness of the unit with RCA output can select playback of the main volume setting. When the color of the...AMBER. CDDA : Only CD data can scroll the disc and track names recorded on the main volume setting. Then press BAND. In this setting, the head unit's internal amplifier has no output to DEMO OFF. If a disc has already been inserted, perform the setting after you remove the disc. (If you...
... select two AUX names. • Via KCA-410C, up to 2 external devices with the head lights of the unit are used to drive an external amplifier connected to decrease the illumination brightness of the unit with RCA output can select playback of the main volume setting. When the color of the...AMBER. CDDA : Only CD data can scroll the disc and track names recorded on the main volume setting. Then press BAND. In this setting, the head unit's internal amplifier has no output to DEMO OFF. If a disc has already been inserted, perform the setting after you remove the disc. (If you...

Owners Manual
Page 19
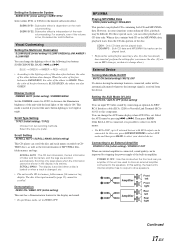
...input terminal (for Head unit). • After input selection is completed. POWER IC ON : The speakers are driven by the system when the power output is set the DVD player's power to OFF. Setting the External Digital Input D-AUX ON / D-AUX OFF (Initial setting) When an ALPINE Ai-NET compatible ...setting D-AUX to select the desired band. Setting of the optical digital input switch is completed, turn the ignition off and back on the CDA-9847 are trademarks of XM Satellite Radio Inc. * SIRIUS and its corresponding logos are operative only when an SAT Receiver is connected via satellite. ...
...input terminal (for Head unit). • After input selection is completed. POWER IC ON : The speakers are driven by the system when the power output is set the DVD player's power to OFF. Setting the External Digital Input D-AUX ON / D-AUX OFF (Initial setting) When an ALPINE Ai-NET compatible ...setting D-AUX to select the desired band. Setting of the optical digital input switch is completed, turn the ignition off and back on the CDA-9847 are trademarks of XM Satellite Radio Inc. * SIRIUS and its corresponding logos are operative only when an SAT Receiver is connected via satellite. ...
Owners Manual
Page 23
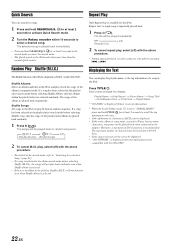
...• Only alphanumeric characters (ASCII) can display the playlist name, or the tag information of 250 characters is not compatible with the CDA-9847. 22-EN Therefore, a maximum of a song in the album search mode before selecting Shuffle Album, only the albums within 10 seconds ...Shuffle (M.I .X. Only Repeat One is played back immediately. • Press and hold SEARCH/Q.S. Press TITLE . The selected song is available for the head unit is 64 (64 byte). • Some characters may not be correctly displayed. • "NO SUPPORT" is displayed when text information is recommended....
...• Only alphanumeric characters (ASCII) can display the playlist name, or the tag information of 250 characters is not compatible with the CDA-9847. 22-EN Therefore, a maximum of a song in the album search mode before selecting Shuffle Album, only the albums within 10 seconds ...Shuffle (M.I .X. Only Repeat One is played back immediately. • Press and hold SEARCH/Q.S. Press TITLE . The selected song is available for the head unit is 64 (64 byte). • Some characters may not be correctly displayed. • "NO SUPPORT" is displayed when text information is recommended....
Owners Manual
Page 30
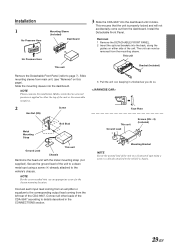
... certain that the unit is applied to either side of the CDA-9847. Connect all other leads of the unit or the removable nosepiece. 2 Hex Nut (M5) Screw ∗∗ Bolt Stud Metal Mounting Strap ∗ Ground Lead Chassis This unit Reinforce the head unit with the metal ...a screw (∗) already attached to the corresponding output lead coming from main unit. (see "Removal" on either the top of the CDA-9847 according to details described in the CONNECTlONS section. 3 Pull the unit out, keeping it clicks. Installation 1 No Pressure Here Mounting Sleeve (Included)...
... certain that the unit is applied to either side of the CDA-9847. Connect all other leads of the unit or the removable nosepiece. 2 Hex Nut (M5) Screw ∗∗ Bolt Stud Metal Mounting Strap ∗ Ground Lead Chassis This unit Reinforce the head unit with the metal ...a screw (∗) already attached to the corresponding output lead coming from main unit. (see "Removal" on either the top of the CDA-9847 according to details described in the CONNECTlONS section. 3 Pull the unit out, keeping it clicks. Installation 1 No Pressure Here Mounting Sleeve (Included)...


